“Oh my gosh!!

Full recipe>>> Servings & Time


Servings: 12 fritters (4 servings)


Prep Time: 15 minutes


Cook Time: 15 minutes


Total Time: 30 minutes


🧾 Ingredients


2 medium zucchini, grated


2 large eggs


½ cup all-purpose flour (or almond flour for gluten-free)


¾ cup shredded mozzarella or cheddar cheese


2 green onions, finely chopped


2 cloves garlic, minced


½ tsp salt


½ tsp black pepper


½ tsp paprika


¼ tsp baking powder (optional, for fluffiness)


2–3 tbsp olive oil (for frying)


👩‍🍳 Instructions


Grate & Drain Zucchini

Grate zucchini, sprinkle with salt, and let sit for 10 minutes. Squeeze out excess liquid using a clean kitchen towel.


Make the Batter

In a bowl, mix eggs, garlic, onions, cheese, spices, and baking powder. Stir in zucchini, then fold in flour until combined.


Cook the Fritters

Heat oil in a nonstick pan over medium heat.

Scoop batter (¼ cup each) into pan and flatten slightly.


Fry Until Golden

Cook 3–4 minutes per side until crispy and golden brown.


Serve Hot

Stack and serve immediately with your favorite dipping sauce.


📝 Recipe Notes & Tips


Squeeze zucchini well! Excess moisture causes soggy fritters.


Use cheddar, mozzarella, parmesan, or a blend for deeper flavor.


Add chili flakes or jalapeños for a spicy kick.


Air fry at 375°F (190°C) for 12–14 minutes, flipping halfway.


Freeze cooked fritters for up to 2 months.
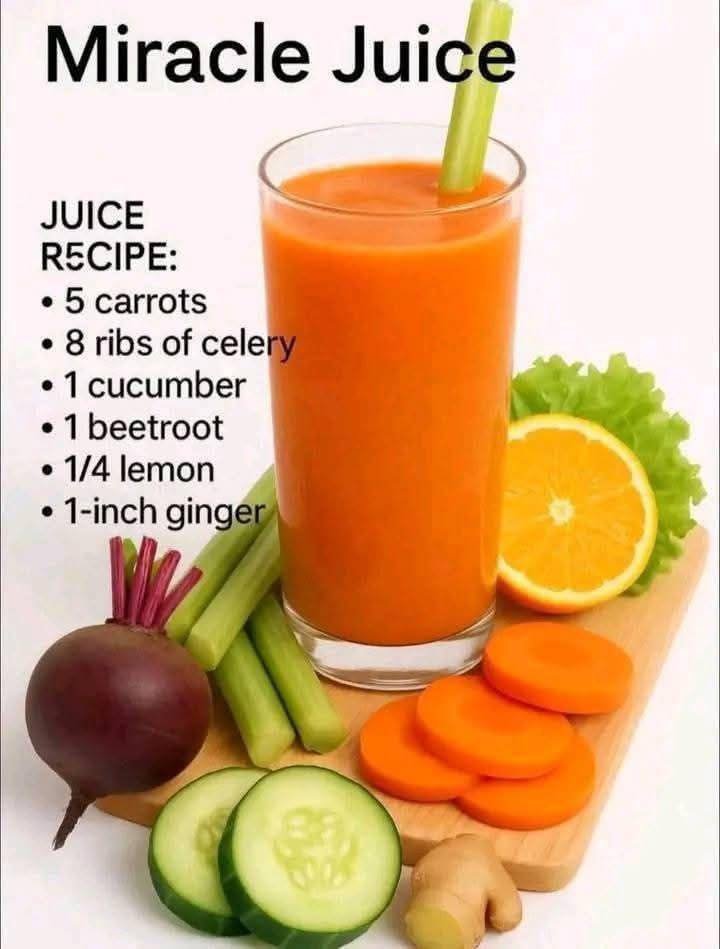
Fresh Vegetable Juice Blend

Fresh Vegetable Juice Blend

A refreshing vegetable juice made from simple, fresh ingredients. This drink is intended for general nourishment and hydration as part of a balanced diet.


Yield

Approximately 2 servings

Preparation Time

10 minutes


Ingredients

  • 5 medium carrots

  • 8 celery ribs

  • 1 medium cucumber

  • 1 beetroot

  • ¼ lemon (peeled)

  • 1-inch piece fresh ginger


Instructions

1. Wash and Prepare the Vegetables

Rinse the carrots, celery, and cucumber thoroughly under running water to remove dirt.

Scrub the beetroot well. You may leave the skin on if it is clean, or peel it for a milder taste.

Peel the ginger using the edge of a spoon.

Remove the outer yellow peel from the lemon and keep the inner white portion.


2. Cut for Juicing

Cut the carrots, celery, and cucumber into pieces that fit easily into your juicer.

Cut the beetroot into smaller chunks to help it process smoothly.


3. Juice the Ingredients

Turn on the juicer and feed the ingredients through gradually.

Alternate between firm vegetables (carrots, beetroot) and softer items (cucumber, lemon, ginger) to ensure smooth processing.


4. Mix and Serve

Stir the juice well to combine all flavors evenly.

Pour into glasses and serve immediately. Ice may be added if desired.


Storage

Fresh juice is best consumed right away. If needed, store in a sealed glass container in the refrigerator for up to 24 hours. Shake well before drinking.

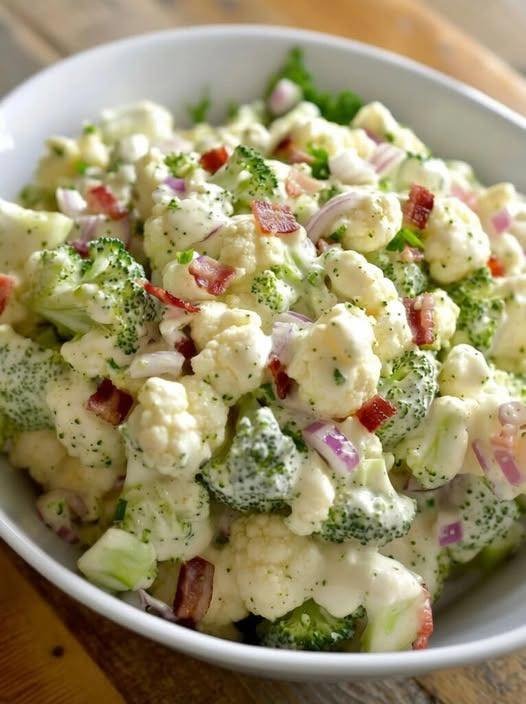
Creamy Broccoli Cauliflower Salad

Creamy Broccoli Cauliflower Salad

Crunchy • Creamy • Savory-Sweet • Perfect for Gatherings

This classic Creamy Broccoli Cauliflower Salad is a well-loved favorite for potlucks, picnics, and family meals. Crisp fresh vegetables are paired with smoky, crunchy bacon, sharp cheese, and a tangy-sweet dressing that coats every bite beautifully. It improves with time, making it ideal for preparing ahead.


Why This Recipe Works

  • Raw broccoli and cauliflower stay crisp and refreshing

  • Creamy dressing balances tang and sweetness

  • Bacon adds depth and crunch

  • Chilling time allows flavors to blend perfectly

  • Easy to customize for different diets


Ingredients

The Salad Base

  • 3 cups fresh broccoli florets, chopped into bite-sized pieces

  • 3 cups fresh cauliflower florets, chopped small

  • 6 slices bacon, cooked until crisp and crumbled

  • ¾ cup sharp cheddar cheese, freshly grated

  • ⅓ cup red onion, finely diced

  • ½ cup roasted sunflower seeds
    (or chopped almonds for a nutty variation)

  • Optional: ½ cup dried cranberries or raisins for gentle sweetness


The Creamy Dressing

  • ¾ cup mayonnaise, good quality

  • ¼ cup sour cream or plain Greek yogurt

  • 2 tablespoons apple cider vinegar

  • 2 tablespoons granulated sugar
    (or honey or maple syrup)

  • ½ teaspoon salt

  • ¼ teaspoon black pepper


Step-by-Step Instructions

1. Prepare the Vegetables

  • Wash broccoli and cauliflower thoroughly

  • Pat completely dry using a clean kitchen towel

Important Tip: Dry vegetables allow the dressing to cling properly instead of sliding off.

  • Chop into small, evenly sized pieces for the best texture and flavor in every bite


2. Cook the Bacon

  • Cook bacon in a skillet or oven until deeply crisp

  • Transfer to paper towels to cool

  • Crumble into small pieces

Make-Ahead Tip: Store bacon separately and add just before serving to keep it crunchy.


3. Make the Dressing

  • In a medium bowl, whisk together:

    • Mayonnaise

    • Sour cream (or yogurt)

    • Apple cider vinegar

    • Sugar

    • Salt

    • Black pepper

  • Whisk until smooth and creamy

  • Taste and adjust:

    • Add more vinegar for tang

    • Add a touch more sweetener if desired


4. Assemble the Salad

  • In a large mixing bowl, combine:

    • Broccoli

    • Cauliflower

    • Red onion

    • Cheddar cheese

    • Sunflower seeds

  • Pour dressing over the salad

  • Fold gently until all vegetables are evenly coated


5. Chill for Best Flavor

  • Cover and refrigerate for at least 30 minutes

  • For best results, chill 3–4 hours to allow flavors to blend

  • Stir in the crumbled bacon just before serving
    (or sprinkle on top for presentation)


Texture & Flavor Notes

  • Crisp vegetables with creamy coating

  • Savory, slightly sweet, and tangy balance

  • Bacon adds crunch and smoky depth


Customization & Variations

Lighter Version

  • Replace half the mayonnaise with Greek yogurt

  • Use honey or reduce sweetener

Low-Carb Version

  • Omit sugar and dried fruit

  • Add extra bacon or chopped hard-boiled eggs

Plant-Based Version

  • Use dairy-free mayonnaise

  • Replace bacon with toasted seeds or smoked seasoning


Storage & Make-Ahead Tips

  • Make Ahead:

    • Chop vegetables and prepare dressing up to 24 hours in advance

    • Store separately and combine 1–2 hours before serving

  • Leftovers:

    • Store in an airtight container in the refrigerator

    • Keeps well for up to 3 days

    • Stir before serving as some moisture may release

  • Freezing:

    • Not recommended due to texture changes

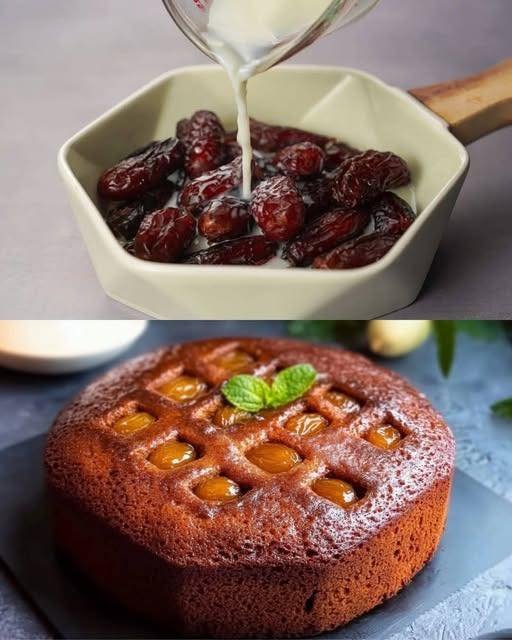
Easy Moist Date Cake

Easy Moist Date Cake

A rich, tender cake naturally sweetened by dates with a warm hint of spice.

  • Prep time: 20 minutes

  • Bake time: 35–45 minutes

  • Servings: 8–10

Ingredients

The Date Base:

  • 1 cup (150g) Pitted dates, chopped

  • 1 cup (250ml) Hot water (boiling)

  • 1 tsp Baking soda

The Batter:

  • ½ cup (115g) Unsalted butter, softened to room temperature

  • ¾ cup (150g) Granulated sugar (or brown sugar for a deeper caramel flavor)

  • 2 Large eggs

  • 1 tsp Vanilla extract

  • 1 ½ cups (190g) All-purpose flour

  • 1 tsp Baking powder

  • ½ tsp Ground cinnamon

  • ¼ tsp Ground nutmeg (optional)

  • Pinch of salt


Detailed Instructions

1. Prepare the Dates

In a heat-proof bowl, combine the chopped dates and the baking soda. Pour the boiling hot water over them. Stir gently and let the mixture sit for about 15 minutes. The baking soda will soften the date skins and break them down, creating a thick, jam-like consistency that ensures the cake is incredibly moist.

2. Prep the Oven and Pan

Preheat your oven to 350°F (175°C). Grease an 8-inch or 9-inch round cake pan (or a square pan) with butter and lightly dust with flour, or line the bottom with parchment paper for easy removal.

3. Cream the Butter and Sugar

In a large mixing bowl, beat the softened butter and sugar together using a hand mixer or stand mixer until the mixture is pale, light, and fluffy (about 3 minutes).

4. Add Wet Ingredients

Add the eggs one at a time, beating well after each addition. Stir in the vanilla extract. If the mixture looks slightly curdled at this stage, don’t worry; it will smooth out once the flour is added.

5. Sift Dry Ingredients

In a separate bowl, whisk together the flour, baking powder, cinnamon, nutmeg, and salt.

6. Combine

Gradually add the dry ingredients to the butter mixture, alternating with the date mixture (including the liquid). Stir with a spatula or use the mixer on low speed just until combined. Avoid overmixing, as this can make the cake tough rather than tender.

7. Bake

Pour the batter into your prepared pan and smooth the top. Bake for 35 to 45 minutes. To check for doneness, insert a wooden skewer or toothpick into the center—it should come out clean or with just a few moist crumbs attached.

8. Cool and Serve

Let the cake cool in the pan for about 10 minutes before transferring it to a wire rack. Serve warm or at room temperature.


Serving Suggestions

  • Classic: Serve with a dollop of whipped cream or a scoop of vanilla bean ice cream.

  • Toffee Style: Drizzle with a warm caramel sauce while the cake is still slightly warm.

  • Tea Time: This cake pairs beautifully with a strong cup of black tea or coffee.

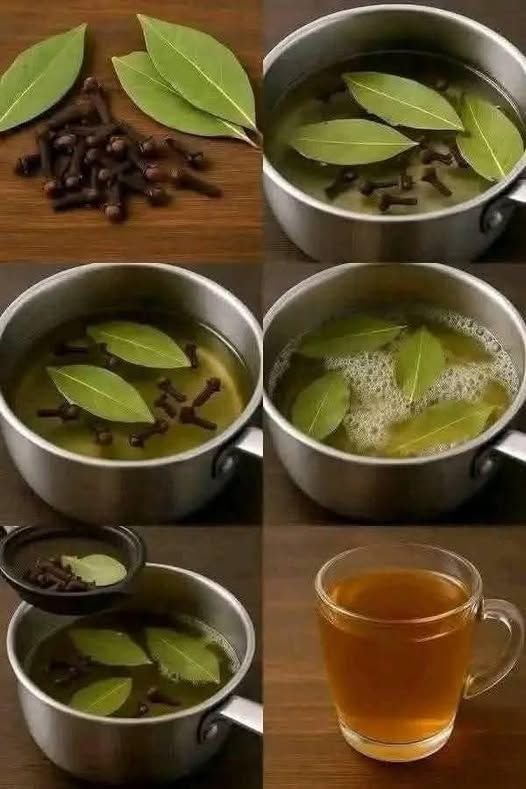
Bay Leaf & Clove Herbal Tea

Bay Leaf & Clove Herbal Tea

A warm, aromatic, caffeine-free beverage

Bay Leaf and Clove Herbal Tea is a simple, comforting drink made by gently simmering dried bay leaves and whole cloves in water. The result is a lightly golden infusion with a warm, earthy aroma and subtle spice. This tea is appreciated for its soothing character, pleasant fragrance, and ease of preparation.

Bay leaves bring a mild herbal depth with hints of eucalyptus and mint, while cloves add a gentle warmth and soft spice. Together, they create a balanced cup that can be enjoyed plain or customized with natural flavor additions like lemon, honey, ginger, or cinnamon.

This herbal tea contains no caffeine and can be enjoyed at any time of day. It is especially comforting during cool weather or quiet moments when a warm, aromatic drink is desired.


🧺 Ingredients

Base Ingredients

  • 3 dried bay leaves (whole)

  • 5–6 whole cloves

  • 2 cups water

Optional Flavor Add-Ins (choose as desired)

  • 1 teaspoon honey (for gentle sweetness)

  • 1 slice fresh ginger

  • 1 small cinnamon stick

  • 1 teaspoon lemon juice or a lemon wedge

  • 1 mint leaf


🧑‍🍳 Instructions

Step 1: Prepare Ingredients

Ensure the bay leaves and cloves are clean and free of dust.
If using ginger or cinnamon, prepare them by slicing or breaking them into small pieces.

Step 2: Heat the Water

Pour 2 cups of water into a small saucepan.
Place over medium heat and bring to a gentle boil.

Step 3: Add Spices

Once the water begins to boil, add the bay leaves and cloves.
Add any optional ingredients at this stage if using.

Step 4: Simmer

Reduce the heat to low and allow the mixture to simmer gently for 7–10 minutes.
The liquid will gradually take on a light golden color and release a pleasant aroma.

Step 5: Strain

Remove the saucepan from heat and let it rest for 1–2 minutes.
Strain the tea into a cup using a fine mesh strainer, removing all solids.

Step 6: Serve

Serve warm. Stir in honey or lemon juice if desired.
Garnish with a mint leaf or lemon slice for presentation.


🍽️ Servings

Makes 1 large mug or 2 small cups.
The recipe can be doubled or tripled as needed.


📝 Helpful Notes

  • Bay Leaves: Dried whole bay leaves are best. Avoid crushed or powdered leaves, which are difficult to strain.

  • Cloves: Use whole, aromatic cloves for best flavor.

  • Simmering: Gentle simmering preserves aroma and prevents bitterness.

  • Flavor Strength: Adjust steeping time to taste—shorter for mild, longer for stronger flavor.

  • Sweeteners: Honey complements the spice naturally without overpowering.

  • Serving: Best enjoyed warm, but may also be served chilled.

  • Storage: Prepared tea can be refrigerated for up to 24 hours and reheated gently.


🌿 Serving Ideas

  • Enjoy on its own as a calming beverage

  • Pair with light snacks or fruit

  • Serve in a clear glass mug to highlight the golden color

  • Add cinnamon and ginger for a richer, spiced version


Bay Leaf and Clove Herbal Tea is a simple drink made with care and intention. Its warm aroma, gentle flavor, and minimal ingredients make it a pleasant addition to any daily routine. Whether enjoyed alone or shared, this tea celebrates simplicity, tradition, and mindful preparation.

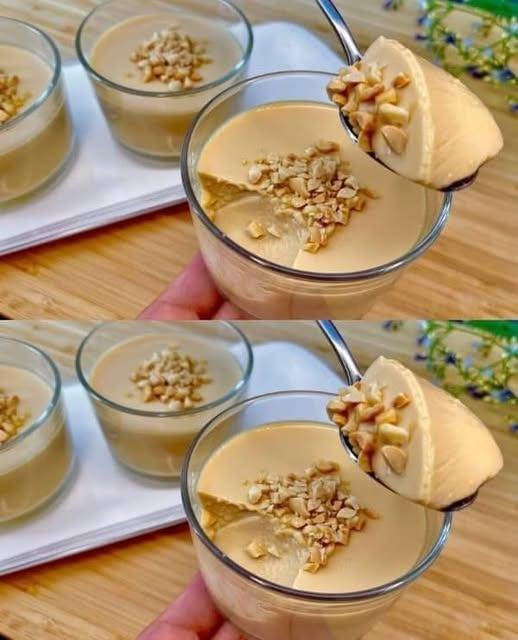
No-Bake 3-Ingredient Milk Pudding

No-Bake 3-Ingredient Milk Pudding

Smooth • Creamy • Simple Custard-Style Dessert

This easy milk pudding is a soft, creamy dessert made with just milk, sugar, and eggs. It sets gently in the refrigerator and has a smooth, comforting texture similar to classic custard. With careful low-heat cooking and constant stirring, you get a silky pudding without baking or complicated steps.


Recipe Overview

  • Prep Time: 5 minutes

  • Cook Time: 10–15 minutes

  • Chill Time: 2–3 hours

  • Servings: 4 small bowls


Ingredients

Main Ingredients

  • 2 cups (500 ml) milk

  • ⅓ cup (70 g) sugar

  • 2 large eggs

Optional (Recommended)

  • 1 teaspoon vanilla extract
    (adds aroma and smooth flavor)

Optional Toppings

  • Chopped peanuts or walnuts

  • Caramel drizzle

  • Fresh fruit


Equipment Needed

  • Medium saucepan

  • Whisk or silicone spatula

  • Fine-mesh strainer

  • Serving bowls or ramekins


Step-by-Step Instructions

1. Mix the Eggs and Sugar

  • Place the saucepan on the counter (do not heat yet)

  • Add eggs and sugar

  • Whisk until the sugar is mostly dissolved and the mixture looks slightly pale and smooth


2. Add the Milk

  • Slowly pour the milk into the egg mixture

  • Whisk continuously to keep everything smooth

  • Add vanilla extract if using


3. Cook Gently

  • Place the saucepan over low heat

  • Stir constantly using a whisk or spatula

  • Scrape the bottom and sides of the pan to prevent sticking

⚠️ Important: Keep the heat low. High heat can cause the eggs to cook unevenly.


4. Thicken the Pudding

  • Continue stirring for 10–12 minutes

  • The mixture will gradually thicken

  • It is ready when it:

    • Coats the back of a spoon

    • Looks creamy but still pours easily

(It will firm up more as it cools.)


5. Strain for Smoothness

  • Remove from heat

  • Pour the mixture through a fine strainer into a bowl or jug

  • This step ensures a silky, lump-free texture


6. Chill and Set

  • Pour the pudding into serving bowls or ramekins

  • Let cool at room temperature for about 20 minutes

  • Cover and refrigerate for 2–3 hours, until fully set


7. Serve

  • Serve chilled

  • Add nuts, caramel, or fruit just before serving if desired


Texture & Flavor

  • Texture: Smooth, soft, custard-like

  • Flavor: Lightly sweet, creamy, comforting


Helpful Tips

  • Stir continuously for best texture

  • Never let the mixture boil

  • Use room-temperature eggs for smoother blending

  • For extra richness, replace ¼ cup of milk with cream


Optional Variation (Firmer Texture)

If you prefer a firmer, pudding-style set:

  • Mix 1 tablespoon cornstarch into the cold milk before heating

  • Proceed with the recipe as written


Storage

  • Store covered in the refrigerator

  • Best enjoyed within 2 days