Homestyle Apple Pie with Warm Spices and Tender Apples

Homestyle Apple Pie with Warm Spices and Tender Apples

Apple pie is a timeless dessert that brings comfort and joy with every slice. Whether it’s a holiday gathering or a cozy weeknight dinner, the delightful aroma of baked apples and spices wafting through your kitchen makes it an all-time favorite. This recipe perfectly captures the sweet and tangy flavors of fresh apples, combined with a rich, moist base that everyone will love. Plus, it’s super easy to whip up, making it a fantastic choice for both experienced bakers and beginners. Let’s dive into making this delicious apple pie!


What Goes Into This Apple Pie

260g all-purpose flour (or oat flour)

100g raisins

120ml oil

120ml water

50g chopped walnuts

90g stevia sweetener (or 180g normal sugar)

12g baking powder

4 apples

3 eggs

Juice of 1 lemon

1 teaspoon vanilla sugar

1 teaspoon vanilla essence

A pinch of salt

A knob of butter (for greasing)

Ground cinnamon

Icing sugar (for dusting)

How to Make Apple Pie

Wash and core the apples, then cut them into small cubes. Sprinkle the pieces with lemon juice to keep them fresh.

In a large bowl, mix the apples with water, vanilla sugar, and sweetener. Stir well and then add raisins, walnuts, salt, and a sprinkle of cinnamon. Let this sit for about 10 minutes to blend the flavors.

In another bowl, whisk together the oil, eggs, and vanilla essence until smooth. Gradually add the flour and baking powder, mixing until everything is well combined.

Carefully fold the apple mixture into the batter, ensuring everything is evenly distributed.

Grease a rectangular glass mold with butter and pour in the batter, leveling it out as you go.

Preheat your oven to 180°C (350°F) and bake the pie for 40-45 minutes, or until it’s golden brown and a toothpick inserted into the center comes out clean.

Once baked, let it cool slightly before dusting with icing sugar.

Cut into slices and serve warm, perhaps with a scoop of vanilla ice cream on the side.

Why This Apple Pie Is So Popular Right Now

People are reaching for apple pie recipes more than ever, and it’s no surprise why! Seasonal gatherings and cozy family dinners have everyone craving this classic dessert. Plus, with a rise in interest around healthier options and baking at home, this recipe using stevia and whole ingredients appeals to health-conscious bakers while still being delightfully indulgent.


Best Ways to Serve It

Apple pie makes for an excellent treat any time of day. Serve it warm for breakfast or enjoy it as an afternoon snack with a cup of tea or coffee. It’s also a wonderful dessert at dinner parties. Consider adding a scoop of vanilla ice cream or a dollop of whipped cream on top for extra indulgence.

Expert Tips for Apple Pie

Storage: Keep any leftovers in an airtight container in the fridge for up to three days. If you want to save it longer, consider freezing individual slices.

Flavor variations: Experiment with different nuts like pecans or add other spices like nutmeg for a unique flavor twist.

Dietary swaps: Feel free to use honey or maple syrup in place of stevia or sugar for a different sweetness profile.

Apple Pie: Frequently Asked Questions

Can I use different types of apples?

Absolutely! For a more complex flavor, mix sweet and tart apples like Granny Smith and Fuji.


Is it necessary to peel the apples?

Peeling is optional. Leaving the skin on adds nutrients and a bit of texture, but it can make the pie a little less smooth.


Can this recipe be made ahead of time?


Yes! You can prepare it a day in advance and simply reheat it in the oven before serving.

Warm up your kitchen with this wonderful apple pie recipe and share it with family and friends. Baking is a joy, and there’s nothing like a homemade pie to bring everyone together! Enjoy the sweet moments!


4-Ingredient Savory Breakfast Muffins

4-Ingredient Savory Breakfast Muffins

Fluffy, golden, and perfect for a quick, healthy morning meal.

Prep time: 10 mins | Cook time: 20 mins | Yield: 12 muffins


Ingredients

  • 8 large eggs – the base for fluffy muffins.

  • 1 cup cooked ham or bacon, finely diced – or substitute with cooked turkey, chicken, or a plant-based alternative.

  • 1 cup shredded cheese – cheddar, mozzarella, or a mild Mexican blend works beautifully.

  • 1/2 cup finely diced red bell peppers – you can also use spinach, onions, or zucchini.

Optional seasoning:

  • A pinch of salt

  • A pinch of black pepper

  • Fresh herbs like parsley, chives, or oregano for garnish


Instructions

1. Preheat and prepare

  • Preheat your oven to 190°C (375°F).

  • Grease a 12-cup muffin tin with cooking spray or line it with silicone muffin liners to prevent sticking.

2. Mix the eggs

  • In a large bowl, whisk the eggs until smooth and slightly frothy.

  • If using, add a pinch of salt and black pepper and whisk lightly to combine.

3. Add the fillings

  • Evenly distribute the diced ham (or alternative protein), shredded cheese, and diced bell peppers into the bottom of each muffin cup.

Tip: Adding the solids first ensures each muffin gets a balanced mix of ingredients.

4. Pour the eggs

  • Carefully pour the whisked eggs over the fillings in each muffin cup, filling about 3/4 full.

The muffins will rise slightly while baking, so don’t fill them to the top.

5. Bake

  • Place the muffin tin on the center oven rack.

  • Bake for 18–22 minutes, or until the tops are set and lightly golden brown.

  • Test with a toothpick in the center—if it comes out clean, the muffins are ready.

6. Cool and serve

  • Let the muffins cool for about 5 minutes in the tin.

  • Gently loosen the edges with a plastic knife or spatula and remove the muffins.

  • Garnish with fresh parsley or chives if desired.


Pro Tips

  • Storage: Once cooled, store muffins in an airtight container in the fridge for up to 4 days.

  • Freezing: Freeze for up to 2 months; thaw overnight in the fridge or reheat directly from frozen.

  • Reheating: Microwave a muffin for 30–45 seconds for a quick breakfast.

  • Optional variation: For a slightly breadier texture, whisk in 1/4 cup of flour or 1/4 cup milk/almond milk into the egg mixture before pouring.


Variations to Try

  1. Veggie-packed: Add spinach, mushrooms, zucchini, or cherry tomatoes.

  2. Spicy: Include finely diced jalapeño or a dash of paprika.

  3. Cheese swap: Try feta, goat cheese, or pepper jack for different flavors.

  4. Meat-free: Skip the ham/bacon and add extra vegetables for a vegetarian version.


These muffins are nutritious, protein-rich, and incredibly versatile—perfect for breakfast, snack, or even a light lunch.

Sausage & Cheese Biscuit Cups

Sausage & Cheese Biscuit Cups

Soft inside, lightly crisp outside, and full of savory flavor.

Prep Time: 10 minutes
Bake Time: 18–22 minutes
Yield: About 24 mini cups


📝 Ingredients

  • 1 lb (450 g) breakfast sausage (mild or spicy)

  • 2 cups shredded cheddar cheese

  • 1½ cups baking mix (such as Bisquick or homemade baking mix)

  • ½ cup milk

  • 1 large egg

  • ½ teaspoon garlic powder

  • ½ teaspoon onion powder

  • Black pepper, to taste

Optional add-ins:
Finely chopped green onions, parsley, or a pinch of paprika


👩‍🍳 Instructions

1️⃣ Cook the Sausage

In a skillet over medium heat, cook the sausage until fully browned.
Break it into small pieces while cooking.
Drain off excess grease and let cool slightly.


2️⃣ Mix the Batter

In a large bowl, combine:

  • Cooked sausage

  • Shredded cheese

  • Baking mix

  • Milk

  • Egg

  • Garlic powder

  • Onion powder

  • Black pepper

Stir until evenly combined. The mixture will be thick.


3️⃣ Fill the Pan

Lightly grease a mini muffin pan.
Spoon the mixture into each cup, filling about ¾ full.


4️⃣ Bake

Preheat oven to 180°C (350°F).
Bake for 18–22 minutes, until:

  • Tops are lightly golden

  • Centers are fully set


5️⃣ Cool and Serve

Let cool in the pan for 5 minutes, then remove and serve warm.


🧊 Storage

  • Refrigerate in an airtight container for up to 3 days

  • Freeze for up to 2 months

  • Reheat in oven or microwave until warm


💡 Variations

  • Add finely diced bell pepper or onion

  • Use mozzarella or Colby Jack instead of cheddar

  • Use turkey sausage for a lighter version

Golden Beef and Cheese Tortilla Folds

Golden Beef and Cheese Tortilla Folds

Crispy tortillas filled with seasoned beef and melted cheese.

Prep Time: 10 minutes
Cook Time: 15 minutes
Yield: 4–6 wraps


📝 Ingredients

  • 6 medium or large flour tortillas

  • 450 g (1 lb) lean ground beef
    (or ground chicken or turkey)

  • 1 small onion, finely diced

  • 2 cups shredded cheese
    (cheddar, mozzarella, or a blend)

  • ½ cup sour cream or plain Greek yogurt

  • ½ cup salsa (mild or medium)

  • 1 teaspoon garlic powder

  • 1 teaspoon onion powder

  • 1 teaspoon smoked paprika

  • Salt and black pepper, to taste

  • 1–2 tablespoons oil or butter (for cooking)

  • Fresh parsley or cilantro, chopped (optional)


👩‍🍳 Instructions

1️⃣ Cook the Beef

Heat a large skillet over medium heat.
Add ground beef and diced onion.
Cook until beef is fully browned and onion is soft.
Drain excess fat if needed.


2️⃣ Season the Filling

Reduce heat to low.
Add:

  • Garlic powder

  • Onion powder

  • Smoked paprika

  • Salsa

  • Sour cream (or yogurt)

Stir until the mixture is evenly combined and creamy.
Remove from heat and set aside.


3️⃣ Assemble the Wraps

Lay one tortilla flat.

  1. Sprinkle shredded cheese in the center.

  2. Add a generous spoonful of beef mixture.

  3. Sprinkle a small amount of cheese on top (helps seal the wrap).


4️⃣ Fold into Pockets

Fold the bottom of the tortilla up over the filling.
Fold the sides inward.
Fold the top down to form a sealed rectangular pocket.


5️⃣ Toast Until Golden

Stovetop Method:
Heat a lightly oiled pan over medium heat.
Place wraps seam-side down.
Cook 2–3 minutes per side until golden and cheese is melted.

Oven Method:
Preheat oven to 200°C (400°F).
Place wraps on a lined baking tray.
Bake for 10 minutes, flipping halfway through.


6️⃣ Serve

Remove from heat and let rest for 1–2 minutes.
Sprinkle with chopped parsley or cilantro if desired.
Serve warm.


🧊 Storage

Store cooked wraps in an airtight container in the refrigerator for up to 3 days.
Reheat in a pan or oven until warm and crisp.

Crispy Crab Rangoon Bombs

Crispy Crab Rangoon Bombs

Savory, creamy crab filling tucked into golden, crunchy wonton shells.

Prep time: 15 mins | Cook time: 10–12 mins | Yields: 10–12 Bombs

Ingredients

  • 8 oz Cream Cheese: Softened to room temperature.

  • 1/2 cup Crab Meat: Cooked real crab or imitation crab, finely chopped.

  • 12 Wonton Wrappers: Square wrappers work best.

  • 2 tbsp Green Onions: Finely chopped.

  • 1 tbsp Soy Sauce

  • 1 tsp Garlic Powder

  • 1 tsp Worcestershire Sauce

  • Cooking Oil Spray: (Or 1 egg beaten with 1 tsp water for an egg wash).


Instructions

  1. Prepare the Filling: In a medium mixing bowl, combine the softened cream cheese, chopped crab meat, green onions, soy sauce, garlic powder, and Worcestershire sauce. Mix until thoroughly combined and creamy.

  2. Prep the Muffin Tin: Lightly grease a standard muffin tin with cooking spray. This helps the wontons hold their “bomb” shape and prevents sticking.

  3. Assemble the Bombs: * Press one wonton wrapper into each muffin cup, allowing the corners to point upward and flare out.

    • Spoon approximately 1.5 to 2 tablespoons of the crab mixture into the center of each wrapper.

  4. The “Crisp” Factor: Lightly spray the edges of the wonton wrappers with cooking oil or brush them with a little egg wash. This ensures they turn a beautiful golden brown rather than just drying out.

  5. Bake: Place in a preheated oven at 190°C (375°F). Bake for 10 to 12 minutes, or until the tips of the wontons are golden brown and the filling is hot and bubbly.

  6. Serve: Let them cool in the pan for 2–3 minutes so the shells firm up. Serve warm with sweet chili sauce or extra soy sauce for dipping.


Air Fryer Option

If you want them even crispier, you can place the filled wontons directly into an air fryer basket (ensure they aren’t touching). Air fry at 180°C (350°F) for 6–8 minutes.

Storage Tip

These are best eaten fresh, but if you have leftovers, reheat them in the oven or air fryer at 175°C for 3 minutes to regain that signature crunch. Avoiding the microwave will prevent the wrappers from becoming soggy.

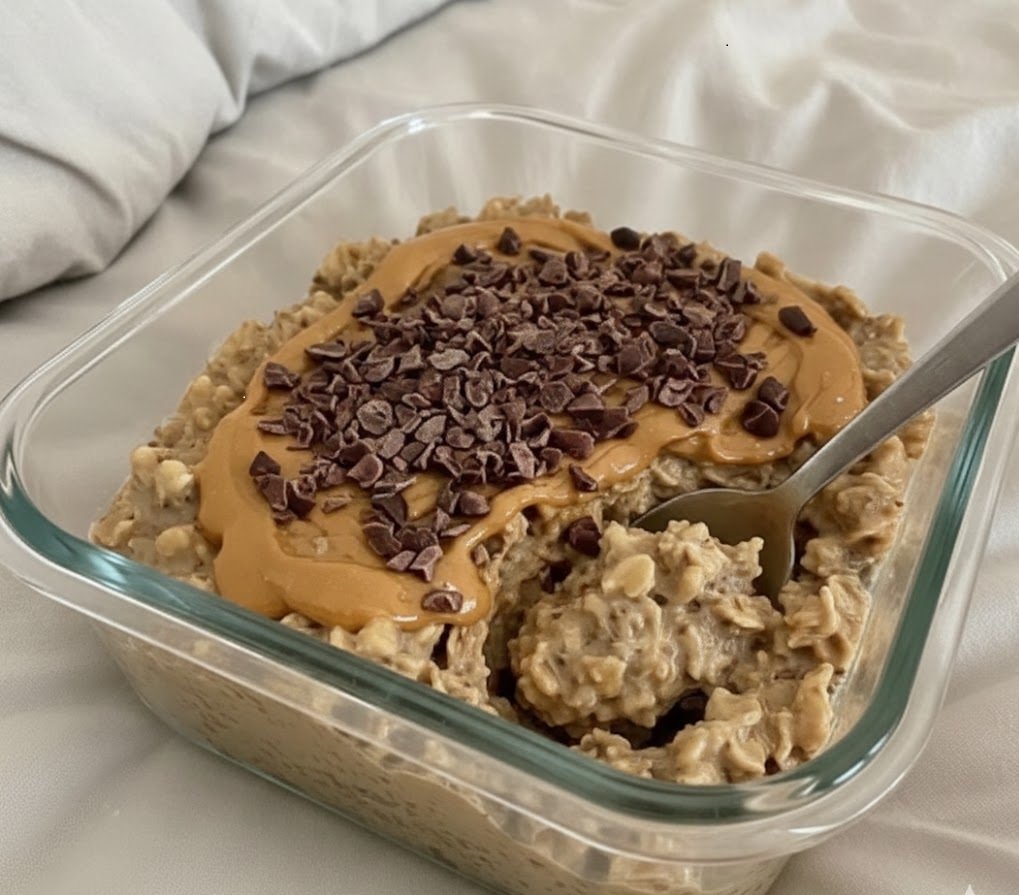
High-Protein Mocha Crunch Bowl

High-Protein Mocha Crunch Bowl

A creamy overnight oat bowl with chocolate–coffee flavor and a crunchy topping.

Prep Time: 5 minutes
Chill Time: 2 hours (or overnight)
Yield: 1 serving


📝 Ingredients

Base:

  • 1 cup rolled oats (old-fashioned oats work best for texture)

  • 1 cup non-fat plain Greek yogurt

  • 1 scoop chocolate protein powder (whey or whey-casein blend preferred)

  • 1 teaspoon instant coffee or espresso powder

  • 1 tablespoon hot water (to dissolve coffee)

  • ¼ cup unsweetened almond milk (or milk of choice)

Topping:

  • 1 tablespoon peanut butter

  • 1 tablespoon cacao nibs or dark chocolate chips (regular or sugar-free)

Optional Sweetener (to taste):

  • Stevia, monk fruit, honey, or maple syrup


👩‍🍳 Instructions

1️⃣ Dissolve the Coffee

In a small bowl, mix the instant coffee or espresso powder with 1 tablespoon hot water. Stir until fully dissolved.


2️⃣ Make the Mocha Base

In a jar or meal prep container, add:

  • Greek yogurt

  • Chocolate protein powder

  • Dissolved coffee

Whisk or stir until smooth and free of lumps.


3️⃣ Add the Oats

Add the rolled oats and almond milk to the container.
Mix well so all oats are evenly coated.

If the mixture seems very thick, add 1–2 more tablespoons of milk.


4️⃣ Taste and Adjust

Taste the mixture.
If needed, add a small amount of sweetener and stir again.


5️⃣ Add the Crunch Topping

Smooth the surface with a spoon.
Drizzle peanut butter over the top.
Sprinkle cacao nibs or chocolate chips evenly.


6️⃣ Chill

Cover tightly and refrigerate for at least 2 hours or overnight.
This allows the oats to soften and the flavors to blend.


💡 Optional Add-Ins

  • 1 tablespoon chia seeds or ground flaxseed

  • ½ teaspoon vanilla extract

  • A pinch of salt to enhance chocolate flavor

  • Banana or berries added before serving


🧊 Storage

Store covered in the refrigerator.
Best enjoyed within 2–3 days.