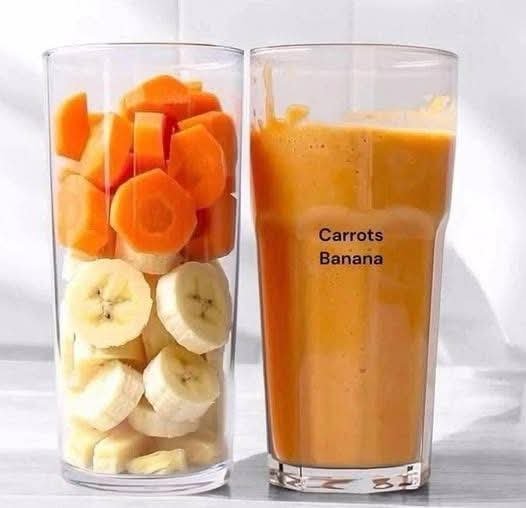
Carrot & Banana Smoothie

Carrot & Banana Smoothie


Ingredients

1 cup Carrots: Roughly chopped or sliced (as seen in the glass). For the smoothest texture, you can lightly steam them first, or use a high-powered blender if they are raw.


1 large Banana: Sliced. Using a frozen banana will make the smoothie extra thick and cold.


Liquid Base: 1 cup of your choice (Water, Coconut Water, Almond Milk, or Orange Juice).


Optional Boosters: A pinch of cinnamon, a squeeze of lemon juice, or a small knob of fresh ginger.

Instructions

Prepare the Carrots: If you don’t have a high-speed blender, grate the carrots or steam them for 5 minutes until slightly soft to ensure there are no “crunchy” bits in your drink.


Layer the Blender: Add your liquid base first. This helps the blades move freely. Add the sliced bananas next, followed by the carrot pieces.


Blend: Start on a low speed and gradually increase to high. Blend for about 45–60 seconds until the mixture is completely vibrant orange and smooth.


Adjust Consistency: If it’s too thick, add a splash more liquid. If you want it colder, add a handful of ice cubes and blend again.


Serve: Pour into a tall glass and enjoy immediately while fresh.

Why this combo works

Carrots provide beta-carotene and fiber.


Bananas provide natural sweetness and creaminess, eliminating the need for added sugars.

Banana Pineapple Ginger Smoothie

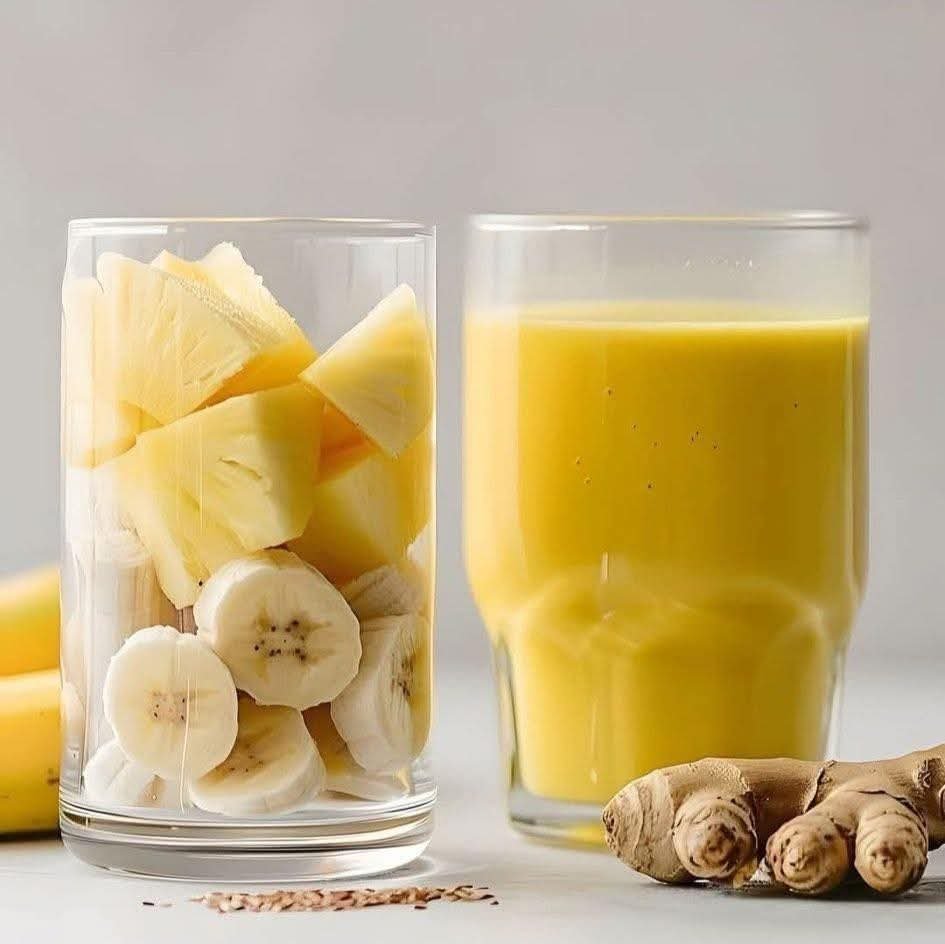
This Banana Pineapple Ginger Smoothie is a vibrant, tropical drink that combines natural sweetness with a gentle spicy kick from fresh ginger. It’s perfect for breakfast, a mid-day energy boost, or a light evening refreshment. The smoothie is rich in vitamins, aids digestion, and helps support immunity.


Ingredients

1 ripe banana (peeled and sliced)


1 cup fresh pineapple chunks (or frozen)


1 teaspoon fresh ginger (grated or thinly sliced)


1 cup chilled milk (dairy or plant-based like almond or coconut milk)


½ cup fresh orange juice or cold water


1 teaspoon honey or maple syrup (optional)


4–5 ice cubes (optional, for extra chill)

Preparation Steps

Prepare the Fruits:

Peel the banana and slice it into small rounds. Cut fresh pineapple into bite-sized chunks, removing the hard core. If using frozen pineapple, no thawing is required.


Prepare the Ginger:

Peel the ginger using a spoon or knife. Grate it finely or slice it thin so it blends smoothly without fibrous bits.

Blend the Ingredients:

Add banana slices, pineapple chunks, ginger, milk, and orange juice (or water) into a blender. If you prefer a sweeter smoothie, add honey or maple syrup at this stage.


Adjust Texture:

Blend on high speed for 30–45 seconds until smooth and creamy. Add ice cubes and blend again if you want a colder, thicker texture.


Taste and Serve:

Taste the smoothie and adjust sweetness or liquid if needed. Pour into a chilled glass and serve immediately

Health Benefits

Banana provides potassium and natural energy.


Pineapple is rich in vitamin C and bromelain, supporting digestion.


Ginger helps reduce inflammation and soothes the stomach.


Milk or plant milk adds creaminess and calcium.


Serving Tips

Garnish with a pineapple slice or a pinch of grated ginger.


For a protein boost, add a tablespoon of yogurt or soaked chia seeds.


Best enjoyed fresh to retain maximum nutrients.

This smoothie is naturally refreshing, lightly spicy, and full of tropical flavor—perfect for a healthy daily routine. 🥤🍍🍌

Cheesy Ground Beef Tortilla Rolls

Cheesy Ground Beef Tortilla Rolls

Savory, oven-baked tortilla rolls filled with creamy seasoned beef and melted cheese. Perfect for family meals or casual gatherings.

Prep Time: 15 minutes
Cook Time: 20 minutes
Servings: 4–6 people


📝 Ingredients

  • 6–8 large flour tortillas – soft and flexible

  • 1 lb (450 g) lean ground beef – or ground chicken/turkey

  • 1 cup shredded cheese – mozzarella, cheddar, or a blend

  • 1/2 cup cream cheese, softened

  • 1/4 cup green onions, finely chopped

  • 1/2 cup tomato sauce or mild salsa

  • Seasonings:

    • 1 tsp garlic powder

    • 1 tsp onion powder

    • 1/2 tsp cumin

    • Salt and black pepper to taste

  • Fresh parsley, chopped (for garnish)


👩‍🍳 Instructions

1. Cook the beef

  • Heat a large skillet over medium heat.

  • Add the ground beef and cook until fully browned, breaking it up with a spoon.

  • Drain excess fat from the pan for a cleaner flavor.


2. Make the filling creamy

  • Reduce heat to low.

  • Add tomato sauce (or salsa), garlic powder, onion powder, cumin, salt, and pepper.

  • Stir well to combine.

  • Add softened cream cheese and half of the chopped green onions.

  • Stir continuously until the mixture becomes smooth and creamy.


3. Assemble the rolls

  • Place one tortilla flat on a clean surface.

  • Spread a thin, even layer of beef mixture across the tortilla.

  • Sprinkle a small handful of shredded cheese over the beef.

  • Roll the tortilla tightly into a log shape.

Repeat with remaining tortillas.


4. Arrange and bake

  • Preheat oven to 190°C (375°F).

  • Lightly grease a baking dish.

  • Place tortilla rolls seam-side down in the dish.

  • Sprinkle remaining shredded cheese over the top.


5. Bake

  • Bake for 15–20 minutes, until cheese is fully melted and lightly golden.


6. Finish and serve

  • Remove from oven and let rest for 5 minutes.

  • Garnish with remaining green onions and fresh parsley.

  • Slice into rounds or serve whole.


🍽 Serving Suggestions

  • Serve with sour cream, Greek yogurt, or extra salsa for dipping.

  • Pair with a simple salad or roasted vegetables for a balanced meal.


⭐ Variations

  • Spicy version: Add chili flakes or chopped jalapeño

  • Vegetarian: Replace beef with mushrooms or lentils

  • Extra cheesy: Mix cheese directly into filling

  • Low-carb: Use low-carb tortillas

Keto Air-Fried Crispy Cauliflower Bites

Keto Air-Fried Crispy Cauliflower Bites

Crispy, savory, and the perfect low-carb alternative to tater tots.

Prep time: 10 mins | Cook time: 15–20 mins | Servings: 3–4

Ingredients

  • 1 large Head of Cauliflower: Cut into bite-sized florets.

  • 2 Large Eggs: Beaten (this helps the “breading” stick).

  • 1 ½ cups Shredded Parmesan Cheese: (The canned grated kind works too for a finer crust).

  • 1 tsp Garlic Powder

  • 1 tsp Smoked Paprika: For that deep golden color and smoky flavor.

  • ½ tsp Onion Powder

  • Salt and Black Pepper: To taste.

  • Optional: Fresh parsley for garnish and your favorite spicy mayo or ranch for dipping.


Instructions

  1. Prep the Cauliflower: Wash the cauliflower and pat it completely dry. If the florets are damp, the coating won’t stick and they won’t get crispy.

  2. The Coating Station: * In one medium bowl, whisk the eggs.

    • In a second medium bowl, combine the Parmesan cheese, garlic powder, smoked paprika, onion powder, salt, and pepper.

  3. Bread the Florets: * Dip each floret into the egg wash, ensuring it’s fully coated.

    • Toss the floret in the Parmesan mixture, pressing gently so the cheese sticks to all the nooks and crannies.

  4. Air Fry: * Arrange the florets in a single layer in the air fryer basket. Do not overcrowd them; work in batches if necessary to ensure air can circulate.

    • Lightly spray the tops with a bit of olive oil or avocado oil spray for extra crunch.

    • Air fry at 200°C (400°F) for 15–20 minutes.

    • Shake the basket halfway through to ensure even browning.

  5. Serve: Once they are deep golden brown and crispy, remove from the air fryer. Sprinkle with fresh parsley and serve immediately while hot with a side of dipping sauce.


Success Tips

  • Extra Crunch: If you aren’t strictly Keto, you can mix in 1/4 cup of crushed pork rinds or Panko breadcrumbs into the cheese mixture for an even heavier “crunch.”

  • Oven Method: If you don’t have an air fryer, bake them on a parchment-lined sheet at 220°C (425°F) for 25–30 minutes, flipping halfway.

  • The Dip: To make the sauce shown in the photo, mix 1/4 cup Mayonnaise with 1 tsp Sriracha and a squeeze of lime juice.

Pineapple Coconut Dream Cake!!!

Pineapple Coconut Dream Cake!!!

If you love the combination of sweet pineapple and creamy coconut, this cake is a dream come true! The Pineapple Coconut Dream Cake is moist, fluffy, and layered with tropical flavors that make every bite taste like a sunny vacation. This guide will take you step by step to create this delectable dessert from scratch.


Ingredients

For the Cake:


2 ½ cups all-purpose flour

2 ½ tsp baking powder

½ tsp baking soda

½ tsp salt

1 cup unsalted butter, softened

2 cups granulated sugar

4 large eggs, at room temperature

1 tsp vanilla extract

1 tsp coconut extract

1 cup buttermilk, at room temperature

1 (20 oz) can crushed pineapple, drained

For the Frosting:


1 cup unsalted butter, softened

4 cups powdered sugar

½ tsp salt

1 tsp vanilla extract

1 tsp coconut extract

4–6 tbsp heavy cream or milk

For Garnish:


1 cup sweetened shredded coconut, toasted

Pineapple slices or chunks (optional)

Step-by-Step Method

Step 1: Preheat and Prepare

Preheat your oven to 350°F (175°C). Grease and flour two 9-inch round cake pans, and line the bottoms with parchment paper to ensure your cakes release easily.

Step 2: Mix Dry Ingredients

In a medium bowl, whisk together:


2 ½ cups flour

2 ½ tsp baking powder

½ tsp baking soda

½ tsp salt

Set aside. These dry ingredients will give your cake structure and ensure it rises evenly.


Step 3: Cream Butter and Sugar

In a large mixing bowl, beat 1 cup butter and 2 cups sugar together using an electric mixer until the mixture is light and fluffy (about 3–5 minutes). This step is crucial for a soft and airy cake.


Step 4: Add Eggs and Extracts

Beat in the eggs one at a time, ensuring each egg is fully incorporated before adding the next. Then add:


1 tsp vanilla extract

1 tsp coconut extract

Mix until combined. The coconut extract enhances the tropical flavor without overpowering the cake.

Step 5: Combine Wet and Dry Ingredients

Alternately add the dry ingredients and 1 cup buttermilk to the butter mixture in three additions, starting and ending with the dry ingredients. Mix on low speed just until combined to avoid overmixing.


Step 6: Fold in Pineapple

Gently fold in the drained crushed pineapple using a spatula. Make sure the pineapple is evenly distributed but don’t overmix, or the cake may become too dense.


Step 7: Bake the Cake

Divide the batter evenly between the prepared pans. Smooth the tops with a spatula. Bake at 350°F (175°C) for 30–35 minutes, or until a toothpick inserted in the center comes out clean.


Once baked, let the cakes cool in the pans for 10 minutes, then turn them out onto a wire rack to cool completely.


Step 8: Make the Frosting

While the cakes cool, prepare the frosting:

Beat 1 cup butter in a large bowl until creamy.

Gradually add 4 cups powdered sugar and ½ tsp salt, mixing until smooth.

Beat in 1 tsp vanilla extract and 1 tsp coconut extract.

Add 4–6 tbsp heavy cream until the frosting reaches your desired consistency (spreadable but not too runny).

Step 9: Assemble the Cake

Place one cake layer on a serving plate. Spread a generous layer of frosting over it.

Place the second cake layer on top and frost the top and sides of the cake evenly.

Press toasted shredded coconut around the sides and sprinkle on top for extra flavor and texture.

Optional: Garnish with pineapple slices or chunks for a vibrant tropical touch.

Step 10: Chill and Serve

For the best flavor and clean slices, chill the cake in the refrigerator for 1–2 hours before serving. This allows the frosting to firm up and the flavors to meld beautifully.


Tips for a Perfect Pineapple Coconut Dream Cake

Drain the pineapple well to avoid making the batter too wet.

Toast the coconut in a dry skillet for 3–5 minutes until golden for extra flavor.

Room temperature ingredients (eggs, butter, buttermilk) help the cake rise evenly.

Optional add-ins: Macadamia nuts or crushed pineapple between layers for extra texture.

This Pineapple Coconut Dream Cake is perfect for birthdays, summer gatherings, or anytime you crave a tropical escape in dessert form. With its moist layers, sweet pineapple bursts, and rich coconut flavor, it’s a guaranteed crowd-pleaser!
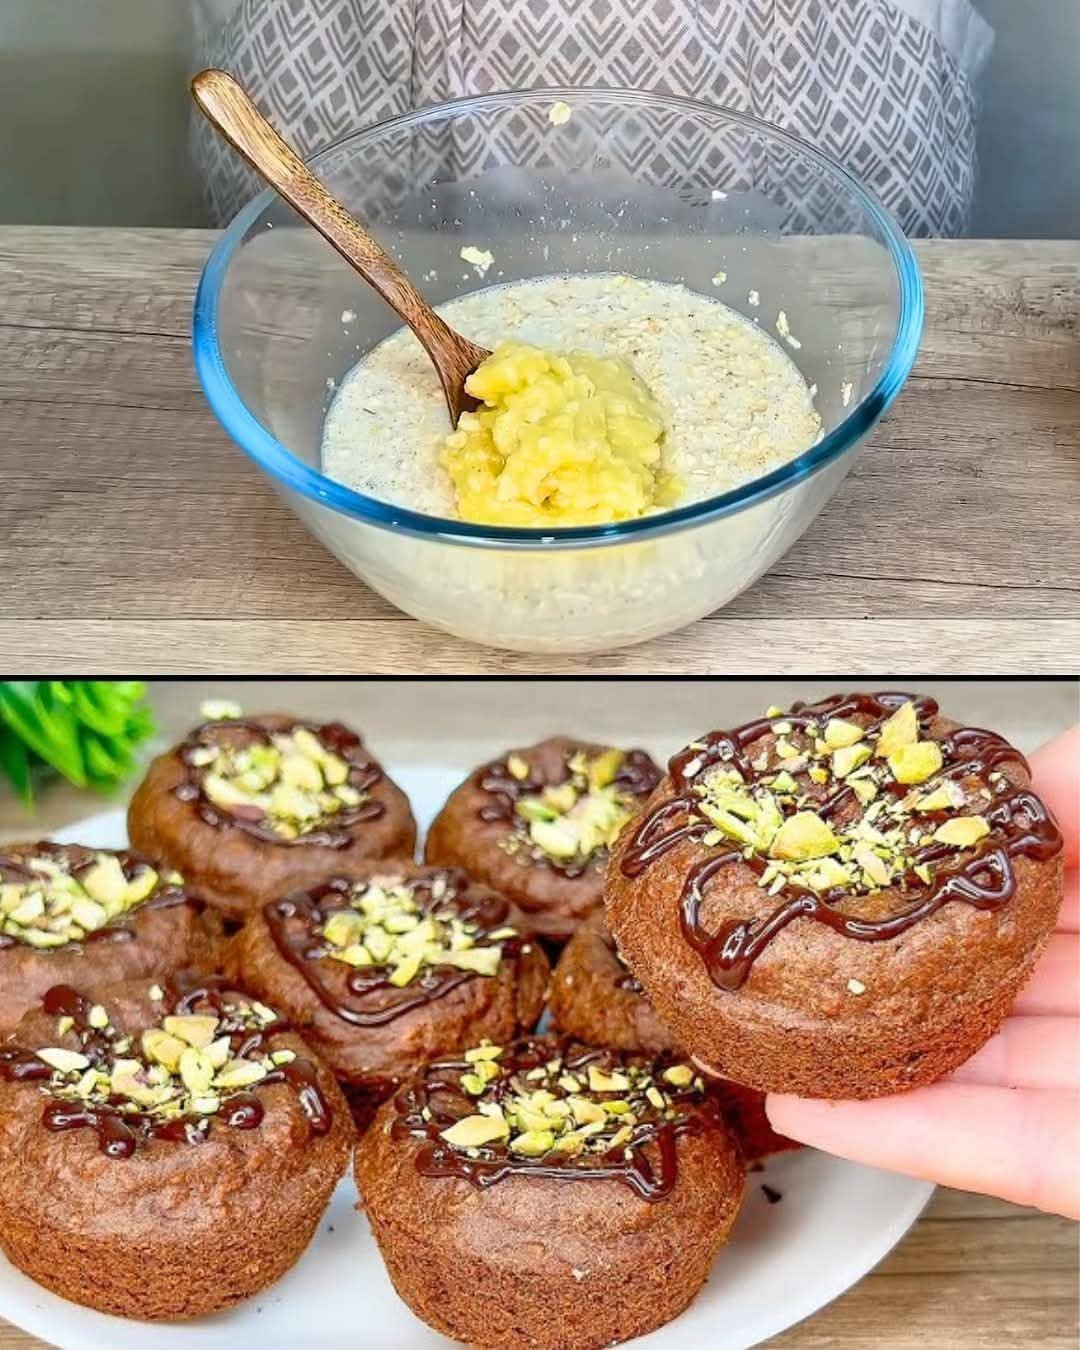
Healthy Chocolate Banana Oatmeal Muffins

Healthy Chocolate Banana Oatmeal Muffins

Healthy Chocolate Banana Oatmeal Muffins

These muffins are soft, naturally sweet from bananas, and flavored with cocoa for a chocolate taste. They are perfect for breakfast, snacks, or lunchboxes.


🧾 Ingredients

For the Muffin Batter:

1 cup (90 g) oats (quick oats or rolled oats)


1 cup (240 ml) water


2 eggs


2 ripe bananas, mashed


1 tablespoon cocoa powder


1 teaspoon baking powder


1 tablespoon stevia sweetener (or sweetener of choice)


1 teaspoon vanilla extract


1 tablespoon coconut flakes


A pinch of salt

For Topping:

Chopped almonds


Sugar-free chocolate syrup (optional)


👩‍🍳 Instructions

1. Soak the Oats

Place the oats and water in a large bowl.


Stir and let them rest for 10 minutes so the oats soften and absorb the water.


2. Prepare the Banana Mixture

In another bowl, mash the bananas until smooth.


Add:


Eggs


Sweetener


Vanilla extract


Salt


Whisk until fully combined.

3. Combine the Mixtures

Pour the banana mixture into the soaked oats and mix well.


Sift in:


Cocoa powder


Baking powder


Add coconut flakes.


Stir gently until the batter is smooth and evenly mixed.


4. Prepare for Baking

Preheat oven to 180°C (350°F).


Lightly grease a muffin tin or use silicone or paper liners.


Fill each cup about ¾ full with batter.


Sprinkle chopped almonds on top.


5. Bake

Place in the oven and bake for 20–25 minutes, or until:

The tops are set


A toothpick inserted in the center comes out clean


6. Cool and Serve

Let the muffins cool in the tin for 5–10 minutes, then remove carefully.


Before serving, drizzle lightly with sugar-free chocolate syrup if desired.


🌟 Texture Tip

For a smoother, cake-like texture:

Blend the oats briefly in a blender to make oat flour before soaking them.


🍽 Serving Ideas

✔ With tea or coffee

✔ As a breakfast muffin

✔ As a school snack

✔ With yogurt or fruit


📦 Storage

Store in an airtight container in the refrigerator for up to 3 days


Freeze for up to 1 month


Reheat in microwave or oven before serving