🥦 Crispy Roasted Cauliflower

This recipe is a true testament to how simple ingredients can transform cauliflower into something irresistibly crispy, savory, and addictive.

Ingredients

  • 1 medium cauliflower, cut into bite-size florets
  • 3 tbsp olive oil
  • ½ tsp salt
  • Âź tsp black pepper
  • ½ tsp garlic powder
  • ½ tsp paprika (optional, for smoky flavor)
  • Âź cup grated Parmesan (optional, for extra crisp and umami)

Instructions

  1. Preheat oven to 220°C / 425°F. Line a baking sheet with parchment paper.
  2. In a large bowl, toss cauliflower florets with olive oil, salt, pepper, garlic powder, and paprika until evenly coated.
  3. Spread florets in a single layer on the baking sheet (don’t overcrowd—this is key for crispiness).
  4. Roast for 20 minutes, then flip the florets.
  5. Sprinkle with Parmesan (if using) and return to the oven.
  6. Roast another 10–15 minutes until golden brown and crispy on the edges.
  7. Serve hot and enjoy immediately 😍

Tips for extra crunch

  • Make sure the cauliflower is completely dry before seasoning
  • Use the convection/fan setting if available
  • Finish with a squeeze of lemon or chili flakes for a flavor boost

Hearty Navy Bean and Ham Hock Soup

Serves 6–8

Ingredients

  • 1 large onion, chopped
  • 2 celery stalks, chopped
  • 2 carrots, peeled and chopped
  • 2 cloves garlic, minced
  • 1–2 ham hocks
  • 2 cups dried navy beans, rinsed and sorted (or 4 cups cooked/canned, drained)
  • 6 cups chicken or vegetable broth
  • 2 bay leaves
  • 1 teaspoon dried thyme
  • Salt and pepper, to taste
  • Optional garnish: chopped parsley

Instructions

  1. Prep the beans (if using dried):
    • Rinse and sort the navy beans.
    • Soak overnight, or use the quick-soak method: cover with water, boil for 2 minutes, then let sit for 1 hour. Drain and set aside.
  2. SautĂŠ vegetables:
    • In a large soup pot, heat 1–2 tablespoons olive oil over medium heat.
    • Add chopped onion, celery, and carrots. SautĂŠ for 5–7 minutes until softened.
    • Add minced garlic and cook 1 minute more, until fragrant.
  3. Add beans and ham hocks:
    • Stir in the soaked beans (or drained canned beans) and ham hocks.
    • Pour in the broth, then add bay leaves and thyme.
  4. Simmer the soup:
    • Bring to a boil, then reduce heat to low.
    • Cover and simmer for 1.5–2 hours (or until beans are tender and the ham hocks are falling apart).
  5. Shred the ham:
    • Remove the ham hocks from the soup. Shred the meat, discarding the bone and excess fat.
    • Return shredded ham to the soup and stir well.
  6. Season and serve:
    • Taste and adjust salt and pepper.
    • Remove bay leaves before serving.
    • Garnish with chopped parsley if desired.

✅ Tips:

  • For a thicker soup, mash some of the beans against the side of the pot or use an immersion blender on a portion.
  • Leftovers taste even better the next day, as the flavors continue to meld.
  • You can also cook this in a slow cooker on low for 6–8 hours for a hands-off method.

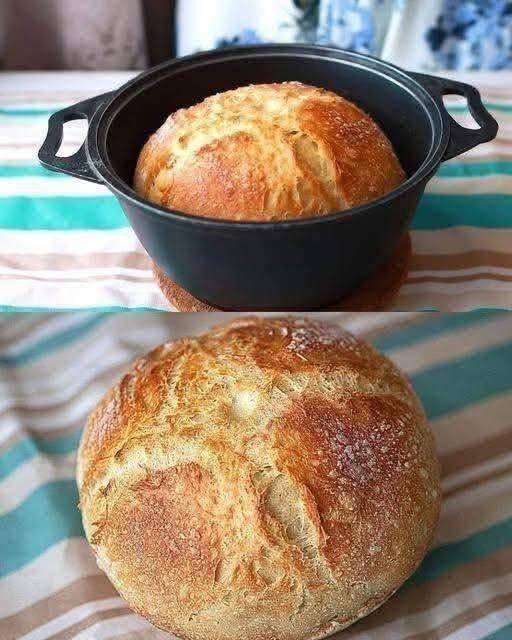
🥖 No-Knead Dutch Oven Bread (Artisan Style)

Ingredients

  • 3 cups (375 g) all-purpose flour
  • 1½ tsp salt
  • ½ tsp instant or dry yeast
  • 1½ cups warm water

(Optional: 1 tsp sugar or honey for better browning)


Instructions

  1. Mix
    • In a large bowl, mix flour, salt, and yeast.
    • Add warm water and stir until a sticky dough forms.
    • Cover and rest 12–18 hours at room temperature.
  2. Shape
    • Turn dough onto a floured surface.
    • Fold a few times into a round shape.
    • Let rest 30 minutes while oven heats.
  3. Preheat
    • Place Dutch oven (with lid) into oven.
    • Heat to 230°C / 450°F for 30 minutes.
  4. Bake
    • Carefully place dough into hot pot.
    • Cover with lid and bake 30 minutes.
    • Remove lid and bake 10–15 minutes until deep golden.
  5. Cool
    • Remove bread and cool at least 30 minutes before slicing.

🔥 Tips for That Perfect Crust

  • Use steam (the lid traps moisture)
  • Don’t skip the long rest — it creates air holes
  • Flour the top lightly before baking for a rustic look

Zero-Carb Pizza All the pizza flavor you crave—without a single gram of carbs

  • Servings: 2
  • Total Time: 25 minutes
  • Difficulty: Medium
  • Calories per Serving: 410 kcal
  • Macros: Protein: 38g / Carbs: 0.5g / Fat: 28g / Fiber: 0g

All the Pizza Flavor, None of the Carbs

If you’ve been struggling to stay in ketosis while craving a Friday night slice, this Zero-Carb Pizza is your ultimate solution. Traditional “healthy” pizzas often rely on cauliflower or almond flour, which still carry a carb count that can add up quickly. Our specialized recipe uses a “Chicken Crust” or “Meatza” base, providing a sturdy, foldable slice that contains virtually zero impact on your blood sugar.

This recipe is a game-changer for those following a strict keto or carnivore-style diet because it prioritizes high-quality animal proteins and healthy fats. We have eliminated the fillers and focused on what makes pizza great: the savory, salty, cheesy satisfaction. It is a macro-friendly powerhouse that fuels your muscles while keeping you in deep fat-burning mode.

By following our specific drying technique for the crust, you’ll achieve a base that isn’t soggy or “meaty” in texture, but rather crisp and satisfying. This is a clean-eating dinner that finally delivers on the promise of zero-carb comfort food.

Look at the Recipe

  • Sensory Appeal: A crisp, golden-brown base topped with bubbling, melted mozzarella and savory herbs.
  • Flavor Highlight: Rich, umami-packed parmesan paired with the classic “pizza shop” aroma of oregano and garlic.
  • Key Diet Benefit: Zero grains, zero gluten, and zero net carbs—perfect for insulin sensitivity and fat loss.

Ingredients Needed

The Zero-Carb Crust:

  • 1 can (10 oz) Chicken breast, drained and shredded (or finely ground fresh chicken)
  • 1 Large egg, lightly beaten
  • 1/2 cup Freshly grated Parmesan cheese
  • 1/2 tsp Garlic powder
  • 1/2 tsp Dried oregano

The Toppings:

  • 1/2 cup Shredded Mozzarella cheese (full-fat)
  • 10-12 Slices of Pepperoni (ensure zero-sugar added)
  • Optional: A pinch of red pepper flakes for heat

How to Make Our Zero-Carb Pizza

Dry the Base: Preheat your oven to 400°F (200°C). The secret to a non-soggy crust is removing moisture. Place your shredded chicken on a baking sheet and bake for 5 minutes. Remove and pat thoroughly with paper towels.

Mix the “Dough”: In a medium bowl, combine the dried chicken, beaten egg, grated Parmesan, garlic powder, and oregano. Mix until a “dough” forms. The Parmesan and egg act as the binding agents in place of flour.

Shape and Pre-Bake: Line a baking sheet with parchment paper. Press the chicken mixture into a thin, even circle (about 1/4 inch thick). Bake for 15–18 minutes until the crust is golden and feels firm to the touch.

Top and Melt: Remove the crust from the oven. Spread a very thin layer of sugar-free tomato sauce (optional) or go “white pizza” style with just cheese. Add your mozzarella and pepperoni.

The Final Broil: Switch your oven to the broil setting. Place the pizza back in for 2–3 minutes until the cheese is bubbling and starting to brown.


Storage & Serving Suggestions

  • Storing: This pizza holds up surprisingly well! Store leftovers in an airtight container for up to 3 days.
  • Reheating: For the best results, reheat in an air fryer or dry skillet to maintain the crispness of the chicken crust.
  • Freezing: You can pre-bake the crusts and freeze them with parchment paper in between. Just add toppings and bake from frozen when a craving hits.
  • Serving Pairings: Serve with a side of buttery buffalo wings or a simple Caesar salad (no croutons) for a high-protein feast.

Tips & FAQs

Does the crust taste like chicken? Because the chicken is dried and seasoned with Parmesan, garlic, and oregano, the flavor profile shifts significantly toward a savory bread-like base. Once topped with cheese and pepperoni, it satisfies the “pizza” palate perfectly.

How do I make the crust crispier? Ensure you squeeze every drop of moisture out of the chicken before mixing. The drier the chicken, the crunchier the crust. Using a silicon baking mat or parchment paper is also essential to prevent sticking.

Is this recipe suitable for the Carnivore Diet? Yes! To make it strictly carnivore, simply omit the oregano and garlic powder, and use a “white” base of extra cheese instead of tomato sauce.

Cranberry Swirl Cheesecake Bars

A creamy, velvety cheesecake bar swirled with tart cranberry sauce and baked on a buttery graham cracker crust.

Servings: 12–16 bars
Prep Time: 15 minutes
Cook Time: 35–40 minutes
Total Time: 55 minutes
Dietary Notes: Vegetarian, Nut-Free (if using nut-free graham crackers)


Recipe Card

Ingredients

(Without checkboxes, but organized for easy scanning)

For the Crust:

  • 2 cups graham cracker crumbs
  • 1/2 cup unsalted butter, melted
  • 2 tbsp granulated sugar
  • Pinch of salt

For the Cheesecake Filling:

  • 16 oz cream cheese, softened
  • 1 cup granulated sugar
  • 2 large eggs
  • 1 cup sour cream
  • 2 tsp vanilla extract
  • 2 tbsp all-purpose flour
  • 1 cup canned cranberry sauce (whole-berry recommended)

Instructions

  1. Preheat oven to 325°F. Grease a 9×13-inch baking dish.
  2. Make the crust: Mix graham crumbs, melted butter, sugar, and salt until evenly moistened. Press firmly into the bottom of the pan. Bake for 8 minutes; cool slightly.
  3. Make the filling: Beat cream cheese and sugar until smooth. Add eggs one at a time. Mix in sour cream, vanilla, and flour until just combined.
  4. Pour filling over the baked crust.
  5. Drop spoonfuls of cranberry sauce over the filling and swirl gently with a knife.
  6. Bake 35–40 minutes or until the center is mostly set with a slight jiggle.
  7. Cool completely, then refrigerate at least 3 hours before slicing.

Additional Notes

  • Use room-temperature cream cheese for the smoothest texture.
  • Swirl lightly; overmixing will incorporate the cranberry instead of marbling it.
  • For a thicker bar, use an 8×11 pan and bake longer.

Thesis:

This recipe-first format gives readers fast access to the essentials while still offering depth, technique, substitutions, and tips below.


Hero Image

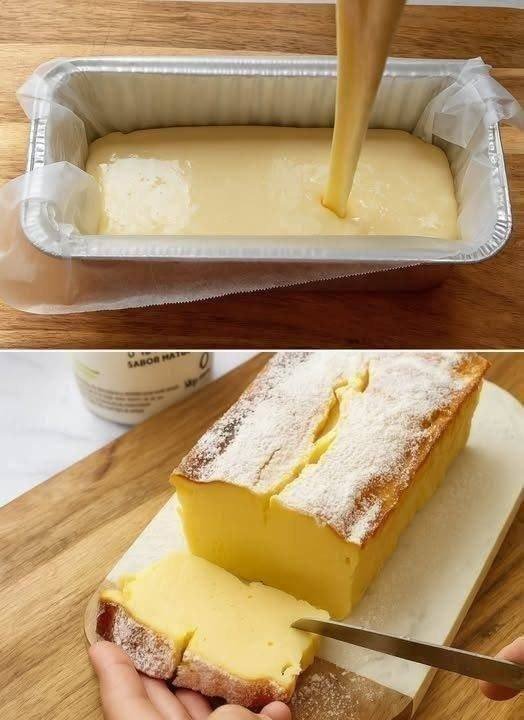
(The image shows a creamy cheesecake mixture in a baking dish with cranberry sauce swirled throughout.)


Brief Introduction

These Cranberry Swirl Cheesecake Bars are the kind of holiday-inspired dessert that works year-round. They’re incredibly creamy, perfectly sweet with a bright tart swirl, and surprisingly simple to make. I first baked this version when I had leftover cranberry sauce after Thanksgiving, and it became one of the most requested desserts in my family. It’s a quick, crowd-pleasing treat that looks impressive without much effort.


Step-by-Step Cooking Guide

Making the Crust

Pressing the graham cracker mixture firmly into the pan helps create a sturdy base that slices cleanly later.
Tip: Use the bottom of a measuring cup to compact the crust evenly across the dish.

Preparing the Cheesecake Filling

Beat the cream cheese until completely smooth before adding anything else. This prevents lumps later.
If your cream cheese resists smoothing, warm it slightly by letting the bowl sit over warm water.

Adding the Cranberry Swirl

Drop small spoonfuls of cranberry sauce across the top, then use a knife in sweeping figure-eight motions to marble it through the batter.
If the cranberry sauce is very thick, stir it briefly to loosen before swirling.

Baking and Cooling

Bake until the edges are set and the center jiggles slightly. Overbaking leads to cracks and a dry texture.
Cooling in the refrigerator is essential; the flavors settle and the bars firm up for clean slicing.


Ingredient Details and Substitution Tips

Why These Ingredients Matter

  • Cream cheese (full fat): Provides structure and signature cheesecake richness.
  • Sour cream: Adds moisture and a tangy balance to the sweetness.
  • Cranberry sauce: Whole berry works best for texture and visual marbling.

Quality and Selection Tips

  • Choose high-quality cream cheese for the smoothest filling.
  • If using canned cranberry sauce, opt for whole berry instead of jellied for better swirl definition.

Substitutions

  • Graham crumbs: Swap with vanilla wafer crumbs or gingersnap crumbs.
  • Sour cream: Replace with Greek yogurt for a slightly tangier version.
  • Cranberry sauce: Raspberry jam or blueberry preserves also work beautifully.

Equipment Alternatives

  • No mixer: Beat by hand with a sturdy silicone spatula; ensure cream cheese is very soft.
  • No 9×13 pan: Use two 8×8 pans or one 8×11 pan and adjust baking time accordingly.

Recipe Variations and Serving Suggestions

Flavor Variations

  • Add 1 tsp orange zest to the filling for a citrus note.
  • Swirl half cranberry, half raspberry for a mixed-berry version.
  • Add 1/2 tsp almond extract for a bakery-style flavor boost.

Dietary Variations

  • Gluten-Free: Use gluten-free graham crackers.
  • Lower-Sugar: Reduce sugar in the filling to 3/4 cup; cheesecake will still set beautifully.

Serving Ideas

  • Slice into small squares for party platters.
  • Serve chilled with whipped cream.
  • Add fresh berries on top for a polished presentation.

Pairing Suggestions

  • Hot coffee or tea.
  • Sparkling water with citrus.
  • Light dessert wines like Moscato.

Storage and Make-Ahead Information

Storage

  • Refrigerate covered for up to 5 days.
  • Keep bars chilled until serving for best texture.

Freezing

  • Freeze tightly wrapped bars for up to 2 months.
  • Thaw overnight in the refrigerator before serving.

Reheating

Not necessary; these are served cold. However, letting them rest at room temperature for 10 minutes before serving improves texture.

Make-Ahead Tips

  • This dessert tastes even better the next day.
  • You can prepare the crust 24 hours early and store it in the fridge before topping with filling.

Shelf Life & Quality Notes

  • Crust may soften slightly after day 4 but flavor remains excellent.

Nutrition (Estimated Per Bar, Based on 16 Bars)

Calories: 265
Carbs: 28 g
Protein: 4 g
Fat: 16 g
Sodium: 160 mg

Allergens: Contains dairy, wheat (if using traditional graham crackers).


Frequently Asked Questions

Q: Can I use homemade cranberry sauce?
Yes. Make sure it’s thick and cooled so it swirls cleanly.

Q: Why did my cheesecake crack?
Likely overbaking. Remove it while the center still jiggles slightly.

Q: Can I make this in a springform pan?
Yes, but baking time may increase by 10–15 minutes.

Q: Is canned cranberry sauce too sweet?
No, the tang from the cream cheese balances it well.


Optional Personal Story

This recipe came from one late-November afternoon when I was determined not to let leftover cranberry sauce go to waste. After swirling it into cheesecake batter, I realized how beautifully the tartness cut through the rich filling. It quickly turned into a tradition, and now I make these bars even when it’s not the holidays.


Call-to-Action

If you bake these Cranberry Swirl Cheesecake Bars, share your results, leave a review, or let others know how you customized the swirl. Your feedback helps shape future recipes and inspires more creative variations.

“Creamy Chicken Corn Chowder — Comforting, Low-Calorie, and Protein-Packed”

  • Servings: 4
  • Total Time: 35 minutes
  • Difficulty: Easy
  • Calories per Serving: ~220 kcal
  • Macros (Per Serving): 25g Protein / 12g Net Carbs / 8g Fat / 3g Fiber

Introduction

There’s nothing quite like a warm, creamy chicken corn chowder to soothe the soul. This recipe is comforting, low-calorie, and high in protein, making it ideal for anyone following Keto, Slimming , Weight Watchers, High-Protein, or Mediterranean diets.

Packed with tender chicken, sweet corn, and fresh vegetables, this chowder is a one-pot meal that’s hearty yet light. Its rich, creamy texture comes from wholesome ingredients, giving you all the indulgence of classic chowder without the guilt.

Perfect for weeknight dinners, meal prep, or cozy lunches, this chowder delivers flavor, nutrition, and simplicity in every spoonful.


Look at the Recipe

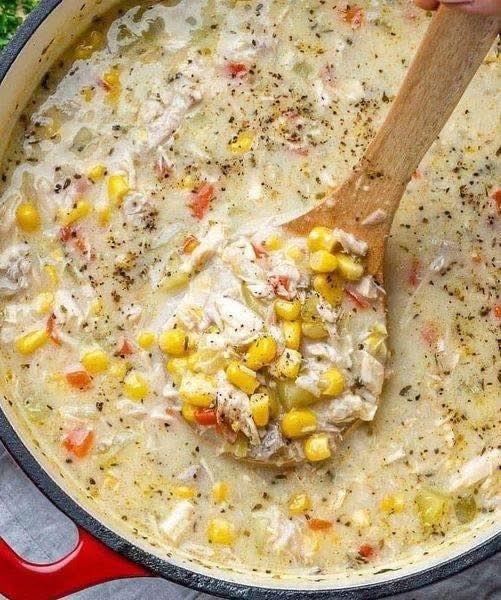
  • Texture & Visual: Thick, creamy, with tender chicken chunks and colorful vegetable bits.
  • Flavor Highlight: Savory chicken paired with the natural sweetness of corn, enriched with herbs and a touch of creaminess.
  • Diet Benefit: High in protein, low in refined carbs, and fully adaptable to Keto, WW, SW, and Mediterranean preferences.

Ingredients Needed

Soup Base

  • 1 lb (450g) cooked chicken breast, shredded or diced
  • 1 cup corn kernels (fresh, frozen, or canned — drained)
  • 1 small onion, diced
  • 2 cloves garlic, minced
  • 1 celery stalk, diced
  • 1 medium carrot, diced
  • 2 cups chicken broth (low-sodium)
  • ½ cup milk or unsweetened almond milk for Keto/low-carb version
  • 1 tsp olive oil or cooking spray
  • Salt and pepper to taste

Optional Flavor Enhancers

  • 1 tsp paprika or smoked paprika
  • 1 tsp dried thyme or Italian herbs
  • Fresh parsley or chives for garnish

How to Make Our Creamy Chicken Corn Chowder

  1. SautĂŠ the vegetables:
    In a large pot, heat olive oil over medium heat. Add onion, celery, carrot, and garlic. SautĂŠ until softened, about 5 minutes.
  2. Add chicken and corn:
    Stir in shredded chicken, corn, paprika, and herbs. Cook for 2–3 minutes to combine flavors.
  3. Add broth and simmer:
    Pour in chicken broth and bring to a gentle boil. Reduce heat and simmer for 10 minutes until vegetables are tender.
  4. Add creaminess:
    Stir in milk or almond milk for a creamy texture. Adjust seasoning with salt and pepper. Simmer for 2–3 minutes until heated through.
  5. Serve & garnish:
    Ladle chowder into bowls and sprinkle with fresh parsley or chives. Serve warm.

Storage & Serving Suggestions

  • Store: Refrigerate in an airtight container for up to 3 days.
  • Freeze: Freeze in individual portions for up to 1 month. Thaw in the fridge overnight and reheat gently.
  • Serving Ideas:
    • Pair with WW Fluffy Garlic Flatbreads for a comforting meal.
    • Serve with a side salad for a Mediterranean-style lunch.
    • Top with a sprinkle of cheese for extra flavor (optional).

Tips & FAQs

1. Can I make this Slimming -friendly?
Yes — use low-fat milk and omit any cheese or cream. Vegetables and chicken are Syn-free.

2. How many Weight Watchers points per serving?
Approximately 4–5 points, depending on milk choice.

3. Can I make it Keto-friendly?
Yes — use almond milk and reduce or skip corn. Add extra low-carb vegetables like zucchini or cauliflower.

4. Can I add more protein?
Yes — add extra chicken or fold in some cooked diced turkey for higher protein content.

5. Can I use frozen corn?
Absolutely — just thaw slightly before adding to the soup.