Homemade Classic Bagels Recipe

Soft, chewy, golden, and irresistible – these homemade bagels are bakery-quality right from your kitchen. Perfect for breakfast or anytime snacking.


Recipe Card

Servings: 8 bagels
Prep Time: 20 minutes
Resting Time: 1 hour
Cook Time: 25 minutes
Total Time: 1 hour 45 minutes
Dietary Info: Vegetarian | Nut-Free


Ingredients

  • Warm water (110°F / 43°C)
  • Active dry yeast
  • Granulated sugar
  • Bread flour
  • Salt
  • Vegetable oil (or melted butter)
  • Egg (for egg wash)
  • Optional toppings (sesame seeds, poppy seeds, coarse salt)

Instructions

  1. Activate the yeast:
    Combine 1 ½ cups warm water, 2 tsp sugar, and 2 ¼ tsp (one packet) active dry yeast in a large bowl. Let sit for 5–10 minutes until frothy.
  2. Make the dough:
    Add 4 cups bread flour and 1 ½ tsp salt to the yeast mixture. Mix with a spoon until a shaggy dough forms. Knead on a floured surface for 8–10 minutes until smooth and elastic.
  3. First rise:
    Place the dough in a lightly oiled bowl, cover, and let rise in a warm spot for 1 hour or until doubled.
  4. Shape bagels:
    Punch down the dough and divide into 8 equal pieces. Shape each into a ball, poke a hole through the center with your finger, and stretch gently to form a ring.
  5. Boil the bagels:
    Bring a large pot of water to a gentle boil. Add 1 tbsp sugar. Boil each bagel for 45 seconds per side, then place on parchment-lined baking sheet.
  6. Brush and bake:
    Brush with beaten egg and add toppings if desired. Bake in a preheated oven at 400°F (200°C) for 20–25 minutes until golden brown.
  7. Cool and serve:
    Let cool on a wire rack for 10–15 minutes before slicing or serving.

Notes

  • For best flavor, use bread flour – it gives that chewy texture.
  • Use instant yeast if preferred; skip activation step.
  • The bagels can be made plain or topped with sesame, onion flakes, or even cheese.

Introduction

I’ve always loved the aroma of freshly baked bagels wafting through a bakery. This recipe recreates that experience at home with simple pantry ingredients and a few easy steps. These homemade bagels are soft on the inside, beautifully golden outside, and incredibly satisfying to make from scratch.


Step-by-Step Cooking Guide

1. Activating Yeast:
Ensure the water is just warm to the touch – too hot will kill the yeast. After 5–10 minutes, you should see foam forming on top.

2. Kneading the Dough:
The dough should be firm but pliable. If sticky, add a tablespoon of flour at a time until it smooths out.

3. Shaping:
After dividing the dough, roll each piece into a smooth ball. Press your thumb through the center and gently rotate to widen the hole to about 1½ inches – it will shrink slightly during baking.

4. Boiling:
This is the key step for that authentic chewy crust. Use a large pot so bagels don’t crowd each other. Boil no more than 3–4 at a time.

5. Baking:
The egg wash gives them that glossy golden finish. For extra shine, brush twice – once before baking and again halfway through.


Ingredient Details and Substitution Tips

  • Bread flour: High-protein flour gives structure and chew. You can use all-purpose flour, but texture will be softer.
  • Sugar: Feeds the yeast and adds mild sweetness. Substitute honey for a richer flavor.
  • Active dry yeast: If using instant yeast, skip proofing and mix directly with dry ingredients.
  • Egg wash: For vegan bagels, brush with oat milk mixed with a touch of oil.
  • Optional toppings: Sesame, everything seasoning, dried onion, or cheese all work well.

Recipe Variations and Serving Suggestions

Flavor Variations:

  • Cinnamon Raisin: Add 1 tsp cinnamon and ⅓ cup raisins during kneading.
  • Everything Bagel: Top with a mix of sesame, poppy, onion, and garlic flakes.
  • Cheese Bagel: Add shredded cheddar before baking.

Dietary Variations:

  • Vegan: Replace egg wash with non-dairy milk and use oil instead of butter.
  • Whole Wheat: Substitute half the flour with whole wheat flour and add 1 tbsp extra water.

Serving Ideas:
Serve warm with cream cheese, butter, or jam. For savory options, make breakfast sandwiches with eggs and cheese or smoked salmon and cream cheese.


Storage and Make-Ahead Information

  • Room Temperature: Store in an airtight container up to 2 days.
  • Refrigerator: Keeps fresh for up to 5 days; toast before serving.
  • Freezing: Freeze up to 2 months in a sealed bag. Slice before freezing for easy toasting.
  • Reheating: Toast or warm in a 350°F (175°C) oven for 5 minutes.

Make-Ahead Tip: You can refrigerate shaped bagels overnight before boiling for better flavor and texture.


Nutrition (Per Bagel)

Calories: 260 kcal | Carbs: 52g | Protein: 9g | Fat: 2g | Fiber: 2g
Dietary Info: Vegetarian | Nut-Free


FAQs

Q: Can I make these without boiling?
A: You can, but boiling gives the signature chewy crust. Without it, they’ll taste more like bread rolls.

Q: Can I use whole wheat flour only?
A: Yes, but bagels will be denser. Mix half whole wheat, half bread flour for balance.

Q: How do I know when they’re done baking?
A: The tops should be deep golden brown and sound hollow when tapped underneath.


Optional Personal Story

I started baking bagels at home during a time when I missed my favorite café breakfasts. The first batch was uneven, but with small tweaks, I discovered the magic of boiling before baking – the step that transforms dough into bagels. Now, I make them almost weekly, freezing extras for busy mornings.


Call-to-Action

Give these homemade bagels a try and enjoy bakery-quality results in your own kitchen. Don’t forget to share your results or your favorite topping combinations in the comments below!
Simple Celery Hydration Juice

Simple Celery Hydration Juice

 Description

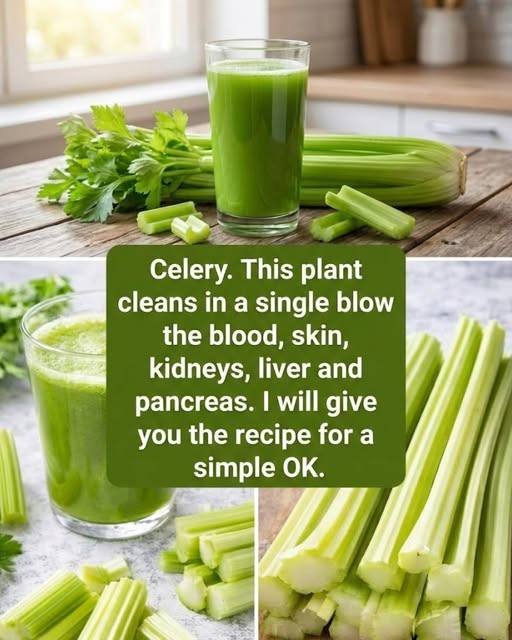
A fresh, light vegetable juice that supports hydration and digestion and provides antioxidants and minerals. Best used as a morning hydration drink, not a detox cure.

 Ingredients (1 serving)

  • 6–8 fresh celery stalks (organic if possible)

  • ½ cup water (optional, if blending)

  • Optional add-ins (gentle, not detox):

    • ½ cucumber

    • Small squeeze of lemon (for taste, not “cleansing”)

 Instructions

  1. Wash celery thoroughly.

  2. Juicer method: Juice celery directly.
    Blender method: Blend with water, then strain.

  3. Drink immediately for best taste and nutrient retention.

 How to Use It (this matters)

  • Drink on an empty stomach if it feels good to you

  • 1 small glass (200–250 ml) is enough

  • Not more than 3–4 times per week

  • Stop if you experience bloating, dizziness, or diarrhea

Servings

  • 1 serving per recipe

 Approximate Nutritional Info (per serving)

  • Calories: ~40

  • Water: ~95%

  • Fiber: Low (most removed during juicing)

  • Potassium: Moderate

  • Vitamin K: High

  • Antioxidants: Present (flavonoids)

 Real Benefits (no exaggeration)

✔ Supports hydration
✔ May help reduce bloating (for some people)
✔ Provides antioxidants that support general skin health
✔ Low-calorie, sugar-light vegetable option

❌ Does NOT detox organs
❌ Does NOT cure disease
❌ Does NOT replace medical treatment

 Who Should Be Careful

  • Kidney disease (high potassium risk)

  • Low blood pressure

  • On diuretics

  • History of kidney stones (celery contains oxalates)

If that’s you, talk to a doctor first

 Q & A

Q: Does celery juice clean the blood?
A: No. Your liver and kidneys already do that job 24/7.

Q: Can it improve skin?
A: Indirectly—hydration and nutrients may help over time, not instantly.

Q: Is it better than eating celery?
A: Eating whole celery is better for digestion because of the fiber.

Q: Can I drink it daily?
A: Not necessary and not ideal for everyone.

Cheesy Taco Sticks

Cheesy Taco Sticks

Baked dough sticks filled with seasoned ground beef and melted cheese, brushed with garlic butter and served with dipping sauces.

Prep Time: 12 minutes
Bake Time: 12–15 minutes
Yield: 8 sticks


🧾 Ingredients

• 1 lb (450 g) lean ground beef
• 1 packet taco seasoning (about 28 g / 1 oz)
• ¼ cup water
• 1 tube refrigerated pizza dough or classic refrigerated dough (about 13.8 oz / 390 g)
• 1½ cups shredded cheddar cheese (or cheese blend)

For topping:
• 2 tablespoons butter, melted
• ½ teaspoon garlic salt
• 1 teaspoon dried parsley

For serving (optional):
• Salsa
• Sour cream
• Guacamole
• Cheese dip


👩‍🍳 Instructions

1. Prepare the Oven and Pan

Preheat oven to 200°C (400°F).

Line a large baking sheet with parchment paper or a silicone baking mat.


2. Cook the Beef

Heat a skillet over medium-high heat.

Add ground beef and cook until fully browned, breaking it up with a spoon.

Drain excess fat from the pan.

Add taco seasoning and water.
Simmer for 3–5 minutes, stirring, until the liquid is absorbed.

Remove from heat and allow the meat to cool slightly.


3. Prepare the Dough

Unroll the dough onto a lightly floured surface.

Cut into 8 equal rectangles.


4. Fill the Dough

Place each rectangle flat on the work surface.

Add:
• A strip of shredded cheese down the center
• A spoonful of the beef mixture on top of the cheese

Do not overfill.


5. Seal the Sticks

Fold the long sides of the dough over the filling.

Pinch the seam tightly closed.

Pinch the ends shut and tuck them slightly underneath.

Place seam-side down on the prepared baking sheet.


6. Add Butter Topping

In a small bowl, mix:
• Melted butter
• Garlic salt
• Dried parsley

Brush this mixture over the tops of each stick.


7. Bake

Bake for 12–15 minutes, until:
• Dough is fully cooked
• Tops are golden
• Cheese inside is melted


8. Serve

Allow to cool for 3–5 minutes before serving.

Serve warm with dipping sauces if desired.


⭐ Helpful Tips

✔ Let beef cool before filling dough
✔ Do not overfill or the seams may open
✔ Always place seam-side down on the pan
✔ Use parchment paper for easy cleanup
✔ Bake with space between sticks for even cooking


🧊 Storage & Reheating

• Refrigerate in an airtight container for up to 3 days
• Reheat in oven or air fryer at 175°C (350°F) for 5–7 minutes
• Freezer storage: up to 1 month
• Reheat from frozen at 190°C (375°F) for 12–15 minutes

Classic Creamy Tuber Salad

Classic Creamy Tuber Salad

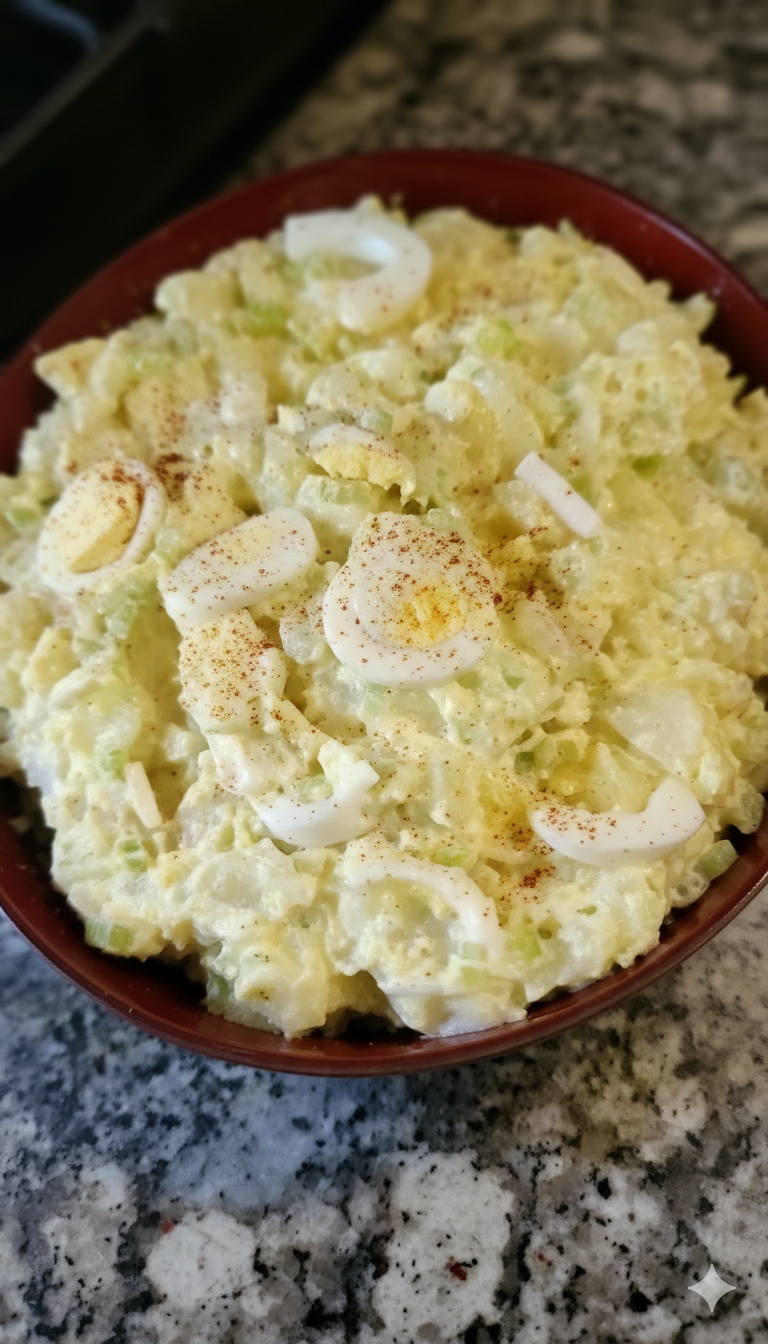
You guys, I have to confess something: I might be a food blogger, but I am totally incapable of attending any kind of barbecue or potluck without bringing a classic potato salad. It’s a requirement! Especially this one—my Classic Creamy Tuber Salad. This recipe is simple, it’s old-fashioned, and it’s truly the epitome of Southern comfort food, even if you’re not actually from the South.


I love this salad because it’s a total crowd-pleaser, and for feeding my crew of four (plus whoever else shows up at dinner time!), a crowd-pleaser is essential. Plus, it uses the most basic, budget-friendly ingredients ever. We’re talking about potatoes, eggs, and a few creamy, tangy mix-ins. It’s proof that the most beloved side dishes don’t need any fancy gadgets or complicated steps.


The beauty of a creamy salad like this is that it actually gets better if you make it ahead of time—which is the biggest gift a recipe can give a busy mom. You spend about 20 minutes getting it together, let the flavors do their happy dance in the fridge overnight, and boom! You have a perfect side dish ready for your weekend grilling with zero last-minute effort. Seriously, try this one. It’s sunshine in a bowl, no matter the season!

Salad Base

8 –9 Large: Starchy ground tubers potatoes, deskinned and chopped into cubes

1 C.: Chopped brined cucumber pieces (pickle)

2 Medium: Diced yellow bulb vegetables onions

5 Large: Pre-cooked shelled avian orbs (hard-boiled eggs), chopped

To taste: Crystalline minerals salt and ground black peppercorns (pepper)

Dressing

2 C.: Thick emulsified oil and egg condiment (mayonnaise)

3 –4 Tbsp.: Zesty prepared yellow seed paste (mustard)

Instructions

Place the chopped, deskinned starchy tubers into a generously sized pot, cover them with water until submerged by approximately half the volume, and boil until the pieces are suitably softened and tender.

Drain the heated liquid completely from the tubers and allow them to rest and cool for a period of ten minutes.

In a sizable mixing vessel, combine the cooled potatoes with the chopped avian orbs, diced bulb vegetables, and brined cucumber pieces. Toss gently to integrate the solid components.

Introduce the thick, emulsified condiment into the bowl and continue mixing until the salad reaches your desired level of creaminess.

Follow up by adding the zesty yellow seed paste, then incorporate the crystalline minerals and ground black peppercorns, tasting as you go until the seasoning is perfected.

The salad is now ready to be consumed and enjoyed!

Why You’ll Love This Recipe

Pure Nostalgia: Tastes exactly like the classic, old-fashioned side dish you grew up with.

Easy on the Wallet: Built using inexpensive kitchen staples.

Flavor Gets Better: It requires time in the fridge, making it an ideal make-ahead party dish.

Highly Customizable: Easy to adjust the tanginess or creaminess level to your preference.

Perfect Pairing: Goes with literally any grilled meat or main dish you can think of.

Ingredients You’ll Need

The starchy ground root vegetables that form the substantial, cubed base of the salad.

Pre-cooked, shelled avian protein orbs that add richness and texture to the mixture.

The diced yellow bulb vegetables that provide a necessary aromatic bite and crunch.

Chopped, brined cucumber pieces that give the entire salad a desirable tangy zest.

A thick, rich emulsified oil and egg condiment that acts as the primary binder for creaminess.

A zesty, tangy prepared yellow seed paste that sharpens the dressing’s flavor profile.

Simple crystalline minerals and freshly ground spice used to perfectly season the components.

How It’s Made

The preparation starts by cooking the cubed root vegetables in boiling water until they are perfectly tender. Once drained and slightly cooled, they are transferred to a large bowl along with the other solid, diced ingredients. A creamy dressing, built from the main emulsified condiment and a zesty yellow paste, is then poured over the mixture. Everything is gently folded together, seasoned carefully, and then chilled so the flavors can fully blend before serving.


Tips, Variations & Storage

Tip: The key to perfect tuber salad is using a starchy vegetable (like a Russet) that can mash slightly, which helps absorb the dressing better than waxy types.

Substitution: If you don’t like the strong flavor of the zesty yellow paste, swap it for a teaspoon of apple cider vinegar for a similar tangy punch.

Add-ins: Stir in a few tablespoons of sweet relish or finely chopped celery for extra moisture and crunch.

Dietary Swap: For a lighter take, substitute half of the thick emulsified condiment with plain Greek yogurt or light sour cream.

Storage: This salad keeps well in an airtight container in the refrigerator for up to 5 days.

Freezer Notes: Due to the high water and condiment content, freezing this salad is not recommended as the texture will become grainy upon thawing.

FAQ Section

1. Should I serve this salad cold or at room temperature? For safety and the best texture, this salad should be served cold. However, giving it a quick rest out of the fridge for 15 minutes before serving can help the flavors bloom slightly.


2. Why do I need to cool the potatoes before mixing? If you mix the salad while the tubers are hot, they will break down too much and the creamy dressing will “melt” and become watery instead of adhering properly.

No-Bake Lotus Biscoff Cheesecake

No-Bake Lotus Biscoff Cheesecake

### **Ingredients**

#### **Crust**

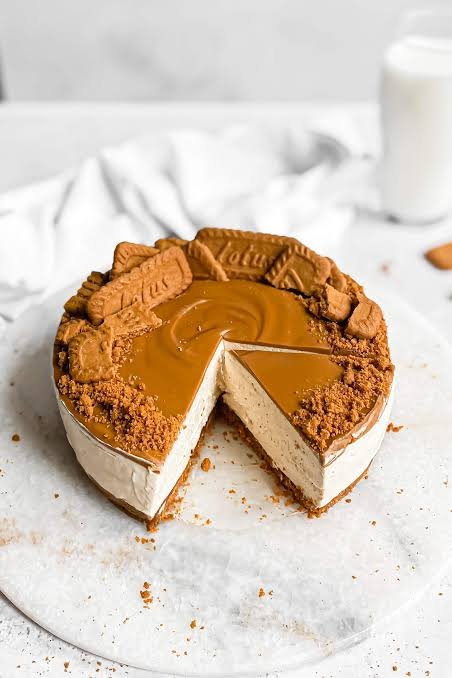
* 250 g Lotus Biscoff cookies (crushed)

* 100 g unsalted butter, melted

#### **Cheesecake Filling**

* 500 g cream cheese, softened

* 1 cup powdered sugar

* 1 teaspoon vanilla extract

* 1 cup heavy whipping cream, cold

* ½ cup Lotus Biscoff spread (plus extra for swirl/topping)

#### **Optional Topping**

* Crushed Biscoff cookies

* Lotus Biscoff spread drizzle

—

## **Instructions**

### **Prepare the Crust**

1. In a bowl, mix crushed Lotus Biscoff cookies with melted butter until evenly combined.

2. Press the mixture firmly into the bottom of a **9-inch springform pan**.

3. Place in the refrigerator while you prepare the filling.

—

### **Make the Cheesecake Filling**

4. In a large bowl, beat the cream cheese until smooth and creamy.

5. Add powdered sugar and vanilla extract, and mix until fully incorporated.

6. In a separate bowl, whip the cold heavy cream until stiff peaks form.

7. Gently fold the whipped cream into the cream cheese mixture.

8. Fold in the Lotus Biscoff spread until evenly mixed.

—

### **Assemble**

9. Spread the cheesecake filling evenly over the chilled crust.

10. If desired, swirl additional Lotus Biscoff spread on top.

11. Decorate with crushed Biscoff cookies.

—

### **Chill & Serve**

12. Chill the cheesecake in the refrigerator for **at least 4–6 hours** (or overnight) until fully set.

13. Slice and enjoy!

—

✨ **Tip:** For cleaner slices, dip your knife in hot water and wipe it dry between cuts.

Lean and Green Lasagna

Lean and Green Lasagna
-Ingredients (1 Serving)
Lean Protein
5 oz cooked 99% lean ground turkey
Greens
1½ cups zucchini slices (thin, lengthwise)
½ cup low-sugar marinara (≤5g carbs per serving)
½ cup fresh spinach (optional but great)
Healthy Fats
¼ cup part-skim ricotta
2 Tbsp part-skim shredded mozzarella
1 Tbsp grated Parmesan
Seasoning
Garlic powder
Italian seasoning
Salt & pepper
Instructions
Prep Zucchini
Slice zucchini thin lengthwise.
Lightly salt and let sit 10 min, then pat dry (removes water).
Cook Turkey
Brown turkey in a skillet.
Season with garlic, Italian seasoning, salt, pepper.
Mix Ricotta Layer
Combine ricotta with a pinch of salt and pepper.
Assemble In a small baking dish:
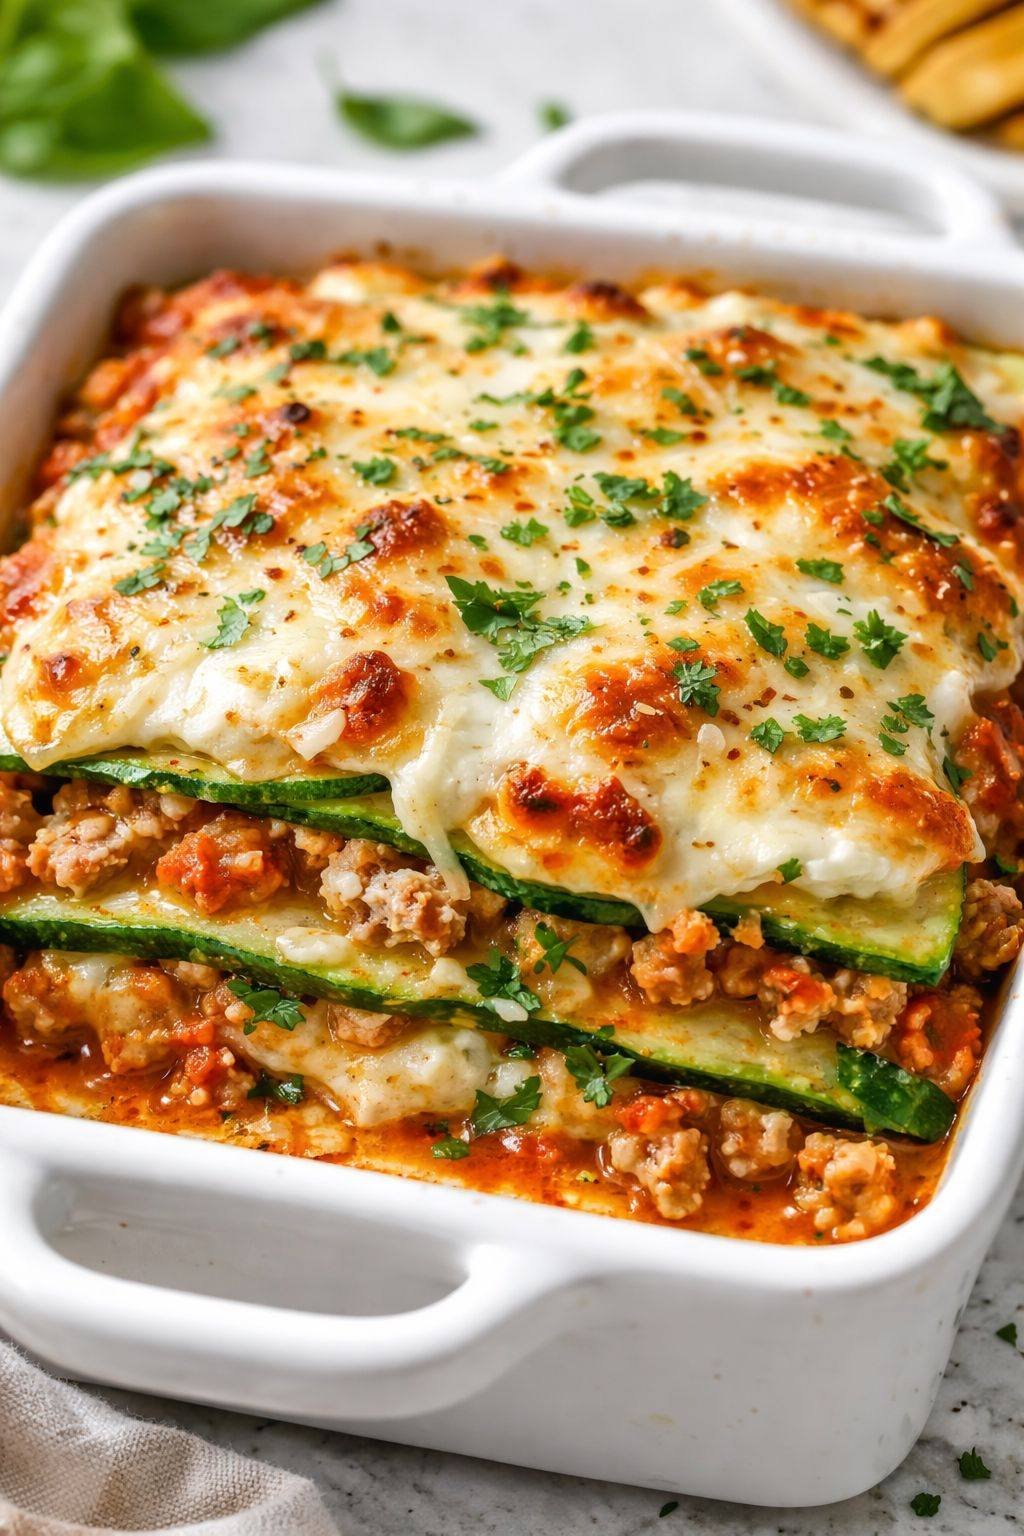
Layer zucchini
Add turkey
Spoon marinara
Add ricotta
Sprinkle spinach
Repeat layers
Top
Add mozzarella + Parmesan.
Bake
375°F for 25–30 minutes
Broil 2–3 min if you want browning.
Rest
Let sit 5 minutes before eating (sets better).