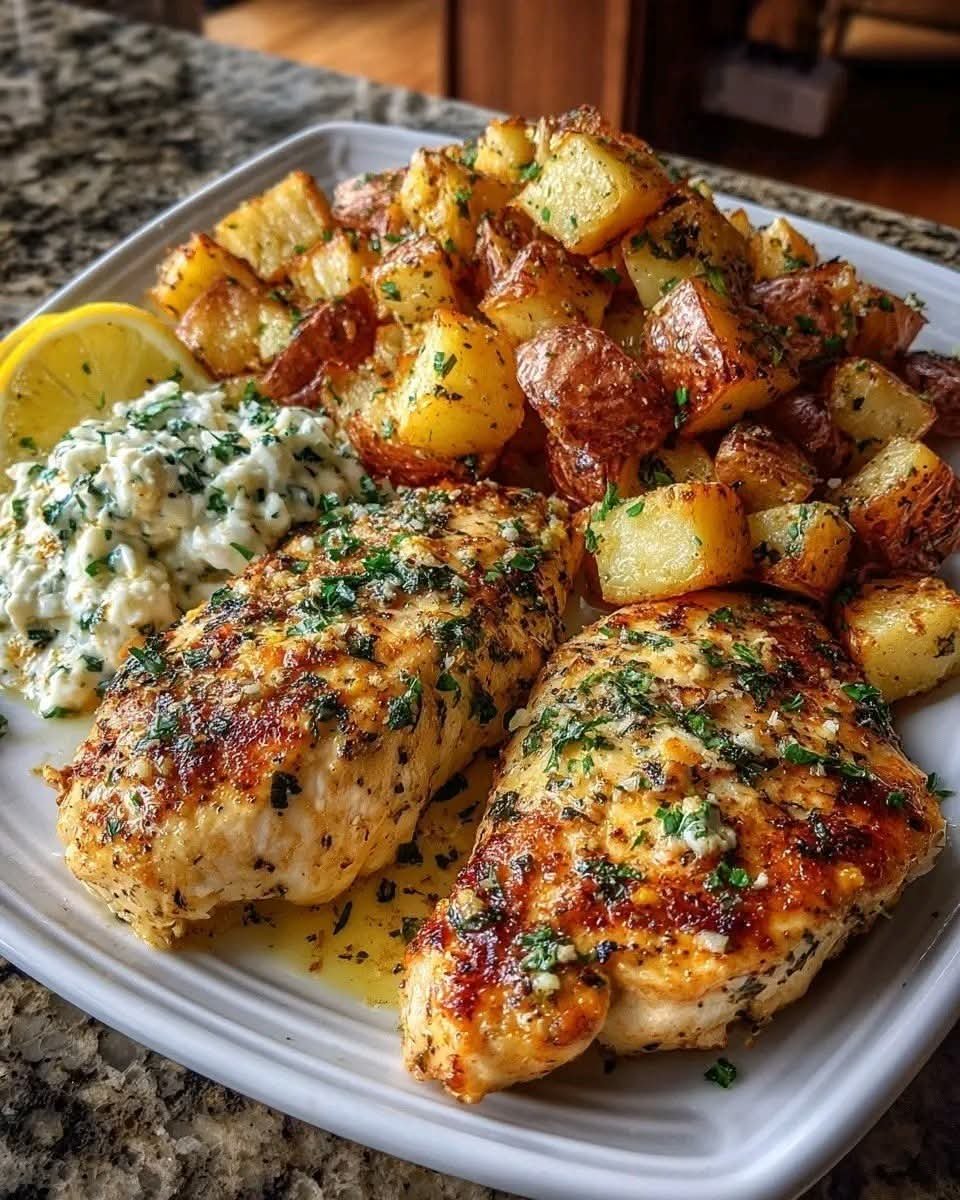
Honey Mustard Glazed Salmon

This honey mustard glazed salmon is a perfect fit for a “set it and forget it” meal, similar to the high-protein comfort foods you often develop. It features perfectly seared fillets topped with a creamy, vibrant sauce.

Honey Mustard Glazed Salmon

Prep time: 10 minutes | Cook time: 12 minutes | Servings: 4


Ingredients

  • Salmon: 4 salmon fillets (6 oz each)

  • Seasoning: Salt and black pepper to taste, 1 tsp garlic powder, 1 tsp smoked paprika

  • The Glaze:

    • 3 tbsp Dijon mustard (or whole grain for texture)

    • 2 tbsp honey (or a sugar-free alternative to keep it low-carb)

    • 1 tbsp mayonnaise (for that creamy finish seen in the image)

    • 1 tsp lemon juice

  • Garnish: Fresh chopped parsley or green onions


Instructions

  1. Prep the Salmon: Pat the fillets dry with a paper towel. Season both sides with salt, pepper, garlic powder, and smoked paprika.

  2. Make the Glaze: In a small bowl, whisk together the mustard, honey, mayonnaise, and lemon juice until smooth.

  3. Cook (Two Options):

    • Air Fryer: Place fillets in the basket. Cook at 200°C for 8-10 minutes. Brush the glaze on generously during the last 3 minutes of cooking.

    • Pan-Seared: Heat 1 tbsp oil in a skillet over medium-high heat. Sear salmon skin-side up for 4 minutes. Flip, brush with glaze, and cook for another 3-4 minutes until flaky.

  4. Finish: Spoon any remaining glaze over the salmon before serving and top with fresh herbs.

Individual Blueberry Baked Oatmeal

Individual Blueberry Baked Oatmeal

🛒 Ingredients

  • The Dry Base: 2 cups rolled oats, 1 tsp baking powder, 1 tsp cinnamon, 1/4 tsp salt ➡️

  • The Wet Mix: 2 ripe bananas (mashed), 1 ½ cups milk of choice, 1 large egg, 1 tsp vanilla extract ➡️

  • The Fruit: 2 cups fresh blueberries (divided) ➡️

  • The Sweetener: 2 tbsp honey or maple syrup ➡️

  • Garnish: Fresh mint leaves and a sprinkle of extra oats ➡️


👩‍🍳 Step-by-Step Instructions

  1. Prep and Preheat 🌡️ Preheat your oven to 180°C (350°F). Lightly grease four to six ceramic ramekins or small glass jars with coconut oil or butter ➡️.

  2. Combine Dry Ingredients 🥣 In a medium bowl, whisk together the rolled oats, baking powder, cinnamon, and salt until well combined ➡️.

  3. Mix Wet Ingredients 🥚 In a separate large bowl, mash the bananas until smooth. Whisk in the milk, egg, honey, and vanilla extract until the mixture is uniform ➡️.

  4. Merge the Batter 🌀 Pour the dry oat mixture into the wet ingredients. Stir gently until all the oats are thoroughly moistened. Fold in half of the blueberries ➡️.

  5. Fill the Ramekins 🥄 Divide the oatmeal mixture evenly among the prepared ramekins. Leave a little space at the top as they will rise slightly while baking ➡️.

  6. Top and Bake 🔥 Press the remaining blueberries into the top of each ramekin for that beautiful “jammy” look seen in your photo. Bake for 25–30 minutes until the tops are golden brown and the centers are set ➡️.

  7. Serve Warm ✨ Let them cool for 5 minutes. Garnish with a sprig of fresh mint and a drizzle of extra honey if desired ➡️.


❓ Common Questions (Q&A)

Q: Can I use frozen blueberries? A: Yes! ❄️ Just don’t thaw them before adding to the batter, or they might turn the entire mixture purple. You may need to add 2–3 minutes to the total bake time.

Q: Is this recipe gluten-free? A: It can be! 🌾 Simply ensure you are using certified gluten-free rolled oats.

Q: Can I prepare these the night before? A: Absolutely. ⏲️ You can assemble the ramekins and keep them covered in the fridge overnight. Bake them fresh in the morning for an easy, warm breakfast.

Q: How do I store leftovers? A: These stay fresh in the refrigerator for up to 4 days. They reheat beautifully in the microwave for about 45 seconds 🧊.

Dark Chocolate Espresso Banana Marble Bread

Dark Chocolate Espresso Banana Marble Bread

🛒 Ingredients

  • The Batter Base: 3 ripe bananas (mashed), 1/2 cup melted coconut oil or butter, 1 cup sugar, 1 egg, 1 tsp vanilla ➡️

  • The Flour Mixture: 1 1/2 cups all-purpose flour, 1 tsp baking soda, 1/2 tsp salt ➡️

  • The Chocolate/Espresso Swirl: 3 tbsp dark cocoa powder, 1 tbsp instant espresso powder (dissolved in 1 tbsp hot water) ➡️

  • The Topping: 1 banana (sliced into rounds), chocolate-covered coffee beans, and a pinch of edible gold dust or coarse sugar ➡️


👩‍🍳 Step-by-Step Instructions

  1. Prep and Mash 🥣 Preheat your oven to 175°C (350°F). In a large bowl, mash the 3 ripe bananas until smooth. Whisk in the melted oil, sugar, egg, and vanilla.

  2. Whisk the Dry Ingredients 🌾 In a separate bowl, whisk together the flour, baking soda, and salt. Gently fold the dry ingredients into the banana mixture until just combined.

  3. Divide for the Marble 🌓 Transfer about 1 cup of the batter into a smaller bowl. Stir in the cocoa powder and the dissolved espresso liquid until you have a rich, dark chocolate batter.

  4. The Swirl Technique 🌀 Grease a loaf pan. Alternate large spoonfuls of the plain banana batter and the chocolate espresso batter into the pan. Use a butter knife to gently swirl the two together in a figure-eight motion.

  5. Decorate the Top ✨ Place your banana slices on top of the batter. As seen in your photo, you can also place chocolate coffee beans on top (or wait until after baking to prevent them from melting too much).

  6. Bake to Perfection 🔥 Bake for 50–60 minutes. A toothpick inserted into the center should come out clean.

  7. Cool and Garnish 🧊 Let the bread cool in the pan for 10 minutes, then move to a wire rack. Once fully cool, add your coffee bean garnishes and a sprinkle of gold dust for that professional look!


❓ Common Questions (Q&A)

Q: My banana bread always sinks in the middle. Why? A: This usually happens if the oven door is opened too early or if there is too much leavening agent. 💡 Ensure your baking soda is fresh and try not to peek until the 50-minute mark!

Q: Can I make this without the espresso? A: Absolutely! ☕ If you prefer to skip the caffeine, just use the cocoa powder. The chocolate and banana combo is still a classic winner.

Q: How do I store this to keep it moist? A: Wrap the cooled loaf tightly in plastic wrap or store in an airtight container at room temperature for 3 days, or in the fridge for up to a week. 🍱

Q: What if my bananas aren’t ripe enough? A: You can “quick-ripen” them by placing them (unpeeled) on a baking sheet in a 150°C oven for about 15 minutes until the skins turn black. 🍌

Crispy Cheesy Chicken Fritters

Crispy Cheesy Chicken Fritters

 Description

These Crispy Cheesy Chicken Fritters are golden on the outside, juicy on the inside, and packed with melty cheese in every bite. They’re quick, budget-friendly, and incredibly satisfying—perfect as an appetizer, snack, or main dish. Serve them with your favorite dip for a crowd-pleasing meal.

 Servings

Serves: 3–4 people (10–12 fritters)

 Ingredients

  • 2 cups cooked chicken (shredded or finely chopped) 🍗
  • 1 cup shredded mozzarella or cheddar cheese 🧀
  • 1/4 cup grated Parmesan cheese
  • 2 eggs 🥚
  • 1/4 cup all-purpose flour
  • 2 tbsp mayonnaise or Greek yogurt
  • 2 tbsp green onions (chopped) 🌿
  • 1 clove garlic (minced)
  • 1/2 tsp paprika
  • Salt & black pepper to taste
  • 2–3 tbsp oil (for frying)

 Instructions

  1. Prepare mixture:
    In a large bowl, combine chicken, cheeses, eggs, flour, mayo, green onions, garlic, paprika, salt, and pepper.
  2. Mix well:
    Stir until everything is fully combined into a thick batter.
  3. Heat pan:
    Heat oil in a skillet over medium heat.
  4. Form fritters:
    Scoop mixture and flatten slightly into small patties.
  5. Cook:
    Fry for 3–4 minutes per side until golden brown and crispy.
  6. Drain & serve:
    Remove and place on paper towels. Serve warm.

 Notes

  • Use finely chopped chicken for better texture
  • Don’t overcrowd the pan
  • Adjust seasoning to taste

 Tips

  • Add chili flakes for a spicy kick 🌶️
  • Use leftover rotisserie chicken for convenience
  • Serve with garlic sauce, ranch, or spicy mayo

 Nutritional Info (Approx per serving)

  • Calories: 320
  • Protein: 26g
  • Fat: 20g
  • Carbs: 8g

 Benefits

  • High in protein 💪
  • Quick and easy meal
  • Great way to use leftovers
  • Kid-friendly and satisfying

 Q&A

Q: Can I bake instead of fry?
A: Yes, bake at 375°F (190°C) for 20–25 minutes, flipping halfway.

Q: Can I freeze them?
A: Yes, freeze cooked fritters up to 1 month.

Q: Can I make them low-carb?
A: Use almond flour instead of regular flour.

Q: What dip goes best?
A: Garlic mayo, ranch, or spicy sriracha sauce.

🍞 Moist Banana Fruit & Nut Bread (Soft, Sweet & Crunchy)

🍞 Moist Banana Fruit & Nut Bread (Soft, Sweet & Crunchy)

This delicious bread is soft, naturally sweet from ripe bananas, filled with chewy dried fruits, and topped with crunchy almonds. Perfect for breakfast or tea time ☕💛


🛒 Ingredients

🥣 For the Batter:

  • 🍌 3 large ripe bananas (mashed, about 1½ cups)
  • 🌾 2 cups all-purpose flour (or gluten-free flour)
  • 🍯 ½ cup brown sugar (or maple syrup)
  • 🧈 ½ cup melted butter (or coconut oil)
  • 🥚 1 large egg (or flax egg for vegan option)
  • 🧁 1 tsp baking powder
  • 🧂 1 tsp baking soda
  • 🍦 1 tsp vanilla extract
  • 🌿 1 tsp cinnamon powder
  • 🍇 ½ cup raisins or mixed dried fruits (cranberries, apricots, figs)

🌰 For the Topping:

  • 1 cup chopped almonds
  • ✨ Optional: a little coarse sugar for extra crunch

👩‍🍳 Step-by-Step Instructions

🔥 Step 1: Prepare Oven & Pan

➡️ Preheat oven to 175°C (350°F)
➡️ Grease a 9×5-inch loaf pan
➡️ Line with parchment paper (leave edges hanging for easy removal)


🍌 Step 2: Mix Wet Ingredients

➡️ Mash bananas in a large bowl until smooth
➡️ Add melted butter, sugar, egg, and vanilla
➡️ Mix well until everything is combined


🌾 Step 3: Mix Dry Ingredients

➡️ In another bowl, add:

  • Flour
  • Baking powder
  • Baking soda
  • Cinnamon
  • Pinch of salt

➡️ Mix or sift together


🔄 Step 4: Combine Mixture

➡️ Slowly add dry ingredients into wet mixture
➡️ Gently fold using a spatula
❗ Do NOT overmix (this keeps bread soft)


🍇 Step 5: Add Fruits

➡️ Fold in raisins or dried fruits evenly


🌰 Step 6: Add Almond Topping

➡️ Pour batter into the pan
➡️ Spread chopped almonds on top
➡️ Lightly press them so they stick


🔥 Step 7: Bake

➡️ Bake for 50–60 minutes
➡️ Check with a toothpick (should come out clean)

💡 Tip: If almonds brown too fast, cover loosely with foil in last 15 minutes


❄️ Step 8: Cool & Slice

➡️ Let bread cool in pan for 10 minutes
➡️ Transfer to a wire rack
➡️ Cool completely before slicing (for neat slices)


❓ Q & A

Q1: Why use ripe bananas?
👉 They are sweeter and make the bread soft and moist.

Q2: Can I make it without egg?
👉 Yes! Use a flax egg (1 tbsp flaxseed + 3 tbsp water).

Q3: Can I skip nuts?
👉 Yes, you can skip almonds or replace with walnuts or seeds.

Q4: How to store it?
👉 Keep in an airtight container for 2–3 days at room temperature or refrigerate for longer.

Q5: Can I freeze it?
👉 Yes! Wrap slices and freeze up to 2 months.


💡 Extra Tips

✨ Use very ripe bananas (dark spots = best flavor)
✨ Do not overmix batter
✨ Add chocolate chips for extra taste 🍫
✨ Toast slices lightly before serving for amazing flavor

Mixed Berry Brioche Bread Pudding

Mixed Berry Brioche Bread Pudding

🛒 Ingredients

  • 6-8 cups Brioche bread, cut into 1-inch cubes (stale bread works best!) 🍞

  • 2 cups Mixed berries (Raspberries, Blueberries, Blackberries) 🫐

  • 4 large Eggs 🥚

  • 2 cups Whole milk (or heavy cream for extra richness)

  • 1/2 cup Granulated sugar

  • 1 tsp Vanilla extract

  • 1/4 tsp Salt

  • Optional: White chocolate chips or a drizzle of condensed milk (as seen in the image) 🥛


🥣 Step-by-Step Instructions

  1. Prep the Dish ➡️ Grease a 9×13 inch baking dish with butter.

  2. Arrange the Bread ➡️ Spread the brioche cubes evenly into the prepared dish. 🍞➡️🥘

  3. Add the Berries ➡️ Scatter 1.5 cups of the mixed berries over and between the bread cubes. Save the remaining 0.5 cup for the very top. 🍓

  4. Whisk the Custard ➡️ In a large mixing bowl, whisk together the eggs, milk, sugar, vanilla extract, and salt until completely smooth. 🥣

  5. The Soak ➡️ Pour the custard mixture slowly over the bread, ensuring every piece of brioche is coated. ➡️ Use a spatula to gently press the bread down so it absorbs the liquid. 🥛

  6. Rest Time ➡️ Let the dish sit for at least 20–30 minutes (or refrigerate overnight). This prevents the pudding from being dry in the center. 🕒

  7. Preheat & Top ➡️ Preheat your oven to 350°F (175°C). Scatter the remaining berries and optional white chocolate on top.

  8. Bake ➡️ Bake for 40–50 minutes. The pudding is done when the custard is set (no longer wobbly) and the top is golden brown and slightly crisp. 🥧🔥

  9. Cool Slightly ➡️ Let it cool for 10 minutes before serving. This allows the custard to firm up.

  10. Final Touch ➡️ Drizzle with a little extra cream, condensed milk, or maple syrup if desired. 🍯


❓ Common Questions (Q&A)

Q: Can I use frozen berries? A: Yes! Do not thaw them first, as the juice will bleed and turn the bread purple. Just toss them in straight from the freezer. ❄️🍓

Q: What if I don’t have Brioche? A: Challah, Croissants, or even thick-cut Texas Toast are great substitutes. Avoid standard sandwich bread as it can become too mushy. 🍞

Q: Can I make this dairy-free? A: Certainly! Use full-fat coconut milk or oat milk for the best texture. 🥥🥛

Q: Is it okay to make this the night before? A: Yes, it’s actually better! Assembling it at night and baking it in the morning results in a much richer, more custardy texture. 🌙➡️☀️


✨ Pro-Tips for Success

  • Stale is Better: If your bread is fresh, toast the cubes in a 300°F oven for 10 minutes to dry them out. Dry bread acts like a sponge for the custard! 🧽

  • Golden Top: If the top is browning too fast but the center is still wet, cover the dish loosely with foil for the last 15 minutes of baking. 🛡️

Fresh Creamy Cucumber & Corn Salad

Fresh Creamy Cucumber & Corn Salad
Prep time: 15 minutes | Servings: 4-6

Ingredients
The Base:

2 large English Cucumbers: Diced or sliced into half-moons (English cucumbers have thinner skin and fewer seeds).

2 cups Sweet Corn: Fresh off the cob is best, but canned (drained) or thawed frozen corn works great too.

1/2 cup Red Onion or Green Onions: Finely diced for a bit of “bite.”

1/4 cup Fresh Herbs: A mix of dill, parsley, and cilantro (as seen in the photos).

Optional: 1/2 cup crumbled Feta cheese (for the salty kick shown in the top right image).

The Creamy Dressing:

1/2 cup Greek Yogurt or Sour Cream: (Use Mayo if you prefer a richer, traditional profile).

2 tbsp Lemon Juice: Freshly squeezed.

1 tbsp Olive Oil.

1 clove Garlic: Minced.

Salt & Black Pepper: To taste.

Instructions
Prep the Veggies: If using fresh corn, you can quickly blanch it or char it in a pan for extra flavor. Slice your cucumbers; if they are very watery, you can salt them lightly in a colander for 10 minutes and pat dry to keep the salad from getting soggy.

Whisk the Dressing: In a small bowl, combine the yogurt (or sour cream), lemon juice, olive oil, minced garlic, salt, and pepper. Whisk until smooth.

Combine: In a large mixing bowl, toss the cucumbers, corn, onions, and fresh herbs together.

Dress and Serve: Pour the dressing over the vegetables and toss gently to coat. If you are using Feta, fold it in last so it doesn’t break down too much.

Chill: This salad is best served cold. Let it sit in the fridge for at least 20 minutes before serving to allow the flavors to meld.

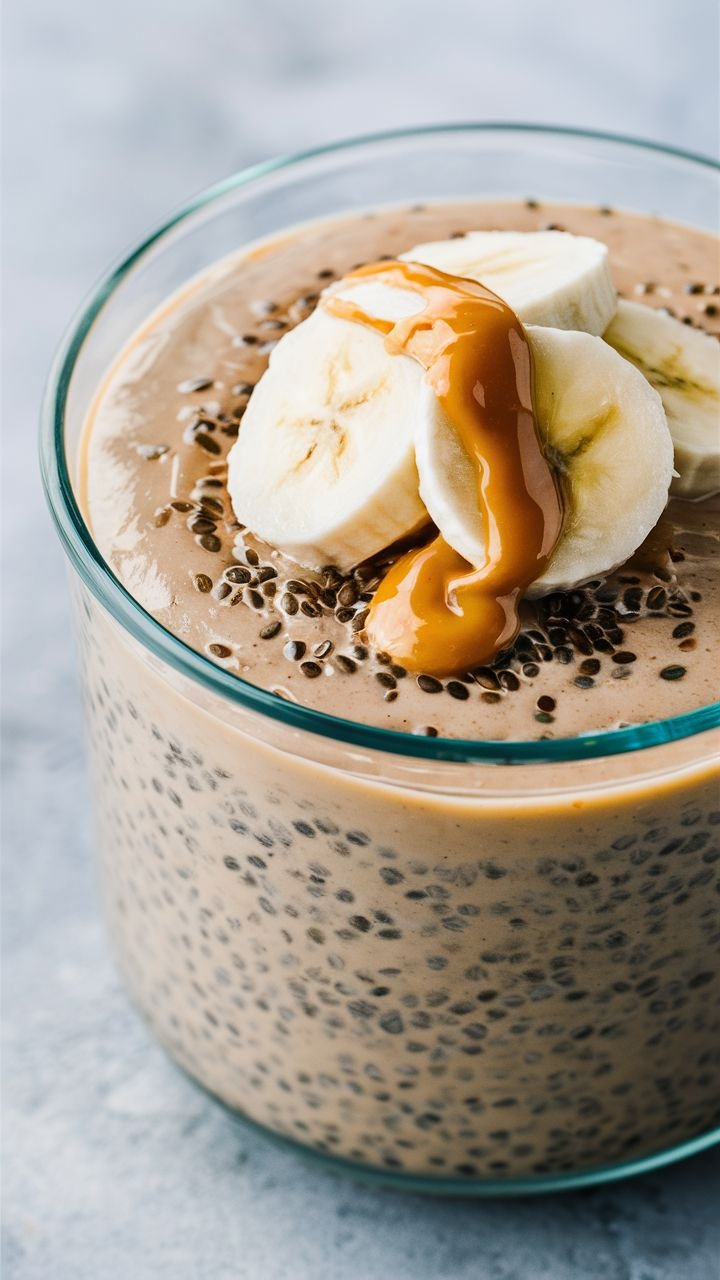
Banana Walnut Overnight Oats

Banana Walnut Overnight Oats


Ingredients

  • 1/2 cup Rolled oats (old-fashioned work best for texture)

  • 2/3 cup Milk of your choice (dairy, almond, or oat)

  • 1/2 Ripe banana, mashed (plus extra slices for topping)

  • 1 tbsp Chia seeds (for that creamy, pudding-like consistency)

  • 1/2 tsp Cinnamon

  • 1 tsp Maple syrup or honey (optional)

  • A splash of vanilla extract

  • Toppings: Crushed walnuts, sliced bananas, and a dollop of Greek yogurt.


Instructions

  1. Mix the Base: In a glass jar or airtight container, combine the rolled oats, chia seeds, and cinnamon. Stir them together so the spices are evenly distributed.

  2. Add Wet Ingredients: Stir in your mashed banana, milk, vanilla extract, and sweetener. Give it a vigorous stir until everything is well incorporated and there are no dry clumps of oats at the bottom.

  3. The Chill: Seal the jar and place it in the refrigerator for at least 4 hours, though overnight is ideal. This gives the oats and chia seeds time to soak up the liquid and soften.

  4. The Topping: In the morning, give the oats a quick stir. If they seem too thick, add a tiny splash of milk. Top with fresh banana slices, a generous handful of crunchy walnuts, and a sprinkle of cinnamon as seen in your photo.

Pro Tip: If you like your walnuts extra crunchy, wait to add them until right before you eat! Enjoy your healthy, energizing breakfast.

Strawberry Swirl Cream Cup

Strawberry Swirl Cream Cup

Ingredients

  • Heavy Whipping Cream: 2 cups (chilled)

  • Sweetened Condensed Milk: 1 can (14 oz)

  • Fresh Strawberries: 2 cups (divided: 1 cup diced, 1 cup sliced for garnish)

  • Vanilla Extract: 1 teaspoon

  • Granulated Sugar: 1 tablespoon (for macerating diced berries)

Instructions

  1. Prepare the Strawberries: In a small bowl, toss the 1 cup of diced strawberries with the sugar. Let them sit for 15 minutes to release their natural juices. Mash them slightly with a fork to create a chunky sauce.

  2. Whip the Cream: In a large, chilled mixing bowl, whip the heavy whipping cream until stiff peaks form. Be careful not to over-whip, or it may turn to butter.

  3. Combine: In a separate bowl, whisk together the sweetened condensed milk and vanilla extract. Gently fold this mixture into the whipped cream using a spatula until fully combined.

  4. Swirl: Pour one-third of the cream mixture into your serving cups or a freezer-safe container. Drizzle some of the strawberry sauce over it. Repeat the layers, gently swirling with a knife to create a marble effect.

  5. Freeze: Cover and freeze for at least 6 hours, or until firm.

  6. Serve: Scoop the mixture into clear cups to recreate the layered look. Top with a generous amount of fresh sliced strawberries and an extra drizzle of the sauce if desired.

Pro-Tip: For the smoothest consistency, ensure your heavy whipping cream is cold straight from the refrigerator. This allows it to hold the air bubbles, resulting in a lighter, fluffier dessert. Enjoy your homemade treat!

Mango Raspberry Sunrise Chia Cups

Mango Raspberry Sunrise Chia Cups

Prep time: 15 minutes | Chill time: 2+ hours | Serves: 2

Ingredients

  • The Chia Layer: 4 tbsp chia seeds, 1 cup unsweetened almond or coconut milk, 1 tsp maple syrup, and ½ tsp vanilla extract.

  • The Mango Layer: 1 cup frozen or fresh mango chunks and a splash of lime juice.

  • The Raspberry Layer: 1 cup fresh raspberries and 1 tbsp honey or agave.

  • Toppings: Fresh raspberries, diced mango, blueberries, crushed pistachios, and extra chia seeds.


Instructions

  1. Prepare the Base: In a small bowl, whisk together the chia seeds, plant milk, maple syrup, and vanilla. Let it sit for 5 minutes, then whisk again to prevent clumping. Cover and refrigerate for at least 2 hours (or overnight) until thick and creamy.

  2. Blend the Fruit: * Mango Puree: Blend the mango chunks with a splash of lime juice until completely smooth. Set aside.

    • Raspberry Puree: Rinse the blender and pulse the raspberries with honey until smooth. If you prefer a seedless texture, press the puree through a fine-mesh sieve.

  3. Assemble the Sunrise: * Grab two clear glasses. Start by spooning the mango puree into the bottom.

    • Gently layer the chilled chia pudding over the mango. Use the back of a spoon to smooth it out.

    • Slowly pour the raspberry puree on top to create that vibrant “sunrise” contrast.

  4. Garnish: Top with diced mango, fresh berries, and a sprinkle of pistachios for a satisfying crunch.


Pro Tip: For clean, distinct layers, wipe the inside of the glass with a paper towel if any puree splashes up before adding the next layer!

Triple Chocolate Moist Sheet Cake

Triple Chocolate Moist Sheet Cake 🍫✨

This recipe produces an incredibly soft, tender cake topped with a rich, pourable chocolate ganache and classic sprinkles. It is the perfect dessert for celebrations or a cozy weekend treat.


🛒 Ingredients

  • For the Cake:

    • 2 cups all-purpose flour 🌾

    • 2 cups granulated sugar 🍯

    • ¾ cup unsweetened cocoa powder 🍫

    • 2 tsp baking soda and 1 tsp baking powder

    • 1 tsp salt 🧂

    • 1 cup buttermilk (at room temperature) 🥛

    • ½ cup vegetable oil 🌻

    • 2 large eggs 🥚

    • 2 tsp vanilla extract

    • 1 cup hot coffee or boiling water (this “blooms” the cocoa for deeper flavor) ☕

  • For the Topping:

    • 1 cup semi-sweet chocolate chips 🍫

    • ½ cup heavy cream 🥛

    • Chocolate sprinkles 🎊


🔪 Step-by-Step Instructions

  1. Prep Work ➡️ Preheat your oven to 350°F (175°C). Grease and flour a 9×13 inch baking pan.

  2. Mix Dry Ingredients ➡️ In a large bowl, whisk together the flour, sugar, cocoa, baking soda, baking powder, and salt. 🥣

  3. Add Wet Ingredients ➡️ Add the eggs, buttermilk, oil, and vanilla extract. ➡️ Beat on medium speed for about 2 minutes until well combined.

  4. The Secret Step ➡️ Lower the speed and carefully pour in the hot coffee or boiling water. ➡️ The batter will be very thin—this is normal and ensures a moist crumb!

  5. Bake ➡️ Pour the batter into the prepared pan. Bake for 30–35 minutes, or until a toothpick inserted in the center comes out clean. ➡️ Let the cake cool completely in the pan.

  6. Prepare the Ganache ➡️ Heat the heavy cream until it just begins to simmer. Pour it over the chocolate chips in a small bowl. ➡️ Let it sit for 5 minutes, then stir until shiny and smooth.

  7. Glaze and Garnish ➡️ Pour the warm ganache over the cooled cake, spreading it to the edges. ➡️ Immediately top with a generous layer of chocolate sprinkles while the glaze is still wet.

  8. Set and Slice ➡️ Let the glaze set for at least 30 minutes before slicing into squares. 🍽️


❓ Q/A Section

Q: Can I taste the coffee in the cake? A: Not at all! ➡️ The coffee simply intensifies the chocolate flavor. If you prefer to avoid it, boiling water works perfectly fine.

Q: Why is my batter so watery? A: Don’t worry! ➡️ This high-moisture batter is exactly what makes the cake so soft and prevents it from becoming dry.

Q: Can I make this in a different pan? A: Yes! ➡️ This recipe works for two 9-inch round pans (bake for 30-35 mins) or about 24 cupcakes (bake for 18-22 mins).

Q: How should I store the leftovers? A: Cover the pan tightly with foil or plastic wrap. ➡️ It stays moist at room temperature for up to 3 days or in the fridge for up to 5 days.

Cottage Cheese Chocolate Ice Cream

Cottage Cheese Chocolate Ice Cream 🍦🍫


🛒 Ingredients

  • The Base: 2 cups full-fat cottage cheese (small curd) 🧀

  • The Flavor: ¼ cup unsweetened cocoa powder 🍫

  • The Sweetener: 3–4 tbsp honey or maple syrup (adjust to taste) 🍯

  • The Boost: 1 tsp vanilla extract

  • Optional Mix-ins: Sugar-free chocolate chips or crushed walnuts 🥜


🔪 Step-by-Step Instructions

  1. Blend the Base ➡️ Add the cottage cheese, cocoa powder, sweetener, and vanilla to a high-speed blender or food processor.

  2. Make it Smooth ➡️ Blend on high for 1–2 minutes until the mixture is completely smooth and no cheese curds remain. ➡️ The consistency should look like a thick chocolate pudding.

  3. Fold in Extras ➡️ If you are using chocolate chips or nuts, stir them in by hand now. 🥣

  4. Transfer ➡️ Pour the mixture into a shallow, freezer-safe container or a loaf pan. Smooth the top with a spatula. ➡️

  5. Freeze ➡️ Place in the freezer for 3–5 hours. ❄️

  6. The “Soft Serve” Check ➡️ If you prefer a soft-serve texture, check it at the 2-hour mark. For scoopable ice cream, let it freeze until firm.

  7. Temper ➡️ If the ice cream has been in the freezer overnight, let it sit on the counter for 10–15 minutes before scooping. ➡️ This makes it much easier to get those perfect round scoops!

  8. Serve ➡️ Scoop into chilled bowls and enjoy! 🍨


❓ Q/A Section

Q: Does it actually taste like cottage cheese? A: Not at all! ➡️ Once blended, the “cheesy” texture disappears, leaving behind a rich, tangy creaminess that tastes very similar to a chocolate cheesecake.

Q: Can I use low-fat cottage cheese? A: You can, but for the best results, use full-fat. ➡️ Higher fat content results in a creamier mouthfeel and prevents the ice cream from becoming too icy in the freezer.

Q: How do I keep it from getting too hard? A: High-protein ice creams can freeze quite solid. ➡️ To help with this, you can add 1 tablespoon of vegetable glycerin or a splash of almond milk to the blender, which helps maintain a softer scoop. 🍦

Q: Can I make other flavors? A: Definitely! ➡️ Omit the cocoa powder and add frozen strawberries for a fruity version, or stir in peanut butter for a chocolate-peanut butter swirl. 🍓🥜

Zesty Lemon Butter Fish Fillet

Zesty Lemon Butter Fish Fillet is a light yet flavorful dish featuring tender white fish coated in warm spices and pan-seared to perfection, then finished with a rich, tangy lemon butter sauce. Bright citrus, fragrant garlic, and fresh parsley balance the buttery sauce, making this an elegant yet easy meal perfect for weeknights or special occasions.

Ingredients

For the Fish

  • 4 fillets of white fish (cod, tilapia, or haddock)
  • 1 teaspoon paprika
  • 1 teaspoon garlic powder
  • 1 teaspoon onion powder
  • 2 tablespoons olive oil
  • Salt and black pepper, to taste

For the Lemon Butter Sauce

  • 4 tablespoons butter
  • 2 tablespoons olive oil
  • Juice and zest of 2 lemons
  • 4 cloves garlic, minced
  • 1 tablespoon fresh parsley, chopped
  • Salt and black pepper, to taste

Instructions

  1. Season the fish:
    Pat fish fillets dry with paper towels. Season both sides with paprika, garlic powder, onion powder, salt, and black pepper.
  2. Cook the fish:
    Heat olive oil in a large skillet over medium heat. Add fish fillets and cook for 3–4 minutes per side, until golden and cooked through. Remove fish from the skillet and set aside.
  3. Make the lemon butter sauce:
    In the same skillet, lower heat to medium-low. Add butter and olive oil. Once melted, stir in garlic and cook for 30–60 seconds until fragrant.
  4. Add lemon flavor:
    Stir in lemon juice and zest. Season with salt and black pepper to taste. Simmer gently for 1–2 minutes.
  5. Combine & serve:
    Return fish to the skillet, spoon sauce over the fillets, and cook for 1 more minute. Garnish with fresh parsley and serve immediately.

Recipe Notes

  • Fish is done when it flakes easily with a fork and appears opaque.
  • Fresh lemon juice is key for the best flavor—avoid bottled juice if possible.
  • Adjust lemon juice to taste if you prefer a milder citrus flavor.

Tips for Best Results

  • Dry the fish well before seasoning to get a nice golden crust.
  • Do not overcrowd the pan—cook in batches if needed.
  • Low heat for sauce: Prevents garlic from burning and butter from separating.
  • Extra richness: Add a splash of cream to the sauce if desired.

Servings

  • Serves: 4
  • Serving size: 1 fish fillet with sauce

Health Benefits

  • High-quality protein: Supports muscle growth and satiety.
  • Heart-healthy fats: Olive oil and fish provide beneficial fats.
  • Rich in omega-3s: Supports brain and heart health.
  • Low-carb & gluten-free: Suitable for many dietary lifestyles.

Lemon Cottage Cheese Loaf Cake

🍋 Lemon Cottage Cheese Loaf Cake

✨ Why You’ll Love It

➡️ Super soft & moist texture
➡️ Light protein boost from cottage cheese
➡️ Fresh lemon flavor – not too heavy
➡️ Perfect for tea time ☕


🛒 Ingredients

🥣 Wet Ingredients

  • 1 cup cottage cheese 🧀
  • 2 large eggs 🥚
  • ½ cup sugar
  • ⅓ cup oil (vegetable or sunflower)
  • 2 tbsp lemon juice 🍋
  • 1 tbsp lemon zest

🌾 Dry Ingredients

  • 1½ cups all-purpose flour
  • 1 tsp baking powder
  • ½ tsp baking soda
  • Pinch of salt

👩‍🍳 Step-by-Step Recipe

🔹 Step 1: Prep

➡️ Preheat oven to 180°C
➡️ Grease a loaf pan or line with baking paper


🔹 Step 2: Blend Wet Mix

➡️ In a blender, add:
✔️ Cottage cheese
✔️ Eggs
✔️ Sugar
✔️ Oil

➡️ Blend until smooth and creamy


🔹 Step 3: Add Lemon Flavor

➡️ Mix in:
✔️ Lemon juice
✔️ Lemon zest

💡 This gives a fresh citrus aroma!


🔹 Step 4: Mix Dry Ingredients

➡️ In a bowl, combine:
✔️ Flour
✔️ Baking powder
✔️ Baking soda
✔️ Salt


🔹 Step 5: Combine

➡️ Slowly add dry ingredients into wet mixture
➡️ Mix gently (do not overmix ❗)


🔹 Step 6: Bake

➡️ Pour batter into loaf pan
➡️ Bake for 40–45 minutes

💡 Insert a toothpick – it should come out clean


🔹 Step 7: Cool & Serve

➡️ Let it cool for 10–15 minutes
➡️ Slice and enjoy 😍


🍯 Optional Lemon Glaze (Extra Yummy!)

➡️ Mix:

  • ½ cup icing sugar
  • 1–2 tbsp lemon juice

➡️ Drizzle over cake for bakery-style finish ✨


❓ Q & A

Q: Can I skip cottage cheese?
➡️ You can, but texture won’t be as soft. Use yogurt instead.

Q: Can I make it healthier?
➡️ Yes! Replace sugar with honey or use whole wheat flour.

Q: Why is my cake dense?
➡️ Overmixing or too much flour can cause that.


💡 Pro Tips

✔️ Blend cottage cheese well for smooth texture
✔️ Use fresh lemon for best flavor 🍋
✔️ Don’t overbake – it dries the cake

Peach Vanilla Ice Cream Sundae Recipe

Peach Vanilla Ice Cream Sundae Recipe

Ingredients

  • Ice Cream: 3 large scoops of high-quality vanilla bean ice cream.

  • Fruit: 1 ripe, fresh peach (half sliced into thin wedges for the topping, half diced for layering).

  • Syrup: 2 tablespoons of peach nectar, honey, or a simple caramel sauce.

  • Serving Vessel: A tall waffle cone or a sundae glass.

Preparation

  1. Prep the Peaches: Wash and pat dry your fresh peach. Dice one half of the peach into small, bite-sized pieces. Slice the remaining half into elegant, thin wedges for the final garnish.

  2. Base Layer: If using a cone, drop a few pieces of the diced peach into the bottom to ensure flavor in every bite. If using a glass, layer the diced peaches at the bottom.

  3. Assembly: Scoop the vanilla ice cream onto your vessel. If using a cone, press the scoops gently to ensure they are stable.

  4. Drizzle: Take your chosen syrup—peach nectar provides a light, fruit-forward flavor, while caramel adds a deeper, buttery contrast—and drizzle it slowly over the top of the ice cream scoops, allowing it to pool in the crevices.

  5. Garnish: Carefully insert one or two peach wedges into the side of the top scoop. For an extra touch, place any remaining diced peaches around the base.

  6. Serve: Enjoy immediately while the ice cream is firm and the fruit is cool.


Tip: For a more decadent texture, you can lightly poach the peach wedges in a teaspoon of sugar and water for two minutes before cooling and adding to your ice cream. This softens the fruit and intensifies the flavor profile.

Strawberries & Cream Frappuccino: Delight in This DIY Recipe!

Strawberries & Cream Frappuccino: Delight in This DIY Recipe!

Why You’ll Love This Strawberries & Cream Frappuccino

This Strawberries & Cream Frappuccino is a game-changer for anyone who loves a sweet, creamy treat without the hassle. It’s incredibly easy to whip up, taking just 10 minutes from start to finish. The vibrant flavor of fresh strawberries combined with rich creaminess makes every sip a delight. Plus, you can customize it to your taste, making it a perfect drink for any occasion. Who wouldn’t love that?

Ingredients for Strawberries & Cream Frappuccino

Gathering the right ingredients is the first step to crafting your perfect Strawberries & Cream Frappuccino. Here’s what you’ll need:

  • Fresh strawberries: The star of the show! Use ripe, juicy strawberries for the best flavor. They add natural sweetness and a vibrant color.
  • Milk: Whole, 2%, or your favorite alternative—milk adds creaminess. Choose what suits your taste or dietary needs.
  • Heavy cream: This ingredient gives the frappuccino its rich, velvety texture. It’s what makes every sip feel indulgent.
  • Vanilla ice cream: For that extra creaminess and sweetness, vanilla ice cream is a must. It enhances the overall flavor profile.
  • Sugar: Adjust the sweetness to your liking. You can use granulated sugar or even a natural sweetener if you prefer.
  • Vanilla extract: A splash of vanilla extract elevates the flavor, adding depth and warmth to the drink.
  • Ice: Essential for that frosty, refreshing texture. Use plenty to achieve the perfect frappuccino consistency.
  • Whipped cream (optional): For those who love a little extra indulgence, whipped cream on top is a delightful finishing touch.
  • Fresh strawberries for garnish (optional): A few slices on top not only look beautiful but also enhance the strawberry flavor.

For those looking for alternatives, you can easily make this recipe dairy-free by substituting milk and heavy cream with almond milk and coconut cream. If you want a more intense strawberry flavor, consider adding a tablespoon of strawberry syrup. The exact quantities for each ingredient are available at the bottom of the article for easy printing!

How to Make Strawberries & Cream Frappuccino

Creating your own Strawberries & Cream Frappuccino at home is a breeze. Follow these simple steps, and you’ll be sipping on a deliciously creamy drink in no time. Let’s get blending!

Step 1: Blend the Ingredients

Start by tossing the hulled and sliced strawberries into your blender. Add in the milk, heavy cream, vanilla ice cream, sugar, vanilla extract, and ice. Blend everything together until it’s smooth and creamy. The vibrant pink color will make your heart sing! If you don’t have a high-powered blender, just blend a little longer to ensure everything is well combined.

Step 2: Adjust Sweetness

Once blended, take a moment to taste your creation. If you want it sweeter, add a bit more sugar and blend again briefly. Remember, the sweetness can vary based on the ripeness of your strawberries. This is your chance to make it just right for your palate!

Step 3: Serve in Glasses

Pour the frappuccino into tall glasses, filling them generously. The creamy texture and bright color will make them look irresistible. If you’re feeling fancy, you can even chill the glasses beforehand for an extra touch of class.

Step 4: Add Toppings

Now comes the fun part! Top your frappuccino with a generous swirl of whipped cream. For an added touch, garnish with fresh strawberry slices on top. This not only looks great but also enhances the strawberry flavor. Serve immediately with a straw or a spoon, and enjoy every sip!


Tips for Success

  • Use ripe strawberries for the best flavor; they should be sweet and fragrant.
  • Chill your glasses before serving for a refreshing experience.
  • Don’t skip the vanilla extract; it adds a lovely depth to the flavor.
  • Experiment with different milk alternatives for a unique twist.
  • Blend longer if you prefer a smoother texture; it’s all about your preference!

Equipment Needed

  • Blender: A standard blender works well, but a high-powered one will give you a smoother texture.
  • Measuring cups: Essential for accurate ingredient portions; you can also use a kitchen scale if you prefer.
  • Tall glasses: Perfect for serving; any glass will do, but clear ones showcase the beautiful color.
  • Spoon or straw: For enjoying your frappuccino; a long straw adds a fun touch!

Variations

  • Chocolate Strawberry Frappuccino: Add a tablespoon of chocolate syrup to the blender for a delicious twist that combines chocolate and strawberry flavors.
  • Berry Blast Frappuccino: Mix in a handful of blueberries or raspberries along with the strawberries for a mixed berry delight.
  • Minty Fresh Frappuccino: Add a few fresh mint leaves to the blender for a refreshing minty flavor that pairs beautifully with strawberries.
  • Protein-Packed Frappuccino: Toss in a scoop of your favorite protein powder to make this drink a post-workout treat.
  • Vegan Version: Use almond milk and coconut cream instead of dairy, and opt for a dairy-free ice cream to keep it plant-based.

Serving Suggestions

  • Pair your Strawberries & Cream Frappuccino with a light salad for a refreshing lunch.
  • Serve alongside buttery scones or muffins for a delightful afternoon treat.
  • For a fun twist, add a splash of sparkling water for a fizzy version.
  • Garnish with mint leaves for a pop of color and freshness.
  • Consider using colorful straws to enhance the presentation and make it more festive!


Final Thoughts

Creating a Strawberries & Cream Frappuccino at home is more than just a recipe; it’s an experience that brings joy and refreshment. Each sip transports you to sun-soaked days, where laughter and good company reign supreme. The vibrant colors and creamy texture make it a feast for the eyes and the palate. Whether you’re treating yourself after a long day or impressing friends at a gathering, this delightful drink is sure to bring smiles all around. So grab your blender, and let the magic of strawberries and cream elevate your day to something truly special!


Ingredients

  • 2 cups fresh strawberries, hulled and sliced
  • 1 cup milk (whole, 2%, or your choice)
  • 1 cup heavy cream
  • 1/2 cup vanilla ice cream
  • 1/4 cup sugar (adjust to taste)
  • 1 teaspoon vanilla extract
  • 1 cup ice
  • Whipped cream for topping (optional)
  • Fresh strawberries for garnish (optional)

Instructions

  1. In a blender, combine the sliced strawberries, milk, heavy cream, vanilla ice cream, sugar, vanilla extract, and ice. Blend until smooth and creamy.
  2. Taste the mixture and adjust the sweetness by adding more sugar if desired, then blend again briefly to combine.
  3. Pour the frappuccino into tall glasses.
  4. Top with whipped cream if desired and garnish with fresh strawberries.
  5. Serve immediately with a straw or a spoon.

Notes

  • For a dairy-free version, substitute milk and heavy cream with almond milk and coconut cream.
  • Add a tablespoon of strawberry syrup for extra sweetness and a more intense strawberry flavor.
  • Prep Time: 10 minutes
  • Cook Time: 0 minutes
  • Category: Beverage
  • Method: Blending
  • Cuisine: American

Nutrition

  • Serving Size: 1 serving
  • Calories: 250
  • Sugar: 30g
  • Sodium: 50mg
  • Fat: 15g
  • Saturated Fat: 9g
  • Unsaturated Fat: 3g
  • Trans Fat: 0g
  • Carbohydrates: 30g
  • Fiber: 1g
  • Protein: 3g
  • Cholesterol: 60mg


Crispy Chicken Cutlets with Whipped Feta, Roasted Tomatoes, and Basil Oil—crunchy, creamy, and fresh all in one plate.

Here’s a flavorful, restaurant-style recipe for Crispy Chicken Cutlets with Whipped Feta, Roasted Tomatoes, and Basil Oil—crunchy, creamy, and fresh all in one plate.
Ingredients
For the Chicken Cutlets
2 boneless chicken breasts (butterflied or pounded thin)
Salt & black pepper (to taste)
½ cup flour
2 eggs (beaten)
1 cup breadcrumbs (panko works best for extra crispiness)
½ tsp garlic powder
½ tsp paprika
Oil (for shallow frying)
For Roasted Tomatoes
2 cups cherry tomatoes
2 tbsp olive oil
Salt & pepper
2–3 cloves garlic (optional)
🧀 For Whipped Feta
1 cup feta cheese
3–4 tbsp yogurt or cream cheese
1–2 tbsp olive oil
1 small garlic clove
Black pepper
🌿 For Basil Oil
1 cup fresh basil leaves
¼ cup olive oil
Pinch of salt
👩‍🍳 Instructions
1. Roast the Tomatoes
Preheat oven to 200°C (400°F).
Toss tomatoes with olive oil, salt, pepper, and garlic.
Roast for 15–20 minutes until soft and slightly caramelized.
2. Make the Basil Oil
Blend basil leaves, olive oil, and salt until smooth.
Optional: strain for a cleaner look.
Set aside.
3. Prepare Whipped Feta
Blend feta, yogurt (or cream cheese), olive oil, garlic, and pepper until smooth and creamy.
Adjust consistency with a little water or more olive oil if needed.
4. Bread the Chicken
Season chicken with salt, pepper, garlic powder, and paprika.
Coat each piece in:
Flour
Egg
Breadcrumbs
5. Cook the Cutlets
Heat oil in a pan over medium heat.
Fry chicken 3–4 minutes per side until golden brown and cooked through.
Drain on paper towels.
Assembly
Spread whipped feta on a plate.
Place crispy chicken cutlet on top.
Add roasted tomatoes over or beside it.
Drizzle basil oil generously.
Optional: garnish with fresh basil leaves.
Tips
Pound chicken thin for even cooking and better crispiness.
Don’t overcrowd the pan while frying.
Add a squeeze of lemon before serving for brightness.

🥗 Mediterranean Quinoa & Roasted Chickpea Bowl

🥗 Mediterranean Quinoa & Roasted Chickpea Bowl
Ingredients
The Base & Protein:
1 cup Quinoa (rinsed)
2 cups Vegetable broth (for more flavor than water)
1 can (15 oz) Chickpeas (rinsed and patted very dry)
1 tbsp Olive oil + 1 tsp Cumin (for roasting)
The Fresh Mix:
1 cup Cherry tomatoes (halved)
1 English cucumber (diced)
1/4 Red onion (thinly sliced)
1/2 cup Kalamata olives (pitted)
1/4 cup Fresh parsley (chopped)
The Toppings & Dressing:
1/2 cup Feta cheese (crumbled)
1 Lemon (juiced)
3 tbsp Extra virgin olive oil
1 clove Garlic (minced)
Salt & Pepper to taste
Instructions
1. Roast the Chickpeas
Preheat your oven to 200°C (400°F). Toss the dry chickpeas with 1 tbsp olive oil, cumin, and a pinch of salt. Spread them on a baking sheet and roast for 20–25 minutes until golden and crunchy.
Pro-Tip: Make sure they are bone dry before oiling them; moisture is what makes them mushy instead of crispy.
2. Cook the Quinoa
In a medium pot, bring the quinoa and vegetable broth to a boil. Reduce heat to low, cover, and simmer for 15 minutes. Remove from heat and let it sit (covered) for 5 minutes, then fluff with a fork.
3. Prep the “Salad”
While the quinoa cools slightly, toss the tomatoes, cucumbers, red onion, and olives together in a large mixing bowl with the fresh parsley.
4. Whisk the Dressing
In a small jar, shake together the lemon juice, olive oil, minced garlic, salt, and pepper until well combined.
5. Assemble the Bowl
Divide the quinoa into bowls. Layer the fresh vegetable mix on one side and the warm, roasted chickpeas on the other.
6. The Final Flourish
Top with a generous amount of feta cheese. Drizzle the lemon-garlic dressing over everything just before serving to keep the chickpeas crunchy.

The Ultimate Green Goddess Sandwich

The Ultimate Green Goddess Sandwich
Ingredients
The Foundation:
3 slices of sourdough or multi-grain bread (toasted or fresh).
1/2 ripe avocado.
1 tbsp lemon juice (to keep the green bright).
The Fillings:
1/2 English cucumber, thinly sliced into rounds.
1 cup Alfalfa sprouts or Clover sprouts.
1 handful Microgreens (like radish or arugula sprouts for the top).
The “Zing” (Green Goddess Spread):
2 tbsp Greek yogurt or Mayo.
1 tsp Fresh dill or chives, finely chopped.
1/2 tsp Garlic powder.
Salt & Black pepper to taste.
Instructions
Prep the Spread: In a small bowl, mash the avocado with the lemon juice, salt, and pepper until mostly smooth. In a separate tiny bowl, mix your yogurt/mayo with the herbs and garlic powder.
The Bottom Layer: Lay down your first slice of bread. Spread a thick layer of the avocado mash. Layer on a generous amount of cucumber slices, followed by a thick nest of alfalfa sprouts.
The Middle Layer: Spread the herb yogurt/mayo on both sides of the second slice of bread and place it on top of the sprouts. Repeat the avocado, cucumber, and sprout layering.
The Top Layer: Spread the remaining avocado or herb mix on the final slice of bread and close the sandwich.
The Garnish: For that “Instagram-ready” look in the photo, press a small amount of microgreens onto the very top of the sandwich.

Fluffy Japanese Souffle Dessert

🍰 Fluffy Japanese Soufflé Dessert (Light & Airy Treat)

This famous Japanese-style soufflé is soft, jiggly, and melts in your mouth 😍. It’s lighter than regular cake and has a delicate sweetness—perfect for tea time ☕


🛒 Ingredients

For the Soufflé Batter:

  • 🥚 3 large eggs (separated)
  • 🥛 1/2 cup milk
  • 🧈 2 tbsp butter
  • 🍰 1/4 cup all-purpose flour
  • 🍬 3 tbsp sugar
  • 🌼 1/2 tsp vanilla extract
  • 🧂 Pinch of salt
  • 🍋 1/2 tsp lemon juice (helps stabilize egg whites)

👩‍🍳 Step-by-Step Instructions

➡️ Step 1: Prepare Base Mixture

  • In a bowl, gently heat milk + butter until melted 🧈
  • Add egg yolks and mix well 🥚
  • Sift in flour and whisk until smooth (no lumps!)

➡️ Step 2: Make Fluffy Meringue

  • In another bowl, beat egg whites + salt until foamy
  • Add lemon juice 🍋
  • Gradually add sugar while beating until soft peaks form ☁️

➡️ Step 3: Combine Gently

  • Add 1/3 of meringue into batter and mix
  • Fold in the rest slowly (don’t overmix!) ➡️ keep it airy

➡️ Step 4: Cook the Soufflé

  • Lightly grease a pan 🍳
  • Pour batter into small molds or directly into pan
  • Cover and cook on very low heat for 8–10 minutes
  • Flip gently and cook another 5 minutes

➡️ Step 5: Serve Fresh

  • Dust with powdered sugar ❄️
  • Add fruits 🍓 or honey 🍯 on top
  • Serve warm and enjoy that soft jiggle!

❓ Q & A

Q1: Why is my soufflé not fluffy?
➡️ Egg whites may not be beaten properly or batter was overmixed.

Q2: Can I bake instead of cook on stove?
➡️ Yes! Bake at 160°C in a water bath for 25–30 minutes.

Q3: How do I know it’s done?
➡️ It should be set but still soft and slightly jiggly in the center.

Q4: Can I store it?
➡️ Best eaten fresh, but you can refrigerate for 1 day.

Creamy Cheesy Chicken Roll-Ups 

Creamy Cheesy Chicken Roll-Ups

📌 About This Dish

These baked chicken roll-ups are soft, juicy, and filled with a rich creamy cheese mixture. They’re rolled into spirals and baked until golden, making them perfect for dinner, lunch, or even special gatherings ✨


🥣 Ingredients (Serves 4–5)

🍗 For the Chicken

👉 4 large chicken breasts (boneless, skinless)
👉 ½ tsp salt
👉 ½ tsp black pepper


🧀 For the Creamy Filling

👉 ½ cup cream cheese (softened)
👉 ½ cup mozzarella cheese (shredded)
👉 ½ cup cheddar cheese (shredded)
👉 2 tbsp mayonnaise or thick yogurt
👉 2 tbsp green onions (finely chopped) 🌿
👉 1 tsp garlic powder
👉 ½ tsp black pepper
👉 ½ tsp salt


🛢️ For Baking

👉 1–2 tbsp olive oil or butter


🔪 Step-by-Step Instructions

🔹 Step 1: Prepare the Chicken

➡️ Place chicken breasts on a cutting board
➡️ Slice each breast horizontally OR gently flatten with a rolling pin
➡️ Aim for thin, even pieces (this helps rolling)

💡 Tip: Cover chicken with plastic while flattening to keep it neat


🔹 Step 2: Season the Chicken

➡️ Sprinkle salt and black pepper on both sides
➡️ Set aside for 5–10 minutes


🔹 Step 3: Prepare the Filling

➡️ Take a mixing bowl
➡️ Add:
✔ cream cheese
✔ mayonnaise or yogurt
✔ garlic powder
✔ salt + pepper

➡️ Mix until smooth and creamy


🔹 Step 4: Add Cheese & Herbs

➡️ Add mozzarella + cheddar
➡️ Add chopped green onions 🌿
➡️ Mix gently

👉 The mixture should be thick, creamy, and easy to spread


🔹 Step 5: Fill the Chicken

➡️ Take one chicken piece
➡️ Spread 2–3 tablespoons of filling evenly
➡️ Leave a little space at edges


🔹 Step 6: Roll the Chicken

➡️ Carefully roll from one side to the other
➡️ Keep it tight (like a spiral)
➡️ Place seam-side down

💡 Tip: You can use toothpicks to hold shape if needed


🔹 Step 7: Prepare Baking Dish

➡️ Grease a baking dish with olive oil or butter
➡️ Arrange all chicken rolls neatly


🔹 Step 8: Bake

➡️ Preheat oven to 180°C (350°F)
➡️ Bake for 25–30 minutes

👉 For extra golden top:
➡️ Bake 5 more minutes or use top heat


🔹 Step 9: Rest & Serve

➡️ Remove from oven
➡️ Let rest for 5 minutes
➡️ Garnish with green onions 🌿
➡️ Serve warm


😍 Texture & Taste

✔ Outside: light golden and slightly crisp
✔ Inside: creamy, cheesy, soft
✔ Flavor: rich, mild, and comforting


🍽️ Serving Ideas

👉 Serve with:
➡️ mashed potatoes 🥔
➡️ rice 🍚
➡️ fresh salad 🥗
➡️ garlic bread 🥖


❓ Q & A

❓ Q1: Can I use only one type of cheese?

➡️ Yes 👍
Use mozzarella for stretch OR cheddar for stronger flavor


❓ Q2: Can I make it ahead of time?

➡️ Yes 😊
✔ Prepare rolls
✔ Cover and refrigerate (up to 24 hours)
✔ Bake when needed


❓ Q3: How do I keep rolls from opening?

➡️ Roll tightly
➡️ Place seam side down
➡️ Use toothpicks if needed


❓ Q4: Can I cook without oven?

➡️ Yes 👇
➡️ Use a covered pan
➡️ Cook on low heat
➡️ Turn gently until done


❓ Q5: How to make it lighter?

➡️ Use yogurt instead of mayonnaise
➡️ Reduce cheese slightly
➡️ Add spinach or herbs 🌿


💡 Pro Tips

👉 Don’t overfill (prevents spilling)
👉 Thin chicken cooks better
👉 Let it rest before cutting
👉 Use fresh ingredients for best taste

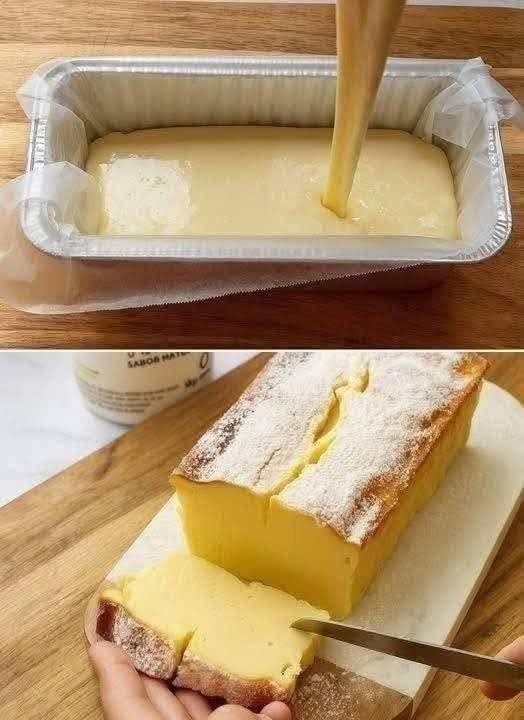
Fluffy Greek Yogurt Soufflé Cake

🍰 Fluffy Greek Yogurt Soufflé Cake

🛒 Ingredients

  • 400g Greek Yogurt (plain and thick)

  • 4 Large Eggs (separated)

  • 40g Cornstarch (or Maizena)

  • 50g Sugar (or your preferred sugar-free sweetener)

  • 1 tsp Vanilla extract

  • Optional: Powdered sugar and fresh raspberries for serving


👩‍🍳 Step-by-Step Instructions

  1. Prep the Pan 🍞 Preheat your oven to 170°C. ➡️ Line a loaf pan or round cake tin with parchment paper, ensuring it climbs up the sides to support the cake’s rise.

  2. Blend the Base 🌪️ In a food processor or large bowl, combine the Greek yogurt, egg yolks, cornstarch, vanilla, and half of the sugar. ➡️ Blend until the mixture is perfectly smooth and creamy.

  3. Whip the Egg Whites 🥚 In a separate clean bowl, beat the egg whites with the remaining sugar until stiff peaks form. ➡️ This is the secret to the “soufflé” height!

  4. Fold Gently ☁️ Slowly and carefully fold the whipped egg whites into the yogurt mixture using a spatula. ➡️ Do not overmix, or you will lose the air bubbles that make the cake fluffy.

  5. Pour and Smooth 🌊 Pour the airy batter into your prepared pan as shown in the photo. ➡️ Smooth the top gently with a spoon or spatula.

  6. The Bake ⏲️ Bake for 45–50 minutes. ➡️ The cake should be risen and slightly golden on top.

  7. Cool and Dust ❄️ Let the cake cool completely in the pan—it will sink slightly, which is normal for a soufflé cake! ➡️ Dust with powdered sugar and serve with fresh raspberries.


❓ Common Questions (Q&A)

Q: Can I use regular yogurt instead of Greek yogurt? A: It is best to stick with Greek yogurt because it is thicker. ➡️ Regular yogurt has too much moisture and might make the cake soggy.

Q: Why did my cake sink so much? A: All soufflé-style cakes sink a little as they cool and the air pockets contract. ➡️ To minimize this, let it cool slowly in the oven with the door slightly cracked.

Q: Is this cake gluten-free? A: Yes! ➡️ By using cornstarch instead of wheat flour, this recipe is naturally gluten-free.

Q: How should I store the leftovers? A: Keep it in the refrigerator in an airtight container. ➡️ It actually tastes even better the next day when it’s chilled! ❄️🍰


✨ Quick Tips

  • Room Temp Eggs: Make sure your eggs are at room temperature before separating. ➡️ The whites will whip up much larger and more stable! 🥚✨

  • No Food Processor? No problem! ➡️ You can whisk the yogurt base by hand; just make sure there are no lumps of cornstarch left before adding the egg whites. 🥣➡️⚖️

🔥 Garlicky Chicken & Cabbage Stir-Fry

🔥 Garlicky Chicken & Cabbage Stir-Fry
Ingredients
The Main Components:
1.5 lbs Chicken breast or thighs (cut into bite-sized chunks)
1 medium Green cabbage (chopped into 1-inch squares)
3 tbsp Neutral oil (Avocado or Grapeseed)
4 cloves Garlic (minced)
1 tbsp Fresh ginger (grated)
1 bunch Green onions (sliced, whites and greens separated)
Optional: Red chili flakes (for that heat seen in the photo)
The Savory Sauce:
3 tbsp Soy sauce (or Tamari)
1 tbsp Oyster sauce
1 tbsp Toasted sesame oil
1 tsp Rice vinegar (or lime juice)
1 tsp Brown sugar (helps with the browning)
Instructions
1. Sear the Chicken
Heat 1.5 tablespoons of oil in a large skillet or wok over high heat. Once shimmering, add the chicken in a single layer.
Important: Let it sit undisturbed for 2–3 minutes to get that golden-brown crust. Toss and cook until just done. Remove chicken from the pan and set aside.
2. Sauté Aromatics
Add the remaining oil to the same pan. Toss in the garlic, ginger, and the white parts of the green onions. Stir-fry for about 30 seconds until fragrant (don’t let the garlic burn!).
3. Blister the Cabbage
Add the cabbage to the pan. It will look like a lot, but it wilts down quickly. Stir-fry on high heat for 5–7 minutes. You want the edges to look slightly charred and “blistered” while the center remains slightly crisp.
4. Combine and Sauce
Whisk the sauce ingredients together in a small bowl. Add the cooked chicken back into the pan with the cabbage. Pour the sauce over everything.
5. The Final Toss
Toss everything together for 1–2 minutes until the sauce thickens slightly and glazes every piece. Fold in the green onion tops and chili flakes right at the end.

Chicken Spinach and Mushroom Low Carb Oven Dish

Chicken Spinach and Mushroom Low Carb Oven Dish
Ingredients:
4 small boneless, skinless chicken breasts (about 1.5 lb), patted dry
8 oz cremini or button mushrooms, sliced
5 oz fresh baby spinach
1/2 small yellow onion, finely chopped
3 garlic cloves, minced
1 tbsp olive oil
2 oz cream cheese, softened
1/3 cup heavy cream
1/4 cup chicken broth
3/4 cup shredded mozzarella
1/4 cup grated Parmesan
1 tsp Italian seasoning
1/2 tsp smoked paprika
1/2 tsp garlic powder
1/2 tsp onion powder
1/2 tsp kosher salt
1/4 tsp black pepper
Pinch crushed red pepper flakes (optional)
Zest of 1/2 lemon (optional)
2 tbsp chopped fresh parsley (optional, for serving)
Directions:
1. Heat the oven to 400°F and lightly grease a 9×13-inch baking dish; you’re about to fill it with cozy, bubbling goodness.
2. Season the chicken all over with salt, pepper, garlic powder, onion powder, Italian seasoning, and smoked paprika, then lay the pieces snugly in the baking dish.
3. Warm the olive oil in a large skillet over medium-high heat; add the onions and mushrooms and cook, stirring, until the mushrooms are golden and any liquid has evaporated, about 6 to 8 minutes.
4. Stir in the garlic and red pepper flakes and cook just until fragrant, 30 seconds; the kitchen should smell amazing.
5. Drop in the cream cheese and let it melt into the pan, then pour in the heavy cream and chicken broth, stirring until the sauce is silky; add the lemon zest if using and taste for salt and pepper.
6. Add the spinach to the skillet and toss gently until it just wilts into the sauce, about 1 to 2 minutes; you want it vibrant and glossy.
7. Spoon the creamy mushroom-spinach mixture evenly over the chicken, nestling it into all the nooks so every bite gets saucy.
8. Sprinkle the mozzarella and Parmesan over the top like a cozy blanket.
9. Bake until the cheese is bubbling and lightly golden and the chicken is cooked through to 165°F, 20 to 25 minutes; if you love a bronzed top, broil for 1 to 2 extra minutes.
10. Let

Protein Balls

Protein Balls

Ingredients:

  • Oats: 1 cup

  • Peanut butter: 1/2 cup

  • Chocolate chips: 1/4 cup

  • Cocoa powder: 1 tbsp

  • Honey or maple syrup (optional for sweetness): 2 tbsp

  • Protein powder (optional for extra protein boost): 1 scoop

  • Chia seeds or flax seeds (optional for added nutrition): 1 tbsp

Instructions:

  1. In a bowl, combine oats, peanut butter, chocolate chips, cocoa powder, and protein powder.

  2. Add in honey or maple syrup if you prefer a sweeter taste.

  3. Mix everything together until fully combined. If it’s too thick, add a small splash of milk to make it easier to mix.

  4. Scoop out small portions and roll them into balls (about 1 inch in diameter).

  5. Place the balls on a baking sheet lined with parchment paper.

  6. Chill them in the refrigerator for 30 minutes to set.

Notes:

  • Feel free to customize these with your favorite add-ins such as dried fruit, seeds, or nuts.

  • These balls are no-bake and can be stored in the fridge for up to a week.

Tips:

  • If you don’t have chocolate chips, you can substitute with cacao nibs or chopped dark chocolate.

  • For a vegan version, use maple syrup and a plant-based protein powder.

  • To make the texture smoother, use creamy peanut butter.

Servings: Makes about 12 balls, depending on size.


Nutritional Information (per ball):

  • Calories: ~120 (depends on the exact ingredients used)

  • Protein: ~4g (depends on protein powder used)

  • Carbs: ~15g

  • Fat: ~6g

Benefits:

  • These protein balls are an easy way to get a quick energy boost.

  • Great for a post-workout snack or a quick breakfast on the go.

  • Packed with fiber and healthy fats from oats and peanut butter.

Q&A for Protein Balls:

Q: Can I use almond butter instead of peanut butter?
A: Yes, almond butter works great if you prefer it over peanut butter.

Q: Can I make these without protein powder?
A: Yes! The protein powder is optional, but it does help with the protein content. You can still enjoy them without it.

Enjoy making your delicious protein balls! Let me know if you need any other details!