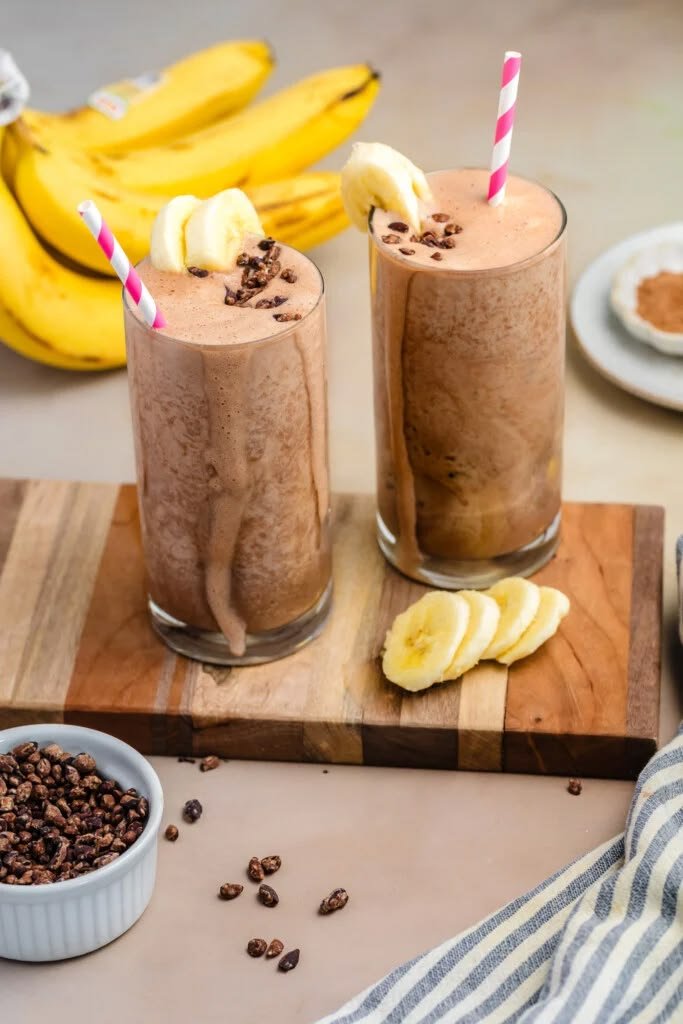
🍫 Heavenly Chocolate Chia Seed Pudding

🍫 Heavenly Chocolate Chia Seed Pudding

Prep time: 5 minutes | Setting time: 4+ hours (or overnight) | Servings: 2

Ingredients

  • 1/4 cup Chia seeds (black or white)

  • 1 cup Unsweetened almond milk (or your favorite plant-based/dairy milk)

  • 2 tbsp Unsweetened cocoa powder (high-quality Dutch-processed works best)

  • 2 tbsp Pure maple syrup or honey (adjust to your preferred sweetness)

  • 1/2 tsp Vanilla extract

  • A tiny pinch of sea salt (this enhances the chocolate flavor!)

Optional Toppings

  • Fresh Berries: Raspberries and blueberries (as seen in the video)

  • Chocolate: Shaved dark chocolate or mini chips

  • Crunch: Crushed hazelnuts or a dollop of almond butter


Instructions

  1. Whisk the Dry & Wet: In a medium bowl or a large glass jar, whisk together the milk, cocoa powder, sweetener, vanilla, and salt until the cocoa is mostly dissolved.

  2. Add the Chia: Stir in the chia seeds thoroughly.

  3. The “Second Stir” (Crucial Step): Let the mixture sit for about 5-10 minutes, then give it another good stir. This prevents the chia seeds from clumping at the bottom and ensures a uniform, creamy texture.

  4. Chill: Cover and refrigerate for at least 4 hours, though leaving it overnight is ideal for the thickest consistency.

  5. Serve: Before eating, give it one last stir. If it’s too thick for your liking, splash in a little more milk. Top with fresh berries and chocolate shavings!


Pro-Tips for Success

  • For a Smooth Mousse: If you aren’t a fan of the “tapioca-like” texture of chia seeds, simply toss the mixture into a high-speed blender after it has set and blend until silky smooth.

  • Meal Prep: These stay fresh in the fridge for up to 5 days, making them a perfect grab-and-go breakfast or healthy dessert.

Enjoy your chocolatey bliss!

Oatmeal, apple and carrots!

Full Recipe Here >>>Ingredients (1–2 servings)

1/2 cup oatmeal

1 cup milk or water (or half milk + half water)

1 small apple (grated or finely chopped)

1 small carrot (grated)

1–2 tsp honey or sugar (optional)

1/2 tsp cinnamon (optional but highly recommended)

A pinch of salt

Nuts or raisins (optional topping)

👩‍🍳 Instructions

Prepare the fruits & veggies

Grate the apple and carrot.

If you prefer, you can peel the apple first.

Cook the oats

In a saucepan, bring milk/water to a gentle boil.

Add oats and a pinch of salt.

Cook on low heat for 3–5 minutes, stirring occasionally.

Add apple & carrot

Mix in grated apple and carrot.

Cook for another 2–3 minutes until everything softens.

Flavor it

Add cinnamon and sweetener (honey or sugar) if using.

Stir well.

Serve

Pour into a bowl.

Top with nuts, seeds, or raisins if you like extra texture.

Crispy Black Pepper Parmesan Crisps

This is a batch of crispy, savory Parmesan Crisps (also known as Fricos). They are incredibly simple to make and work perfectly as a standalone snack, a salad topper, or a low-carb alternative to crackers.


Here is the full recipe:


Crispy Black Pepper Parmesan Crisps

Prep time: 5 minutes


Cook time: 5–7 minutes


Yields: Approx. 12–15 crisps


Ingredients

1 cup High-quality Parmesan cheese (freshly grated is best; avoid the powdered “shaker” cans as they won’t melt properly).


1/2 tsp Freshly cracked black pepper (coarse grind).


Optional: A pinch of garlic powder or smoked paprika for extra depth.


Instructions

Preheat & Prep:

Preheat your oven to 200°C (400°F). Line a large baking sheet with parchment paper or a silicone baking mat. This is crucial—otherwise, they will stick!


Mound the Cheese:

Spoon the grated Parmesan onto the baking sheet in small mounds (about 1 tablespoon each). Space them at least 2 inches apart, as they will spread while melting.


Flatten & Season:

Lightly pat the mounds down with the back of a spoon to level them out. Sprinkle the freshly cracked black pepper (and optional spices) evenly over each circle.


Bake:

Place in the oven for 5 to 7 minutes. Watch them closely! They are done when the centers are bubbly and the edges turn a golden brown. If they get too dark, they can taste bitter.


Cool & Set:

Remove from the oven and let them sit on the baking sheet for 2 to 3 minutes. They will be soft at first but will become crisp and rigid as they cool.

Vegetable Cream Cheese

Ingredients

200 g (about 1 cup) cream cheese (softened)

¼ cup finely chopped carrots

¼ cup finely chopped capsicum (bell peppers) (any color)

2 tbsp finely chopped cucumber (seeds removed)

2 tbsp finely chopped spring onions

1 tbsp fresh coriander (cilantro), chopped

1–2 tbsp mayonnaise (optional, for extra creaminess)

½ tsp black pepper powder

½ tsp salt (adjust to taste)

½ tsp garlic powder or 1 clove fresh garlic (minced)

½ tsp lemon juice

🔪 Preparation Steps

Soften the cream cheese

Leave it at room temperature for 10–15 minutes so it mixes easily.

Prep the vegetables

Chop all veggies very finely. The smaller the pieces, the smoother your spread will be.

Mix the base

In a bowl, add cream cheese and mayonnaise (if using). Mix until smooth.

Add vegetables & seasoning

Stir in all chopped vegetables, garlic, salt, pepper, and lemon juice.

Blend well

Mix until everything is evenly combined.

Chill (recommended)

Refrigerate for 30–60 minutes to let the flavors develop.

Creamy Cheesy Chicken Fajita Casserole

Here is the full recipe:.

Creamy Cheesy Chicken Fajita Casserole
Prep time: 10 mins

Cook time: 25–30 mins

Servings: 6

Ingredients
Chicken: 1.5 to 2 lbs cooked chicken (shredded or diced). Rotisserie chicken works perfectly for this.

Vegetables: 3 bell peppers (red, green, and yellow), sliced or diced, and 1 medium onion, sliced.

Creamy Base: 8 oz cream cheese (softened to room temperature) and 1/2 cup sour cream (or salsa for a tangier kick).

Seasoning: 1 packet (1 oz) Fajita or Taco seasoning.

Cheese: 2 cups shredded Mexican blend cheese (divided).

Optional: Fresh cilantro or sliced jalapeños for topping.

Instructions
Preheat & Prep:
Preheat your oven to 375°F (190°C) and lightly grease a 9×13-inch baking dish.

Sauté the Veggies:
In a large skillet over medium-high heat, sauté the sliced peppers and onions with a splash of oil for 5–7 minutes until they are tender-crisp.

Mix the Filling:
In a large mixing bowl, combine the softened cream cheese, sour cream, and fajita seasoning. Mix until smooth. Fold in the cooked chicken, the sautéed peppers and onions, and 1 cup of the shredded cheese.

Assemble:
Spread the mixture evenly into your prepared baking dish.

Bake:
Bake uncovered for 20 minutes.

The Cheese Topping:
Remove from the oven, sprinkle the remaining 1 cup of cheese over the top, and return to the oven for another 5–10 minutes (or until the cheese is bubbly and starting to brown).

Serve:
Let it rest for 5 minutes before serving. It’s great on its own, over rice, or tucked into warm tortillas.

Creamed Peas on Toast

A cozy, nostalgic comfort dish made with tender peas in a creamy sauce spooned over crispy golden toast. Perfect for breakfast, lunch, or a quick comforting snack! 🥖💚


🛒 Ingredients

🌱 For the Creamed Peas

  • 2 tbsp unsalted butter 🧈
  • 1 small shallot or onion, finely chopped 🧅
  • 2 cloves garlic, minced 🧄
  • 2 tbsp all-purpose flour 🌾
  • 1 cup milk 🥛
  • 1 cup frozen peas 🫛
  • ¼ tsp salt 🧂
  • ¼ tsp black pepper 🌶️
  • Pinch of nutmeg (optional) ✨
  • 1 tsp lemon juice 🍋

🍞 For Serving

  • 2 slices bread (sourdough, white, or whole wheat) 🥖
  • Butter for toast (optional) 🧈
  • Fresh herbs like parsley or mint 🌿

👩‍🍳 Step-by-Step Instructions

1️⃣ Toast the Bread

➡️ Toast bread slices until golden and crispy.
➡️ Spread with a little butter for extra richness.


2️⃣ Cook the Aromatics

➡️ Melt butter in a pan over medium heat.
➡️ Add chopped onion/shallot and cook 2–3 minutes until soft.
➡️ Stir in garlic and cook for 30 seconds until fragrant.


3️⃣ Make the Creamy Sauce

➡️ Sprinkle flour into the pan and stir well for 1 minute.
➡️ Slowly pour in milk while whisking to keep the sauce smooth.
➡️ Cook for 2–3 minutes until slightly thick and creamy.


4️⃣ Add the Peas

➡️ Stir in peas and cook for 2–3 minutes until tender and warm.
➡️ Add salt, pepper, nutmeg, and lemon juice.
➡️ Taste and adjust seasoning if needed.


5️⃣ Assemble & Serve

➡️ Spoon the creamy peas generously over warm toast.
➡️ Garnish with fresh herbs or grated parmesan if desired.
➡️ Serve immediately and enjoy the cozy goodness 💚


🌟 Helpful Tips

✔️ Use heavy cream instead of milk for extra richness.
✔️ Add cheddar or parmesan for a cheesy version 🧀
✔️ Top with a fried or poached egg for brunch 🍳
✔️ Fresh mint adds a bright spring flavor 🌿


❓Quick Q&A

❔ Can I use canned peas?

Yes! Just drain them well and reduce cooking time slightly.

❔ How do I store leftovers?

Keep the creamed peas in an airtight container in the fridge for up to 2 days.

❔ Can I make it dairy-free?

Absolutely! Use plant-based butter and almond or oat milk.


🌱 Nutritional Benefits

✨ Peas are rich in fiber and plant protein
✨ Milk provides calcium and creaminess
✨ Garlic and onions add natural flavor and nutrients
✨ Whole-grain toast adds extra fiber and energy


🍽️ Perfect Pairings

🥗 Fresh green salad
🍲 Tomato or vegetable soup
🍳 Poached eggs
🐟 Grilled salmon or chicken

Soft Garlic Herb Pita Bread Recipe

Soft Garlic Herb Pita Bread Recipe ✨🫓

Fluffy, soft, and delicious homemade pita bread perfect for wraps, dips, sandwiches, or snacks 😍


🛒 Ingredients

  • 3 cups all-purpose flour 🌾
  • 1 cup warm water 💧
  • 2 tsp instant yeast 🥄
  • 1 tsp sugar 🍬
  • 1 tsp salt 🧂
  • 2 tbsp olive oil 🫒
  • 1 tsp garlic powder 🧄
  • 1 tbsp chopped fresh parsley 🌿
  • Optional: chili flakes 🌶️

👩‍🍳 Step-by-Step Instructions

1️⃣ Activate the Yeast

➡️ In a bowl, combine:

  • Warm water
  • Sugar
  • Yeast

➡️ Let sit for 5–10 minutes until foamy ✨


2️⃣ Make the Dough

➡️ Add:

  • Flour
  • Salt
  • Olive oil
  • Garlic powder

➡️ Mix until a soft dough forms.

➡️ Knead for 8–10 minutes until smooth and elastic 💪


3️⃣ Let the Dough Rise

➡️ Place dough in a lightly oiled bowl.

➡️ Cover and let rise for 1 hour ⏰
Until doubled in size.


4️⃣ Divide the Dough

➡️ Punch down the dough gently.

➡️ Divide into 8 equal balls ⚪

➡️ Let them rest for 10 minutes.


5️⃣ Roll the Pita

➡️ Roll each dough ball into a round flat circle.

Not too thin, not too thick 👍


6️⃣ Cook the Pita

➡️ Heat a skillet or pan over medium-high heat 🍳

➡️ Cook each pita for:

  • 1–2 minutes on one side
  • Flip and cook another 1–2 minutes

➡️ They will puff up beautifully 😍


7️⃣ Add Garlic Herb Flavor

➡️ Brush warm pita with olive oil.

➡️ Sprinkle parsley and chili flakes 🌿🌶️


🍽️ Serving Ideas

✨ Serve with:

  • Hummus 🥣
  • Olives 🫒
  • Grilled chicken 🍗
  • Cheese 🧀
  • Fresh salad 🥗

💡 Tips

✅ Use warm—not hot—water
✅ Cover cooked pita with a towel to keep soft
✅ Can be frozen for later ❄️
✅ Add cheese inside for stuffed pita 😋


🌟 Nutritional Benefits

🌾 Flour provides energy
🫒 Olive oil contains healthy fats
🌿 Herbs add freshness and antioxidants
🧄 Garlic adds delicious flavor and nutrients


❓Q & A

❓Why didn’t my pita puff up?

✅ Make sure the pan is very hot before cooking.

❓Can I bake them?

✅ Yes! Bake at 475°F (245°C) for 5–7 minutes.

❓Can I use whole wheat flour?

✅ Absolutely 🌾

❓How do I store them?

✅ Keep in an airtight container for 2–3 days.

Chocolate Strawberry Dream Smoothie

Chocolate Strawberry Dream Smoothie

Prep time: 5 minutes Servings: 1


Ingredients

  • 1 cup Frozen strawberries (yields a thicker, colder texture)

  • 1 Ripe banana (preferably frozen for extra creaminess)

  • 1 cup Unsweetened almond milk (or your preferred dairy/non-dairy milk)

  • 1 scoop Chocolate protein powder (or 2 tablespoons of unsweetened cocoa powder)

  • 1 tablespoon Almond butter or peanut butter (for healthy fats)

  • 1 teaspoon Honey or maple syrup (optional, depending on your sweet tooth)

  • A pinch of sea salt (to balance the chocolate notes)

For Garnish:

  • Fresh strawberry halves

  • A sprinkle of cocoa powder or dark chocolate shavings

  • Shredded coconut


Instructions

  1. Prepare your base: Start by pouring the milk into your blender. Adding the liquid first prevents the solid ingredients from getting stuck at the bottom and ensures a smoother blend.

  2. Add the fruit: Drop in the frozen strawberries and the banana. Using frozen fruit is the “secret” to achieving that thick, milkshake-like consistency without needing to add ice, which can water down the flavor.

  3. Boost the flavor: Add the chocolate protein powder (or cocoa powder), nut butter, and sweetener if you are using it.

  4. The Blend: Secure the lid and start the blender on a low speed, gradually increasing to high. Blend for about 45–60 seconds until the mixture is completely smooth and no frozen fruit chunks remain.

  5. Adjust the consistency: If the smoothie is too thick, add an extra splash of milk. If you prefer it thicker, add a few more frozen strawberries or a couple of ice cubes and pulse again.

  6. Serve: Pour the smoothie into a tall glass. Top with fresh strawberry slices and a light dusting of cocoa powder as seen in your image.


Why This Works

The acidity of the strawberries perfectly cuts through the richness of the chocolate. By using a banana, you get a natural dose of potassium and a silky texture. If you want to make this even more nutritious, you can easily hide a handful of fresh baby spinach in the mix—the chocolate will completely mask the color and taste!

Mango Coconut Overnight Oats

🥭 Tropical Mango Overnight Oats

Prep time: 10 minutes | Chill time: 6 hours (or overnight) | Servings: 2 jars

Ingredients

The Oat Base:

  • 1 cup Rolled oats (old-fashioned work best for texture)

  • 1 cup Unsweetened coconut milk (canned for richness, or carton for lighter calories)

  • 1/2 cup Greek yogurt (plain or vanilla)

  • 1 tbsp Chia seeds (helps thicken the mixture)

  • 1-2 tbsp Maple syrup or honey (adjust to your sweetness preference)

  • 1/2 tsp Vanilla extract

  • A pinch of salt

The Layers & Topping:

  • 1 large Ripe mango, diced into cubes

  • 1 tsp Toasted sesame seeds or “Everything Bagel” seasoning (as seen in the photo for a savory-sweet contrast)

  • Optional: A squeeze of lime juice over the mango for brightness


Instructions

  1. Mix the Base: In a medium bowl, whisk together the coconut milk, yogurt, maple syrup, vanilla, and salt until smooth.

  2. Add Grains: Fold in the rolled oats and chia seeds. Stir well to ensure all the oats are submerged.

  3. The First Layer: Spoon about 1/3 of the oat mixture into the bottom of two glass jars.

  4. The Fruit Middle: Add a generous layer of diced mango on top of the oats.

  5. Finish Layering: Top with the remaining oat mixture, leaving a little room at the top of the jar.

  6. Chill: Seal the jars and place them in the refrigerator for at least 6 hours, though overnight is ideal for the creamiest texture.

  7. Serve: Right before eating, add the final fresh mango cubes on top and sprinkle with the sesame seeds or seed mix.


Pro Tips for Success

  • Texture Check: If the oats are too thick the next morning, stir in a splash of extra coconut milk to loosen them up.

  • Mango Hack: To get those perfect cubes like the photo, slice the mango “cheeks” off the pit, score them in a grid pattern without cutting the skin, and scoop them out with a spoon.

  • Storage: These stay fresh and delicious in the fridge for up to 4 days, making them excellent for meal prep.

High Iron Smoothie Recipe

High Iron Smoothie Recipe

This blend focuses on iron-rich plant foods like spinach and chia seeds, paired with Vitamin C-rich fruits to help your body absorb that iron more effectively.

Ingredients

  • 1 cup Fresh Spinach (packed)

  • 1/2 cup Kiwi (sliced or chopped)

  • 1/2 cup Pineapple (fresh or frozen chunks)

  • 1 Frozen Banana (peeled and sliced before freezing for best texture)

  • 2 tbsp Chia Seeds

  • Liquid Base (Optional): Add 1/2 to 1 cup of water, coconut water, or orange juice to help the ingredients blend smoothly.


Instructions

  1. Prep the Greens: Place the spinach and your chosen liquid base into the blender first. Blend these together until the liquid is bright green and no large leaf chunks remain. This ensures a smooth texture.

  2. Add the Fruit: Add the frozen banana, pineapple, and kiwi. The frozen banana is the secret to a creamy, “milkshake-like” consistency without needing dairy.

  3. Boost with Seeds: Add the 2 tablespoons of chia seeds.

  4. Final Blend: Blend on high speed until completely smooth.

  5. Serve: Pour into a glass. You can sprinkle a few extra chia seeds on top for a little crunch, just like in the picture!


Nutritional Highlights

Ingredient Key Benefit
Spinach & Chia Excellent sources of plant-based iron and fiber.
Kiwi & Pineapple High in Vitamin C, which is essential for increasing iron absorption.
Banana Provides potassium and natural sweetness for sustained energy.

Pro-Tip: For the best results, drink this smoothie fresh. The chia seeds will naturally thicken the drink the longer it sits!

🥗 Heirloom Tomato & Feta Salad

🥗 Heirloom Tomato & Feta Salad

Prep time: 10 minutes | Servings: 2-4

Ingredients

  • 3-4 Large Heirloom Tomatoes: Choose a variety of colors (red, orange, striped) for the best visual appeal.

  • Extra Virgin Olive Oil: Use a high-quality, cold-pressed oil for a rich finish.

  • Feta Cheese: About 50g, crumbled.

  • Fresh Mint Leaves: A handful for garnish and fragrance.

  • Dried Oregano or Za’atar: 1 tsp for an earthy depth.

  • Sea Salt & Freshly Cracked Black Pepper: To taste.

  • Optional: A squeeze of lemon juice or a drizzle of balsamic glaze for extra acidity.


Instructions

  1. Prep the Tomatoes: Slice the tomatoes into thick, even rounds. Lay them out on a shallow plate or platter, overlapping them slightly to create a “carpaccio” effect.

  2. Drizzle: Generously drizzle the extra virgin olive oil over the slices. Ensure every slice has a light coating to help the seasoning stick.

  3. Season: Sprinkle the sea salt, cracked black pepper, and dried oregano (or za’atar) evenly across the dish.

  4. Add Texture: Crumble the feta cheese over the top. The saltiness of the feta perfectly balances the sweetness of the heirloom tomatoes.

  5. Garnish: Place fresh mint leaves on top. You can leave them whole (as seen in the video) or chiffonade (finely slice) them for a more distributed minty flavor.

  6. Serve: Serve immediately at room temperature to enjoy the full flavor profile of the tomatoes.


Pro Tips for the Perfect Salad

  • Temperature Matters: Never refrigerate your tomatoes before making this! Room-temperature tomatoes have a much better texture and more complex flavor.

  • The Salt: Use flaky sea salt (like Maldon) if you have it; the crunch adds a lovely tactile element to the soft tomatoes.

  • Bread Pairing: This dish is incredible when served with a side of toasted sourdough or warm pita to soak up the leftover olive oil and tomato juices.

Enjoy your fresh and healthy creation!

🌯 Creamy Ham & Veggie Tortilla Pinwheels Recipe 🌯

🌯 Creamy Ham & Veggie Tortilla Pinwheels Recipe 🌯

These delicious bite-sized pinwheels are creamy, colorful, and perfect for parties, lunch boxes, Ramadan gatherings, or quick snacks 😋✨

🛒 Ingredients

  • 4 large flour tortillas 🌮
  • 1 cup cream cheese, softened 🧀
  • ½ cup mayonnaise 🥄
  • 1 cup diced cooked ham or turkey 🍖
  • ½ cup chopped pickles 🥒
  • ½ cup diced bell peppers 🌶️
  • ¼ cup sweet corn 🌽
  • 2 tbsp chopped green onions 🧅
  • 1 tsp garlic powder 🧄
  • ½ tsp black pepper ⚫
  • ½ tsp dried herbs 🌿

👩‍🍳 Step-by-Step Instructions

1️⃣ Prepare the Creamy Filling

➡️ In a large bowl, mix together:

  • Cream cheese
  • Mayonnaise
  • Garlic powder
  • Black pepper
  • Dried herbs

Mix until smooth and creamy ✨


2️⃣ Add the Fillings

➡️ Add:

  • Diced ham
  • Pickles
  • Bell peppers
  • Corn
  • Green onions

Stir everything well until evenly combined 🥗


3️⃣ Spread on Tortillas

➡️ Lay tortillas flat on a clean surface.

➡️ Spread the creamy mixture evenly over each tortilla.

Make sure to cover all edges for perfect rolls 🌯


4️⃣ Roll Tightly

➡️ Roll each tortilla tightly into a log shape.

➡️ Wrap in plastic wrap or foil.

➡️ Refrigerate for at least 1 hour ❄️
This helps them stay firm and slice neatly.


5️⃣ Slice & Serve

➡️ Remove from fridge.

➡️ Slice into bite-sized pinwheels using a sharp knife 🔪

➡️ Arrange on a serving plate and enjoy 😍


💡 Tips

✅ Chill before slicing for cleaner cuts
✅ Add shredded cheese for extra flavor 🧀
✅ Use spinach tortillas for colorful pinwheels 💚
✅ Great make-ahead party snack 🎉


🍽️ Serving Ideas

✨ Serve with:

  • Ranch dip
  • Garlic sauce
  • Fresh salad 🥗
  • Fries 🍟

🌟 Nutritional Benefits

🥒 Pickles & peppers provide vitamins
🌽 Corn adds sweetness and fiber
🧀 Cream cheese gives creamy richness
🌮 Tortillas make it filling and satisfying


❓Q & A

❓Can I make these ahead of time?

✅ Yes! Store in the fridge up to 24 hours.

❓Can I use chicken instead of ham?

✅ Absolutely 😋

❓Can I make them spicy?

✅ Add jalapeños or chili flakes 🌶️

❓Can I freeze them?

✅ Best enjoyed fresh, but you can freeze tightly wrapped rolls before slicing.

Enjoy your creamy tortilla pinwheels 🌯✨

Creamy Cucumber Tea Sandwiches

 Creamy Cucumber Tea Sandwiches

Soft, delicate, and refreshing — these classic cucumber tea sandwiches are perfect for brunches, parties, afternoon tea, or light snacks. The creamy herb filling paired with crisp cucumber makes every bite fresh and delicious ✨


🧾 Ingredients (Makes 12–16 Small Sandwiches)

🥪 For the Sandwiches

  • 1 loaf soft white sandwich bread
  • 1 medium cucumber, thinly sliced
  • 8 oz cream cheese, softened
  • 2 tbsp mayonnaise
  • 1 tbsp fresh chives or parsley, finely chopped
  • 1 tsp lemon juice
  • 1/2 tsp garlic powder
  • Salt & black pepper to taste

🔪 Instructions

1. Prepare the filling

In a bowl, mix together:

  • Cream cheese
  • Mayonnaise
  • Chives or parsley
  • Lemon juice
  • Garlic powder
  • Salt and pepper

Mix until smooth and creamy.


2. Prep the cucumber

Thinly slice the cucumber.
Pat slices dry with paper towels to remove extra moisture.

💡 This keeps the sandwiches from getting soggy.


3. Prepare the bread

Trim the crusts off the bread slices for the classic tea sandwich look.


4. Assemble

Spread a generous layer of the cream cheese mixture onto one slice of bread.

Add cucumber slices evenly on top.

Place another bread slice over it gently.


5. Cut & serve

Cut sandwiches into:

  • Squares
  • Triangles
  • Finger sandwiches

Arrange on a serving tray and chill until ready to serve.


🌿 Optional Add-Ins

  • Fresh dill
  • Mint leaves
  • Thin radish slices
  • Smoked salmon
  • Cracked black pepper

🍽️ Perfect For

  • Tea parties ☕
  • Bridal showers
  • Baby showers
  • Brunch tables
  • Picnic platters

❄️ Storage Tips

  • Best served fresh
  • Store covered in the fridge up to 24 hours
  • Place a damp paper towel over sandwiches to keep bread soft

💡 Pro Tips

✔ Use very soft bread for the best texture
✔ English cucumbers work best because they contain less water
✔ Chill sandwiches before cutting for cleaner edges

Coconut Cream Cake

Coconut Cream Cake 

Ingredients

For the Cake

  • 3 Large eggs

  • 1 cup Granulated sugar

  • 1/2 cup Vegetable oil

  • 1 cup Whole milk

  • 2 cups All-purpose flour

  • 1 tbsp Baking powder

  • 1 tsp Vanilla extract

For the Custard Filling

  • 2 cups Milk

  • 1/2 cup Sugar

  • 2 tbsp Cornstarch

  • 2 Egg yolks

  • 1 tsp Vanilla extract

For the Topping

  • 1/2 cup Apricot jam or honey (for glazing)

  • 1/2 cup Shredded coconut


Instructions

1. Bake the Sponge

Preheat your oven to 180°C. In a large bowl, whisk eggs and sugar until pale and fluffy. Gradually add the oil, milk, and vanilla. Sift in the flour and baking powder, folding gently until smooth. Pour into a greased 9-inch round pan and bake for 30–35 minutes. Let it cool completely.

2. Prepare the Filling

In a saucepan, whisk milk, sugar, cornstarch, and egg yolks. Cook over medium heat, stirring constantly until the mixture thickens into a heavy cream. Remove from heat, stir in vanilla, and let it cool.

3. Assemble the Cake

Once the cake is cool, slice it horizontally in half. Spread the thick custard filling evenly over the bottom layer, then place the second layer on top.

4. The Finish

Warm the jam or honey slightly and brush it generously over the top and sides of the cake. This acts as the “glue” for your coconut. Sprinkle the shredded coconut over the entire cake until it is well-coated.

Pro Tip: Chill the cake for at least 2 hours before serving. This allows the custard to set and makes the sponge extra moist!

Refreshing 4-Ingredient Lemon Mousse

Refreshing 4-Ingredient Lemon Mousse

This recipe yields a velvety, stable mousse that perfectly balances sweet and tart.

Ingredients

  • 1 cup Heavy whipping cream (chilled)

  • 1/2 cup Lemon curd (store-bought or homemade)

  • 2 tbsp Powdered sugar (adjust to taste)

  • 1 tsp Fresh lemon zest (plus extra for garnish)

  • Optional: Fresh whipped cream and a lemon slice for topping.


Instructions

  1. Chill Your Tools: For the fluffiest results, place your mixing bowl and whisk attachment in the freezer for about 10 minutes before starting.

  2. Whip the Cream: Pour the chilled heavy cream into your cold bowl. Add the powdered sugar and whip on medium-high speed until stiff peaks form. Be careful not to over-whip, or it will turn into butter!

  3. Prepare the Lemon Base: In a separate medium bowl, give your lemon curd a quick stir to loosen it up. Stir in the fresh lemon zest to brighten the flavor.

  4. The Gentle Fold: This is the most important step. Add about a third of your whipped cream to the lemon curd and stir gently to lighten the mixture. Then, add the remaining whipped cream and fold it in using a spatula. Use a slow, circular motion to keep the air in the mousse.

  5. Chill and Set: Spoon the mousse into individual serving glasses or one large bowl. Refrigerate for at least 2 hours (or overnight) to allow the texture to set firmly.

  6. Garnish: Just before serving, top with an extra dollop of whipped cream, a sprinkle of zest, and a fresh lemon slice as seen in the video.


Quick Tips

  • For Extra Stability: If you want it even firmer, you can fold in 4 oz of softened cream cheese before adding the whipped cream.

  • Zest First: Always zest your lemons before juicing or slicing them—it’s much easier!

Biscoff Cookie Butter Sundae

Biscoff Cookie Butter Sundae

Serves: 1 | Prep time: 10 minutes

Ingredients

  • Base: 2–3 large scoops of premium Vanilla Bean ice cream.

  • Drizzle: 2 tablespoons of Biscoff (speculoos) cookie butter.

  • Crunch: 2 Biscoff cookies (one crushed, one whole for garnish).

  • Texture: 1 small waffle cone.

  • Optional: A dollop of whipped cream.


Instructions

  1. Prepare the Drizzle: Place the cookie butter in a small microwave-safe bowl. Heat it for about 15–20 seconds until it reaches a pourable, silky consistency. Set aside to cool slightly so it doesn’t instantly melt your ice cream.

  2. The Foundation: Scoop your vanilla ice cream into a chilled ceramic bowl. For that “gourmet” look shown in the photo, place one large, neat scoop on top of a bed of slightly softer ice cream or whipped cream.

  3. The Assembly: * Take your waffle cone and press it gently into the side of the ice cream at a slight angle.

    • Tuck the whole Biscoff cookie into the opposite side.

  4. The Finishing Touches: * Generously spoon the warm cookie butter over the center scoop, letting it drip down the sides.

    • Finish by sprinkling the crushed cookie crumbs over the top. The contrast between the cold ice cream and the warm, spiced butter is what makes this dessert legendary.


Quick Tip

If you want to go the extra mile, sprinkle a tiny pinch of sea salt over the drizzle. It cuts through the sweetness and highlights the cinnamon and nutmeg notes in the cookie butter! Enjoy every bite.

Salted Caramel Apple Pie Ice Cream

Salted Caramel Apple Pie Ice Cream

The Components

  • The Base: 2 cups heavy cream (cold), 1 can (14 oz) sweetened condensed milk, 1 tsp vanilla extract.

  • The Apple Stir-in: 2 medium apples (diced), 1 tbsp butter, 2 tbsp brown sugar, 1 tsp cinnamon.

  • The Toppings: Sea salt caramel sauce and crushed graham crackers or shortbread.


Instructions

1. Prepare the Spiced Apples In a small skillet over medium heat, melt the butter. Add the diced apples, brown sugar, and cinnamon. Sauté for about 5–8 minutes until the apples are soft and caramelized. Set them aside to cool completely. Tip: Mixing warm apples into the cream will melt your ice cream instantly, so patience is key!

2. Whip the Cream In a large bowl, whip the cold heavy cream until stiff peaks form. In a separate bowl, whisk the vanilla extract into the sweetened condensed milk.

3. Fold and Combine Gently fold the condensed milk mixture into the whipped cream using a spatula. Be careful not to deflate the air. Once smooth, fold in your cooled spiced apples and a handful of crushed cookies for that “pie crust” texture.

4. The Swirl Pour half the mixture into a loaf pan. Drizzle a generous amount of caramel sauce over the top. Add the remaining mixture, more caramel, and use a knife to swirl it gently.

5. Freeze and Serve Cover and freeze for at least 6 hours (or overnight). Scoop into a bowl, drizzle with extra caramel as seen in your photo, and enjoy!


Total Prep Time: 20 Minutes

Freeze Time: 6 Hours

Yield: Approx. 1.5 Quarts

Creamy Pineapple Mango Oat Smoothie

Creamy Pineapple Mango Oat Smoothie

🥤 Ingredients

To achieve that perfect velvety texture shown in the image, gather these items:

  • 1 cup frozen mango chunks

  • 1 cup fresh or frozen pineapple

  • 1/4 cup rolled oats (old-fashioned)

  • 1/2 cup Greek yogurt (plain or vanilla)

  • 1 cup unsweetened coconut milk (or almond milk)

  • 1 tsp honey or maple syrup (optional)

  • Garnish: Extra rolled oats and a fresh pineapple wedge


🥣 Instructions

  1. Prep the Oats: For an extra smooth consistency, pulse the dry rolled oats in your blender first until they reach a fine, flour-like texture. This ensures your smoothie isn’t “chewy.”

  2. Layer the Liquids: Pour the coconut milk and Greek yogurt into the blender. Adding liquids first helps the blades move freely and prevents “air pockets.”

  3. Add the Fruit: Drop in the mango and pineapple. Using frozen fruit is the secret to that thick, frost-like consistency without needing ice, which can water down the flavor.

  4. Blend: Start on a low speed and gradually increase to high. Blend for about 45–60 seconds until the mixture is completely creamy and gold in color.

  5. Adjust: If it’s too thick, add a splash more milk. If you prefer it sweeter, drizzle in your honey now and pulse again briefly.

  6. Serve: Pour into a tall glass. Top with a generous sprinkle of toasted oats and a slice of pineapple for that professional aesthetic.


✨ Why You’ll Love It

The oats provide a steady release of energy, while the pineapple contains bromelain, which is great for digestion. It’s a refreshing, nutrient-dense breakfast or post-workout treat that tastes exactly like a vacation. Enjoy your tropical boost!

Mediterranean Tzatziki Chicken Salad:

Mediterranean Tzatziki Chicken Salad:

This is meal prep that doesn’t taste like punishment. Cold, creamy, herby, bright. The dill + lemon + garlic hit makes it taste like you’re at a taverna.

Serves 4 | Prep 20 min | Cook 12 min if grilling chicken

Ingredients

For the lemon-oregano chicken:
Chicken breast: 1.5 lbs / 2 large, or 3 cups shredded rotisserie
Olive oil: 1 tbsp
Lemon juice: 1 tbsp + 1 tsp zest
Dried oregano: 1½ tsp — Greek if you have it
Garlic powder: 1 tsp
Kosher salt: 1 tsp
Black pepper: ½ tsp

For the salad:
English cucumber: 1 large, sliced ¼-inch — or 2 Persian cukes
Cherry tomatoes: 1 cup, halved — red + yellow for color like your photo
Red onion: ⅓ cup, thinly sliced
Fresh dill: ⅓ cup, chopped + sprigs for garnish
Fresh parsley: 2 tbsp, chopped
Kalamata olives: ¼ cup, halved — optional but makes it Mediterranean

For the tzatziki dressing:
Greek yogurt: 1 cup, full-fat 5% — thick = better
Grated cucumber: ⅓ cup, squeezed dry — key to real tzatziki flavor
Garlic: 2 cloves, finely grated
Lemon juice: 1½ tbsp, fresh
Extra virgin olive oil: 1 tbsp
Fresh dill: 2 tbsp, chopped
Red wine vinegar: 1 tsp
Kosher salt: ¾ tsp
Black pepper: ½ tsp

Method

Make the tzatziki dressing — 5 min
Grate cucumber on box grater. Wrap in towel + squeeze out ALL the water. You want it dry or dressing gets watery.
Bowl: Greek yogurt, dry grated cucumber, grated garlic, lemon juice, olive oil, dill, vinegar, salt, pepper. Stir.
Chill 10 min while you prep. Flavors meld + garlic mellows.

Cook the chicken — 12 min
Pound breasts to ¾-inch. Rub with oil, lemon juice, zest, oregano, garlic powder, salt, pepper.
Grill or skillet on med-high 6 min per side until 165°F and charred like your photo. Rest 5 min, then dice.
Rotisserie hack: 3 cups shredded + toss with 1 tsp oregano + lemon zest. No shame.

Prep the veggies — 5 min
Slice cukes. Toss with ½ tsp salt in colander. Let sit 10 min, pat dry.
Ice bath for red onion 5 min to kill the bite. Drain well. Halve tomatoes.

Assemble — 3 min
Large bowl: chicken, salted cucumbers, tomatoes, red onion, olives if using, parsley, half the fresh dill.
Pour tzatziki dressing over. Toss gently. Top with remaining dill sprigs.

Serve cold
Best after 15 min in fridge. Eat within 2 days.

Why this works:
Squeezed cucumber in dressing: That’s authentic tzatziki. Not just yogurt + dill
Salted cucumber slices: Keeps salad crisp instead of watery
Charred chicken: Smoky flavor + texture so it doesn’t get lost in creamy dressing
Garlic + lemon + dill: Classic Greek flavor bomb
Full-fat yogurt: Low-fat = thin, watery dressing. 5% holds up

Pro tips:
Grate garlic: No chunks. Use microplane so it melts into dressing
Don’t skip draining cucumbers: #1 reason this salad fails
Chicken temp: Pull at 160°F, rest to 165°F. Overcooked = dry
Meal prep: Store chicken, veggies, dressing separate. Toss before eating or it gets soggy
Extra tang: Add 2 tbsp crumbled feta to the salad

Easy swaps:
Protein: Grilled shrimp, chickpeas, or gyro meat
Veggies: Add bell pepper, pepperoncini, or avocado
No grill: Air fryer chicken 400°F 10 min, flip halfway
Dairy-free: Coconut yogurt + skip garlic, add ¼ tsp onion powder
Serve it: In pita, over greens, with those Greek Lemon Potatoes, or straight from bowl

Macros per serving:
Calories: ∼340
Protein: 38g
Carbs: 10g
Fiber: 3g
Net carbs: 7g
Fat: 16g
Gluten-free, high protein, low carb.

Storage:
Best day-of. Fridge 2 days max. Cukes release water over time. If prepping, keep dressing separate until serving.

Superfood Green Smoothie Recipe

Superfood Green Smoothie Recipe

This blend combines healthy fats, hydrating vegetables, and a spicy kick of ginger to keep you feeling energized.

Ingredients

  • 1/4 Avocado: Provides a creamy texture and heart-healthy monounsaturated fats.

  • 1 cup Kale (packed): A leafy green powerhouse loaded with Vitamin K and antioxidants.

  • 1/2 Cucumber: Adds high water content for hydration and a crisp flavor.

  • 1/2 inch Fresh Ginger: Peeled and sliced; great for digestion and adding zing.

  • Liquid Base: 1 cup of water, unsweetened almond milk, or coconut water.

  • Optional: A squeeze of lemon juice or a few ice cubes for extra chill.

Instructions

  1. Prep the Greens: Thoroughly wash the kale and remove any tough woody stems. Pack it tightly into your measuring cup.

  2. Prepare the Produce: Peel the ginger skin using the edge of a spoon and slice the cucumber. Scoop out your quarter of an avocado.

  3. Layer the Blender: To ensure a smooth blend, add your liquid base first, followed by the ginger and kale. Top with the avocado and cucumber.

  4. Blend: Start on a low speed and gradually increase to high. Blend for 45–60 seconds until the kale is completely pulverized and the mixture is vibrant green and silky.

  5. Serve: Pour into a glass and enjoy immediately to get the most benefit from the fresh ingredients.


Pro-Tip: If you find kale too bitter, try swapping it for baby spinach or adding a small squeeze of lime to brighten the flavors!

Creamy Mango Parfait Smoothie

Creamy Mango Parfait Smoothie

Ingredients

  • The Base: 2 cups frozen mango chunks, 1/2 cup whole milk (or coconut milk), and 2 scoops of vanilla ice cream.

  • The Layers: 1 cup heavy whipping cream (chilled), 2 tbsp condensed milk, and 1/2 cup crushed graham crackers or digestive biscuits.

  • The Topping: 1 fresh large mango (cubed) and extra whipped cream.

Instructions

  1. Prepare the Cream: In a chilled bowl, whip the heavy cream until soft peaks form. Gently fold in the condensed milk. This creates that thick, velvety white layer seen in the cup. Transfer half of this to a piping bag.

  2. Blend the Smoothie: In a high-speed blender, combine the frozen mango, milk, and vanilla ice cream. Blend until completely smooth. It should be thick enough to hold its shape—if it’s too thin, add more frozen mango.

  3. Assemble the Layers: * Start by pouring a small amount of the mango smoothie into the bottom of a tall glass.

    • Spoon or pipe a layer of the sweetened cream over the mango.

    • Sprinkle a layer of crushed crackers for a bit of crunch.

    • Repeat the layers until you reach the top of the glass.

  4. The Grand Finale: Pipe a generous swirl of whipped cream on top. Pile the fresh mango cubes high in a pyramid shape, as shown in your photo.

Pro Tip: For those beautiful side streaks, use a spoon to “paint” some of the cream against the inside walls of the glass before pouring the smoothie!

Festive Cream Cheese Appetizer Log

🧀🌿 Festive Cream Cheese Appetizer Log

🛒 Ingredients

  • 🧀 2 blocks cream cheese
  • 🫒 ½ cup green olives
  • 🫒 ½ cup black olives
  • 🌶️ ½ red bell pepper (finely chopped)
  • 🌿 Fresh parsley (chopped)
  • 🌿 Fresh rosemary sprigs
  • 🍇 2 tbsp dried cranberries
  • 🧄 1 garlic clove (minced)
  • 🧂 Salt
  • 🌶️ Black pepper
  • 🍘 Crackers for serving

👩‍🍳 Step-by-Step Recipe

🔹 Step 1: Soften the Cream Cheese

  • 🧀 Leave the cream cheese at room temperature for a few minutes until soft.
  • 🥄 Place it into a mixing bowl and stir gently until creamy and smooth.

🔹 Step 2: Prepare the Mix-Ins

  • 🔪 Finely chop the olives and red bell pepper into tiny pieces.
  • 🌿 Chop the parsley for freshness and color.
  • 🧄 Mince the garlic very finely so it blends smoothly into the mixture.

🔹 Step 3: Mix Everything Together

  • 🥣 Add the chopped olives, peppers, parsley, cranberries, and garlic into the cream cheese.
  • 🧂 Season lightly with salt and black pepper.
  • 🥄 Fold everything together gently until evenly mixed.

🔹 Step 4: Shape the Cheese Log

  • 🧻 Place the mixture onto plastic wrap or parchment paper.
  • ✋ Roll and shape it carefully into a log shape.
  • ✨ Smooth the sides gently so it looks neat and firm.

🔹 Step 5: Decorate the Outside

  • 🌿 Press extra chopped parsley, peppers, olives, and cranberries around the outside for a colorful coating.
  • 🌱 Add rosemary sprigs on top for a festive look.
  • 😍 The brighter and more colorful, the prettier it will look when served!

🔹 Step 6: Chill & Serve

  • ❄️ Refrigerate the cheese log for at least 1 hour to firm up.
  • 🍘 Serve chilled with crackers or toasted bread slices.
  • 😋 Spread onto crackers and enjoy the creamy, savory flavor!

❓ Q/A

❓ Can I make this appetizer ahead of time?

  • ⏰ Yes! It can be prepared a day in advance and kept chilled.

❓ What else can I add?

  • 🌰 Chopped nuts or shredded cheese add extra flavor and texture.

❓ How should I store leftovers?

  • 🧊 Wrap tightly and refrigerate for up to 3 days.

Fudgy Chocolate Fudge Bars

🍫 Fudgy Chocolate Fudge Bars

🛒 Ingredients

  • 🍫 3 cups chocolate chips
  • 🥛 1 can condensed milk
  • 🧈 2 tbsp butter
  • 🍦 1 tsp vanilla extract
  • 🍫 ½ cup cocoa powder
  • 🧂 A pinch of salt

👩‍🍳 Step-by-Step Recipe

🔹 Step 1: Prepare the Tray

  • 🧻 Line a square tray or baking dish with foil or parchment paper.
  • ✨ Smooth it neatly so removing the fudge later becomes easy.

🔹 Step 2: Melt the Chocolate

  • 🍫 Add chocolate chips, condensed milk, and butter into a saucepan.
  • 🔥 Heat on low while stirring continuously.
  • 🥄 Keep mixing gently until everything melts into a silky smooth texture.

🔹 Step 3: Add Flavor

  • 🍦 Stir in the vanilla extract.
  • 🍫 Add cocoa powder and a tiny pinch of salt.
  • 🥄 Mix thoroughly until the mixture becomes rich, glossy, and lump-free.

🔹 Step 4: Pour & Smooth

  • 🍫 Pour the thick chocolate mixture into the prepared tray.
  • 🥄 Spread evenly using a spatula.
  • ✨ Smooth the top carefully for that beautiful shiny finish.

🔹 Step 5: Chill the Fudge

  • ❄️ Place the tray into the refrigerator.
  • ⏳ Chill for at least 3–4 hours until fully firm.
  • 🍫 The fudge should feel solid but soft enough to cut smoothly.

🔹 Step 6: Slice & Serve

  • 🔪 Lift the fudge out using the foil or parchment paper.
  • 🍫 Cut into neat squares or bars.
  • 😋 Serve chilled for the best rich and creamy texture.

❓ Q/A

❓ Why is my fudge too soft?

  • ❄️ It may need more chilling time or slightly more chocolate for firmness.

❓ Can I add nuts or toppings?

  • 🌰 Yes! Chopped nuts, sprinkles, or crushed cookies taste amazing on top.

❓ How should I store the fudge?

  • 🧊 Keep it in an airtight container in the refrigerator for up to 1 week.

French Toast Bites

Ingredients

4 slices bread (thick-cut works best; brioche or white bread)

2 large eggs

¼ cup milk

1 tbsp sugar

½ tsp cinnamon

½ tsp vanilla extract

Pinch of salt

1–2 tbsp butter (for frying)


Optional toppings:


Maple syrup

Powdered sugar

Fresh fruit (like strawberries or bananas)

👩‍🍳 Instructions

Cut the bread

Slice each bread piece into small cubes (bite-sized).

Make the egg mixture

In a bowl, whisk together eggs, milk, sugar, cinnamon, vanilla extract, and salt.

Soak the bread

Add bread cubes to the mixture and gently toss so they’re coated but not soggy.

Cook

Heat butter in a pan over medium heat.

Add the coated bread cubes in a single layer.

Cook for 2–3 minutes per side, turning occasionally, until golden brown and slightly crispy.

Serve warm

Sprinkle powdered sugar and drizzle maple syrup on top, or serve with fruit.

Ultra-Fluffy Soufflé Pancakes

Ultra-Fluffy Soufflé Pancakes

These are tall, jiggly, and melt in your mouth. The secret is in the meringue!

🛒 Ingredients

  • 2 Large eggs (separated)

  • 2 tbsp Whole milk

  • ½ tsp Vanilla extract

  • ¼ cup All-purpose flour

  • ½ tsp Baking powder

  • 2 tbsp Sugar

  • 1 tbsp Water (for steaming)

👩‍🍳 Step-by-Step Instructions

  • 🥚 Separate Eggs: Place egg whites in a large metal or glass bowl and yolks in a smaller bowl.

  • 🥣 Mix Yolks: Add milk and vanilla to the yolks. Whisk until creamy ⮕ Sift in the flour and baking powder ⮕ Whisk until smooth with no lumps.

  • 🌪️ Beat Whites: Use an electric mixer on the egg whites. Once frothy, add sugar gradually ⮕ Beat until stiff peaks form (the foam should stand straight up when you lift the beaters).

  • ☁️ Combine: Gently fold 1/3 of the whites into the yolk mixture ⮕ Pour that back into the remaining whites ⮕ Fold very gently with a spatula so you don’t pop the air bubbles.

  • 🔥 Cook: Heat a non-stick pan on the lowest setting. Lightly oil the surface.

  • 🥄 Scoop: Pile 2-3 scoops of batter on top of each other to create height ⮕ Add 1 tsp of water to the empty spaces in the pan.

  • 🥘 Steam: Cover with a lid and cook for 4–5 minutes ⮕ Flip very carefully ⮕ Add another tsp of water ⮕ Cover and cook for 3 more minutes.

  • Serve: Plate immediately and top with butter or honey.