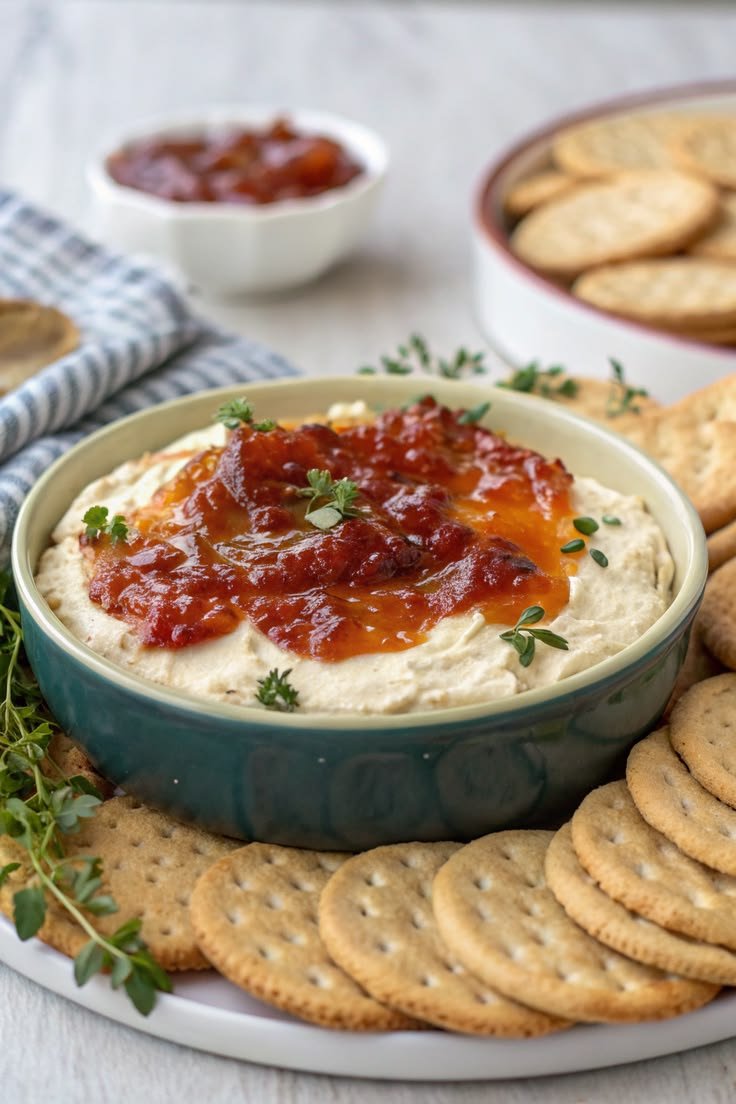
Creamy PB & Banana Oat Smoothie

Creamy PB & Banana Oat Smoothie

Prep time: 5 minutes | Servings: 1

Ingredients

  • 1 large banana (frozen works best for a thicker texture)

  • 2 tablespoons peanut butter (creamy or crunchy)

  • 1/4 cup rolled oats (gives it that great “cookie dough” flavor)

  • 1 cup milk of choice (dairy, almond, or oat milk all work beautifully)

  • 1/2 teaspoon vanilla extract (optional, for extra depth)

  • A pinch of cinnamon

  • 1 teaspoon honey or maple syrup (optional, if you like it sweeter)

  • Handful of ice (only if using a fresh banana)


Instructions

  1. Prep the Oats: For a smoother texture, you can pulse the dry oats in the blender first until they become a fine powder. This prevents the smoothie from feeling “gritty.”

  2. Combine: Add the banana, peanut butter, milk, vanilla, and cinnamon into the blender.

  3. Blend: Start on a low speed and gradually increase to high. Blend for about 45–60 seconds until completely smooth.

  4. Check Consistency: If it’s too thick, add a splash more milk. If you want it thicker, add more ice or a few more oats.

  5. Garnish: Pour into a glass and top with a few banana slices, a sprinkle of oats, and a dash of cinnamon, just like in the photo!


Pro Tips for the Best Texture

  • Freeze your bananas: Peel ripe bananas, break them in half, and keep them in a freezer bag. Using frozen fruit makes the smoothie creamy like a milkshake without needing extra ice.

  • Nut Butter Swap: If you have an allergy or just want to switch it up, almond butter or sunflower seed butter are fantastic alternatives.

Healthy 5-Minute Oat & Banana Cake

Healthy 5-Minute Oat & Banana Cake

No Sugar, No Flour, High Fiber

Ingredients

  • 1 cup oatmeal (rolled or quick oats)

  • 150 ml milk (dairy or plant-based)

  • 2 bananas, mashed

  • 2 eggs, beaten

  • 50 g cranberries

  • 50 g dried apricots, chopped

  • 30 g almond flakes

  • 1 tsp baking powder

  • A pinch of vanillin

Instructions

  1. Soak: Mix the oatmeal and milk in a bowl and let sit for a few minutes to soften the oats.

  2. Combine: Stir in the mashed bananas, beaten eggs, vanillin, and baking powder until well combined.

  3. Fold: Gently fold in the cranberries, chopped apricots, and almond flakes.

  4. Bake: Pour the mixture into a small lined loaf pan or microwave-safe dish.

    • Microwave: Cook for approximately 5–7 minutes (times vary by wattage).

    • Oven: Bake at 350°F (180°C) for 25–30 minutes until firm.

  5. Cool: Let it cool slightly before slicing to allow the structure to set.


A Friendly Note on Health Claims

While this cake is packed with amazing whole-food ingredients like fiber-rich oats and potassium-filled bananas, it’s important to be mindful of “fat loss” claims. Losing 2 kg of body fat typically requires a consistent caloric deficit over time rather than one specific food. However, swapping processed flour and sugar for this recipe is a fantastic way to reduce inflammation and stay full longer!

Cabbage & Veggie Savory Bake (Blood-Sugar Friendly)

Cabbage & Veggie Savory Bake (Blood-Sugar Friendly)

Description

This savory cabbage bake is a nutritious, budget-friendly dish made with shredded cabbage, onions, garlic, eggs, and herbs. It’s high in fiber, low in refined carbohydrates, and packed with vegetables—making it a smart choice for people looking to support stable blood sugar levels.
Perfect for breakfast, lunch, or a light dinner.

⚠️ Note: This recipe supports healthy blood sugar management, but it does not replace medical treatment or cause “instant” glucose drops.

 Ingredients

  • 400 g cabbage, finely shredded

  • 1 large onion, finely chopped

  • 3 cloves garlic, minced

  • 4 large eggs

  • ½ cup milk or unsweetened plant milk

  • ½ cup grated cheese (optional – mozzarella, cheddar, or feta)

  • 2 tablespoons olive oil

  • 2 tablespoons fresh parsley or green onions, chopped

  • ½ teaspoon salt

  • ½ teaspoon black pepper

  • ½ teaspoon paprika

  • Optional add-ins: grated carrot, zucchini, bell pepper, or herbs

 Instructions

  1. Prepare the vegetables
    Heat olive oil in a pan. Sauté onion until soft (3–4 minutes). Add garlic and cook 30 seconds.

  2. Soften the cabbage
    Add shredded cabbage to the pan. Cook 5–7 minutes until slightly wilted. Let cool slightly.

  3. Mix the batter
    In a bowl, whisk eggs, milk, salt, pepper, paprika, and herbs.

  4. Combine
    Add cooked cabbage mixture and cheese (if using). Mix well.

  5. Bake
    Pour into a greased baking dish.
    Bake at 180°C (350°F) for 35–40 minutes, until golden and set.

  6. Cool & serve
    Rest 10 minutes before slicing.

 Notes

  • For lower carbs, skip cheese and milk or use almond milk

  • For extra protein, add cottage cheese or Greek yogurt

  • Can be baked in muffin tins for meal prep

Tips for Best Results

  • Squeeze excess moisture from cabbage if very juicy

  • Don’t overbake—keeps it moist and tender

  • Pairs well with yogurt sauce or avocado

Servings

4–6 servings

 Approximate Nutritional Information (per serving, 1/6 recipe)

  • Calories: ~150–180

  • Protein: 8–10 g

  • Carbohydrates: 8–10 g

  • Fiber: 3–4 g

  • Fat: 9–11 g

  • Glycemic Load: Low

(Values vary depending on cheese and milk used)

 Health Benefits

  • Cabbage: High fiber → slows glucose absorption

  • Eggs: Stabilize blood sugar with protein & fats

  • Low refined carbs: No flour or sugar

  • Gut-friendly: Supports digestion and insulin sensitivity

✔ Suitable for:

  • Prediabetes

  • Type 2 diabetes (portion-controlled)

  • Low-carb & Mediterranean diets

 Q & A

Q: Does this instantly lower blood sugar?
A: No food works instantly. This dish helps prevent spikes and supports steady levels.

Q: Can I eat this for breakfast?
A: Yes! It’s excellent for breakfast because protein + fiber help prevent morning glucose spikes.

Q: Can I make it dairy-free?
A: Absolutely—use plant milk and skip cheese.

Q: How long does it keep?
A: 3–4 days refrigerated; freezes well up to 2 months.

Greek Feta Salad Tower (Fresh Mediterranean Layered Salad)

Greek Feta Salad Tower (Fresh Mediterranean Layered Salad)

A beautiful, stacked presentation of the classic Greek salad — fresh vegetables layered neatly and topped with creamy feta and a bright oregano dressing. Perfect for entertaining or a light, refreshing meal.

 Description

This “salad tower” version elevates traditional Greek salad by layering:

  • Juicy tomatoes

  • Crisp cucumber

  • Thin red onion

  • Briny olives

  • Creamy feta

  • Fresh herbs

  • Simple olive oil–lemon dressing

It’s vibrant, refreshing, and naturally gluten-free.

 Ingredients (Serves 2–4)

For the Salad Layers:

  • 2 large ripe tomatoes, sliced thick

  • 1 large cucumber, sliced into rounds

  • ¼ small red onion, very thinly sliced

  • ½ cup Kalamata olives, pitted

  • 4–6 oz block feta cheese (cut into thick squares or rounds)

  • 1 tablespoon fresh parsley or oregano (optional)

  • Freshly cracked black pepper

For the Dressing:

  • 3 tablespoons extra virgin olive oil

  • 1 tablespoon fresh lemon juice (or red wine vinegar)

  • ½ teaspoon dried oregano

  • Pinch of sea salt

  • Optional: ½ teaspoon Dijon mustard for slight creaminess

 Instructions

1️⃣ Prepare Vegetables

  • Slice tomatoes and cucumber evenly (about ½-inch thick).

  • Soak sliced red onions in cold water for 5–10 minutes to reduce sharpness.

2️⃣ Make the Dressing

Whisk together olive oil, lemon juice, oregano, salt, pepper, and Dijon (if using).

3️⃣ Build the Tower

Using a food ring mold (or freehand stacking):

  1. Start with a tomato slice.

  2. Add cucumber slice.

  3. Sprinkle a few onions and olives.

  4. Repeat layers once or twice.

  5. Finish with a thick piece of feta on top.

Gently remove ring mold if used.

4️⃣ Finish

  • Drizzle dressing over the top.

  • Sprinkle herbs and cracked black pepper.

  • Serve immediately.

 Serving Size

  • Serves 2 as a main

  • Serves 4 as a side dish

 Nutritional Information (Approximate per serving, serves 4)

  • Calories: 220–250

  • Protein: 6–8g

  • Carbohydrates: 8–10g

  • Fat: 20g

  • Fiber: 2–3g

  • Low carb & gluten-free

 Tips for Best Results

  • Use block feta, not crumbles — it holds shape better.

  • Choose ripe but firm tomatoes.

  • Chill ingredients before stacking for clean layers.

  • Add avocado slices for a creamy twist.

  • Serve with warm pita or grilled chicken for a complete meal.

 Health Benefits

✔ Heart-healthy fats from olive oil
✔ Rich in antioxidants (tomatoes + olive oil combo enhances absorption)
✔ Good source of calcium from feta
✔ Hydrating and low-calorie
✔ Naturally Mediterranean diet–friendly

 Q & A

Q: Can I make it ahead?
Yes, prep ingredients ahead but assemble just before serving.

Q: Can I add protein?
Grilled chicken, shrimp, or chickpeas work beautifully.

Q: What if I don’t have a ring mold?
Stack carefully by hand or serve layered in a clear glass for a “parfait” look.

Q: Is this keto-friendly?
Yes, it’s naturally low-carb.

Classic Seafood Salad

🦐 Classic Seafood Salad 

Ingredients

  • 1 cup cooked shrimp, chopped

  • 1 cup cooked crab meat (or imitation crab), shredded

  • 1 cup cooked calamari rings (optional)

  • ½ cup celery, finely chopped

  • ¼ cup red onion, finely diced

  • 2 tbsp fresh parsley, chopped

  • 1 tbsp capers (optional)

  • Lemon wedges for serving

Dressing

  • 3 tbsp mayonnaise

  • 1 tbsp olive oil

  • 1 tbsp lemon juice

  • 1 tsp Dijon mustard

  • ½ tsp Old Bay seasoning (optional)

  • Salt & pepper to taste

Instructions

  1. Prep the seafood:
    Make sure all seafood is cooked, chilled, and chopped into bite-size pieces.

  2. Make the dressing:
    In a bowl, whisk together mayo, olive oil, lemon juice, mustard, and seasoning.

  3. Combine everything:
    In a large bowl, mix the seafood, celery, onion, parsley, and capers.

  4. Add dressing:
    Toss gently to coat. Taste and adjust seasoning.

  5. Chill:
    Refrigerate at least 30 minutes for flavors to develop.

  6. Serve:
    Enjoy on toasted bread, over lettuce, or with crackers.

Mini Chicken Pot Pies (Biscuit Cups)

🥧 Mini Chicken Pot Pies (Biscuit Cups)

Comforting, creamy, and family-approved!

Description

These Mini Chicken Pot Pies are a comforting twist on the classic chicken pot pie — flaky biscuit dough filled with creamy chicken and vegetables. They’re easy to make, portioned for individual servings, and irresistibly golden and savory. Even picky eaters will love them!

Perfect for cozy dinners, potlucks, or quick meals — these little pies deliver homemade comfort in every bite.

🧂 Ingredients

For the Filling:

  • 1 cup cooked chicken, shredded or diced (rotisserie works great)
  • 1 cup mixed vegetables (peas, carrots, corn)
  • 1 can (10.5 oz) cream of chicken soup (or homemade equivalent)
  • ¼ cup milk
  • Salt and black pepper, to taste
  • ¼ tsp garlic powder (optional)
  • ¼ tsp onion powder (optional)

For the Crust:

  • 1 can refrigerated biscuit dough (8 biscuits)
    or homemade biscuit dough / puff pastry circles

Optional Garnish:

  • Fresh parsley or chives, chopped

👩‍🍳 Instructions

  1. Preheat Oven:
    Preheat oven to 375°F (190°C). Lightly grease a muffin tin.
  2. Prepare the Filling:
    In a bowl, combine chicken, mixed vegetables, cream of chicken soup, milk, and seasonings. Stir until smooth and creamy.
  3. Prepare the Biscuit Cups:
    Separate biscuits and flatten each slightly with your hands or a rolling pin.
    Press each biscuit into a muffin cup, pressing up the sides to create a “bowl.”
  4. Fill the Cups:
    Spoon about 2 tablespoons of the chicken mixture into each biscuit cup.
  5. Bake:
    Bake for 20–25 minutes, until biscuits are golden brown and the filling is bubbly.
  6. Cool & Serve:
    Let cool for 5 minutes before gently removing from the pan. Garnish with parsley if desired.

💡 Notes & Tips

  • Short on time? Use pre-cooked rotisserie chicken and frozen vegetables.
  • For a richer flavor, add a tablespoon of butter to the filling.
  • You can substitute cream of mushroom soup for a deeper flavor or if avoiding chicken soup.
  • To make it extra cheesy, stir in ½ cup shredded cheddar to the filling.
  • These reheat beautifully — just bake at 325°F for 10 minutes or microwave gently.

🍽️ Servings

  • Makes 8 mini pot pies (1 per biscuit).
  • Serves 4 people (2 per person).

🔢 Nutritional Information (per mini pot pie)

(Approximate values)

Nutrient Amount
Calories 220 kcal
Protein 11 g
Fat 11 g
Saturated Fat 4 g
Carbohydrates 19 g
Fiber 1 g
Sugars 2 g
Sodium 450 mg
Cholesterol 35 mg

🌿 Health Benefits

  • Protein-Rich: Chicken helps maintain muscle and energy.
  • Vegetable Goodness: Peas and carrots provide vitamins A, C, and fiber.
  • Portion-Controlled: Baked in muffin tins for easy serving and calorie control.
  • Comfort Food Made Lighter: Less crust and no heavy pie dough.

❓ Q&A Section

Q1: Can I freeze these?
A: Yes! Cool completely, wrap each in foil, and freeze up to 2 months. Reheat in the oven at 350°F for 20 minutes.

Q2: Can I use puff pastry instead of biscuits?
A: Absolutely. Puff pastry will give you a flakier, more buttery crust — just reduce baking time slightly (about 18–20 minutes).

Q3: What can I use instead of canned soup?
A: Make your own sauce with 1 tbsp butter, 1 tbsp flour, ½ cup milk, and ½ cup chicken broth, cooked until thickened.

Q4: Can I make them vegetarian?
A: Yes — replace chicken with sautéed mushrooms or chickpeas and use cream of mushroom soup.

Q5: Can I make a large version instead of minis?
A: Definitely. Use a 9-inch pie dish and bake for 30–35 minutes until golden.

Creamy Beef & Mushroom Rice Bake

Creamy Beef & Mushroom Rice Bake

Ingredients:

  • 1 lb ground beef

    • Provides the hearty base and protein for the dish.

  • 1 cup chopped mushrooms

    • Adds a savory, earthy flavor to complement the beef.

  • 1 small onion, diced

    • Provides sweetness and depth of flavor.

  • 1 cup uncooked white rice

    • Forms the base of the bake, soaking up all the creamy flavors.

  • 1 can (10.5 oz) cream of mushroom soup

    • Adds creaminess and a rich, savory flavor to bind the ingredients together.

  • 1 cup shredded cheese (cheddar, mozzarella, or a mix)

    • For a cheesy, melty topping that adds richness to the dish.

  • 1/2 cup beef broth (or water)

    • Adds moisture for cooking the rice and creating a creamy texture.

  • Salt and pepper to taste

    • For seasoning and balancing the flavors.

  • Optional: Fresh parsley

    • For garnish, adding a pop of color and freshness.

Instructions:

  1. Preheat the Oven:

    • Preheat your oven to 375°F (190°C).

  2. Cook the Ground Beef:

    • In a large skillet, cook the ground beef over medium heat until browned and fully cooked. Drain any excess fat.

  3. Sauté the Mushrooms and Onion:

    • Add the diced onion and chopped mushrooms to the skillet with the beef. Cook for 3-5 minutes until the mushrooms are softened and the onions are translucent.

  4. Prepare the Rice:

    • In a separate pot, cook the rice according to the package instructions, using the beef broth (or water) for added flavor.

  5. Mix the Ingredients:

    • In a large mixing bowl, combine the cooked beef, mushroom, and onion mixture with the cooked rice. Add the cream of mushroom soup and stir everything together until well combined. Season with salt and pepper to taste.

  6. Transfer to Baking Dish:

    • Transfer the mixture into a greased baking dish (about 9×9 or similar size).

  7. Top with Cheese:

    • Sprinkle the shredded cheese evenly over the top of the rice mixture.

  8. Bake:

    • Cover the dish with foil and bake in the preheated oven for 25-30 minutes. After 30 minutes, remove the foil and bake for an additional 10 minutes until the cheese is melted and bubbly.

  9. Serve:

    • Remove from the oven and let it sit for 5 minutes before serving. Garnish with fresh parsley if desired.

Benefits:

  • Protein-Packed: The ground beef provides a good amount of protein, making this a filling and satisfying meal.

  • Hearty and Comforting: The combination of beef, rice, mushrooms, and cheese creates a warm and hearty meal that’s perfect for cozy dinners.

  • Rich in Flavor: The cream of mushroom soup creates a rich, creamy texture that ties everything together with a savory flavor.

  • Mushrooms for Nutrients: Mushrooms are rich in vitamins and minerals, including vitamin D, potassium, and antioxidants.

Nutritional Info (Approximate per Serving):

  • Calories: 400-500 kcal

  • Carbohydrates: 30-40 g

  • Protein: 25-30 g

  • Fat: 20-25 g

  • Fiber: 2-4 g

  • Sodium: 800-1000 mg (depending on the soup and broth used)

Tips:

  • Rice Variations: Feel free to substitute the white rice with brown rice or a different grain, but adjust cooking times accordingly.

  • Cheese Options: Use any cheese you like for the topping. Cheddar adds a sharp flavor, while mozzarella gives a creamy melt.

  • Add Veggies: You can add extra vegetables like peas or spinach to make the dish even more nutritious.

  • Make it Spicy: For a kick, add some red pepper flakes or chopped jalapeños to the beef and mushroom mixture.

Frequently Asked Questions (Q/A):

Q1: Can I make this dish ahead of time?
A1: Yes! You can prepare the dish up to the point of baking, then cover and refrigerate it for up to 24 hours. When ready to bake, let it sit at room temperature for 10-15 minutes, then bake as directed.

Q2: Can I use ground turkey or chicken instead of beef?
A2: Yes, you can substitute ground turkey or chicken for a leaner option, though ground beef provides a richer flavor.

Q3: Can I freeze this bake?
A3: Yes! This dish freezes well. After baking, allow it to cool, then store it in an airtight container in the freezer for up to 3 months. Reheat in the oven when ready to serve.

Q4: Can I make this without mushrooms?
A4: Of course! If you’re not a fan of mushrooms, you can omit them or substitute with another vegetable like zucchini or bell peppers.

Ultra-Crispy Baked Cauliflower Bites (Better Than Meat!)

Ultra-Crispy Baked Cauliflower Bites (Better Than Meat!)

 Description

These baked cauliflower bites are crispy on the outside, tender on the inside, and packed with savory flavor. Roasted at high heat and coated in a seasoned crust, they’re perfect as a snack, side dish, or plant-based main. Even meat-lovers are surprised by how satisfying they are!

 Prep & Cook Time

  • Prep: 10 minutes

  • Cook: 30–35 minutes

  • Total: ~45 minutes

 Servings

4 servings

 Ingredients

Cauliflower

  • 1 large head of cauliflower (cut into bite-size florets)

  • 3 tablespoons olive oil

Seasoning & Coating

  • ½ cup breadcrumbs or panko (for extra crunch)

  • ¼ cup grated Parmesan cheese (optional but recommended)

  • 1 teaspoon garlic powder

  • 1 teaspoon smoked paprika (or regular paprika)

  • ½ teaspoon onion powder

  • ½ teaspoon salt (adjust to taste)

  • ¼ teaspoon black pepper

Optional Add-Ons

  • Pinch of chili flakes (for heat)

  • Fresh parsley (for garnish)

 Instructions

  1. Preheat oven to 425°F (220°C)
    Line a baking sheet with parchment paper.

  2. Prepare cauliflower
    Wash, dry thoroughly (very important for crispiness), and cut into evenly sized florets.

  3. Season
    In a large bowl, toss cauliflower with olive oil until well coated.

  4. Mix coating
    In a separate bowl, combine breadcrumbs, Parmesan, garlic powder, paprika, onion powder, salt, and pepper.

  5. Coat florets
    Toss cauliflower in the breadcrumb mixture, pressing lightly so the coating sticks.

  6. Bake
    Spread florets in a single layer (don’t overcrowd).
    Bake for 25–30 minutes, flipping halfway, until golden and crispy.

  7. Optional crisp boost
    Broil for 2–3 minutes at the end for extra crunch (watch closely).

  8. Serve hot
    Garnish with parsley and serve with your favorite dipping sauce.

Serving Suggestions

  • Garlic aioli

  • Spicy mayo

  • Yogurt-based ranch

  • Sweet chili sauce

Tips for Best Results

  • Dry cauliflower well – moisture prevents crisping

  • Use panko for extra crunch

  • Don’t overcrowd the pan – air circulation = crispiness

  • High heat is key – lower temps make it soft, not crispy

 Nutritional Information (Per Serving – Approx.)

  • Calories: 180–220 kcal

  • Protein: 7 g

  • Carbohydrates: 18 g

  • Fiber: 4 g

  • Fat: 10 g

  • Sodium: 300–350 mg

(Values vary depending on cheese and oil used)

 Health Benefits

  • Low-calorie, high-volume food – very filling

  • Rich in fiber – supports digestion

  • High in antioxidants – supports immunity

  • Plant-based & gluten-free adaptable

  • Great meat alternative – satisfying texture & umami flavor

Q & A

Q: Can I make this vegan?
Yes! Skip the Parmesan or use nutritional yeast or vegan cheese.

Q: Can I make it gluten-free?
Absolutely. Use gluten-free breadcrumbs or crushed rice crackers.

Q: Can I air-fry this instead?
Yes! Air fry at 375°F (190°C) for 15–18 minutes, shaking halfway.

Q: How do I store leftovers?
Store in an airtight container in the fridge for up to 3 days. Reheat in the oven or air fryer for crispiness.

Q: Why isn’t my cauliflower crispy?
Common causes: overcrowding, too much oil, or cauliflower not dried properly.

Golden-Brown Roasted Chicken Breasts with Mediterranean Stuffing

🍗 Golden-Brown Roasted Chicken Breasts with Mediterranean Stuffing

🌿 Description

These Golden-Brown Roasted Chicken Breasts are tender, juicy, and generously stuffed with a bold Mediterranean filling of feta, sun-dried tomatoes, Kalamata olives, pine nuts, and fresh herbs. Roasted to perfection, this dish delivers restaurant-quality flavor while staying simple, wholesome, and naturally satisfying.

📝 Ingredients

For the Chicken

  • 4 boneless, skinless chicken breasts
  • 2 tbsp olive oil
  • Salt and freshly ground black pepper, to taste
  • 1 tsp smoked paprika
  • 1 tsp garlic powder

For the Mediterranean Stuffing

  • ½ cup feta cheese, crumbled
  • ¼ cup sun-dried tomatoes, finely chopped
  • ¼ cup Kalamata olives, chopped
  • 2 tbsp pine nuts, toasted
  • 2 tbsp fresh parsley, chopped
  • 1 small garlic clove, minced

👩‍🍳 Instructions

  1. Preheat oven to 400°F (200°C). Lightly grease a baking dish.
  2. Prepare stuffing: In a bowl, mix feta, sun-dried tomatoes, olives, pine nuts, parsley, and minced garlic. Set aside.
  3. Prepare chicken: Using a sharp knife, carefully slice a pocket into the side of each chicken breast.
  4. Stuff chicken: Fill each pocket with the Mediterranean mixture, pressing gently to seal.
  5. Season: Brush chicken with olive oil, then season with salt, pepper, smoked paprika, and garlic powder.
  6. Roast: Place chicken in the baking dish and roast for 25–30 minutes, or until golden brown and internal temperature reaches 165°F (74°C).
  7. Rest & serve: Let rest for 5 minutes before serving.

⭐ Notes

  • Secure stuffed chicken with toothpicks if needed.
  • Use oil-packed sun-dried tomatoes for extra moisture.
  • Internal temperature is key for juicy chicken.

💡 Tips for Best Results

  • Pound chicken slightly for even thickness before stuffing.
  • Add lemon zest to the stuffing for extra brightness.
  • Broil for 2–3 minutes at the end for a crisp golden finish.
  • Serve with roasted vegetables, couscous, or a Greek salad.

🍽 Servings

Serves: 4
Serving Size: 1 stuffed chicken breast

🧮 Nutritional Information (Approx. per serving)

  • Calories: ~360 kcal
  • Protein: ~38 g
  • Fat: ~22 g
  • Carbohydrates: ~4 g
  • Fiber: ~1 g
  • Calcium: ~15% DV

(Values may vary depending on brands used)

🌟 Health Benefits

  • High-protein: Supports muscle strength and satiety
  • Mediterranean fats: Heart-healthy olive oil, olives, and pine nuts
  • Low-carb & gluten-free: Great for balanced eating
  • Calcium-rich: Thanks to feta cheese

❓ Q & A

Q: Can I make this ahead of time?
A: Yes! Stuff the chicken up to 24 hours ahead and refrigerate until ready to roast.

Q: Can I use chicken thighs instead?
A: Yes, boneless thighs work well but may need a slightly longer cook time.

Q: What can I substitute for feta?
A: Goat cheese or ricotta salata are great alternatives.

Q: Is this keto-friendly?
A: Yes, it’s naturally low-carb and keto-approved.

Baked Pears with Berries, Honey & Blue Cheese

Baked Pears with Berries, Honey & Blue Cheese

Ingredients

  • 3 ripe pears (Bosc or Bartlett), halved and cored

  • 2 tbsp butter, melted

  • 2 tbsp honey

  • 1/2 cup fresh berries (blueberries and raspberries)

  • 1/4 cup walnuts, chopped

  • 2-3 tbsp blue cheese, crumbled

  • Fresh thyme sprigs (for garnish)

Instructions

  1. Preheat your oven to 375°F (190°C).

  2. Prep: Place the pear halves cut-side up in a baking dish. Brush them evenly with the melted butter and drizzle with half of the honey.

  3. First Bake: Bake for 15–20 minutes until the pears begin to soften.

  4. Assemble: Remove from the oven. Fill the centers with the berries, chopped walnuts, and crumbled blue cheese.

  5. Final Roast: Drizzle with the remaining honey and bake for another 5–10 minutes until the cheese is slightly softened and the berries are juicy.

  6. Serve: Garnish with fresh thyme and serve warm.


Social Media Caption

Elevate your dessert game with these Sweet & Savory Baked Pears! 🍐✨

If you’re looking for a simple yet sophisticated treat, this is it. Ripe, buttery pears roasted with fresh berries, crunchy walnuts, and a bold kick of blue cheese. It’s the perfect balance of flavors that feels like a gourmet restaurant dish made right in your kitchen.

Perfect for a cozy night in or a quick weekend treat! 🍯🧀

Strawberry Banana Nice Cream (Healthy 2-Ingredient Ice Cream)

Strawberry Banana Nice Cream (Healthy 2-Ingredient Ice Cream)

Ingredients

  • 2 large ripe bananas, sliced and frozen

  • 1–1½ cups strawberries, hulled, halved, and frozen

  • Optional: 1–3 tbsp milk (dairy or plant-based) for easier blending

  • Optional: honey or agave, to taste

👩‍🍳 Instructions

1. Freeze the fruit
Peel and slice the bananas. Hull and halve the strawberries. Spread in a single layer on a parchment-lined tray so pieces don’t stick together. Freeze at least 4 hours or overnight until completely solid.

2. Blend until creamy
Add frozen bananas and strawberries to a food processor or high-powered blender. Blend, stopping occasionally to scrape down the sides. At first it will look crumbly, then thick, and finally smooth and creamy. Add a splash of milk only if needed to help it move.

3. Serve or firm up
Serve immediately for a soft-serve texture, or transfer to a container and freeze 1–4 hours for scoopable ice cream.

4. Garnish (optional)
Top with fresh berries, granola, coconut flakes, or a drizzle of chocolate.

💡 Tips

  • Use very ripe bananas for natural sweetness.

  • Don’t over-add liquid — it melts the texture.

  • Store up to 1 week in the freezer; let sit 5 minutes before scooping.

A refreshing, dairy-free, naturally sweet treat ready in minutes!

🥭 Creamy Mango Lassi

🥭 Creamy Mango Lassi

Prep time: 5 minutes | Servings: 2

Ingredients

  • 2 cups Fresh mango (peeled and chopped) or canned mango pulp

  • 1 cup Plain Greek yogurt (or full-fat yogurt for extra creaminess)

  • ½ cup Milk (whole milk or a plant-based alternative like coconut milk)

  • 2-3 tsp Honey or sugar (adjust based on the sweetness of the mango)

  • ¼ tsp Ground cardamom (optional, but highly recommended for that authentic flavor)

  • Ice cubes (optional, for a chilled texture)


Instructions

  1. Blend: Add the chopped mango, yogurt, milk, sweetener, and cardamom into a blender.

  2. Smooth: Blend on high speed until the mixture is completely smooth and frothy.

  3. Adjust: If the lassi is too thick, add a splash more milk. If you want it colder, toss in a few ice cubes and blend again.

  4. Garnish: Pour into glasses. To match the image, thread a few fresh mango cubes onto a small skewer and rest it across the rim.


💡 Pro-Tips for the Best Lassi

  • Mango Choice: If using fresh fruit, look for varieties like Alphonso or Honey (Ataulfo) mangos; they are less fibrous and naturally sweeter.

  • The “Twist”: Add a tiny drop of rose water for a floral aroma that pairs beautifully with the mango.

  • Vegan Option: Use coconut yogurt and almond milk for a dairy-free version that still tastes rich and tropical.

Fluffy Turkish Bread

Introduction

Soft, warm, and beautifully golden, this Fluffy Turkish Bread is a true delight for any meal. Known as Bazlama or Pide, this bread has a light, airy texture with a tender interior that feels almost cloud-like. Whether you’re serving it with dips, soups, or grilled dishes, this easy homemade bread adds a delicious Mediterranean touch to your table.

Ingredients

  • 3 cups (375 g) all-purpose flour

  • 1 tablespoon sugar

  • 1 teaspoon salt

  • 2¼ teaspoons (7 g) instant dry yeast

  • ¾ cup (180 ml) warm milk

    ADVERTISEMENT

  • ¼ cup (60 ml) warm water

  • 3 tablespoons olive oil

Optional Topping

  • 1 egg yolk

  • 1 tablespoon milk

  • Sesame or nigella seeds

    ADVERTISEMENT

Directions

  1. Activate the yeast:
    In a large bowl, combine warm milk, warm water, sugar, and yeast.
    Let sit for 5–7 minutes until foamy.

  2. Form the dough:
    Add olive oil and salt, then gradually mix in flour until a soft dough forms.

  3. Knead the dough:
    Transfer to a floured surface and knead for 8–10 minutes until smooth and elastic.

  4. First rise:
    Place the dough in a greased bowl, cover, and let rise in a warm place for about 1 hour, or until doubled in size.

  5. Shape the bread:
    Divide the dough into two portions and shape into rounds or ovals.

    ADVERTISEMENT

  6. Add topping (optional):
    Brush with a mixture of egg yolk and milk, then sprinkle with sesame or nigella seeds.

  7. Bake:
    Preheat oven to 425°F (220°C) and bake for 10–12 minutes until puffed and lightly golden.

  8. Rest and serve:
    Remove from the oven and cover with a clean towel for a few minutes to keep the bread soft.

Tips for Best Results

  • Use warm (not hot) liquids to activate yeast properly.

  • Knead well to develop a soft and elastic dough.

    ADVERTISEMENT

  • Bake at high heat for that signature puffed texture.

  • Serve warm for the best flavor and softness.

Conclusion

This Fluffy Turkish Bread is simple, versatile, and incredibly satisfying. With its soft interior and golden crust, it’s perfect for dipping, wrapping, or enjoying on its own. Try it once, and you’ll love bringing this homemade bread to your table again and again!

Creamy Banana & Oat Breakfast Smoothie

Creamy Banana & Oat Breakfast Smoothie

This recipe is perfect for a quick breakfast or a post-workout snack. It’s naturally sweet, filling, and takes less than 5 minutes to make.

Ingredients

  • 1 large banana (frozen slices work best for a thicker texture)

  • 1/4 cup rolled oats (gives it that hearty, “oatmeal in a glass” feel)

  • 1 cup milk of choice (dairy, almond, oat, or soy)

  • 1 tbsp honey (adjust to your sweetness preference)

  • 1/4 tsp vanilla extract (optional, for extra flavor)

  • A pinch of cinnamon (optional)

  • Ice cubes (if using a fresh banana)

For Garnish:

  • Extra rolled oats

  • A fresh mint sprig

  • A banana slice


Instructions

  1. Prep the Oats: For a smoother texture, you can pulse the dry oats in the blender first to turn them into a fine powder before adding other ingredients.

  2. Combine: Add the banana, milk, honey, vanilla, and cinnamon into the blender.

  3. Blend: Blitz on high speed until the mixture is completely smooth and creamy. If it feels too thick, add a splash more milk; if it’s too thin, add a few more oats or ice.

  4. Serve: Pour into a tall glass.

  5. Decorate: Top with a sprinkle of dry oats and a sprig of mint, and slide a banana slice onto the rim just like in your photo.


Quick Tips for the Best Smoothie

  • Make it Vegan: Swap the honey for maple syrup or a pitted date.

  • Add Protein: Stir in a spoonful of Greek yogurt or a scoop of your favorite protein powder.

  • Boost the Fiber: Add a teaspoon of chia seeds or flaxseeds before blending.

Healthy Banana Oat Cookies Recipe

Healthy Banana Oat Cookies Recipe

These Healthy Banana Oat Cookies are a delicious and nutritious snack, combining the natural sweetness of bananas with the wholesome goodness of oats. They’re simple to make, and you can customize them with your favorite nuts or dried fruits. Best of all, they’re a guilt-free treat you can enjoy anytime!

Ingredients:

  • 2 ripe bananas
  • 250 grams oat flakes (you can use gluten-free oats if needed)
  • 1 teaspoon baking powder or baking soda
  • 40 grams cashew nuts (or any nuts of your choice, optional)

Instructions:

1. Prepare the Bananas:

  • In a mixing bowl, mash the ripe bananas using a fork or potato masher until they are smooth and creamy. Make sure to mash the bananas well to avoid any large chunks in the cookies.

2. Combine Dry Ingredients:

  • Add the oat flakesbaking powder (or baking soda), and cashew nuts (or other nuts of your choice, such as almonds, walnuts, or pecans) into the mashed bananas.
  • Mix well until all ingredients are evenly combined. You should have a thick dough that holds together.

3. Shape the Cookies:

  • Preheat your oven to 180°C (350°F) and line a baking sheet with parchment paper or a silicone baking mat.
  • Using your hands or a spoon, shape the dough into small, round cookies. Place them on the prepared baking sheet, leaving some space between each cookie to allow for spreading as they bake.

4. Bake the Cookies:

  • Bake the cookies in the preheated oven for about 30 minutes, or until they are golden brown and firm to the touch.
  • Check the cookies after 20 minutes to make sure they’re not overbaking. If they’re starting to get too brown, you can remove them earlier.

5. Serve and Enjoy:

  • Once done, remove the cookies from the oven and let them cool slightly on the baking sheet for a few minutes.
  • Transfer them to a wire rack to cool completely before serving.
  • Enjoy these healthy and tasty banana oat cookies as a snack, breakfast, or dessert!

Nutritional Information:

These cookies are made with nutritious ingredients, and here’s why they’re so good for you:

  • Bananas provide natural sweetness, potassium, and fiber.
  • Oat flakes are a great source of fiber and protein, which help in digestion and provide lasting energy.
  • Cashew nuts (or other nuts) add healthy fats and protein, promoting heart health and fullness.
  • These cookies are naturally sweetened, so they’re a great option if you’re looking to reduce refined sugar intake.

Dietary Information:

  • Vegan-Friendly: This recipe is vegan if you skip using honey or any other non-vegan ingredients.
  • Gluten-Free Option: Ensure that the oat flakes you use are certified gluten-free to make this recipe gluten-free.

Storage:

  • Store the cooled cookies in an airtight container at room temperature for up to 3-4 days.
  • If you want to store them for a longer period, you can freeze the cookies. Place them in a freezer-safe container or bag, and thaw before consuming.

Why You’ll Love These Cookies:

  • Healthy Snack: Packed with fiber from oats and nutrients from bananas, these cookies are a wholesome snack.
  • Easy to Make: With minimal ingredients and simple preparation, these cookies are a breeze to make.
  • Customizable: Add your favorite nuts, seeds, or dried fruits to make these cookies your own. Try adding chocolate chips, cranberries, or raisins for variety.
  • Great for Weight Management: These cookies are naturally sweetened, high in fiber, and provide healthy fats, making them a great snack for weight management when eaten in moderation.

FAQs (Q/A)

1. Can I use other fruits instead of bananas?

  • Yes! While bananas provide the natural sweetness and moisture needed in this recipe, you can experiment with other fruits like applesauce or pumpkin puree. Just keep in mind that this may slightly change the texture and flavor of the cookies.

2. Can I use other types of nuts?

  • Absolutely! You can swap cashew nuts for other nuts like almondspecans, or walnuts based on your preference. You can also skip the nuts entirely if you prefer a nut-free version.

3. How can I make these cookies sweeter?

  • If you prefer sweeter cookies, you can add a bit of maple syrupagave syrup, or a small amount of stevia or coconut sugar to the mixture. Adjust according to your sweetness preference.

4. Can I make these cookies gluten-free?

  • Yes! To make these cookies gluten-free, just ensure that the oat flakes you use are certified gluten-free. The rest of the ingredients are naturally gluten-free.

5. Can I add chocolate chips or dried fruits to these cookies?

  • Definitely! You can mix in a handful of chocolate chipsraisinsdried cranberries, or even dried apricots for added flavor and texture. Just make sure to adjust the quantity of oats to maintain the right consistency for the dough.

6. How long can I store the cookies?

  • These cookies will stay fresh at room temperature for up to 3-4 days in an airtight container. You can also freeze them for longer storage. Just thaw and enjoy!

Conclusion:

These Healthy Banana Oat Cookies are a delightful treat that is both nutritious and delicious. They are perfect for a quick snack, breakfast, or dessert, and the best part is that they’re easy to make and customizable to your preferences. Packed with the goodness of oats and bananas, these cookies are a great way to indulge in a healthier treat. Give them a try, and enjoy a guilt-free moment!

Holiday Flatbreads with Warm Cheese Ball Spread & Pecan Crunch

Holiday Flatbreads with Warm Cheese Ball Spread & Pecan Crunch

Ingredients:

For the Flatbreads:

2 store-bought naan or flatbreads

1 tbsp olive oil

½ tsp garlic powder

½ tsp dried thyme or rosemary

For the Warm Cheese Ball Spread:

8 oz (225g) cream cheese, softened

1 cup shredded sharp cheddar cheese

¼ cup crumbled feta or goat cheese

1 tbsp honey or maple syrup

1 tsp Dijon mustard

¼ tsp cayenne pepper (optional)

Salt and black pepper, to taste

For the Pecan Crunch Topping:

½ cup chopped pecans

1 tbsp butter

1 tbsp brown sugar or honey

Pinch of sea salt

For Garnish:

Fresh thyme or rosemary leaves

Drizzle of honey or balsamic glaze

Directions:

Prepare the Flatbreads:

Preheat oven to 375°F (190°C).

Brush flatbreads lightly with olive oil and sprinkle with garlic powder and herbs.

Bake for 6–8 minutes, until lightly crisp around the edges.

Make the Warm Cheese Spread:

In a bowl, combine cream cheese, cheddar, feta (or goat cheese), honey, mustard, cayenne, salt, and pepper.

Beat until smooth and fluffy.

Transfer to an oven-safe dish and bake for 10–12 minutes, until warm and slightly golden on top.

Prepare the Pecan Crunch:

In a small skillet, melt butter over medium heat.

Add pecans, brown sugar (or honey), and a pinch of salt.

Stir until nuts are caramelized and fragrant, about 3 minutes.

Spread on parchment to cool slightly.

Assemble:

Spread warm cheese mixture onto flatbreads or serve in a bowl for dipping.

Top with pecan crunch and drizzle with honey or balsamic glaze.

Garnish with fresh herbs for a festive finish.

Serve:

Slice flatbreads into wedges and serve warm.

Perfect for holiday gatherings or cozy winter evenings.

Nutritional Information (per serving, approx. 6 servings):

Calories: 420 kcal

Protein: 11g

Fat: 31g

Carbohydrates: 28g

Fiber: 2g

No-Knead Rosemary Cranberry Bread with Olive Oil & Sea Salt

No-Knead Rosemary Cranberry Bread with Olive Oil & Sea Salt
Ingredients:
3 cups all-purpose flour
1 ½ tsp salt
½ tsp active dry yeast
1 ½ cups warm water
¾ cup dried cranberries
1 tbsp chopped fresh rosemary (or 1 tsp dried)
1 tbsp olive oil (plus more for drizzling)
Flaky sea salt, for topping
Directions:
In a large mixing bowl, stir together flour, salt, yeast, cranberries, and rosemary. Add warm water and mix until a shaggy dough forms. Cover with plastic wrap or a damp towel and let rest at room temperature for 12–18 hours.
Preheat oven to 450°F (230°C). Place a Dutch oven or heavy pot with a lid inside to heat for 30 minutes. Turn the dough out onto a floured surface and shape into a ball. Carefully place it into the hot pot, drizzle with olive oil, and sprinkle with flaky sea salt.
Cover and bake for 30 minutes. Remove lid and bake another 10–15 minutes until golden brown and crusty. Cool before slicing and serving with more olive oil or butter if desired.
Prep Time: 10 minutes (plus overnight rise)
Cooking Time: 40–45 minutes
Total Time: ~13–18 hours
Kcal: Approximately 180 per slice
Servings: 10–12 slices

Magic Tomato Salad – The Most Delicious Appetizer!

Magic Tomato Salad – The Most Delicious Appetizer!

This Magic Tomato Salad is the perfect appetizer to start any meal. With its vibrant flavors and refreshing ingredients, it’s sure to leave a lasting impression on your guests. The combination of juicy tomatoes, aromatic herbs, and a tangy dressing makes it an unforgettable dish. The best part? It’s quick, easy, and requires just a handful of ingredients.

Preparation Time:

  • Prep Time: 15 minutes
  • Refrigeration Time: 2-3 hours
  • Total Time: 2 hours 15 minutes (including refrigeration)

Servings:

  • 4-6 servings

ingredients:

  • 800-900 grams of tomatoes (around 5-6 medium-sized tomatoes)
  • 50 ml olive oil
  • 25 ml 9% vinegar (or apple cider vinegar)
  • 30 ml water
  • 1 teaspoon salt (adjust to taste)
  • 3 teaspoons sugar
  • 1 bell pepper (any color, finely chopped)
  • 1/2 chili pepper (seeds removed, finely chopped for a mild heat)
  • 6 cloves garlic (minced)
  • A bunch of fresh dill (chopped)
  • A bunch of fresh parsley (chopped)

Instructions:

Step 1: Slice the Tomatoes

  • Begin by slicing the tomatoes into thin rounds (about 1/4 inch thick).
  • Arrange the sliced tomatoes on a serving platter or in a large shallow dish.

Step 2: Prepare the Dressing

  • In a mixing bowl, combine:
    • 50 ml olive oil
    • 25 ml vinegar (9% or apple cider vinegar works well)
    • 30 ml water
    • 1 teaspoon salt
    • 3 teaspoons sugar
  • Whisk these ingredients together until the sugar and salt are dissolved and the dressing is well combined.

Step 3: Add the Flavorful Components

  • Finely chop:
    • 1 bell pepper (sweet or mild variety)
    • 1/2 chili pepper (adjust based on desired heat level)
    • 6 cloves garlic (minced)
  • Add these chopped ingredients to the prepared dressing mixture and stir to combine. The pepper and garlic will infuse the dressing with an extra punch of flavor.

Step 4: Dress the Tomatoes

  • Pour the prepared dressing mixture over the sliced tomatoes, ensuring they are evenly coated with the flavorful liquid.

Step 5: Add Fresh Herbs

  • Sprinkle the chopped dill and parsley generously over the top of the tomatoes. These fresh herbs will add a burst of flavor and color to the dish.

Step 6: Let the Salad Marinate

  • Refrigerate the salad for 2-3 hours to allow the flavors to meld together and the tomatoes to soak up the dressing. The longer it sits, the more flavorful it will become.

Step 7: Serve

  • After marinating, serve the Magic Tomato Salad chilled as a refreshing and tangy appetizer to complement your meal.

Tips:

  • Customize the Heat: If you prefer a spicier version, you can add more chili pepper or even a dash of hot sauce to the dressing.
  • Use Heirloom Tomatoes: For extra flavor and color, try using heirloom or cherry tomatoes, which offer a range of tastes and textures.
  • Make It Ahead: You can prepare this salad a few hours in advance to let the flavors fully develop, making it the perfect dish for meal prep or gatherings.

Health Benefits:

  • Tomatoes: Rich in vitamin C, potassium, and antioxidants, tomatoes help support heart health, reduce inflammation, and promote glowing skin.
  • Olive Oil: A healthy fat source that is rich in monounsaturated fats and antioxidants, olive oil supports heart health and has anti-inflammatory properties.
  • Garlic: Known for its immune-boosting and anti-inflammatory properties, garlic helps with digestion and may reduce the risk of chronic diseases.
  • Herbs: Dill and parsley are both rich in vitamins and antioxidants that support digestive health and provide anti-inflammatory benefits.

Why You’ll Love This Salad:

  • Quick and Easy: With just a few simple ingredients, this salad comes together in minutes.
  • Vibrant Flavors: The tangy dressing, fresh herbs, and crunchy vegetables create a balanced and flavorful appetizer.
  • Refreshing: Perfect for warm weather or as a side dish to complement heavier meals, this salad is light yet satisfying.

Enjoy your Magic Tomato Salad as a delicious and refreshing start to any meal. It’s sure to become a favorite in your recipe collection!

Mediterranean Garden Slaw with Creamy Lemon-Tahini Dressing

Mediterranean Garden Slaw with Creamy Lemon-Tahini Dressing

Mediterranean Garden Slaw with Creamy Lemon-Tahini Dressing is a bright, crunchy, and nourishing salad that celebrates fresh vegetables and bold, wholesome flavors. This slaw is light yet satisfying, making it perfect as a side dish, a light lunch, or a refreshing companion to grilled meats and plant-based mains. The creamy tahini dressing adds richness without heaviness, while lemon and garlic bring a lively, zesty finish. Every bite is crisp, colorful, and packed with texture.

Ingredients

For the Slaw

  • 2 cups shredded green cabbage

  • 1 cup shredded purple cabbage

  • 1 large carrot, grated

  • ½ cucumber, julienned or thinly sliced

  • ½ red bell pepper, thinly sliced

  • 2 tablespoons fresh parsley, finely chopped

  • 1 tablespoon fresh mint, chopped (optional)

  • 2 tablespoons toasted sunflower seeds or sliced almonds (optional, for crunch)

For the Creamy Lemon-Tahini Dressing

  • 3 tablespoons tahini

  • 2 tablespoons fresh lemon juice

  • 1 tablespoon olive oil

  • 1 small garlic clove, minced

  • 1–2 tablespoons warm water, as needed

  • 1 teaspoon honey or maple syrup

  • Salt and black pepper, to taste

Instructions

  1. Prepare the vegetables
    Start by washing and drying all your vegetables thoroughly. Shred the green and purple cabbage finely for the best texture. Grate the carrot, slice the cucumber into thin matchsticks or rounds, and cut the bell pepper into thin strips. Place all prepared vegetables into a large mixing bowl.

  2. Add fresh herbs and crunch
    Sprinkle the chopped parsley and mint over the vegetables. If using sunflower seeds or almonds, add them now for extra texture and nutty flavor. Gently toss the slaw to distribute everything evenly.

  3. Make the lemon-tahini dressing
    In a small bowl, whisk together the tahini and lemon juice until smooth. Add olive oil, minced garlic, honey or maple syrup, salt, and black pepper. Slowly whisk in warm water, one tablespoon at a time, until the dressing becomes creamy and pourable. Taste and adjust seasoning as needed.

  4. Combine and toss
    Pour the dressing over the slaw. Using tongs or clean hands, toss everything together until the vegetables are evenly coated with the dressing. The slaw should look glossy but not overdressed.

  5. Rest and serve
    For the best flavor, allow the slaw to rest for 10–15 minutes before serving. This brief resting time helps soften the cabbage slightly and allows the flavors to blend beautifully.

Serving Suggestions

This Mediterranean garden slaw pairs wonderfully with grilled chicken, fish, or shrimp. It’s also excellent alongside falafel, roasted vegetables, or stuffed into warm pita bread. Serve it as a refreshing side at picnics, barbecues, or family dinners, or enjoy it as part of a grain bowl with quinoa or couscous.

Tips & Variations

  • Add chickpeas or lentils for a plant-based protein boost.

  • For extra creaminess, mix a spoonful of Greek yogurt into the dressing (not vegan).

  • Store leftovers in the refrigerator for up to 24 hours; toss again before serving.

This Mediterranean slaw is crisp, creamy, and endlessly versatile—an easy, healthy dish you’ll come back to again and again. 🥗✨

tasty Taco Casserole

Sure! Here’s a tasty Taco Casserole recipe for you:
Ingredients:
– 1 lb ground beef (or turkey)
– 1 onion, chopped
– 2 cloves garlic, minced
– 1 packet taco seasoning
– 1 can (15 oz) black beans, drained and rinsed
– 1 can (15 oz) corn, drained
– 1 can (10 oz) diced tomatoes with green chilies
– 2 cups tortilla chips, crushed
– 2 cups shredded cheese (cheddar or Mexican blend)
– 1/2 cup sour cream (optional)
– Chopped green onions or cilantro for garnish (optional)
Instructions:
1. Preheat the Oven:
– Preheat your oven to 350°F (175°C).
2. Cook the Meat:
– In a large skillet, cook the ground beef (or turkey) over medium heat until browned. Drain excess fat if necessary. Add the chopped onion and minced garlic, cooking until the onion is translucent.
3. Add Seasoning and Ingredients:
– Stir in the taco seasoning, black beans, corn, and diced tomatoes. Cook for another 5 minutes, allowing the flavors to combine.
4. Layer the Casserole:
– In a greased baking dish, layer half of the crushed tortilla chips at the bottom. Pour half of the meat mixture over the chips, then sprinkle with half of the cheese. Repeat the layers with the remaining chips, meat mixture, and cheese.
5. Bake:
– Cover the casserole with aluminum foil and bake for about 20 minutes. Remove the foil and bake for an additional 10-15 minutes, or until the cheese is bubbly and golden.
6. Serve:
– Let it cool for a few minutes before serving. Top with sour cream, chopped green onions, or cilantro if desired.
Here are the recipes 🥰

Creamy 3-layer dessert: the perfect recipe to serve at the holidays

Hi, everyone, today we’re going to learn how to make a creamy dessert using simple ingredients. So grab your pen and paper to jot down the ingredients, then follow the complete preparation method.

How to Make Creamy 3-layer dessert

Practical and delicious, the creamy dessert in a glass dish can be made ahead of time, giving you more moments to enjoy special occasions. See below the list of all ingredients and required quantities. And then, a very complete preparation method with details of the recipe.

Recipe Ingredients:

Chocolate Cream:

  • 1 cup of grated milk chocolate
  • 1 cup of milk
  • 1 carton of heavy cream (8 oz)
  • 1 tablespoon of cornstarch
  • 1 can of sweetened condensed milk (14 oz)

Passion Fruit Cream:

  • 1 can of sweetened condensed milk (14 oz)
  • 1 cup of concentrated passion fruit juice
  • 1 tablespoon of cornstarch
  • 1 carton of heavy cream (8 oz)

Lime Cream:

  • Juice of 3 limes (about 1/3 cup)
  • 1 can of sweetened condensed milk (14 oz)

Instructions:

First, prepare the passion fruit cream:

In a saucepan, mix the sweetened condensed milk with the cornstarch until completely dissolved. Then, add the passion fruit juice and heavy cream.

Cook over medium heat, stirring constantly, until the mixture thickens and becomes smooth.

Remove from heat and pour into a glass dish, spreading evenly. Cover with plastic wrap and refrigerate.

Next, make the chocolate cream:

Dissolve the cornstarch in the milk in a bowl and set aside. After that, melt the grated chocolate with the heavy cream in a saucepan over low heat.

Remove from heat, add the cornstarch and milk mixture, and the sweetened condensed milk.

Cook again over low heat, stirring, until it thickens and becomes glossy.

Let cool slightly, then pour over the passion fruit cream in the glass dish. Spread evenly and return to the refrigerator.

Easy Dessert with 3 Simple Ingredients, in 10 Minutes

Hi everyone, today we’re going to learn how to make Easy Dessert Recipe using simple ingredients. So grab your pen and paper to jot down the ingredients, then follow the complete preparation method.

How to Make Easy Dessert

It has good yield and uses 3 simple ingredients. See below the list of all ingredients and required quantities. And then, a very complete preparation method with details of the recipe.

Recipe Ingredients:

  • 1 envelope of pineapple gelatina (25 grams/0.88 oz)
  • 400 grams/14.1 oz of cream
  • 300 ml/10.1 fl oz  of hot water

Method of preparation:

Start by organizing the 3 ingredients listed, then use a bowl to add the pineapple gelatin and 300 ml of hot water.

Then, mix well until completely dissolved and place the dissolved gelatin in the blender. And then add the cream and beat until smooth.

And finally, place the mixture on a plate, refrigerate for about 3 hours (or until set), decorate with chocolate (optional) and serve.

Creamy Pie with a Special 4-Milk Cream: Wonderful Recipe-I Always Make It for Dessert

Hi, everyone! Welcome back to our cooking blog, where we share delicious recipes every week. Today, we’re preparing a Creamy Pie. So, grab your pen and paper to jot down the ingredients and let’s dive into this easy, step-by-step recipe that’s perfect for breakfast, appetizers or even to accompany fresh salads!

How to Make Creamy Pie with a Special 4-Milk Cream

The Creamy Pie is an irresistible dessert with a smooth texture and rich flavor—perfect for ending a meal in style. You don’t need cooking classes or costly meal delivery services to prepare something delicious at home. With a bit of planning and our detailed meal prep guide, you can create amazing dishes with confidence and ease.

Recipe Ingredients:

For the Four-Milk Cream:

  • 1 2/3 cups milk (13.5 fl oz / 400ml)
  • 1 carton of table cream or heavy cream (7 oz / 200g)
  • 1 can sweetened condensed milk (14 oz / 395g)
  • 1 small bottle of coconut milk (6.8 fl oz / 200ml)
  • 4 tablespoons powdered milk (about 1 oz / 30g)
  • 3 tablespoons cornstarch (about 1 oz / 25g)

For the Biscuit Crumble:

  • 2 tablespoons melted butter (about 1 oz / 30g)
  • 4.6 oz milk biscuits or cookies (130g)

For Assembly:

  • Whipped cream, beaten to stiff peaks, to taste
  • 3.5 oz chopped white chocolate (100g)

Instructions:

Four Milk Cream:
First, in a saucepan, add the cornstarch, powdered milk, and sweetened condensed milk. Stir well until everything is fully dissolved.
Next, add the coconut milk, heavy cream, and regular milk. Mix again until smooth. Then, place the mixture over low heat, stirring constantly until it starts to boil and thickens.
After that, let it cook for another 2 minutes to ensure it’s well done. Finally, remove from heat and allow it to cool to room temperature before using.

Cookie Crumb Mixture:
To start, place the cookies in a food processor and blend until you get a fine crumb texture.
Then, add the melted butter and blend a little more until you have a moist crumb mixture.

Assembly:
In a glass baking dish, spread half of the cream evenly. After that, make a layer with the cookie crumbs and then a layer of chopped white chocolate.
Next, add the remaining cream on top, spreading it gently. Lastly, top it with whipped cream beaten to stiff peaks and sprinkle a bit more of the cookie crumbs on top to decorate.
To finish, refrigerate for at least 3 hours. Serve this creamy and beautiful Belgian-style dessert well chilled!

Mediterranean Crockpot “Marry Me” Chicken Macaroni Soup

Mediterranean Crockpot “Marry Me” Chicken Macaroni Soup

Total Time: 4–6 hours (hands-off slow cooker recipe)
Servings: 6

This Mediterranean Crockpot Marry Me Chicken Macaroni Soup combines the comforting creaminess of a classic “marry me” chicken with the heartiness of pasta soup. It’s rich, savory, and infused with Mediterranean ingredients like sun-dried tomatoes, spinach, and olive oil. The slow cooker makes it easy—just toss in your ingredients, let the flavors blend, and come back to a bowl of cozy, creamy perfection. It’s a family-friendly dinner that tastes like it simmered all day (because it did).

Ingredients

Main Ingredients

1 lb (450 g) boneless, skinless chicken breasts

6 cups chicken broth

1½ cups dry macaroni or other small pasta

1 tablespoon olive oil

1 medium onion, chopped

3 cloves garlic, minced

2 carrots, peeled and diced

1 cup spinach, roughly chopped

½ cup sun-dried tomatoes, chopped

1 tablespoon tomato paste

1 cup cream or heavy cream

½ cup grated Parmesan cheese

Seasonings & Spices

1 teaspoon salt (adjust to taste)

½ teaspoon black pepper

1½ teaspoons Italian seasoning

¼ teaspoon red pepper flakes (optional, for a mild kick)

½ teaspoon dried parsley

½ teaspoon thyme

Instructions

Sauté Aromatics (optional but adds flavor):
Heat olive oil in a skillet over medium heat. Add the onion, garlic, and carrots. Sauté for 3–4 minutes until fragrant and lightly softened. Transfer to your slow cooker.

Add Chicken and Base Ingredients:
Place the chicken breasts in the crockpot. Add chicken broth, sun-dried tomatoes, tomato paste, Italian seasoning, thyme, parsley, salt, and pepper. Stir to combine.

Slow Cook:
Cover and cook on Low for 5–6 hours or High for 2½–3 hours, until the chicken is fully cooked and tender.

Shred the Chicken:
Remove the chicken from the slow cooker, shred it using two forks, and return it to the pot.

Add the Pasta:
Stir in the dry macaroni. Cook on High for 20–25 minutes, or until the pasta is tender. Stir occasionally to prevent sticking.

Add Cream & Spinach:
Pour in the cream and add the chopped spinach. Stir gently and let it heat through for about 5 minutes until the soup becomes creamy and the spinach wilts.

Finish with Parmesan:
Stir in Parmesan cheese right before serving. Taste and adjust seasoning if needed.

Serve:
Ladle into bowls and drizzle lightly with olive oil or sprinkle with extra Parmesan and red pepper flakes for garnish.

Tips & Variations

Boost the Flavor Base:
While optional, sautéing the onion, garlic, and carrots before adding them to the slow cooker deepens the flavor and adds a slightly caramelized note. If you’re short on time, skip this step—but it’s worth doing if you can.

Chicken Options:

Boneless chicken thighs can replace breasts for a richer flavor and tender texture.

You can also use rotisserie chicken—just add it during the final 30 minutes of cooking to avoid overcooking.

Pasta Tips:

Add the pasta near the end to keep it from getting mushy.

If you plan to store leftovers, cook the pasta separately and add it to individual portions when serving.

Any small pasta like ditalini, small shells, or elbow macaroni works well.

Make It Creamier:
For a more indulgent soup, stir in an extra ¼ cup of cream or a small spoon of cream cheese near the end. If you prefer it lighter, use half-and-half or evaporated milk instead of heavy cream.

Adjusting Thickness:
If the soup thickens too much after adding pasta and cheese, simply stir in more chicken broth until it reaches your desired consistency.

Extra Mediterranean Flair:
Add chopped roasted red peppers, artichoke hearts, or a few Kalamata olives for more depth and color. Fresh herbs like basil, parsley, or oregano can be stirred in before serving for brightness.

Spice Level:
The red pepper flakes give just a touch of warmth. Increase or omit them depending on your taste. You can also add a pinch of smoked paprika for a hint of depth.

Dairy-Free Option:
Use coconut milk instead of cream and skip the Parmesan. Add a spoonful of nutritional yeast for a cheesy flavor.

Serving Ideas:
Serve with warm pita bread, toasted baguette slices, or homemade pita chips on the side. A squeeze of lemon right before serving brightens the flavors beautifully.

Storage & Reheating:
Store leftovers in an airtight container in the fridge for up to 3 days. The pasta will absorb some liquid, so add a splash of broth or water when reheating. For longer storage, freeze the soup without pasta for up to 2 months.

Q&A

Q: Can I cook the pasta separately and add it later?
Yes, that’s a great option if you’re making the soup ahead or want to freeze it. Add cooked pasta to individual bowls just before serving to keep it from getting soggy.

Q: Can I use milk instead of cream?
You can, but the soup will be less rich. To keep it creamy, use whole milk or add a small spoon of cream cheese or Greek yogurt at the end.

Q: What other vegetables work in this soup?
You can include chopped zucchini, celery, peas, or even diced sweet peppers. Just make sure they’re added early enough to soften during cooking.

Q: Can I make this on the stovetop instead of a crockpot?
Yes. Sauté the vegetables, then add the broth, chicken, and seasonings. Simmer covered for 20–25 minutes until the chicken is cooked, then shred it, add pasta, and finish with cream, spinach, and Parmesan.

Q: How can I make it more “Mediterranean”?
Add chopped olives, roasted red peppers, or a handful of fresh basil before serving. You can also top each bowl with a drizzle of olive oil and extra Parmesan.

Nutrition

(per serving, approx.)

Calories: 420 kcal

Protein: 34 g

Carbohydrates: 28 g

Fat: 18 g

Fiber: 3 g

Sugar: 5 g

Sodium: 720 mg

(Values may vary depending on pasta type, cream percentage, and cheese amount used.)

Conclusion

This Mediterranean Crockpot Marry Me Chicken Macaroni Soup is a bowl of comfort that delivers both creamy richness and bright, savory Mediterranean flavor. With tender chicken, sun-dried tomatoes, and spinach in a velvety broth, it’s the perfect slow cooker meal for busy days. The macaroni makes it hearty enough for dinner, while the cream and Parmesan create that irresistible “marry me” flavor everyone loves. Simple, cozy, and satisfying—this is a one-pot dish worth making again and again.

Creamy Cheesy Potato Skillet Frittata

Creamy Cheesy Potato Skillet Frittata

Ingredients

The Base:

  • 3-4 medium potatoes, peeled and sliced into thin rounds (about 3mm-5mm thick).

  • Oil for frying (vegetable or olive oil).

  • Salt and pepper to taste.

The Egg Mixture:

  • 4-5 large eggs.

  • 1/2 cup heavy cream (or whole milk for a lighter version).

  • 1/2 cup spring onions (scallions), finely chopped.

  • 1/4 cup red bell pepper, finely diced.

  • 1/2 tsp garlic powder (optional).

  • Salt and chili flakes to taste.

The Topping:

  • 1 cup shredded Mozzarella (or any melting cheese).

  • Fresh parsley or cilantro for garnish.


Instructions

  1. Crisp the Potatoes: Heat oil in a non-stick skillet over medium heat. Fry the potato slices in batches until they are golden brown and crispy on both sides. Drain on paper towels and season with a pinch of salt.

  2. Prepare the Pour: In a bowl, whisk together the eggs, cream, chopped spring onions, red peppers, and spices until well combined.

  3. Layer the Skillet: Arrange the fried potatoes back into the skillet in overlapping layers (as seen in the first image). Ensure the heat is on low.

  4. Add the Mixture: Slowly pour the egg and cream mixture over the potatoes. Use a spatula to gently nudge the potatoes so the liquid seeps between the layers. Cover the pan with a lid and cook for 5–7 minutes until the eggs are mostly set.

  5. The Cheesy Finish: Sprinkle a generous layer of mozzarella cheese over the top. Cover again for 2–3 minutes until the cheese is completely melted and bubbly.

  6. Garnish and Serve: Slide the frittata onto a plate, garnish with fresh herbs, and slice it into wedges.


Quick Tip for Success

Use a true non-stick pan. Since this dish is heavy on eggs and cheese, a well-seasoned or high-quality non-stick skillet is the difference between a beautiful wedge and a scrambled mess!