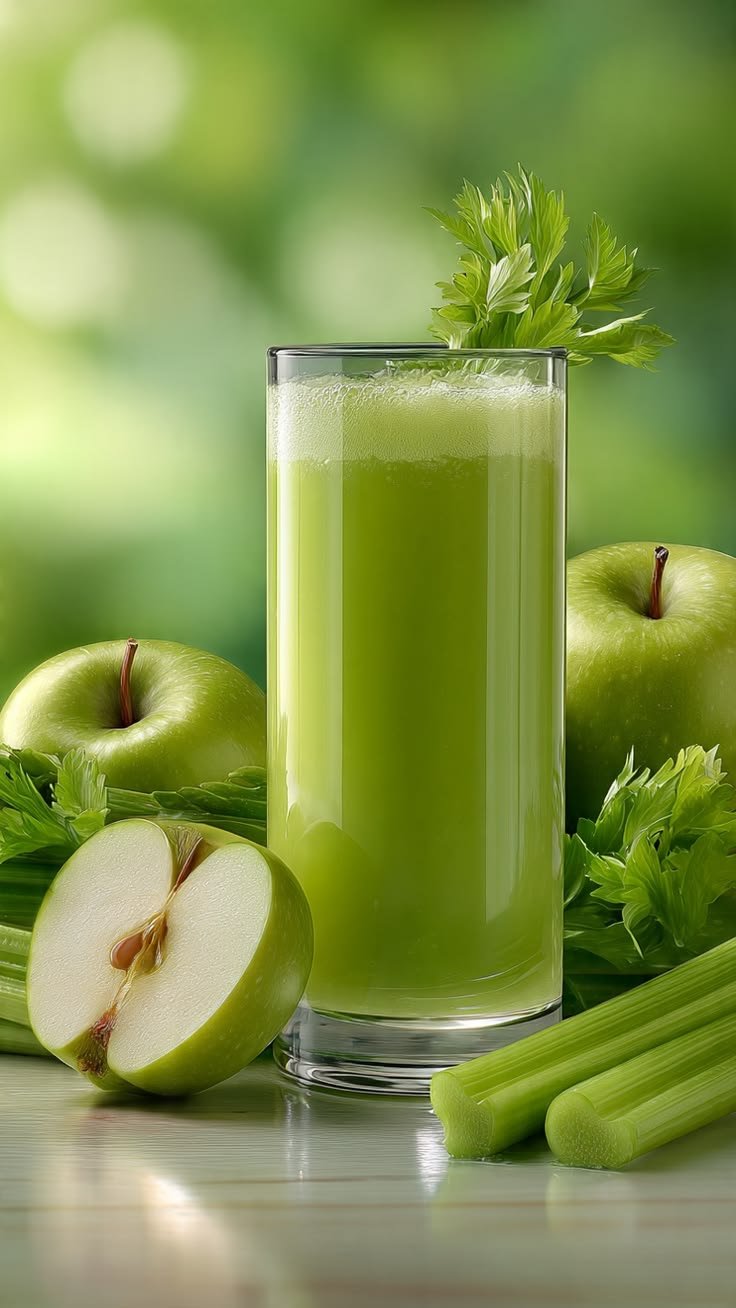
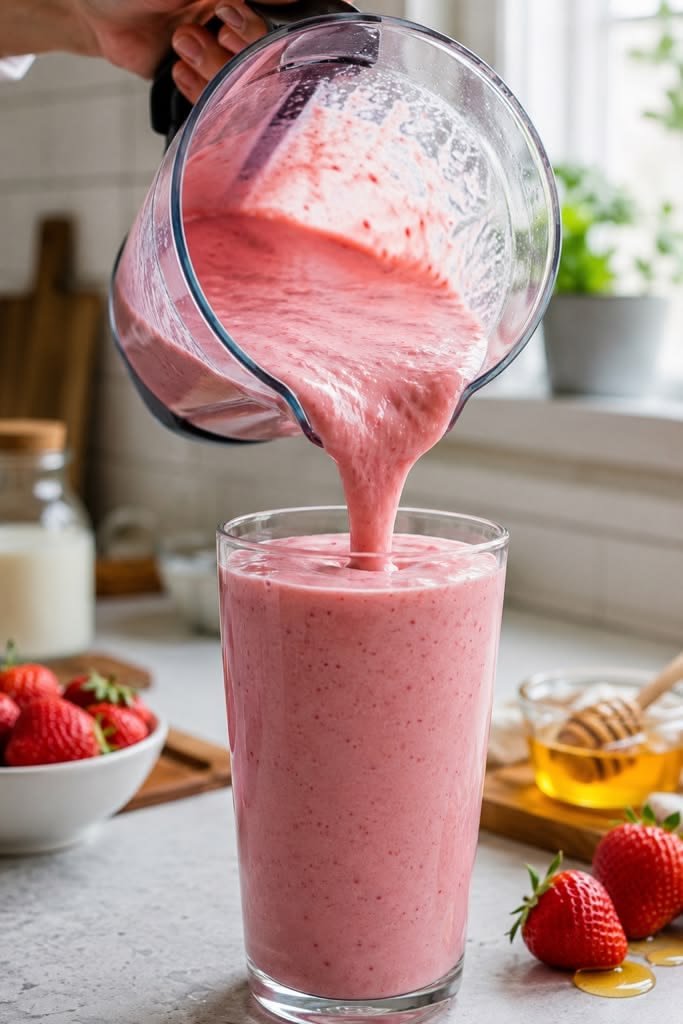
Mango Kale Smoothie

Mango Kale Smoothie

Ingredients

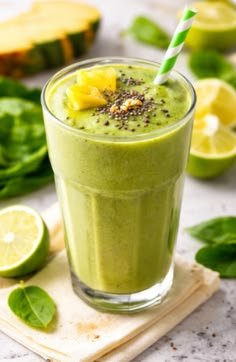
  • 1 cup fresh kale (stems removed, roughly chopped)

  • 1 cup frozen mango chunks (adds natural sweetness and chill)

  • 1/2 ripe banana (sliced, for a creamy texture)

  • 3/4 cup almond milk (or any milk of your choice)

  • 1/2 cup plain Greek yogurt (adds protein and creaminess)

  • 1 tablespoon honey or maple syrup (optional, for extra sweetness)

Instructions

  1. Prep the Greens: Wash the kale thoroughly. Remove the tough inner ribs and stems, keeping only the tender green leaves.

  2. Layer the Blender: Add the liquid almond milk and Greek yogurt to your blender first. This helps the blades spin freely and prevents the frozen ingredients from getting stuck.

  3. Add the Fruits and Greens: Toss in the chopped kale leaves, frozen mango chunks, and banana slices. If you want a sweeter taste, drizzle your honey or maple syrup on top.

  4. Blend Until Smooth: Secure the lid and blend on high speed for about 60 to 90 seconds. Keep blending until the green flecks of kale are completely broken down and the mixture looks uniformly smooth and creamy.

  5. Adjust and Serve: If the smoothie is too thick, add a splash more milk and blend for another 5 seconds. Pour into a tall glass and enjoy immediately while cold!

Tip: If you do not have frozen mango, use fresh mango and add 3 to 4 ice cubes to the blender to achieve that perfect chilled consistency.

30-Minute Egg Bites

30-Minute Egg Bites

Prep time: 10 mins | Bake time: 20 mins | Yield: 6-8 bites

Ingredients

  • 6 large eggs

  • 1/4 cup milk (or heavy cream for extra richness)

  • 1/2 cup shredded cheese (cheddar, mozzarella, or Swiss)

  • 1/4 cup diced bell peppers (red and green)

  • 2 tablespoons chopped green onions

  • A pinch of salt and black pepper

  • Optional: 1/4 cup cooked, crumbled bacon or diced ham

Instructions

  1. Preheat & Prep: Heat your oven to 350°F (175°C). Generously grease a standard muffin tin with cooking spray or butter to prevent sticking.

  2. Whisk the Base: In a large bowl, whisk the eggs, milk, salt, and black pepper together until smooth, light, and slightly frothy.

  3. Layer the Fillings: Divide your diced bell peppers, green onions, cheese, and optional meat evenly among the muffin cups.

  4. Pour the Eggs: Carefully pour the whisked egg mixture over the fillings in each cup, filling them about 3/4 of the way full. Give each a gentle stir with a toothpick to distribute the ingredients.

  5. Bake: Place the tin in the oven and bake for 18 to 20 minutes. The egg bites should be puffed up, set in the center, and lightly golden on the edges.

  6. Cool & Serve: Remove from the oven and let them cool in the pan for 5 minutes. Run a butter knife around the edges to gently pop them out.

Tip: Enjoy them warm, or let them cool completely and store them in an airtight container in the fridge for an easy, grab-and-go weekday breakfast!

Easy Pickled Beets Recipe

Ingredients
4 medium beets ❤️
1 cup vinegar
1 cup water
1/3 cup sugar
1 tsp salt
👩‍🍳 Step-by-Step Recipe
🥔 Step 1: Prepare the Beets
➡️ Wash the beets very well to remove dirt.
➡️ Cut off the tops and bottoms.
➡️ Place them in a pot and cover with water.
🔥 Step 2: Cook the Beets
➡️ Boil for about 35–45 minutes until fork tender.
➡️ Drain and let them cool slightly.
➡️ Rub off the skins using your hands or a paper towel.
💡 The skins should slide off easily after boiling.
🔪 Step 3: Slice the Beets
➡️ Cut the beets into rounds or cubes.
➡️ Place them into clean glass jars.
🍯 Step 4: Make the Pickling Liquid
➡️ In a saucepan, add vinegar, water, sugar, and salt.
➡️ Stir and heat for 3–4 minutes until the sugar dissolves completely.
🫙 Step 5: Fill the Jars
➡️ Pour the hot pickling liquid over the beets until fully covered.
➡️ Close the jars tightly with lids.
❄️ Step 6: Chill & Serve
➡️ Let the jars cool to room temperature.
➡️ Refrigerate for at least 24 hours before eating for the best flavor. 😋
➡️ Serve cold with salads, sandwiches, or grilled meals.
❓Quick Q&A
❓How long do pickled beets last?
➡️ They stay fresh in the fridge for up to 2 weeks.
❓Can I make them less sweet?
➡️ Yes! Reduce the sugar to your taste.
❓Do I need to peel the beets first?
➡️ No, peeling after boiling is much easier.

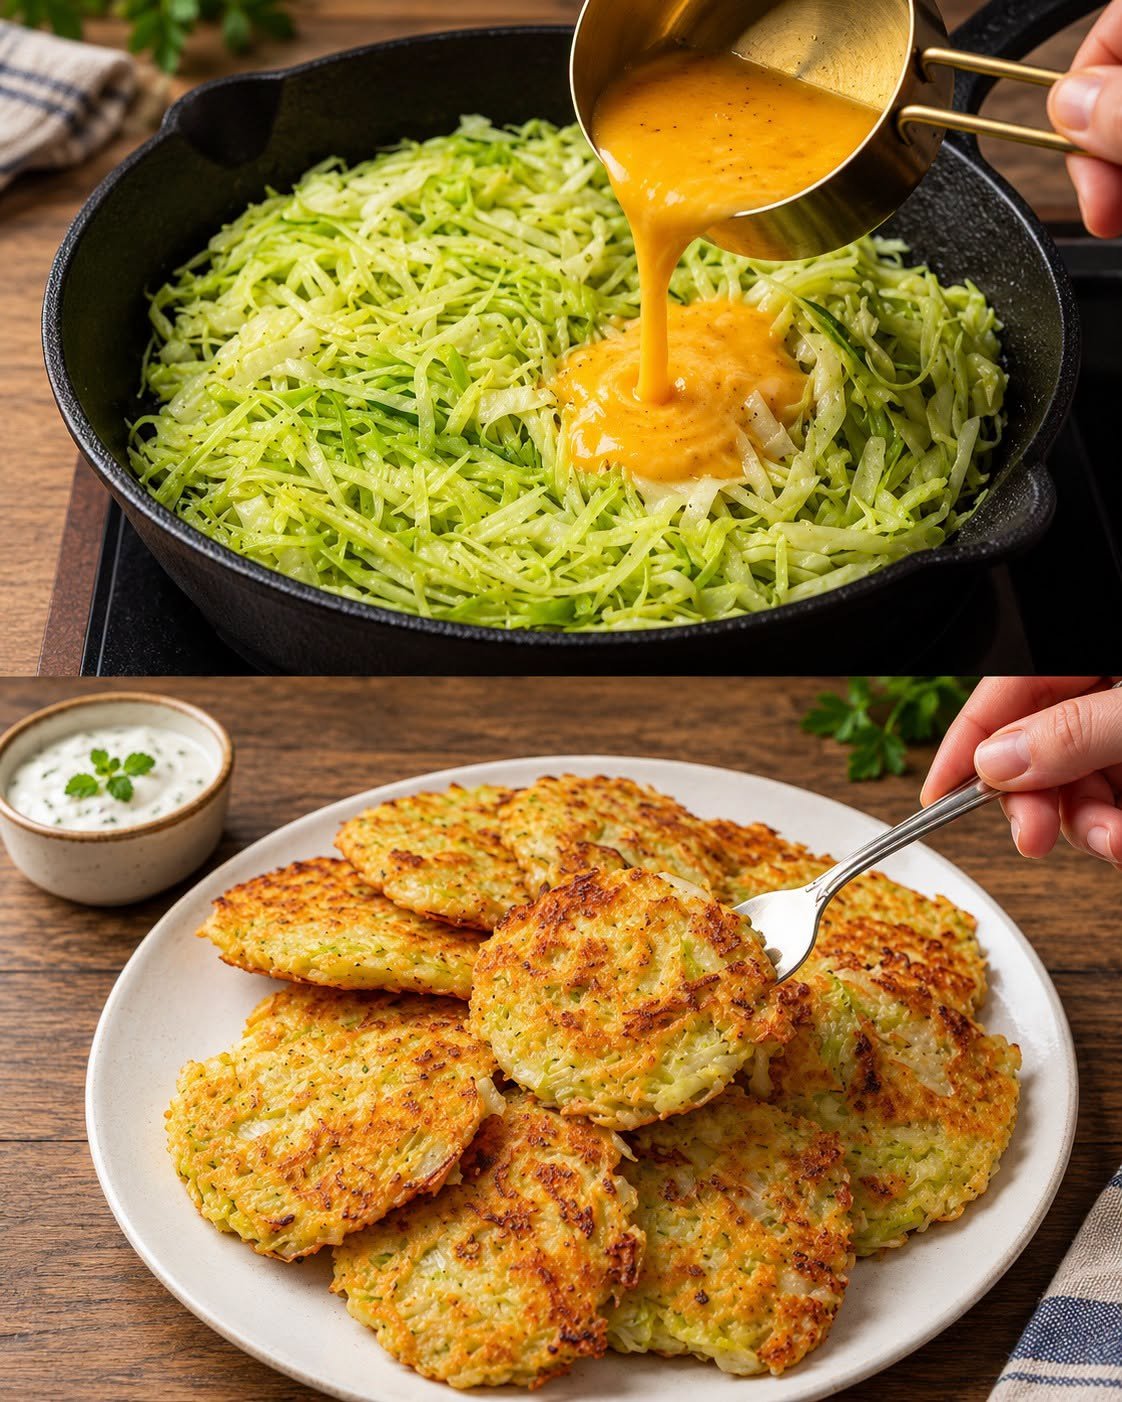
Cheesy Green Onion Patties

Cheesy Green Onion Patties 🧀🌿

Ingredients 🍴

  • 2 cups shredded potatoes
  • 1 cup shredded cheese
  • 2 green onions (chopped)
  • 1 egg
  • 3 tbsp flour
  • Salt & black pepper
  • Oil for frying

Detailed Procedure 👩‍🍳

Step 1: Prepare the Potatoes 🥔

➡️ Peel and wash the potatoes very well.
➡️ Grate them using the large side of a grater.
➡️ Place the grated potatoes in a clean towel and squeeze out as much water as possible.
➡️ This step is very important because dry potatoes make crispy patties.


Step 2: Mix the Ingredients 🥣

➡️ Add the potatoes to a large bowl.
➡️ Add shredded cheese and chopped green onions.
➡️ Crack in the egg.
➡️ Sprinkle flour, salt, and black pepper.
➡️ Mix everything very well until the mixture sticks together.


Step 3: Shape the Patties ✋

➡️ Take a small amount of mixture in your hands.
➡️ Shape into thick finger-like rolls or oval patties.
➡️ Press gently so they stay firm and do not break while cooking.


Step 4: Heat the Pan 🔥

➡️ Add a little oil to a non-stick pan.
➡️ Heat over medium flame for 2 minutes.
➡️ The pan should be hot but not smoking.


Step 5: Fry the Patties 🧈

➡️ Carefully place the patties into the pan.
➡️ Do not overcrowd the pan.
➡️ Cook for about 4–5 minutes on one side until deep golden brown.
➡️ Flip gently using a spatula.
➡️ Cook the other side for another 4 minutes until crispy and fully cooked inside.


Step 6: Remove Extra Oil ✨

➡️ Place cooked patties on paper towels for 1 minute.
➡️ This helps remove extra oil and keeps them crispy.


Step 7: Serve Hot 🍽️

➡️ Serve warm with ketchup, yogurt dip, or garlic sauce.
➡️ Best enjoyed fresh and crispy.


Quick Q&A ❓

Why are my patties breaking?

✅ The potatoes may have too much water. Squeeze them well before mixing.

Can I bake them instead?

✅ Yes! Bake at 200°C (400°F) for about 20–25 minutes.

Can I add extra vegetables?

✅ Absolutely. Finely chopped spinach or carrots work great.

Tropical Mango Banana Smoothie

Tropical Mango Banana Smoothie

Ingredients

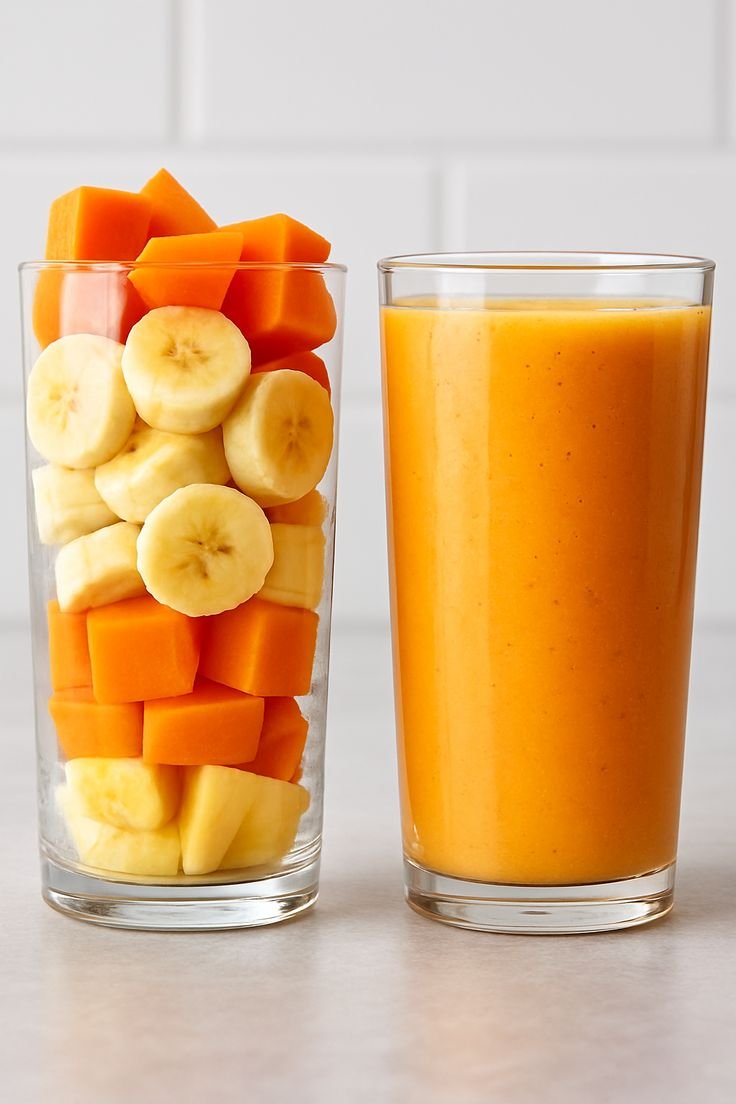
  • Mango: 1 cup, diced (fresh or frozen)

  • Banana: 1 medium, sliced (frozen works best for extra creaminess)

  • Pineapple: cup, diced chunks

  • Yogurt: cup, plain or vanilla (Greek yogurt works great for extra protein)

  • Almond Milk: to 1 cup, unsweetened (adjust based on your preferred thickness)

  • Optional Toppings: Sliced almonds, extra banana coins, or mango cubes

Instructions

  1. Prep the Fruit: If you are using fresh fruit, peel and chop your mango, banana, and pineapple into bite-sized pieces.

  2. Layer the Blender: Add the liquid first to help things blend smoothly. Pour the almond milk into your blender, followed by the yogurt.

  3. Add the Fruit: Drop in the banana slices, pineapple chunks, and mango cubes on top of the liquid base.

  4. Blend: Secure the lid and blend on high speed for about 45 to 60 seconds until the mixture is completely smooth, thick, and velvety. If it feels too thick, simply splash in a little more almond milk and blend for another few seconds.

  5. Serve: Pour the smoothie into a tall glass. If you want to recreate the look in the picture, you can layer some sliced almonds, yogurt, and fresh fruit at the bottom of a separate glass before pouring, or simply scatter them right on top. Enjoy immediately while chilled!

Mediterranean Marinated Feta Dip

Mediterranean Marinated Feta Dip

  • Prep time: 10 minutes

  • Servings: 4–6

Ingredients

  • 1 block (8 oz) Feta cheese (whole, in brine)

  • 1/2 cup Extra virgin olive oil

  • 1/4 cup Kalamata olives and green olives (pitted)

  • 1/4 cup Sun-dried tomatoes, chopped

  • 2 tbsp Fresh parsley and rosemary, finely chopped

  • 1 tsp Dried oregano or thyme

  • 1 Small lemon (zested)

  • 1 pinch Black pepper

  • To serve: Crackers, pita chips, or crusty bread

Instructions

  1. Prepare the Base: Remove the feta cheese block from its brine and pat it dry with a paper towel. Place the whole block in the center of a shallow serving bowl or rimmed plate.

  2. Infuse the Oil: In a small bowl, mix the extra virgin olive oil, dried oregano, lemon zest, a pinch of black pepper, and half of the chopped fresh herbs.

  3. Assemble: Pour the seasoned olive oil generously over and around the block of feta cheese so it sits in a shallow pool.

  4. Garnish: Scatter the olives, chopped sun-dried tomatoes, and the remaining fresh parsley and rosemary all over the top of the cheese and into the oil.

  5. Serve: Let it sit for 10 minutes at room temperature to absorb the flavors. Arrange your favorite crackers or warm bread around the dish and enjoy!

Tip: You can gently warm the olive oil with the herbs for 1 minute before pouring it over the cheese to release even more aroma.

Zero Point Fatbomb Fluff

Zero Point Fatbomb Fluff 🍫✨

Ingredients 🍴

  • 1 cup Greek yogurt
  • 2 tbsp cocoa powder
  • 2 tbsp sugar-free sweetener or honey
  • 2 tbsp mini chocolate chips

Detailed Procedure 👩‍🍳

Step 1: Prepare the Mixing Bowl 🥣

➡️ Take a medium bowl and make sure it is clean and dry.
➡️ Cold bowls help the fluff stay thick and creamy.


Step 2: Add the Yogurt 🍦

➡️ Spoon the Greek yogurt into the bowl.
➡️ Stir it slowly for a few seconds to make it smooth.


Step 3: Mix the Chocolate Flavor 🍫

➡️ Add cocoa powder to the yogurt.
➡️ Add the sweetener or honey.
➡️ Mix very well using a whisk or spoon until the color becomes fully chocolatey with no dry powder left.


Step 4: Make It Fluffy ✨

➡️ Whisk the mixture for about 2–3 minutes.
➡️ The more you whisk, the lighter and fluffier it becomes.
➡️ Scrape the sides of the bowl while mixing so everything blends evenly.


Step 5: Add Chocolate Chips 🍪

➡️ Fold in half of the chocolate chips gently.
➡️ Do not overmix or the fluff may lose some airiness.


Step 6: Chill the Fluff ❄️

➡️ Place the bowl in the fridge for 15–20 minutes.
➡️ Chilling helps the texture become thicker and creamier.


Step 7: Serve & Decorate 🍴

➡️ Spoon the fluff into a serving bowl or ramekin.
➡️ Sprinkle the remaining chocolate chips on top.
➡️ Serve cold and enjoy the creamy chocolate texture.


Quick Q&A ❓

Can I freeze it?

✅ Yes, freeze for 1–2 hours for an ice-cream-like texture.

Can I use regular yogurt?

✅ Yes, but Greek yogurt makes it thicker and creamier.

How long does it last?

✅ Store in the fridge for up to 2 days.

Loaded Avocado Toast

Loaded Avocado Toast

  • Prep time: 10 minutes

  • Servings: 2 slices

Ingredients

  • Bread: 2 thick slices of your favorite crusty bread (like sourdough or artisan white)

  • Avocado: 1 large ripe avocado

  • Lemon: 1 teaspoon fresh lemon juice

  • Tomatoes: ½ cup cherry tomatoes, sliced

  • Peppers: ¼ cup red bell pepper, thinly sliced rings

  • Greens: A small handful of fresh microgreens or sprouts

  • Seeds: 1 tablespoon hemp seeds (for that lovely sprinkle on top)

  • Seasoning: A pinch of salt, black pepper, and garlic powder to taste

Instructions

  1. Toast the Bread: Toast your bread slices in a toaster or on a skillet until they are golden brown and perfectly crispy. Place them on a serving board.

  2. Mash the Avocado: Scoop the flesh of the avocado into a small bowl. Add the fresh lemon juice, salt, black pepper, and garlic powder. Mash everything together using a fork until it reaches your desired consistency (smooth or slightly chunky).

  3. Spread the Base: Divide the mashed avocado evenly between the two slices of toasted bread, spreading it generously from edge to edge.

  4. Layer the Veggies: Arrange the sliced cherry tomatoes and red bell pepper rings beautifully over the avocado layer.

  5. Add the Finishing Touches: Top each toast with a handful of fresh microgreens. Finally, sprinkle the hemp seeds over everything for a nice crunch and presentation.

Serve immediately while the bread is warm and the toppings are fresh!

Cheesy Spinach & Veggie Egg Bake

Cheesy Spinach & Veggie Egg Bake 🥚🧀

Ingredients 🍴

  • 6 eggs
  • 1 cup spinach (chopped)
  • 1/2 cup shredded cheese
  • 2 green onions (sliced)
  • 1/4 cup diced chicken or turkey pieces
  • Salt & black pepper

Detailed Procedure 👩‍🍳

Step 1: Prepare the Oven 🔥

➡️ Preheat your oven to 180°C (350°F).
➡️ Lightly grease a baking dish or pie plate with a little oil or butter.


Step 2: Prepare the Ingredients 🥬

➡️ Wash and chop the spinach into small pieces.
➡️ Slice the green onions.
➡️ Cut the chicken or turkey into tiny cubes for even cooking.


Step 3: Beat the Eggs 🥚

➡️ Crack all the eggs into a large bowl.
➡️ Add a pinch of salt and black pepper.
➡️ Whisk well until the mixture becomes smooth and slightly foamy.


Step 4: Mix Everything Together 🧀

➡️ Add spinach, green onions, and chicken into the egg mixture.
➡️ Stir gently so everything spreads evenly.
➡️ Add shredded cheese and mix again.


Step 5: Pour into Baking Dish 🍽️

➡️ Pour the mixture into the prepared dish.
➡️ Spread it evenly using a spoon.


Step 6: Bake Until Golden ✨

➡️ Place the dish in the oven.
➡️ Bake for 30–35 minutes until the top becomes golden and fluffy.
➡️ Insert a knife in the center — if it comes out clean, it’s ready.


Step 7: Cool & Serve 🍴

➡️ Let it rest for 5 minutes before slicing.
➡️ Serve warm for breakfast, lunch, or dinner.


Quick Q&A ❓

Can I use another vegetable?

✅ Yes! Bell peppers, mushrooms, or tomatoes work great.

Can I make it without meat?

✅ Absolutely. Just add extra vegetables instead.

How do I store leftovers?

✅ Keep in the fridge for up to 3 days and reheat before serving.

Homemade Chicken Noodle Soup

Homemade Chicken Noodle Soup

  • Prep time: 15 minutes

  • Cook time: 30 minutes

  • Servings: 6

Ingredients

  • 2 cups shredded cooked chicken (breast or thighs)

  • 2 cups wide egg noodles

  • 1 tablespoon olive oil or butter

  • 1 medium yellow onion, diced

  • 2 medium carrots, sliced into rounds

  • 2 stalks celery, sliced

  • 2 cloves garlic, minced

  • 6 cups low-sodium chicken broth

  • 1 bay leaf

  • ½ teaspoon dried thyme

  • Salt and black pepper to taste

  • Fresh parsley, chopped (for garnish)

Instructions

  1. Sauté the Vegetables: Heat the olive oil or butter in a large pot or Dutch oven over medium heat. Add the diced onion, carrots, and celery. Cook for about 6 to 8 minutes until the vegetables begin to soften. Stir in the minced garlic and cook for 1 more minute until fragrant.

  2. Simmer the Broth: Pour in the chicken broth. Add the bay leaf, dried thyme, salt, and black pepper. Bring the liquid to a boil, then reduce the heat to low, cover the pot, and let it simmer for 10 to 12 minutes so the vegetables become tender.

  3. Cook the Noodles: Stir in the wide egg noodles. Cook uncovered for about 6 to 8 minutes, or until the noodles are tender.

  4. Add Chicken & Serve: Stir in the shredded cooked chicken and let it heat through for 2 to 3 minutes. Taste the soup and adjust the salt and pepper if needed. Remove the bay leaf, garnish with fresh parsley, and serve warm.

Berry-Banana Smoothie Bowl,

Berry-Banana Smoothie Bowl,

Ingredients

For the Base:

  • Frozen mixed berries: 1 cup (strawberries, blueberries, or raspberries)

  • Frozen banana: 1 sliced

  • Milk of choice: cup (almond, oat, or dairy milk)

  • Greek yogurt: cup (optional, for extra creaminess)

For the Toppings (Arranged in Rows):

  • Strawberries: cup, sliced

  • Fresh raspberries & blueberries: A small handful of each

  • Dried goji berries: 1 tablespoon

  • Shredded coconut: 1 tablespoon

  • Banana: fresh banana, sliced

  • Granola & Almonds: 2 tablespoons for crunch

Instructions

  1. Blend the Base: Add the frozen mixed berries, frozen banana, milk, and yogurt into a high-speed blender.

  2. Mix Until Thick: Blend on high until completely smooth and thick, like soft-serve ice cream. If it gets stuck, stop and scrape down the sides, or add an extra splash of milk. Tip: Keep the liquid minimal so your toppings don’t sink!

  3. Pour: Spoon the thick smoothie base into a chilled serving bowl and smooth out the top with the back of a spoon.

  4. Artfully Arrange: Recreate the beautiful look in the photo by arranging your toppings in neat, vertical rows across the top. Start from the left with sliced strawberries, followed by raspberries, goji berries, blueberries, a stripe of shredded coconut, fresh banana slices, and finish with granola and almonds on the right edge.

  5. Serve: Enjoy immediately with a spoon while cold and fresh!

Blueberry Yogurt Parfait

Blueberry Yogurt Parfait 🫐🥄

Ingredients 🍴

  • 2 cups Greek yogurt
  • 1 cup fresh blueberries
  • 1 cup granola
  • 2 tbsp honey

Detailed Procedure 👩‍🍳

Step 1: Prepare the Blueberries 🫐

➡️ Wash the blueberries very well under cold water.
➡️ Let them dry for a few minutes using a clean towel.
➡️ Keep a few whole blueberries aside for the topping.


Step 2: Make the Blueberry Sauce 🍯

➡️ Add half of the blueberries to a small pan.
➡️ Add 1 tablespoon honey.
➡️ Cook on low heat for about 4–5 minutes while stirring gently.
➡️ The blueberries will become soft and juicy like a jam.
➡️ Turn off the heat and let the sauce cool slightly.


Step 3: Prepare the Glass 🥛

➡️ Take a clear glass or dessert cup for beautiful layers.
➡️ Add 2 tablespoons granola at the bottom.
➡️ Press lightly with a spoon to make the base even.


Step 4: Add the Yogurt Layer 🍦

➡️ Spoon a thick layer of Greek yogurt over the granola.
➡️ Spread gently so the layers look clean from the sides.


Step 5: Add Blueberries 🫐

➡️ Add some fresh blueberries over the yogurt.
➡️ Spoon a little blueberry sauce on top.


Step 6: Repeat the Layers ✨

➡️ Repeat the layers again:

  • Granola
  • Yogurt
  • Fresh blueberries
  • Blueberry sauce

➡️ Finish with extra blueberries on top for a fresh look.


Step 7: Chill & Serve ❄️

➡️ Place the parfait in the fridge for 10–15 minutes before serving.
➡️ Serve cold with a spoon and enjoy the creamy crunchy texture.


Quick Q&A ❓

Can I use frozen blueberries?

✅ Yes, just thaw them before making the sauce.

How do I keep granola crunchy?

✅ Add granola just before serving for the best crunch.

Can I make it healthier?

✅ Use unsweetened yogurt and skip extra honey.

Cheesy Green Onion Patties 🧀🌿

🥔 Cheesy Green Onion Patties 🧀🌿

🛒 Ingredients

  • 3 medium potatoes 🥔
  • 1 cup mozzarella cheese 🧀
  • 2 tbsp cornflour
  • 2 green onions, chopped 🌿
  • Salt & black pepper
  • 2 tbsp oil for frying

👩‍🍳 Step-by-Step Recipe

🥔 Step 1: Boil the Potatoes

➡️ Peel and cut the potatoes into chunks.

➡️ Boil in salted water for about 15 minutes until soft.

➡️ Drain all the water completely.

➡️ Mash the potatoes until smooth with no lumps.


🧀 Step 2: Make the Mixture

➡️ Add mozzarella cheese to the mashed potatoes.

➡️ Add cornflour, chopped green onions, salt, and black pepper.

➡️ Mix everything well until a soft dough forms.

💡 If the mixture feels sticky, add a little more cornflour.


✋ Step 3: Shape the Sticks

➡️ Take small portions of the mixture.

➡️ Roll and shape them into thick finger-sized sticks.

➡️ Place them on a plate.


🔥 Step 4: Cook Until Golden

➡️ Heat a little oil in a non-stick pan.

➡️ Place the potato sticks gently in the pan.

➡️ Cook on medium heat for 3–4 minutes on each side.

➡️ Turn carefully until all sides become crispy and golden brown. 😍


🍽️ Step 5: Serve

➡️ Serve hot with ketchup, garlic sauce, or spicy mayo.

➡️ Enjoy the crispy outside and cheesy soft inside! 🧀✨


❓Quick Q&A

❓Can I bake them instead?

➡️ Yes! Bake at 200°C (400°F) for 20–25 minutes.

❓Can I use cheddar cheese?

➡️ Absolutely, cheddar gives a richer flavor.

❓How do I store leftovers?

➡️ Keep in the fridge for up to 2 days and reheat in a pan.

Decadent Chocolate Layer Cake

Decadent Chocolate Layer Cake

🛒 Ingredients

For the Cake

  • 2 eggs 🥚
  • 1 cup sugar
  • 1/2 cup oil
  • 1 cup milk 🥛
  • 1 1/2 cups all-purpose flour
  • 1/3 cup cocoa powder 🍫
  • 1 tsp baking powder

For the Cream Layer

  • 1 cup whipped cream
  • 2 tbsp cocoa powder
  • 2 tbsp powdered sugar

For the Ganache

  • 1/2 cup chocolate chips 🍫
  • 1/4 cup warm milk

👩‍🍳 Detailed Step-by-Step Recipe

🍰 Step 1: Make the Chocolate Cake Batter

➡️ In a large bowl, crack the eggs and add sugar.
➡️ Beat for 2–3 minutes until light and slightly fluffy.

➡️ Add oil and milk. Mix well.

➡️ Add flour, cocoa powder, and baking powder.
➡️ Gently mix until smooth and lump-free.

💡 Do not overmix or the cake can become dense.


🔥 Step 2: Bake the Cake

➡️ Grease a square baking tray or line it with baking paper.

➡️ Pour the batter evenly into the tray.

➡️ Bake at 180°C (350°F) for about 25–30 minutes.

➡️ Insert a toothpick in the center. If it comes out clean, the cake is ready.

➡️ Let the cake cool completely. ❄️


🍫 Step 3: Prepare the Chocolate Cream

➡️ In a bowl, add whipped cream, cocoa powder, and powdered sugar.

➡️ Beat until thick and creamy.

➡️ Place in the fridge for 10 minutes for a firmer texture.


✂️ Step 4: Assemble the Layers

➡️ Slice the cake carefully into 2 thin layers.

➡️ Spread the chocolate cream evenly over the bottom layer.

➡️ Place the second cake layer on top gently.


🍮 Step 5: Make the Ganache

➡️ Add chocolate chips to a bowl.

➡️ Pour warm milk over them.

➡️ Stir slowly until smooth and glossy. ✨


🍫 Step 6: Final Touch

➡️ Pour the ganache over the cake.

➡️ Spread evenly with a spoon or spatula.

➡️ Chill for 20–30 minutes before slicing.

➡️ Cut into squares and enjoy! 😍


❓Quick Q&A

❓Can I use dark chocolate?

➡️ Yes! It gives a richer chocolate flavor.

❓How should I store it?

➡️ Keep in the fridge for up to 4 days.

❓Can I freeze it?

➡️ Yes, freeze slices in an airtight container for up to 1 month.

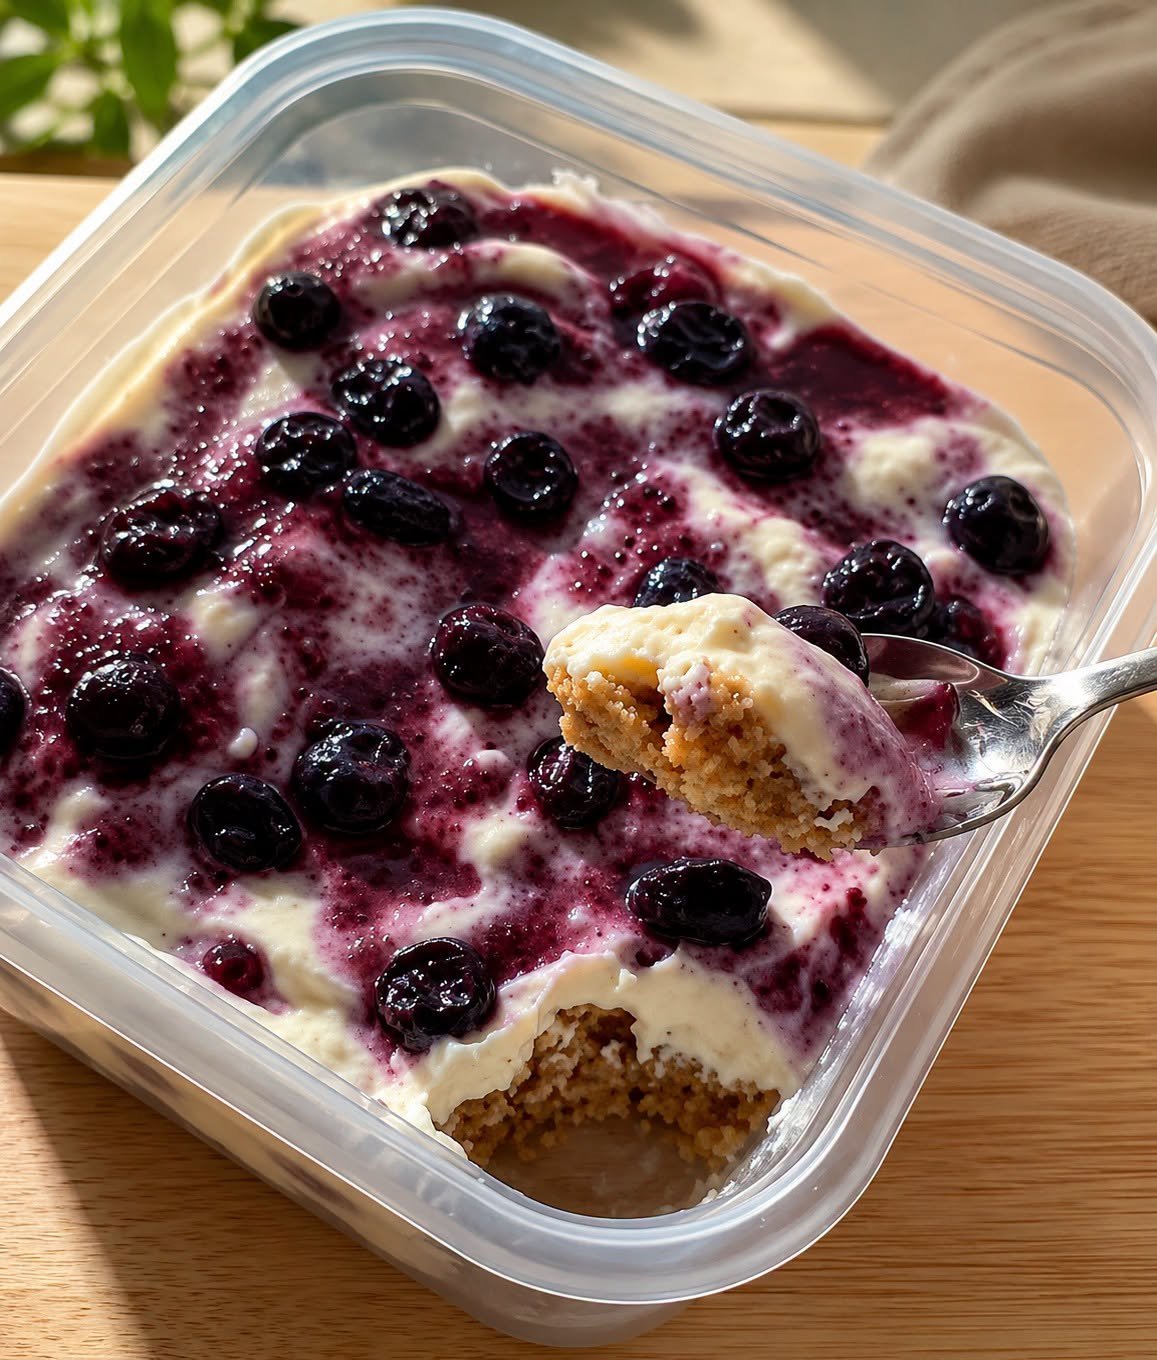
Baked Blueberry Cottage Cheese Breakfast Bowls

Baked Blueberry Cottage Cheese Breakfast Bowls 🫐🥣

These creamy blueberry breakfast bowls are soft, lightly sweet, and packed with juicy blueberries in every bite. Perfect for cozy mornings, meal prep, or a healthy dessert!

Ingredients 🥄

  • 1 cup cottage cheese
  • 2 eggs
  • 2 tbsp honey or maple syrup
  • 1 tsp vanilla extract
  • 1 cup blueberries
  • ½ cup oats or granola

Step-by-Step Instructions 👩‍🍳

🫐 Step 1: Prepare the Blueberries

  • Wash the blueberries gently under cool water.
  • Pat them dry with a paper towel.

👉 Keep a few extra blueberries for topping later.


🥣 Step 2: Make the Creamy Mixture

  • In a mixing bowl, add:
    • cottage cheese
    • eggs
    • honey
    • vanilla
  • Whisk everything together until creamy and smooth.

✨ The mixture should look thick and creamy.


🌾 Step 3: Add the Oats

  • Stir the oats or granola into the mixture.
  • Mix gently so everything combines evenly.

👉 This gives the bowls a soft baked texture.


🍇 Step 4: Fold in Blueberries

  • Add most of the blueberries into the bowl.
  • Carefully fold them into the batter so they don’t burst too much.

🧈 Step 5: Prepare Baking Dish

  • Lightly grease small ramekins or one baking dish.
  • Pour the mixture evenly into the dishes.
  • Sprinkle extra blueberries on top.

🔥 Step 6: Bake

  • Bake at 175°C (350°F) for about 25–30 minutes.

✅ The top should look lightly golden and the center should be set.


❄️ Step 7: Cool & Serve

  • Let the bowls cool for 5 minutes.
  • Add extra granola or honey on top if desired.

✨ Serve warm for the best cozy flavor.


Quick Q&A ❓

Can I use frozen blueberries?

Yes 👍 No need to thaw them first.

Is this good for meal prep?

Absolutely 😊 Store in the fridge for up to 3 days.

Can I make it sweeter?

Yes 🍯 Add a little extra honey or maple syrup.

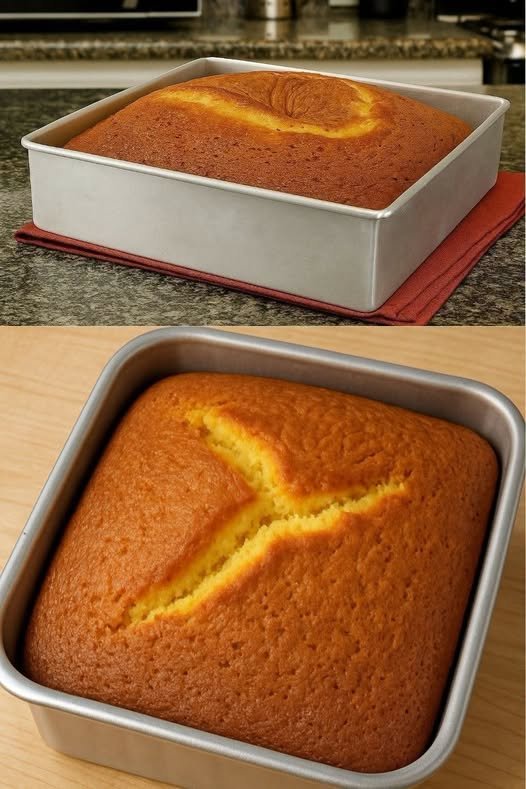
Easy Lemon Cake 🍋🍰

Easy Lemon Cake 🍋🍰

Soft, fluffy, and full of fresh lemon flavor, this easy lemon cake is perfect for tea time, breakfast, or dessert. Even beginners can make it perfectly on the first try!

Ingredients 🥄

  • 4 eggs
  • 1 cup sugar
  • Juice & zest of 1 lemon
  • 1 cup vegetable oil
  • 4/5 cup milk
  • 4 tsp baking powder
  • 2½ cups all-purpose flour

Step-by-Step Instructions 👩‍🍳

🥚 Step 1: Beat the Eggs & Sugar

  • Crack the eggs into a large mixing bowl.
  • Add the sugar.
  • Beat with a whisk or mixer for 3–4 minutes until light, pale, and slightly fluffy.

👉 This helps make the cake soft and airy.


🍋 Step 2: Add Lemon Flavor

  • Grate the lemon zest carefully.
  • Squeeze the lemon juice.
  • Add both to the egg mixture.

✨ The zest gives the cake a strong fresh lemon aroma.


🥛 Step 3: Add Wet Ingredients

  • Pour in the vegetable oil and milk.
  • Mix slowly until smooth and fully combined.

👉 Do not overmix.


🌾 Step 4: Add Dry Ingredients

  • In another bowl, combine:
    • flour
    • baking powder
  • Gradually add the dry ingredients into the wet mixture.
  • Stir gently until the batter becomes smooth with no dry flour left.

✨ The batter should be thick but pourable.


🧈 Step 5: Prepare the Pan

  • Grease a loaf pan with oil or butter.
  • Lightly dust with flour to prevent sticking.

🔥 Step 6: Bake the Cake

  • Pour the batter into the prepared pan.
  • Bake at 170°C (340°F) for about 40–45 minutes.

✅ The cake is ready when:

  • the top is golden
  • a toothpick inserted in the center comes out clean

❄️ Step 7: Cool & Serve

  • Let the cake cool for 10 minutes before removing from the pan.
  • Slice and enjoy with tea or coffee ☕🍋

Quick Q&A ❓

Can I use butter instead of oil?

Yes 👍 Melted butter works well too.

How do I make it extra lemony?

Add a little extra lemon zest on top after baking.

Can beginners make this?

Absolutely 😊 This is one of the easiest homemade cakes.

Surf & Turf Steak Tray 🥩🍤

Ingredients

  • 1 ribeye steak
  • 8–10 shrimp, peeled & cleaned
  • 1 bunch asparagus
  • 2 cups mashed potatoes
  • 2 tbsp butter
  • 3 garlic cloves, minced
  • Salt & black pepper
  • Paprika
  • Olive oil
  • Fresh parsley

👩‍🍳 Step-by-Step Recipe

🥩 Step 1: Season the Steak

➡️ Pat the steak dry with paper towel.
➡️ Rub with olive oil, salt, black pepper, and paprika.
➡️ Let it rest for 10–15 minutes for better flavor.


🍤 Step 2: Cook the Shrimp

➡️ Heat a pan with a little olive oil.
➡️ Add shrimp, garlic, salt, pepper, and paprika.
➡️ Cook 2–3 minutes per side until golden and juicy.
➡️ Remove and set aside.


🌱 Step 3: Roast the Asparagus

➡️ Toss asparagus with olive oil, salt, and pepper.
➡️ Cook in a hot pan or oven until slightly charred and tender.
➡️ Sprinkle parsley on top.


🥔 Step 4: Make the Mashed Potatoes

➡️ Prepare creamy mashed potatoes.
➡️ Add butter, salt, pepper, and parsley.
➡️ Mix until smooth and fluffy.


🔥 Step 5: Cook the Steak

➡️ Heat a skillet until very hot.
➡️ Sear steak 3–5 minutes per side depending on thickness.
➡️ Add butter during the last minute for extra flavor.
➡️ Let steak rest before serving.


🍽️ Step 6: Assemble the Tray

➡️ Place mashed potatoes on one side.
➡️ Add grilled shrimp and asparagus.
➡️ Place juicy steak beside everything.
➡️ Serve hot and enjoy!


❓Q/A

❓Can I use chicken instead of steak?

➡️ Yes! Grilled chicken works great too.

❓How do I keep shrimp juicy?

➡️ Don’t overcook them — remove once pink and curled.

❓Can I make this for meal prep?

➡️ Yes, store in airtight containers for up to 3 days.


🌟 Tips

✅ Add lemon juice over shrimp for extra freshness.
✅ Use garlic butter on steak for restaurant-style flavor.
✅ Serve with extra herbs for a fresh finish.

Garlic Mushroom Cauliflower Skillet (Healthy Creamy Veggie Bowl)

Description

This Garlic Mushroom Cauliflower Skillet is a warm, savoury, and comforting vegetable dish made with golden sautéed mushrooms, tender roasted cauliflower, and herbs. It’s simple, low-carb, and full of rich umami flavour. Perfect as a light meal, side dish, or healthy dinner bowl.

 Ingredients

Vegetables

  • 1 medium cauliflower, cut into florets
  • 2 cups mushrooms, sliced (button or cremini)
  • 3 tbsp olive oil or butter
  • 4 garlic cloves, minced
  • 1 small onion, chopped (optional)

Seasoning

  • ½ tsp black pepper
  • 1 tsp salt (adjust to taste)
  • 1 tsp dried oregano or thyme
  • ½ tsp chili flakes (optional)

Creamy Add-on (Optional but recommended)

  • ¼ cup grated Parmesan or mozzarella
  • 2 tbsp cream cheese or Greek yogurt

Garnish

  • Fresh parsley, chopped
  • Extra black pepper

 Instructions

Step 1: Cook Cauliflower

Steam or boil cauliflower florets for 4–5 minutes until slightly tender but not mushy. Drain and set aside.

Step 2: Sauté Mushrooms

Heat olive oil in a large skillet. Add mushrooms and cook for 6–8 minutes until golden brown and moisture evaporates.

Step 3: Add Aromatics

Add onion and garlic to the mushrooms. Cook for 2–3 minutes until fragrant.

Step 4: Combine

Add cauliflower to the skillet. Sprinkle salt, pepper, oregano, and chilli flakes. Toss well.

Step 5: Make It Creamy (Optional)

Stir in cream cheese or Greek yoghurt for a creamy texture. Add cheese if desired and let it melt slightly.

Step 6: Finish & Serve

Garnish with fresh parsley and serve warm.

 Tips

  • Roast cauliflower instead of steaming for extra flavor
  • Use butter for a richer taste
  • Don’t overcrowd mushrooms or they won’t brown properly
  • Add spinach or zucchini for extra vegetables
  • Great with grilled chicken or eggs

 Servings

Serves 2–3 people

 Nutritional Information (Approx.)

  • Calories: 180–260
  • Protein: 6–10g
  • Carbs: 12–18g
  • Fat: 12–18g
  • Fiber: 5–7g

 Benefits

  • Low-carb and keto-friendly
  • Rich in antioxidants from mushrooms and cauliflower
  • Supports digestion and gut health
  • High fiber and filling
  • Quick one-pan healthy meal

 Recipe Notes

This dish tastes best fresh and warm. You can store leftovers for up to 2 days and reheat in a skillet. Adding cheese or cream gives it a richer, comfort-food-style flavour.

 Q&A

Can I make it vegan?

Yes, skip cheese and use olive oil instead of butter.

Can I roast cauliflower instead of boiling?

Yes, roasting at 200°C for 20 minutes gives a deeper flavour.

What mushrooms work best?

Cremini or button mushrooms work best, but shiitake adds extra umami.

Can I add protein?

Yes, add chicken, tofu, or eggs for a complete meal.

🍍 Pineapple Ginger Smoothie Recipe

🍍 Pineapple Ginger Smoothie Recipe

Prep time: 5 minutes | Servings: 1-2

Ingredients

  • 1.5 cups Pineapple chunks (fresh or frozen)

  • 1 teaspoon Fresh ginger, peeled and grated (add more if you love a spicy kick)

  • 1/2 cup Fresh spinach or kale (optional, for that green color seen in the photo)

  • 1/2 cup Coconut water, almond milk, or regular water

  • 1/2 Banana (frozen works best to make it creamy)

  • 1 tablespoon Fresh lime juice (adds a great zest)

  • 4-5 Ice cubes (omit if using all frozen fruit)

Instructions

  1. Prep the ingredients: If you are using fresh ginger, peel a small piece with a spoon and grate it finely so you don’t get large woody chunks in your drink.

  2. Layer the blender: Add the liquid (coconut water or milk) to the blender first. This helps the blades spin smoothly. Next, add the greens, ginger, banana, and pineapple.

  3. Blend: Secure the lid and blend on high speed for 60 to 90 seconds until the mixture is completely smooth and no green specks remain.

  4. Adjust consistency: If the smoothie is too thick, add a splash more liquid. If it is too thin, add a few more frozen pineapple chunks or ice cubes and blend again.

  5. Serve: Pour into a tall glass, garnish with a fresh pineapple wedge if desired, and enjoy immediately!

💡 Quick Tips

  • Naturally Sweet: Pineapple and banana provide plenty of natural sweetness. If your pineapple is a bit tart, you can add a drizzle of honey or maple syrup.

  • Boost It Up: Feel free to add a tablespoon of chia seeds or hemp seeds for extra texture and nutrients.

Garlic Honey Immune Booster 🧄🍯

Garlic Honey Immune Booster 🧄🍯

Ingredients

  • 1 cup raw honey 🍯
  • 10–12 garlic cloves 🧄
  • 1 clean glass jar

Step-by-Step Recipe

🧄 Step 1: Prepare the Garlic

  • Peel all garlic cloves carefully.
  • Lightly crush each clove using the side of a knife.
    ➡️ This helps release the natural flavor.

🍯 Step 2: Fill the Jar

  • Place garlic cloves into a clean glass jar.
  • Pour raw honey over the garlic until fully covered.

➡️ Make sure no garlic is sticking out above the honey.


✨ Step 3: Let It Rest

  • Close the jar tightly.
  • Keep it at room temperature for 24 hours.

➡️ After a day, the honey becomes more flavorful and aromatic.


🥄 Step 4: Serve

  • Take 1 small spoon of honey with 1 garlic clove.
  • Can also be added to warm water or tea. ☕

Helpful Tips 🌿

✔️ Use fresh garlic for best taste
✔️ Store in a cool dry place
✔️ Stir gently every few days


Q&A 💬

❓Can I keep it in the fridge?

➡️ Yes, but room temperature keeps the honey smoother.

❓How long does it last?

➡️ It can stay fresh for several weeks in a sealed jar.

❓Can I add lemon?

➡️ Yes! Lemon slices give extra fresh flavor 🍋


Simple Nutritional Benefits 🌟

✔️ Contains natural antioxidants
✔️ Great cozy wellness mixture
✔️ Honey adds natural sweetness
✔️ Garlic is rich in natural compounds

Creamy Berry Cheesecake Fluff

This dreamy no-bake dessert is loaded with fresh berries and creamy cheesecake flavor. Light, fluffy, fruity, and perfect for parties or summer treats!

🛒 Ingredients

  • 1 package cream cheese, softened
  • 1 cup whipped topping
  • ½ cup powdered sugar
  • 1 tsp vanilla extract
  • 1 cup strawberries, chopped
  • 1 cup blueberries
  • 1 cup raspberries
  • 1 cup blackberries

👩‍🍳 Step-by-Step Instructions

1️⃣ Prepare the Cream Base

  • Add softened cream cheese to a large bowl.
  • Beat until smooth and creamy.
  • Add powdered sugar and vanilla extract.
  • Mix again until fluffy.

👉 Make sure cream cheese is soft for a smooth texture.


2️⃣ Fold in the Whipped Topping

  • Gently fold whipped topping into the cream cheese mixture.
  • Stir slowly to keep the mixture light and airy.

✨ This creates the fluffy cheesecake texture.


3️⃣ Prepare the Berries

  • Wash all berries carefully.
  • Slice strawberries into small pieces.
  • Pat berries dry with paper towels.

👉 Dry berries help keep the dessert creamy instead of watery.


4️⃣ Combine Everything

  • Add strawberries, blueberries, raspberries, and blackberries into the bowl.
  • Fold gently until berries are evenly mixed.

🍓 Don’t overmix or berries may break apart too much.


5️⃣ Chill Before Serving

  • Cover and refrigerate for at least 1 hour.
  • Serve cold for the best flavor and texture.
❄️ The flavors become even better after chilling!


❓ Q/A

❓ Can I use frozen berries?

✅ Yes, but thaw and drain them well first.

❓ How long does it stay fresh?

✅ Store in the refrigerator for up to 3 days.

❓ Can I make it lighter?

✅ Use light cream cheese and low-fat whipped topping.


💡 Helpful Tips

  • Add mini marshmallows for extra sweetness.
  • Garnish with fresh mint for a beautiful presentation.
  • Serve in dessert cups for parties.

🍽️ Serving Ideas

  • Summer dessert
  • BBQ treat
  • Holiday party bowl
  • Potluck favorite

💪 Nutritional Benefits

  • Berries are packed with antioxidants and vitamins.
  • Cream cheese adds richness and creaminess.
  • Fresh fruit provides natural sweetness and fiber.

Creamy Chicken Lettuce Boats Recipe

Creamy Chicken Lettuce Boats Recipe
Ingredients
  • 2 cups cooked chicken, diced

  • 1 cup cherry tomatoes, sliced

  • 1 avocado, diced

  • 4 slices cooked turkey bacon, chopped

  • 2 tablespoons fresh parsley, chopped

  • 1/2 cup plain yogurt or mayonnaise

  • 1 tablespoon lemon juice

  • 1/2 teaspoon garlic powder

  • 1/2 teaspoon black pepper

  • 1/4 teaspoon salt

  • 8 large romaine lettuce leaves

Instructions

  1. Wash the romaine lettuce leaves well and pat dry. Place them on a serving tray.

  2. In a large bowl, add the diced chicken, cherry tomatoes, avocado, turkey bacon, and parsley. Mix gently so the avocado stays in small pieces.

  3. In a small bowl, stir together the yogurt or mayonnaise, lemon juice, garlic powder, salt, and black pepper until smooth and creamy.

  4. Pour the creamy dressing over the chicken mixture. Stir gently until everything is evenly coated.

  5. Spoon the filling into each lettuce leaf. Spread the mixture evenly so every lettuce boat is full and colorful.

  6. Sprinkle a little extra parsley and black pepper on top for fresh flavor.

  7. Serve immediately while the lettuce is crisp and fresh.

Easy Tips

  • Use rotisserie chicken for quicker preparation.

  • Add cucumber or celery for extra crunch.

  • Chill the filling for 15 minutes before serving for a cooler, creamier texture.
  • These lettuce boats are perfect for lunch, dinner, or light gatherings.

This recipe makes about 4 servings and is fresh, creamy, and easy to prepare at home.

Spinach Green Apple Smoothie,

Spinach Green Apple Smoothie,

Ingredients

  • cups almond milk (or your preferred plant-based milk)

  • 2 cups fresh spinach leaves

  • 1 medium green apple, cored and diced

  • 1 cup frozen mango chunks (adds natural sweetness)

  • Ice cubes (optional, for an extra chill)

Instructions

  1. Blend the Greens First: Pour the milk into your blender and add the fresh spinach. Blend on high until completely smooth and no leaf pieces remain. This step ensures a velvety texture.

  2. Add the Fruit: Add the diced green apple and frozen mango chunks to the blender.

  3. Final Blend: Blend everything again on high speed until completely smooth, thick, and creamy.

  4. Serve: If you prefer it colder, toss in a few ice cubes and blend for another 10 seconds. Pour into glasses and enjoy immediately!

Spinach and Feta Egg Muffins!

 Spinach and Feta Egg Muffins!

Ingredients

  • Eggs: 6 large eggs

  • Milk: 2 tablespoons (any kind)

  • Spinach: 1 cup fresh spinach, chopped

  • Feta Cheese: 1/2 cup crumbled feta cheese

  • Salt & Pepper: A pinch of each to taste

  • Cooking Spray or Olive Oil: For greasing the pan

Instructions

  1. Preheat and Prep: Preheat your oven to 350°F (180°C). Generously grease a 6-cup muffin tin with cooking spray or olive oil to prevent sticking.

  2. Whisk: In a medium bowl, whisk the eggs and milk together until smooth. Season with a pinch of salt and black pepper.

  3. Layer Fillings: Divide the chopped fresh spinach and crumbled feta cheese evenly among the 6 prepared muffin cups.

  4. Pour: Carefully pour the whisked egg mixture over the spinach and feta in each cup, filling them about 3/4 of the way full.

  5. Bake: Place the tin in the oven and bake for 18 to 20 minutes. The egg muffins are done when they are puffed up, golden brown on the edges, and the center is set (not jiggly).

  6. Cool and Serve: Remove from the oven and let them cool in the pan for 5 minutes. Use a butter knife to gently loosen the edges of each muffin and pop them out. Enjoy warm!

Tip: You can store these in an airtight container in the fridge for up to 4 days. Just microwave them for 20–30 seconds for a quick, warm breakfast on the go!

Easy Mozzarella Sticks

Easy Mozzarella Sticks

Ingredients

  • Mozzarella: 12 low-moisture mozzarella string cheese sticks

  • Flour: 1/2 cup all-purpose flour

  • Eggs: 2 large eggs, beaten

  • Breadcrumbs: 1 cup Panko or Italian seasoned breadcrumbs

  • Seasonings: 1 teaspoon garlic powder and 1 teaspoon dried oregano (or Italian seasoning)

  • Oil: Vegetable oil for frying

  • Sauce: Marinara or pizza sauce for dipping

Instructions

  1. Prep the Cheese: Cut the string cheese sticks in half horizontally if you prefer shorter bites.

  2. Set Up Coating Station: Place the flour in one shallow bowl. In a second bowl, whisk the eggs. In a third bowl, mix the breadcrumbs with the garlic powder and dried oregano.

  3. Coat the Cheese: Dredge a cheese stick in the flour, shaking off the excess. Dip it into the egg, then roll it in the breadcrumbs until fully coated.

  4. Double Coat: Dip the stick back into the egg and into the breadcrumbs one more time. This double-coating prevents the cheese from leaking out while cooking. Repeat for all sticks.

  5. Freeze: Place the coated cheese sticks on a tray and freeze them for at least 1 to 2 hours. Do not skip this step, or the cheese will melt too quickly.

  6. Cook: Heat about 2 inches of vegetable oil in a deep skillet over medium-high heat. Fry the frozen sticks in small batches for about 1 to 2 minutes until they are golden brown.

  7. Serve: Drain on paper towels and serve warm with a side of heated marinara sauce.