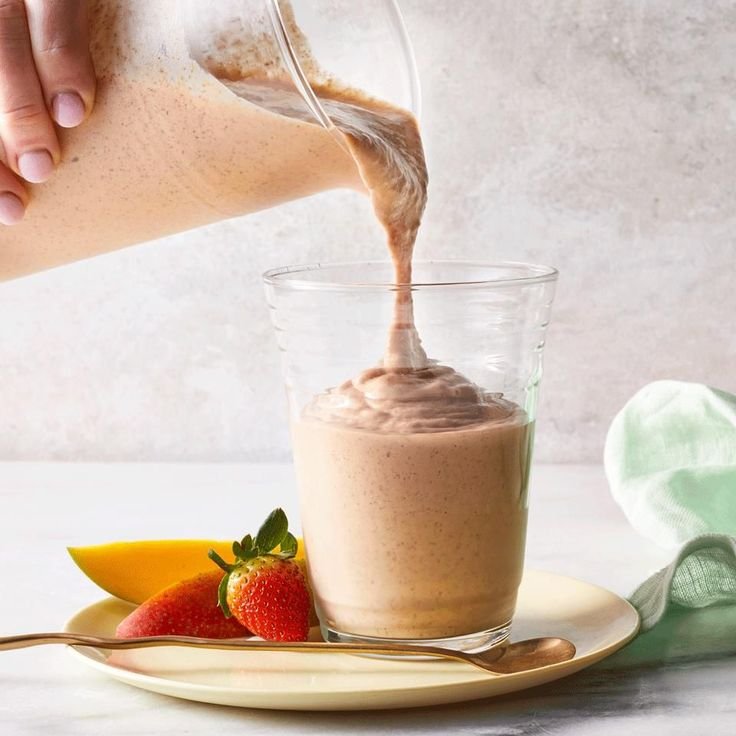
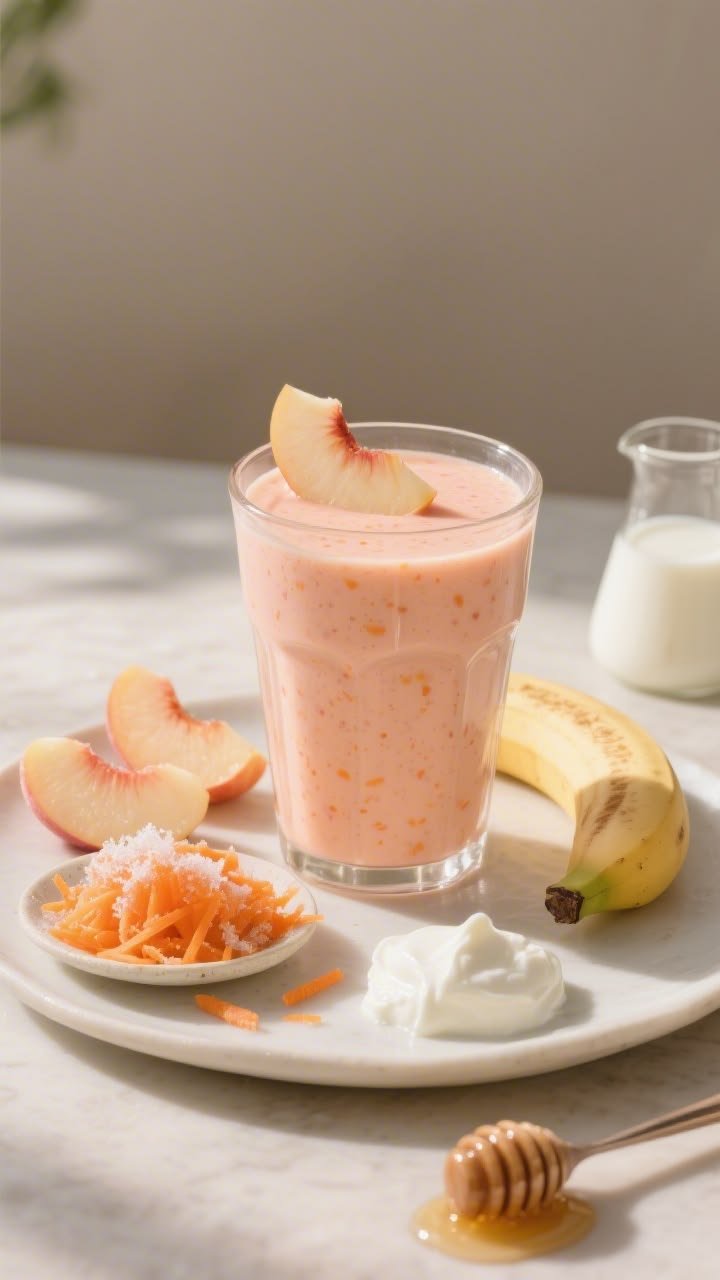
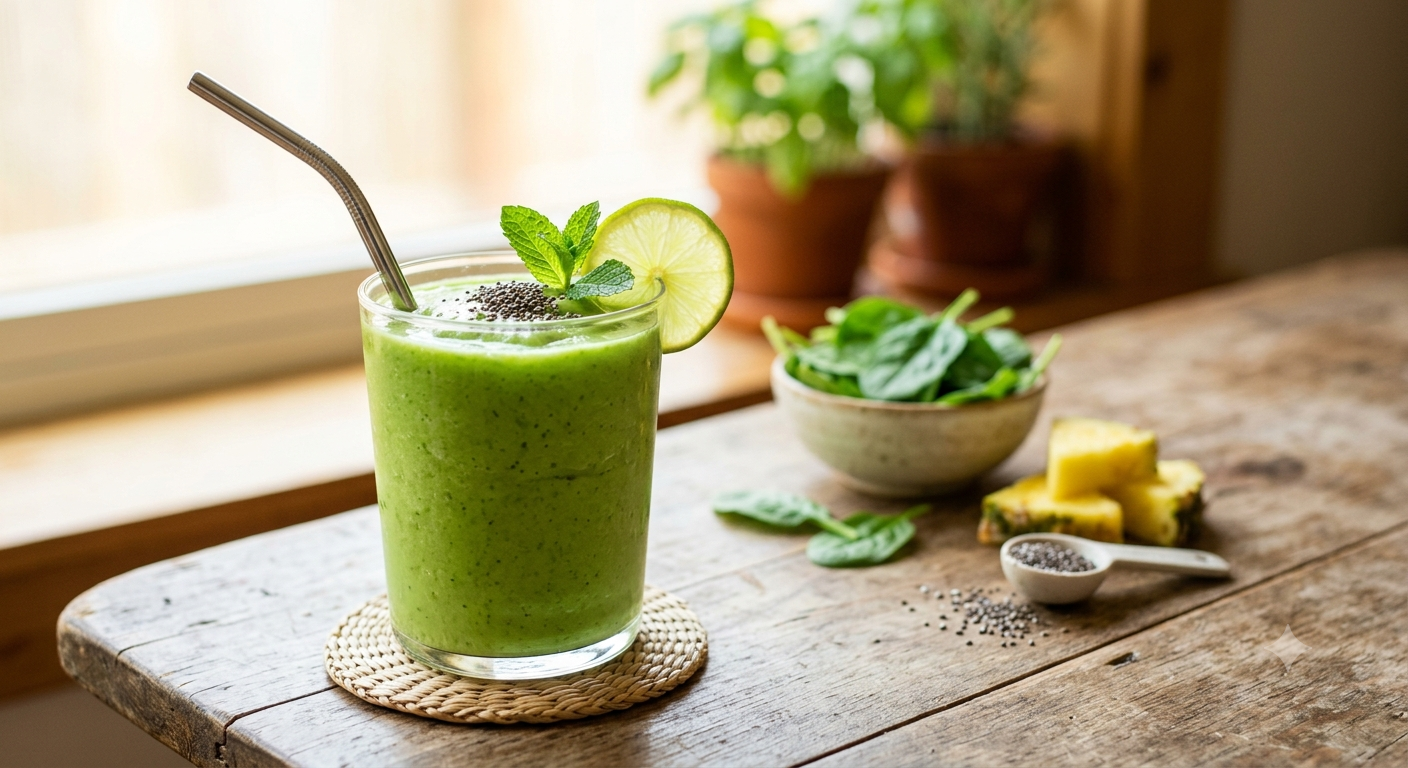
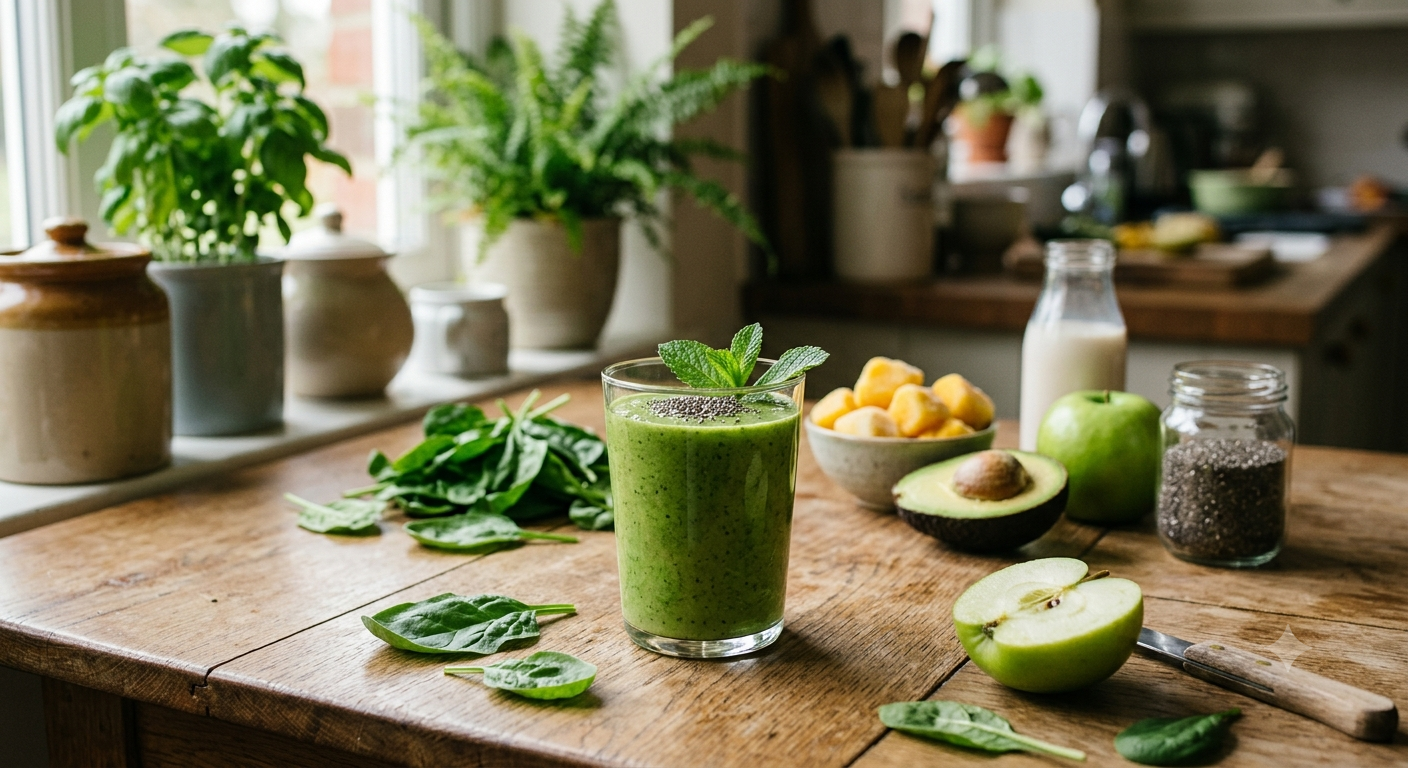
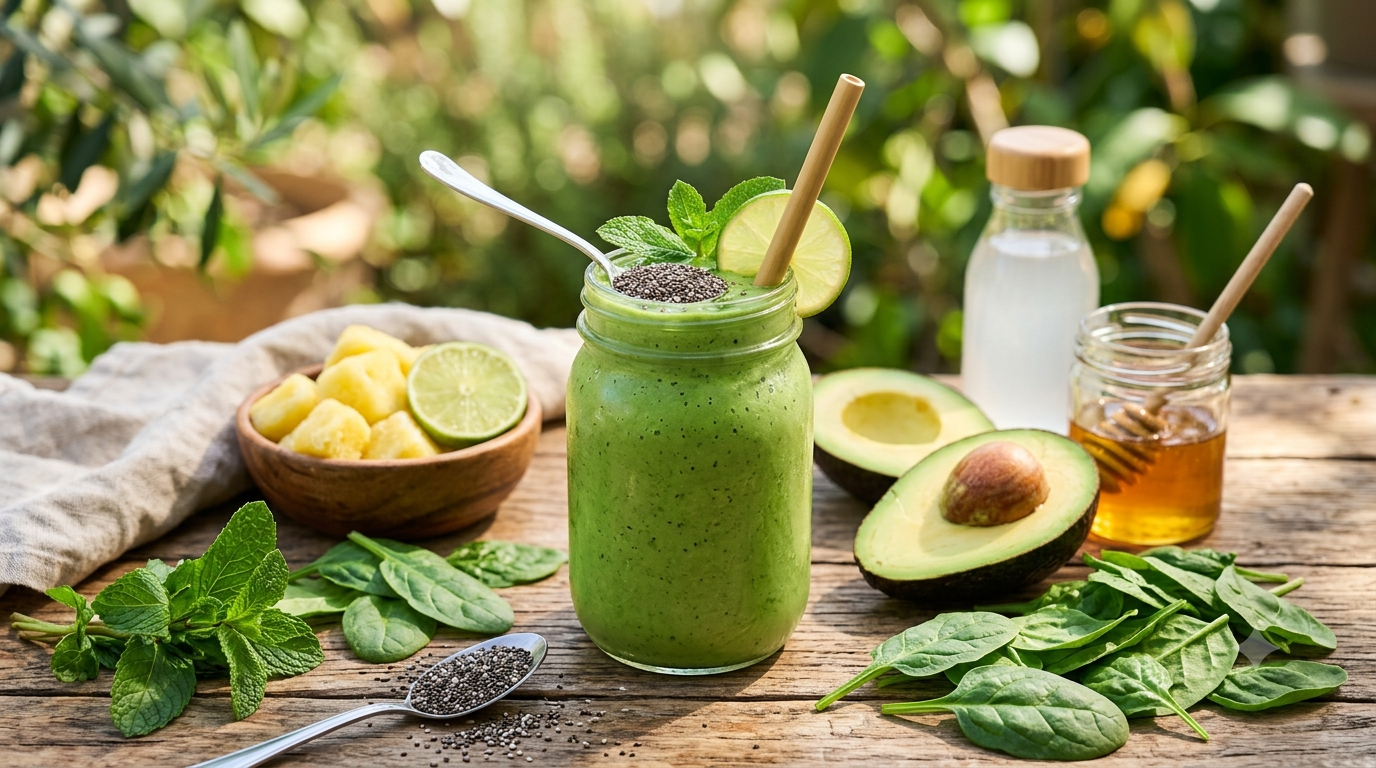
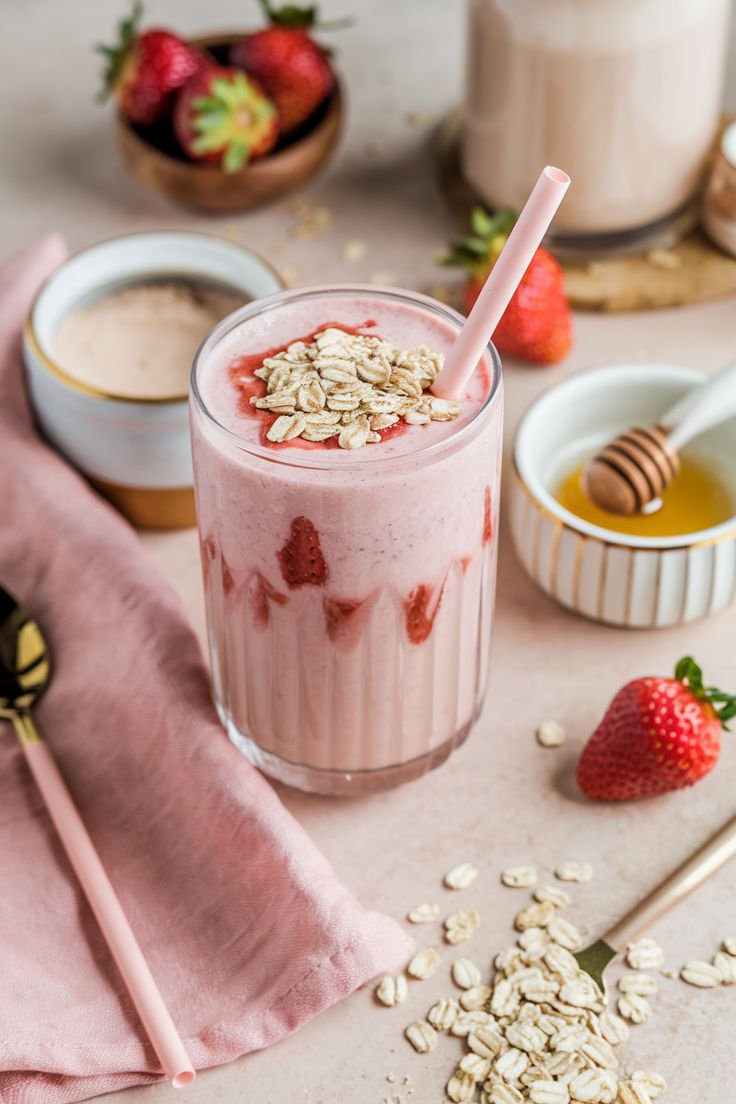
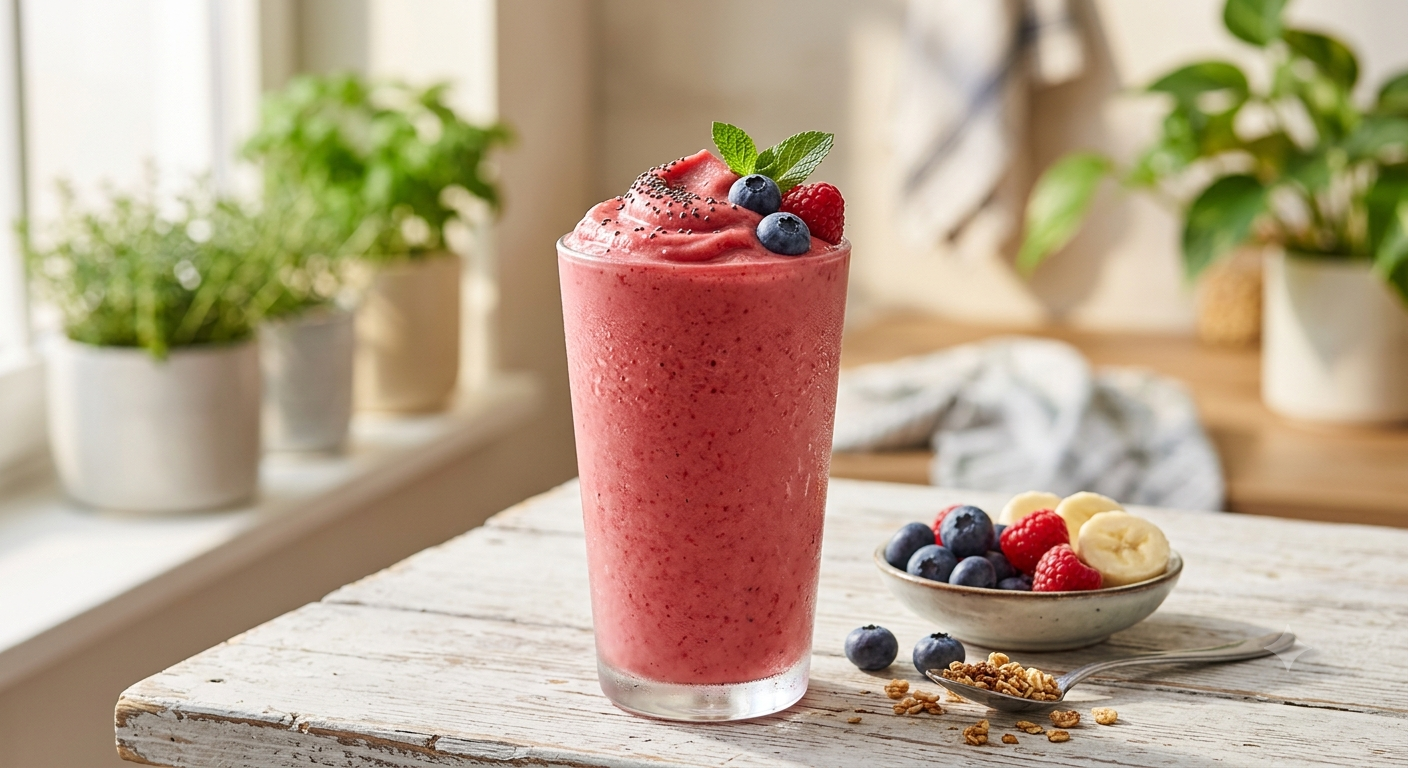
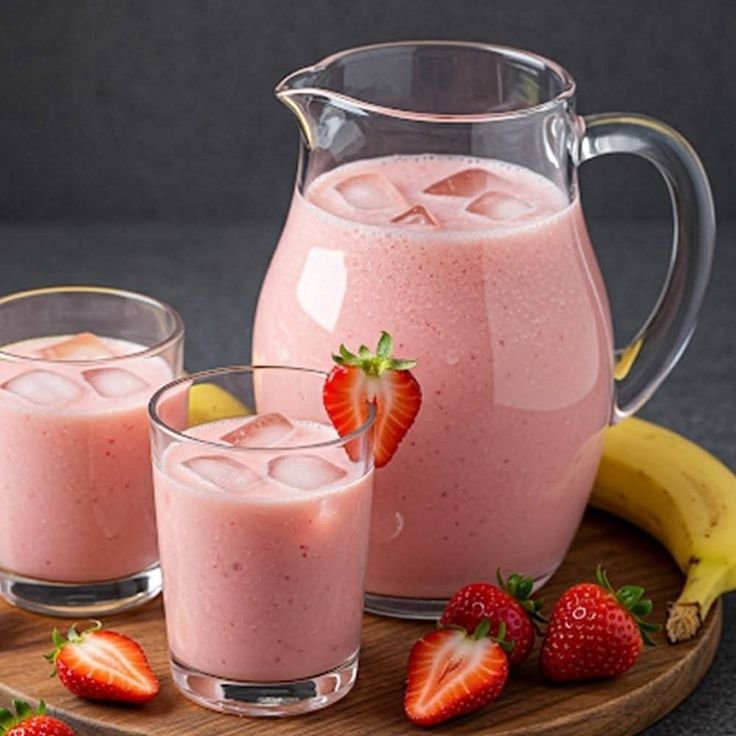
Zesty Cucumber & Pepper Garden Salad

Zesty Cucumber & Pepper Garden Salad

Ingredients 🛒

  • 2 large cucumbers, thinly sliced
  • 1 red bell pepper, thinly sliced
  • ½ red onion, thinly sliced
  • 2 tbsp olive oil
  • 1 tbsp fresh lemon juice
  • 1 tsp honey
  • ½ tsp salt
  • ¼ tsp black pepper
  • ½ tsp chili flakes (optional)
  • 1 tbsp fresh parsley, chopped

Detailed Steps 👩‍🍳

1️⃣ Prepare the Vegetables

  • Wash the cucumbers, bell pepper, and onion thoroughly.
  • Slice the cucumbers into thin rounds.
  • Cut the bell pepper into thin strips.
  • Slice the red onion into thin half-rings.
  • Chop the parsley finely.

2️⃣ Make the Dressing

  • In a small bowl, add olive oil, lemon juice, honey, salt, and black pepper.
  • Whisk well until the dressing looks smooth and fully combined.

3️⃣ Combine the Salad

  • Place the sliced cucumbers, bell pepper, and onion into a large mixing bowl.
  • Sprinkle the chopped parsley over the vegetables.
  • Pour the prepared dressing evenly over the top.

4️⃣ Toss Well

  • Using salad tongs or a large spoon, gently toss everything together.
  • Continue mixing for 1–2 minutes so every vegetable slice is coated with the dressing.

5️⃣ Chill for Better Flavor

  • Cover the bowl or transfer the salad to a glass container.
  • Refrigerate for 20–30 minutes.
  • Chilling helps the vegetables absorb the dressing and become more flavorful.

6️⃣ Serve

  • Give the salad one final toss before serving.
  • Serve cold as a refreshing side dish, light lunch, or healthy snack.

Quick Q/A ❓

Can I make it ahead of time?
➡️ Yes, it can be prepared up to 24 hours in advance.

Can I add cheese?
➡️ Yes, crumbled feta cheese pairs perfectly with this salad.

How long does it stay fresh?
➡️ Store in the refrigerator for up to 2 days.

Blueberry Lemon Loaf Cake

Blueberry Lemon Loaf Cake

Ingredients

For the Cake

  • 1½ cups all-purpose flour
  • 1 tsp baking powder
  • ¼ tsp salt
  • ½ cup unsalted butter, softened
  • ¾ cup sugar
  • 2 eggs
  • ½ cup milk
  • 1 tbsp lemon zest
  • 1 tsp vanilla extract
  • 1 cup fresh blueberries

For the Lemon Glaze

  • 1 cup powdered sugar
  • 2–3 tbsp lemon juice

Instructions

➡️ Preheat oven to 350°F (175°C). Grease and line a loaf pan.

➡️ In a bowl, whisk together flour, baking powder, and salt.

➡️ In another bowl, beat butter and sugar until light and fluffy.

➡️ Add eggs one at a time, mixing well after each addition.

➡️ Mix in vanilla extract and lemon zest.

➡️ Add the dry ingredients and milk alternately, mixing until just combined.

➡️ Gently fold in the blueberries.

➡️ Pour batter into the prepared loaf pan and smooth the top.

➡️ Bake for 50–60 minutes or until a toothpick inserted in the center comes out clean.

➡️ Let the loaf cool completely.

➡️ Mix powdered sugar and lemon juice until smooth.

➡️ Drizzle the glaze over the cooled loaf and top with extra blueberries if desired.

➡️ Slice and serve.

Q & A

Q: Can I use frozen blueberries?
A: Yes, add them frozen and lightly coat them with flour before mixing into the batter.

Q: How do I store this loaf?
A: Keep it in an airtight container at room temperature for up to 3 days.

Q: Can I skip the glaze?
A: Yes, the loaf is delicious on its own, but the glaze adds extra lemon flavor and sweetness.

Air Fryer Crispy Potatoes

Air Fryer Crispy Potatoes

Ingredients

  • 6 medium potatoes, sliced into thick rounds
  • 2 tbsp olive oil
  • 1 tsp garlic powder
  • 1 tsp dried parsley
  • ½ tsp paprika
  • ½ tsp salt
  • ¼ tsp black pepper
  • Fresh parsley for garnish

Instructions

🔹 Wash and slice the potatoes into thick, even rounds.

🔹 Place the potatoes in a bowl and add olive oil, garlic powder, parsley, paprika, salt, and black pepper.

🔹 Toss well until all potato slices are evenly coated.

🔹 Preheat the air fryer to 200°C (400°F) for 3 minutes.

🔹 Arrange the potato slices in a single layer in the air fryer basket.

🔹 Air fry for 18–22 minutes, flipping halfway through cooking.

🔹 Cook until the potatoes are golden brown and crispy on the outside.

🔹 Remove from the air fryer and garnish with fresh parsley.

🔹 Serve hot with your favorite dipping sauce.

Q & A

Q: How do I make them extra crispy?
A: Soak the sliced potatoes in cold water for 20–30 minutes, then dry thoroughly before seasoning.

Q: Can I use sweet potatoes?
A: Yes, but reduce the cooking time by 2–4 minutes and check frequently.

Q: How should I store leftovers?
A: Refrigerate in an airtight container for up to 3 days and reheat in the air fryer for best crispiness.

Chocolate Biscuit Roll Cake

Ingredients

For the Roll

  • 2 packs chocolate sandwich cookies, crushed
  • 1 cup milk
  • 1 tsp vanilla extract

Filling

  • 1 cup whipped cream
  • 4 oz cream cheese, softened
  • 2 tbsp powdered sugar

Chocolate Coating

  • 1½ cups milk chocolate chips
  • ½ cup heavy cream

Topping

  • ¼ cup chopped nuts

Instructions

Step 1

  • Crush the chocolate cookies into fine crumbs.
  • Mix with milk and vanilla until a soft dough forms.

Step 2

  • Place the dough between two sheets of parchment paper.
  • Roll into a large rectangle.

Step 3

  • Beat cream cheese and powdered sugar until smooth.
  • Fold in whipped cream.

Step 4

  • Spread the filling evenly over the chocolate layer.

Step 5

  • Carefully roll the dessert into a log shape.
  • Wrap tightly and refrigerate for 1 hour.

Step 6

  • Heat the heavy cream until warm.
  • Pour over chocolate chips and stir until smooth.

Step 7

  • Cover the chilled roll with the chocolate coating.

Step 8

  • Sprinkle chopped nuts over the top.

Step 9

  • Refrigerate for another 30 minutes.

Step 10

  • Slice and serve chilled.

Q & A

Q: Can I make it ahead of time?
A: Yes, it can be made a day in advance and kept refrigerated.

Q: Can I use dark chocolate?
A: Yes, dark chocolate works wonderfully for a richer flavor.

Q: How long does it last?
A: Store covered in the refrigerator for up to 4 days.

Cheeseburger Bowl Meal Prep

Ingredients

  • 1 lb ground beef
  • 4 cups cooked rice
  • 2 cups lettuce, shredded
  • 1 cup cherry tomatoes, diced
  • 1 cup cheddar cheese, shredded
  • 1 cup pickle slices
  • 1 tsp garlic powder
  • 1 tsp onion powder
  • ½ tsp paprika
  • Salt and black pepper to taste

Special Sauce

  • ½ cup mayonnaise
  • 2 tbsp ketchup
  • 1 tbsp mustard
  • 1 tbsp pickle juice

Instructions

Step 1

  • Cook the ground beef in a skillet over medium heat.
  • Add garlic powder, onion powder, paprika, salt, and black pepper.
  • Cook until fully browned.

Step 2

  • Mix mayonnaise, ketchup, mustard, and pickle juice in a small bowl.
  • Stir until smooth.

Step 3

  • Divide the cooked rice evenly among 4 meal-prep bowls.

Step 4

  • Add shredded lettuce and diced tomatoes over the rice.

Step 5

  • Top with shredded cheddar cheese.

Step 6

  • Add the seasoned ground beef.

Step 7

  • Arrange pickle slices on top.

Step 8

  • Drizzle with the special sauce and serve.

Q & A

Q: Can I make these ahead of time?
A: Yes, store in the refrigerator for up to 4 days.

Q: Can I use ground turkey instead of beef?
A: Yes, ground turkey or chicken works well.

Q: Can I use cauliflower rice?
A: Yes, for a lower-carb option.

Mixed Berry Jam

Mixed Berry Jam

Ingredients

  • 2 cups mixed berries (strawberries, blueberries, raspberries, or blackberries)
  • ¾ cup granulated sugar
  • 1 tbsp lemon juice

Instructions

Step 1

  • Wash the berries thoroughly.
  • Remove stems from strawberries and cut larger berries into smaller pieces.

Step 2

  • Add the berries, sugar, and lemon juice to a saucepan.

Step 3

  • Cook over medium heat, stirring occasionally until the berries begin to soften and release their juices.

Step 4

  • Use a potato masher or spoon to gently mash the berries to your desired texture.

Step 5

  • Continue cooking for 15–20 minutes, stirring often, until the mixture thickens.

Step 6

  • Remove from heat and allow the jam to cool for 10 minutes.

Step 7

  • Transfer the jam to a clean glass jar.

Step 8

  • Let cool completely before sealing and refrigerating.

Q & A

Q: How long does homemade jam last?
A: Store in the refrigerator for up to 2 weeks.

Q: Can I use frozen berries?
A: Yes, frozen berries work just as well as fresh berries.

Q: How do I make the jam thicker?
A: Cook it a little longer until more liquid evaporates.

Oatmeal Banana Breakfast Bake

Ingredients:

    • 1 cup oatmeal
    • 150 ml milk
    • 2 bananas, mashed
    • 2 eggs, beaten (be sure to wash your eggs before using them)
    • A pinch of vanillin
    • 50 g cranberries
    • 50 g dried apricots, chopped
    • 30 g almond flakes
  • 1 teaspoon baking powder
  • Vegetable oil (for greasing)

Instructions:

  1. Prepare the Oatmeal Mixture:
      • In a bowl, combine the oatmeal and milk. Mix well and let stand for 10 minutes to allow the oats to absorb the milk and soften.


  2. Combine Ingredients:
      • Mash the bananas and add them to the oatmeal mixture.
      • Add the beaten eggs, vanillin, cranberries, chopped dried apricots, almond flakes, and baking powder. Mix thoroughly to ensure all ingredients are well combined.


  3. Prepare the Baking Pan:
      • Preheat the oven to 180°C (360°F).
      • Line a baking pan with baking paper and grease it with vegetable oil to prevent sticking.


  4. Bake the Mixture:
      • Pour the oatmeal mixture into the prepared baking pan, spreading it evenly.
      • Bake in the preheated oven for 40 minutes, or until the top is golden brown and a toothpick inserted into the center comes out clean.


  5. Serve:
      • Allow the breakfast bake to cool slightly before slicing.
      • Serve warm or at room temperature.


Serving Suggestions:

    • Enjoy a slice of the breakfast bake with a dollop of Greek yogurt or a drizzle of honey.
    • Pair with a fresh fruit  salad for a complete breakfast.

Cooking Tips:

  • Make sure to mix the oatmeal and milk well and let it stand to ensure the oats are adequately softened.
  • You can substitute dried apricots and cranberries with other dried fruits like raisins or dates if preferred.

Nutritional Benefits:

    • Oats provide a good source of fiber, which aids in digestion and keeps you full longer.
  • Bananas are rich in potassium and vitamins, making them a great addition to a healthy breakfast.
  • Almond flakes add healthy fats and a delightful crunch to the bake.

Dietary Information:

    • Vegetarian: Yes
  • Gluten-Free: Can be made with gluten-free oats
  • Nut-Free: Omit the almond flakes or substitute with sunflower seeds

Storage:

    • Store any leftovers in an airtight container in the refrigerator for up to 3 days.
  • Reheat individual slices in the microwave for a quick and easy breakfast.

🌮🥟 Easy Chicken Taco Wonton Cups

🌮🥟 Easy Chicken Taco Wonton Cups
📝 Ingredients:
12 wonton wrappers
1 cup cooked chicken (shredded)
1/2 cup salsa
1/2 cup cream cheese (softened)
1/2 cup shredded cheddar cheese
1/2 teaspoon taco seasoning
1/4 cup corn (optional)
1/4 cup black beans (optional)
2 tablespoons chopped green onions
Toppings (optional):
Sour cream
Guacamole
Fresh cilantro
Diced tomatoes
👩‍🍳 Instructions:
Preheat oven:
Set to 180°C (350°F). Lightly grease a muffin tin.
Form cups:
Press one wonton wrapper into each muffin cup to form a shell.
Bake shells:
Bake for 5–7 minutes until lightly golden.
Make filling:
In a bowl, mix shredded chicken, salsa, cream cheese, taco seasoning, corn, and black beans.
Fill cups:
Spoon mixture into each wonton cup.
Add cheese:
Sprinkle cheddar cheese on top.
Bake again:
Bake for 10–12 minutes until heated through and cheese is melted.
Garnish & serve:
Top with green onions and your favorite toppings. Serve warm.
💡 Tips:
Use rotisserie chicken for quick prep
Add jalapeños for extra spice 🌶️
Swap chicken for beef or keep it vegetarian
Air fryer option: 180°C for 8–10 minutes
❓ Q&A:
Q: Can I make these ahead of time?
Yes! Prepare filling in advance and assemble before baking.
Q: How do I keep them crispy?
Bake the wonton shells first before adding filling.
Q: What can I serve with them?
Serve with dips like salsa, sour cream, or queso.

Black Cocoa Cake

Black Cocoa Cake

Ingredients

For the Cake

  • 2 cups all-purpose flour
  • ¾ cup black cocoa powder
  • 1½ cups sugar
  • 1 tsp baking soda
  • 1 tsp baking powder
  • ½ tsp salt
  • 2 eggs
  • 1 cup milk
  • ½ cup vegetable oil
  • 1 tsp vanilla extract
  • 1 cup hot coffee or hot water

For the Chocolate Frosting

  • 1 cup butter, softened
  • 3 cups powdered sugar
  • ½ cup black cocoa powder
  • 2–3 tbsp milk
  • 1 tsp vanilla extract

Instructions

Step 1

  • Preheat oven to 350°F (175°C).
  • Grease and line two 8-inch cake pans.

Step 2

  • In a large bowl, combine flour, black cocoa powder, sugar, baking soda, baking powder, and salt.

Step 3

  • Add eggs, milk, oil, and vanilla.
  • Mix until smooth.

Step 4

  • Slowly stir in the hot coffee or hot water.
  • The batter will be thin.

Step 5

  • Divide the batter evenly between the cake pans.

Step 6

  • Bake for 30–35 minutes or until a toothpick inserted in the center comes out clean.

Step 7

  • Let the cakes cool completely before frosting.

Step 8

  • For the frosting, beat butter until creamy.
  • Add powdered sugar, black cocoa powder, vanilla, and milk.
  • Beat until smooth and fluffy.

Step 9

  • Spread frosting between the cake layers and over the top and sides.

Step 10

  • Slice and serve.

Q & A

Q: What is black cocoa powder?
A: It is a heavily alkalized cocoa powder that gives cakes a deep black color and rich chocolate flavor.

Q: Can I use regular cocoa powder?
A: Yes, but the cake will be lighter in color.

Q: How should I store the cake?
A: Store covered at room temperature for up to 3 days or refrigerate for up to 5 days.

“Take 2 tablespoons in the morning

Garlic, Ginger & Turmeric Wellness Drink

Ingredients

  • 2 cups water
  • 1-inch piece fresh ginger, sliced
  • 2 garlic cloves, crushed
  • ½ teaspoon turmeric
  • 1 cinnamon stick
  • 1 teaspoon honey (optional)

Instructions

Step 1

Add the water to a small saucepan.

Step 2

Add the ginger, garlic, turmeric, and cinnamon stick.

Step 3

Bring to a boil, then reduce the heat and simmer for 10–15 minutes.

Step 4

Strain the mixture into a cup.

Step 5

Add honey if desired and stir well.

Step 6

Serve warm.

Q & A

Q: Can I drink this every day?
A: Most healthy adults can enjoy it in moderation as part of a balanced diet.

Q: Can I add lemon?
A: Yes, fresh lemon juice can be added for extra flavor.

Q: Does this drink cure diseases?
A: No. This is a traditional herbal drink and is not a proven treatment or cure for any medical condition.

Humpty Dumpty Dip

Humpty Dumpty Dip

Ingredients

  • 12 hard-boiled eggs
  • 8 oz (226 g) cream cheese, softened
  • 2 tbsp mayonnaise
  • 1 tbsp yellow mustard
  • ½ tsp garlic powder
  • ½ tsp salt
  • ¼ tsp black pepper
  • 1 tbsp chives, finely chopped (optional)

Instructions

Step 1

  • Peel the hard-boiled eggs and roughly chop them.

Step 2

  • Add eggs, cream cheese, mayonnaise, mustard, garlic powder, salt, and black pepper to a food processor.

Step 3

  • Blend until smooth and creamy.

Step 4

  • Stir in chives if desired.

Step 5

  • Transfer to a serving bowl and refrigerate for 30 minutes.

Step 6

  • Serve with crackers, toasted bread, pretzels, celery sticks, or cucumber slices.

Q & A

Q: Why is it called Humpty Dumpty Dip?
A: The dip is made primarily from eggs, inspired by the famous egg-shaped nursery rhyme character, Humpty Dumpty.

Q: Can I make it ahead of time?
A: Yes, prepare it up to 24 hours in advance and keep refrigerated.

Q: How long will it keep?
A: Store in an airtight container in the refrigerator for up to 3 days.

Creamy Cheeseburger Soup

Creamy Cheeseburger Soup

Ingredients

  • 1 lb ground beef
  • 4 tbsp butter, divided
  • 1 cup onion, diced
  • 1 cup carrots, shredded
  • 1 cup celery, diced
  • 3 cups potatoes, peeled and diced
  • 3 cups chicken broth
  • ¼ cup all-purpose flour
  • 2 cups whole milk
  • 2 cups cheddar cheese, shredded
  • ½ tsp garlic powder
  • 1 tsp salt
  • ½ tsp black pepper
  • ¼ cup sour cream

Instructions

Step 1

  • Cook the ground beef in a large pot until fully cooked.
  • Remove excess liquid if needed and set aside.

Step 2

  • Melt 2 tablespoons butter in the same pot.
  • Add onion, carrots, and celery.
  • Cook for 5 minutes until softened.

Step 3

  • Add potatoes and chicken broth.
  • Bring to a gentle boil.
  • Reduce heat and simmer for 12–15 minutes until potatoes are tender.

Step 4

  • In a separate saucepan, melt the remaining butter.
  • Whisk in flour and cook for 1 minute.
  • Slowly add milk while whisking until smooth.

Step 5

  • Pour the milk mixture into the soup pot.
  • Add cooked beef, garlic powder, salt, and pepper.
  • Stir well.

Step 6

  • Lower the heat.
  • Gradually add shredded cheese and stir until melted.

Step 7

  • Remove from heat.
  • Stir in sour cream.

Step 8

  • Serve warm with extra cheese, green onions, or croutons if desired.

Q & A

Q: Can I make this soup ahead of time?
A: Yes, it can be stored in the refrigerator for up to 4 days.

Q: Can I use ground turkey instead of beef?
A: Yes, ground turkey works well as an alternative.

Q: How can I make the soup thicker?
A: Mash some of the cooked potatoes before serving.

Cranberry Walnut Stuffed Sweet Potatoes

 Cranberry Walnut Stuffed Sweet Potatoes
✅ Ingredients
4 medium sweet potatoes
1 cup feta or goat cheese
½ cup dried cranberries
½ cup chopped walnuts
2 tbsp honey
2 tbsp melted butter
1 tbsp chopped parsley
1 tsp rosemary
½ tsp black pepper
Salt to taste
👩‍🍳 Step-by-Step Recipe
Bake Sweet Potatoes 🍠
→ Wash sweet potatoes well.
→ Prick with a fork.
→ Bake at 200°C / 400°F for 45–55 minutes until soft.
Prepare Topping 🧀
→ In a bowl, mix feta or goat cheese, cranberries, walnuts, parsley, rosemary, black pepper, and a little salt.
Open Potatoes 🔪
→ Cut each baked sweet potato from the center.
→ Gently press the sides to open.
Fill Them 🥄
→ Add the cheese mixture generously inside each potato.
Make Honey Butter Glaze 🍯
→ Mix melted butter with honey.
→ Drizzle over the stuffed potatoes.
Bake Again 🔥
→ Put them back in the oven for 8–10 minutes until cheese becomes warm and slightly creamy.
Serve 🌿
→ Garnish with extra walnuts, cranberries, parsley, and rosemary.
→ Serve warm.
🌿 Nutritional Benefits
Sweet potatoes give fiber and natural sweetness.
Walnuts add healthy fats and crunch.
Cranberries add fruity flavor and antioxidants.
Cheese gives protein and creamy texture.
Rosemary and parsley add fresh flavor.
❓ Q/A
Q: Can I use cream cheese instead of feta?
A: Yes, cream cheese makes it more creamy.
Q: Can I make this ahead?
A: Yes, bake potatoes first, then fill and warm before serving.
Q: Can I skip walnuts?
A: Yes, use almonds, pecans, or leave nuts out.
Q: Is this good for dinner?
A: Yes, it works as a light dinner, side dish, or holiday recipe.

Cilantro Jalapeño Dip

Cilantro Jalapeño Dip

Ingredients

  • 1 cup sour cream
  • 1 cup mayonnaise
  • 1 bunch fresh cilantro
  • 2 jalapeños, seeded (or leave seeds for extra heat)
  • 1 clove garlic
  • Juice of 1 lime
  • 1/2 tsp salt
  • 1/4 tsp black pepper

Instructions

Step 1

  • Wash and roughly chop the cilantro.
  • Remove stems from the jalapeños if desired.

Step 2

  • Add cilantro, jalapeños, garlic, lime juice, salt, and pepper to a food processor.

Step 3

  • Blend until finely chopped.

Step 4

  • Add sour cream and mayonnaise.
  • Blend again until smooth and creamy.

Step 5

  • Taste and adjust salt or lime juice as needed.

Step 6

  • Cover and refrigerate for at least 30 minutes before serving.

Serving Suggestions

  • Tortilla chips
  • Fresh vegetables
  • Tacos and burritos
  • Grilled chicken or steak
  • Sandwich spread

Prep Time

  • 10 minutes

Chill Time

  • 30 minutes

Servings

  • 8–10 servings

Q&A

Can I make it less spicy?
Yes, remove all jalapeño seeds and membranes before blending.

How long does it last?
Store in an airtight container in the refrigerator for up to 4 days.

Can I use Greek yogurt instead of sour cream?
Yes, Greek yogurt works well and adds extra protein.

Cheesy Sloppy Joe Garlic Bread Boats

Cheesy Sloppy Joe Garlic Bread Boats

Ingredients

  • 1 loaf French bread or Italian bread
  • 1 lb (450g) ground beef
  • 1 small onion, finely diced
  • 1 cup sloppy joe sauce (or tomato sauce with seasoning)
  • 2 cups shredded mozzarella cheese
  • 1 tbsp butter

Instructions

Step 1: Prepare the Beef

  • Heat a skillet over medium heat.
  • Add ground beef and onion.
  • Cook until the beef is browned and the onion is soft.
  • Drain excess grease.

Step 2: Make the Filling

  • Stir in the sloppy joe sauce.
  • Simmer for 5 minutes until thick and flavorful.

Step 3: Prepare the Bread

  • Slice the loaf into thick pieces.
  • Arrange the bread pieces in a greased baking dish.
  • Lightly brush with melted butter.

Step 4: Assemble

  • Spoon the beef mixture generously onto each bread piece.
  • Top with plenty of mozzarella cheese.

Step 5: Bake

  • Bake at 375°F (190°C) for 12–15 minutes.
  • Broil for 1–2 minutes if desired until the cheese is bubbly and lightly golden.

Step 6: Serve

  • Let cool for 2–3 minutes.
  • Serve warm with a side salad or fries.

Prep Time

  • Prep: 10 minutes
  • Cook: 20 minutes
  • Total: 30 minutes

Servings

  • 8–10 bread boats

Q&A

Can I use ground turkey instead of beef?
Yes, ground turkey or chicken works well.

Can I make it ahead of time?
Yes. Assemble the bread boats, refrigerate, and bake when ready to serve.

What cheese works best?
Mozzarella, provolone, Monterey Jack, or a blend of Italian cheeses are all great options.

Milk Chocolate Candy With 4 Simple Ingredients, In Minutes

Chocolate Coconut Bars

Ingredients

  • 2 cups shredded coconut
  • 1/2 cup sweetened condensed milk
  • 1 tsp vanilla extract
  • 2 cups milk chocolate, melted
  • 2 tbsp coconut oil (optional, for smoother chocolate)

Instructions

Step 1: Make the Coconut Filling

  • In a bowl, combine shredded coconut, sweetened condensed milk, and vanilla extract.
  • Mix until the coconut is fully coated and the mixture holds together.

Step 2: Shape the Bars

  • Take small portions of the mixture and shape into mini logs or bars.
  • Place on a parchment-lined tray.
  • Freeze for 20–30 minutes until firm.

Step 3: Coat with Chocolate

  • Melt the milk chocolate with coconut oil until smooth.
  • Dip each coconut bar into the melted chocolate, coating completely.
  • Place back on the lined tray.

Step 4: Decorate

  • Drizzle extra melted chocolate over the tops for the classic look.

Step 5: Chill

  • Refrigerate for 20–30 minutes or until the chocolate is fully set.

Prep Time

  • Prep: 15 minutes
  • Chill Time: 50 minutes
  • Total: 1 hour 5 minutes

Yield

  • 12–15 chocolate coconut bars

Q&A

Can I use dark chocolate?
Yes, dark or semi-sweet chocolate works great.

Can I freeze these?
Yes, store in an airtight container and freeze for up to 2 months.

How should I store them?
Keep refrigerated for up to 1 week for the best texture.

Cheesy Spinach & Corn Breakfast Bake

Ingredients

  • 6 large eggs
  • 1 cup milk
  • 2 cups fresh spinach, chopped
  • 1 cup sweet corn kernels
  • 1½ cups shredded mozzarella cheese
  • ½ cup shredded cheddar cheese
  • ½ teaspoon garlic powder
  • ½ teaspoon salt
  • ¼ teaspoon black pepper

Instructions

Step 1

Preheat the oven to 375°F (190°C). Grease a 9-inch baking dish.

Step 2

In a large bowl, whisk together the eggs, milk, garlic powder, salt, and black pepper until smooth.

Step 3

Add the chopped spinach, corn kernels, and half of the mozzarella cheese. Stir to combine.

Step 4

Pour the mixture into the prepared baking dish and spread evenly.

Step 5

Sprinkle the remaining mozzarella cheese and cheddar cheese over the top.

Step 6

Bake for 30–35 minutes, or until the center is set and the top is golden brown.

Step 7

Remove from the oven and let rest for 5 minutes before slicing.

Step 8

Serve warm for breakfast, brunch, or a light dinner.

Prep Time

  • Prep: 10 minutes
  • Cook: 35 minutes
  • Total: 45 minutes

Servings

6 servings

Q&A

Can I use frozen spinach?
Yes. Thaw it first and squeeze out excess water.

Can I make this ahead of time?
Yes. Store in the refrigerator for up to 3 days and reheat before serving.

Can I add other vegetables?
Yes. Bell peppers, mushrooms, or onions work well in this recipe.

Easy Corn, Pea & Green Bean Salad

Ingredients

  • 2 cups corn kernels
  • 2 cups green peas
  • 2 cups green beans, chopped
  • 1 small red bell pepper, diced
  • 2 celery stalks, diced
  • 1/3 cup mayonnaise
  • 1 tablespoon vinegar
  • Salt and black pepper to taste

Instructions

Step 1:
Cook the green beans in boiling water for 4–5 minutes until tender-crisp. Drain and let cool.

Step 2:
If using frozen peas, blanch them in hot water for 1 minute, then drain.

Step 3:
In a large mixing bowl, combine the corn, peas, green beans, red bell pepper, and celery.

Step 4:
In a small bowl, whisk together the mayonnaise, vinegar, salt, and black pepper until smooth.

Step 5:
Pour the dressing over the vegetables and mix well until everything is evenly coated.

Step 6:
Cover and refrigerate for at least 1 hour before serving to allow the flavors to blend.

Step 7:
Serve chilled as a side dish for barbecues, picnics, or family meals.

Q&A

Can I make this salad ahead of time?
Yes. It can be prepared up to 24 hours in advance.

How long does it last in the refrigerator?
Stored in an airtight container, it will stay fresh for up to 3 days.

Can I use canned vegetables?
Yes. Drain them thoroughly before mixing with the dressing.

Mushroom & Cheese Puff Pastry Cups

Mushroom & Cheese Puff Pastry Cups

Ingredients

  • 1 sheet puff pastry, thawed
  • 1 cup mushrooms, sliced
  • 1 cup shredded mozzarella cheese
  • 2 eggs
  • ¼ cup heavy cream
  • 1 tbsp butter
  • 1 tsp garlic, minced
  • 1 tbsp grated Parmesan cheese
  • Salt and black pepper, to taste
  • Fresh thyme or parsley for garnish

Instructions

Step 1: Cook the Mushrooms

Heat butter in a skillet over medium heat.

Add mushrooms and garlic.

Cook for 5–7 minutes until the mushrooms are golden and tender.

Season with salt and pepper.

Remove from heat and let cool slightly.

Step 2: Prepare the Pastry Cups

Preheat the oven to 375°F (190°C).

Roll out the puff pastry and cut into 6 equal squares.

Press each square into a greased muffin tin to form cups.

Step 3: Make the Filling

In a bowl, whisk together the eggs and heavy cream.

Mix in the mozzarella and Parmesan cheese.

Fold in the cooked mushrooms.

Step 4: Fill and Bake

Spoon the filling into each pastry cup, filling about three-quarters full.

Bake for 20–25 minutes or until the pastry is golden brown and the filling is set.

Step 5: Serve

Allow the pastry cups to cool for 5 minutes.

Garnish with fresh thyme or parsley before serving.

Quick Q&A

Can I make these ahead of time?
Yes. Store them in the refrigerator and reheat in the oven before serving.

Can I use a different cheese?
Yes. Cheddar, Swiss, or Gruyère work well.

Can I add meat?
Yes. Cooked bacon, chicken, or sausage can be added to the filling.

Prep Time: 15 minutes
Cook Time: 25 minutes
Total Time: 40 minutes
Servings: 6 pastry cups

Hearty Vegetable Soup

Ingredients

  • 1 tbsp olive oil
  • 1 onion, diced
  • 2 carrots, sliced
  • 2 celery stalks, chopped
  • 2 potatoes, diced
  • 1 cup green beans, cut into pieces
  • 1 cup broccoli florets
  • 1 can diced tomatoes (14 oz)
  • 1 cup corn kernels
  • 1 cup green peas
  • 1 can chickpeas, drained
  • 6 cups vegetable broth
  • 1 tsp Italian seasoning
  • 1 tsp garlic powder
  • Salt and black pepper to taste
  • Fresh parsley, chopped

Instructions

1. Sauté the Vegetables

  • Heat olive oil in a large pot over medium heat.
  • Add onion, carrots, and celery.
  • Cook for 4–5 minutes until softened.

2. Build the Soup

  • Add potatoes, green beans, broccoli, diced tomatoes, corn, peas, and chickpeas.
  • Stir well to combine.

3. Add Broth & Seasoning

  • Pour in vegetable broth.
  • Add Italian seasoning, garlic powder, salt, and pepper.
  • Bring to a gentle boil.

4. Simmer

  • Reduce heat to low.
  • Cover and simmer for 25–30 minutes, or until vegetables are tender.

5. Finish & Serve

  • Taste and adjust seasoning if needed.
  • Sprinkle with fresh parsley before serving.
  • Serve hot with crusty bread or crackers.

Q&A

Can I make this soup ahead of time?
Yes, it tastes even better the next day after the flavors meld together.

Can I freeze it?
Yes, store in freezer-safe containers for up to 3 months. Enjoy! 🍲✨

Garlic Parmesan Chicken Skewers

Garlic Parmesan Chicken Skewers

Ingredients

For the Chicken

  • 2 lbs chicken tenders, chicken thighs, or chicken breast, cut into pieces
  • 2 tbsp olive oil
  • 1 tsp paprika
  • 1 tsp garlic powder
  • 1 tsp onion powder
  • 1 tsp salt
  • 1/2 tsp black pepper

Garlic Parmesan Butter Sauce

  • 1 stick (1/2 cup) butter
  • 6 cloves garlic, minced
  • 1/2 cup grated Parmesan cheese
  • 1 tbsp chopped parsley

Instructions

Step 1

In a large bowl, combine the chicken, olive oil, paprika, garlic powder, onion powder, salt, and black pepper. Mix well until the chicken is evenly coated.

Step 2

Thread the chicken pieces onto skewers.

Step 3

Preheat the grill, air fryer, or oven to 400°F (200°C).

Step 4

Cook the skewers for 12–15 minutes, turning halfway through, until the chicken is golden brown and reaches an internal temperature of 165°F (74°C).

Step 5

While the chicken cooks, melt the butter in a saucepan over medium heat.

Step 6

Add the minced garlic and cook for 1 minute until fragrant.

Step 7

Remove from heat and stir in the Parmesan cheese and parsley.

Step 8

Brush the garlic Parmesan butter sauce generously over the cooked chicken skewers.

Step 9

Serve immediately with extra Parmesan cheese and fresh parsley.

Q&A

Can I use chicken thighs instead of chicken breast?
Yes, chicken thighs stay extra juicy and flavorful.

Can I cook these in an air fryer?
Yes, air fry at 400°F (200°C) for 10–12 minutes, turning halfway through.

How do I store leftovers?
Store in an airtight container in the refrigerator for up to 3 days.

Chocolate Peanut Butter Dessert Trifle

Ingredients

  • 1 chocolate cake, baked and cooled
  • 2 cups whipped topping
  • 1 cup creamy peanut butter
  • 1 package (3.4 oz) vanilla pudding mix
  • 2 cups cold milk
  • 1/2 cup chocolate chips
  • 1/4 cup caramel sauce
  • 1/4 cup chopped peanuts

Instructions

Step 1

Prepare the vanilla pudding according to the package directions using cold milk. Refrigerate until set.

Step 2

In a mixing bowl, combine the peanut butter with the prepared pudding until smooth and creamy.

Step 3

Cut or crumble the chocolate cake into small bite-sized pieces.

Step 4

In a large trifle bowl or glass serving dish, spread half of the peanut butter pudding mixture on the bottom.

Step 5

Add a layer of chocolate cake pieces over the pudding mixture.

Step 6

Spread half of the whipped topping over the cake layer.

Step 7

Repeat the layers with the remaining pudding mixture, cake pieces, and whipped topping.

Step 8

Drizzle caramel sauce over the top.

Step 9

Sprinkle with chocolate chips and chopped peanuts.

Step 10

Refrigerate for at least 1 hour before serving for the best flavor and texture.

Q&A

Can I make this dessert ahead of time?
Yes. It can be made up to 24 hours in advance and kept refrigerated.

Can I use store-bought cake?
Yes. A prepared chocolate cake works perfectly.

Can I substitute peanut butter?
Yes. Cookie butter, almond butter, or chocolate hazelnut spread are great alternatives.

Homemade Cheese with Milk, Yogurt, and Lemon

Ingredients

  • 1 liter whole milk
  • 1 cup plain yogurt
  • Juice of 1/2 lemon

Instructions

Step 1

Pour the milk into a large saucepan and heat over medium heat. Stir occasionally to prevent scorching.

Step 2

Once the milk becomes hot and starts to simmer gently, add the yogurt and stir well.

Step 3

Add the lemon juice and continue stirring gently. The milk will begin to curdle and separate into curds and whey.

Step 4

Remove from the heat and let the mixture sit for 5–10 minutes.

Step 5

Place a cheesecloth or clean kitchen towel over a strainer and pour the mixture through it.

Step 6

Allow the whey to drain completely. Gather the cloth and gently squeeze out excess liquid.

Step 7

For soft cheese, use immediately. For firmer cheese, place a weight on top and let it drain for 1–2 hours.

Step 8

Transfer the cheese to a container and refrigerate until ready to serve.

Q&A

How long does homemade cheese last?
Store in an airtight container in the refrigerator for up to 5 days.

Can I add salt or herbs?
Yes, mix in salt, parsley, dill, or your favorite herbs after draining.

What can I do with the leftover whey?
Use it in smoothies, soups, bread dough, or cooking grains.

Buckwheat and Chickpea Salad

Buckwheat and Chickpea Salad

This Buckwheat and Chickpea Salad is a wholesome Mediterranean-inspired dish packed with plant-based protein, fiber, and fresh vegetables. Nutty buckwheat groats pair perfectly with hearty chickpeas, crisp cucumbers, juicy tomatoes, and a bright lemon-herb dressing. It’s refreshing, satisfying, and ideal for meal prep, healthy lunches, or a light dinner.

Time

Cook Time: 15 minutes

Total Time: 30 minutes

Servings: 4

Cuisine: Mediterranean

Course: Salad, Lunch, Dinner

Ingredients

For the Salad

1 cup buckwheat groats, rinsed

1 can (15 oz) chickpeas, drained and rinsed

1 cup cucumber, diced

1 cup cherry tomatoes, halved

¼ cup red onion, finely sliced

¼ cup fresh parsley, chopped

2 tablespoons fresh mint, chopped

¼ cup crumbled feta cheese (optional)

For the Lemon Herb Dressing

3 tablespoons extra virgin olive oil

2 tablespoons fresh lemon juice

1 teaspoon Dijon mustard

1 garlic clove, minced

½ teaspoon dried oregano

½ teaspoon salt

¼ teaspoon black pepper

Instructions

Step 1: Cook the Buckwheat

Bring 2 cups of water to a boil in a saucepan.

Add the buckwheat groats, reduce the heat, cover, and simmer for 12–15 minutes until tender.

Drain any excess water and let cool completely.

Step 2: Prepare the Vegetables

While the buckwheat cools, chop the cucumber, tomatoes, onion, parsley, and mint.

Step 3: Make the Dressing

In a small bowl, whisk together the olive oil, lemon juice, Dijon mustard, garlic, oregano, salt, and black pepper.

Step 4: Assemble the Salad

In a large mixing bowl, combine:

Cooked buckwheat

Chickpeas

Cucumber

Tomatoes

Red onion

Parsley

Mint

Pour the dressing over the salad and toss well.

Step 5: Finish and Serve

Sprinkle with crumbled feta cheese if using.

Serve immediately or chill for 30 minutes before serving for even better flavor.

Notes & Tips

Allow the buckwheat to cool completely before mixing.

Feta adds a creamy, salty flavor but can be omitted for a vegan version.

Fresh herbs make a significant difference in flavor.

Expert Tips

Add diced avocado just before serving.

Toss in roasted vegetables for extra texture.

Make a double batch for meal prep lunches.

Add grilled chicken or salmon for additional protein.

Frequently Asked Questions

Is buckwheat gluten-free?

Yes. Despite its name, buckwheat is naturally gluten-free and not related to wheat.

Can I make this salad ahead of time?

Yes. It stores well in the refrigerator for up to 4 days.

What does buckwheat taste like?

Buckwheat has a mild, earthy, and slightly nutty flavor that works beautifully in salads.

Can I use canned chickpeas?

Absolutely. Canned chickpeas are convenient and work perfectly in this recipe.

What can I serve with buckwheat chickpea salad?

It pairs well with grilled fish, chicken, roasted vegetables, or Mediterranean mezze dishes.

Nutritional Information

Calories: 320

Protein: 11g

Carbohydrates: 39g

Fiber: 9g

Sugar: 4g

Fat: 14g

Saturated Fat: 2g

Sodium: 280mg

Mediterranean Roasted Sweet Potato & Crispy Tofu Salad

Mediterranean Roasted Sweet Potato & Crispy Tofu Salad

This Mediterranean Roasted Sweet Potato & Crispy Tofu Salad is a hearty, plant-based meal packed with vibrant vegetables, crispy protein-rich tofu, and naturally sweet roasted sweet potatoes. Fresh cucumbers, tomatoes, herbs, and a simple lemon dressing add brightness and balance, creating a satisfying salad that’s perfect for lunch, dinner, or meal prep.

Time

Prep Time: 15 minutes

Cook Time: 25 minutes

Total Time: 40 minutes

Servings: 4

Cuisine: Mediterranean

Course: Salad, Main Course

Ingredients

For the Salad

1 block (14 oz) extra-firm tofu, pressed and cubed

1 medium sweet potato, cubed

4 cups mixed greens

1 cucumber, sliced

2 tomatoes, diced

½ red onion, thinly sliced

¼ cup fresh parsley, chopped

2 tablespoons olive oil

1 teaspoon paprika

½ teaspoon garlic powder

Salt and black pepper to taste

Lemon Herb Dressing

3 tablespoons olive oil

1½ tablespoons fresh lemon juice

1 teaspoon Dijon mustard

1 teaspoon honey or maple syrup

Salt and pepper to taste

Instructions

Step 1: Roast the Sweet Potatoes

Preheat the oven to 425°F (220°C).

Toss sweet potato cubes with 1 tablespoon olive oil, paprika, salt, and pepper. Spread on a baking sheet and roast for 20–25 minutes until golden and tender.

Step 2: Cook the Tofu

Pat the tofu dry and toss with the remaining olive oil, garlic powder, salt, and pepper.

Bake alongside the sweet potatoes for 20 minutes or pan-fry until crispy and golden on all sides.

Step 3: Prepare the Vegetables

In a large bowl, combine mixed greens, cucumber, tomatoes, red onion, and parsley.

Step 4: Make the Dressing

Whisk together olive oil, lemon juice, Dijon mustard, honey, salt, and pepper until smooth.

Step 5: Assemble the Salad

Add the roasted sweet potatoes and crispy tofu to the vegetables.

Drizzle with the dressing and toss gently before serving.

Nutritional Information

Calories: 340

Protein: 15g

Carbohydrates: 28g

Fiber: 7g

Fat: 18g

Saturated Fat: 2g

Sugar: 7g

Sodium: 280mg