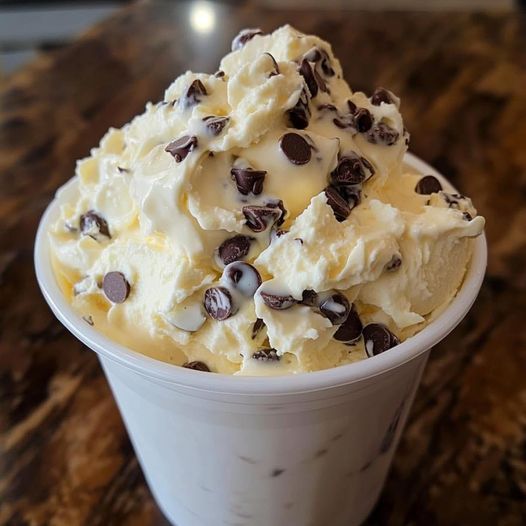
Zero-Point Fatbomb Fluff

Zero-Point Fatbomb Fluff
WW Low-Point Zero-Point Fatbomb Fluff
Ingredients:
1 cup fat-free Greek yogurt
1 cup unsweetened almond milk
1 tablespoon chia seeds
1 tablespoon flaxseed meal
1 teaspoon vanilla extract
1/2 teaspoon almond extract (optional)
Stevia or other zero-calorie sweetener, to taste
Fresh berries or other fruit for serving (optional)
Instructions:
Prepare the Base:
In a mixing bowl, combine fat-free Greek yogurt and unsweetened almond milk. Mix until smooth and well combined.
Add Seeds and Extracts:
Stir in chia seeds, flaxseed meal, vanilla extract, and almond extract (if using). These ingredients will add thickness and flavor to the fluff.
Sweeten to Taste:
Sweeten the mixture with stevia or your preferred zero-calorie sweetener. Start with a small amount and adjust to your desired level of sweetness.
Chill:
Cover the bowl and refrigerate the mixture for at least 1 hour, or overnight if possible. This allows the chia seeds and flaxseed meal to absorb moisture and thicken the fluff.
Serve:
Before serving, stir the fluff to ensure it’s well mixed and creamy. Divide into serving bowls or glasses.
Garnish:
Garnish with fresh berries or your favorite fruit, if desired. This adds extra flavor and texture to the dish.
Nutritional Information (per serving, without fruit):
Calories: Approximately 80 kcal
Protein: 7g
Carbohydrates: 7g
Fat: 2g
Fiber: 3g
Sugar: 3g
SmartPoints (WW):
Each serving of the WW Low-Point Zero-Point Fatbomb Fluff is approximately 1 SmartPoint on the WW (Weight Watchers) program.
Tips:
Variations: Customize your fluff by adding different extracts such as coconut or lemon for a variety of flavors. You can also top it with nuts or shredded coconut for added crunch.
Make-Ahead: This fluff can be prepared ahead of time and stored in the refrigerator for up to 3 days. It’s a convenient option for quick breakfasts or snacks.
Health Benefits: This recipe is low in calories and packed with protein from the Greek yogurt. Chia seeds and flaxseed meal provide omega-3 fatty acids and fiber, contributing to a balanced diet.
Allergen Information: Ensure all ingredients used are suitable for your dietary needs, especially if you have allergies or sensitivities to dairy or nuts.
Zero-Point Fatbomb Fluff is a satisfying and guilt-free treat that fits into a healthy eating plan. Whether you’re looking for a nutritious breakfast option, a post-workout snack, or a light dessert, this fluff delivers on taste and nutrition without compromising your wellness goals.
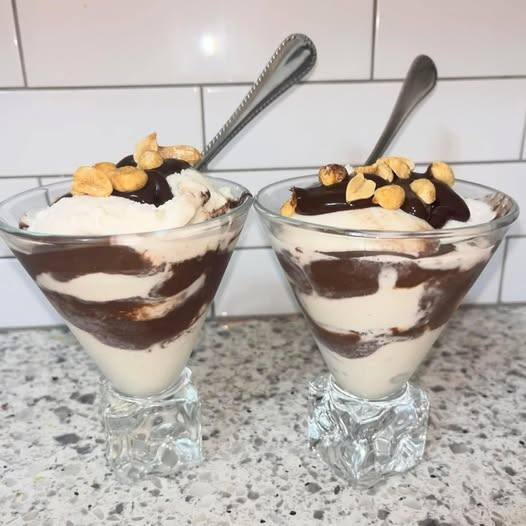
Low Point Peanut Buster Parfait

Low point Peanut Buster parfait is great dessert when you have sweet tooth, perfect dessert for me Low Point Peanut Buster Parfait (WW Friendly)
Servings: 1 WW Points: 2–3 points (depending on brands used – can be 1 if simplified)
Ingredients:
  • ½ cup fat-free vanilla Greek yogurt (or plain with vanilla extract) – 0 points
  • 1 tbsp sugar-free chocolate syrup (e.g., Hershey’s Zero Sugar) – 0 points
  • 1 tbsp PB2 (powdered peanut butter), mixed with a bit of water to make a drizzle – 1 point
  • 1 tbsp fat-free whipped topping – 0 points
  • 1 tsp crushed peanuts – 1 point
  • Optional: A sprinkle of sugar-free mini chocolate chips (like Lily’s) – 0–1 point
Instructions:
  • In a glass or bowl, layer half of the Greek yogurt on the bottom.
  • Drizzle with half the PB2 and chocolate syrup.
  • Add the remaining yogurt on top.
  • Drizzle again with the rest of the PB2 and syrup.
  • Top with fat-free whipped topping, crushed peanuts, and optional chocolate chips.
  • Serve immediately — or chill it a few minutes for that parfait chill factor!
Tips:
  • Want it even more indulgent? Add a few pieces of crushed chocolate rice cakes or a mini WW bar crumbled in (adjust points).
  • Use chocolate Greek yogurt for a double chocolate twist.

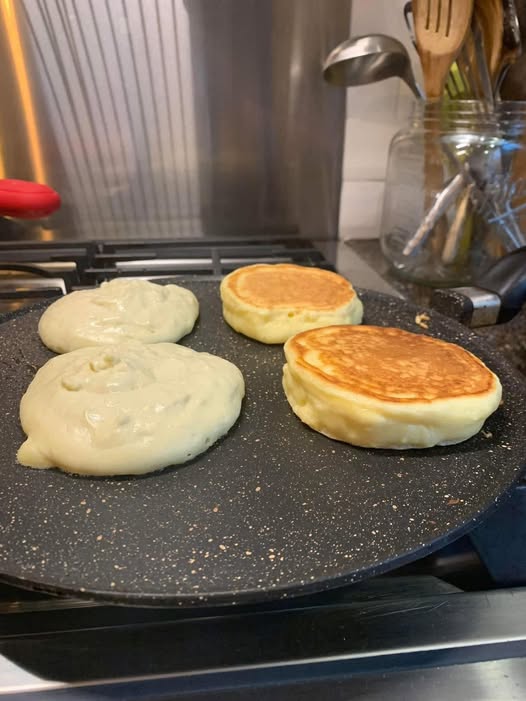
1 Point Weight Watchers Fluffy Pancakes – No Bananas!

Ingredients

      • 1 cup self rising flour
      • 1/2 cup NF greek  yogurt
      • 2 eggs
      • 1 1/2 teaspoon baking powder
      • 1 1/2 teaspoon vanilla extract
      • 1/8 teaspoon almond extract
      • 1/3 cup + 2Tablespoons water

Instructions

      • Put all ingredients into mixer (wet ingredients first). Mix with whisk attachment until blended. Cook on griddle heated to medium. Makes 12 pancakes, 1 SP each!

Ingredients

      • 1 cup self rising flour
      • 1/2 cup NF greek yogurt
      • 2 eggs
      • 1 1/2 teaspoon baking powder
      • 1 1/2 teaspoon vanilla extract
      • 1/8 teaspoon almond extract
      • 1/3 cup + 2Tablespoons water

Instructions

      • Put all ingredients into mixer (wet ingredients first). Mix with whisk attachment until blended. Cook on griddle heated to medium. Makes 12 pancakes, 1 SP each!
      • Source:slapdashmom.com

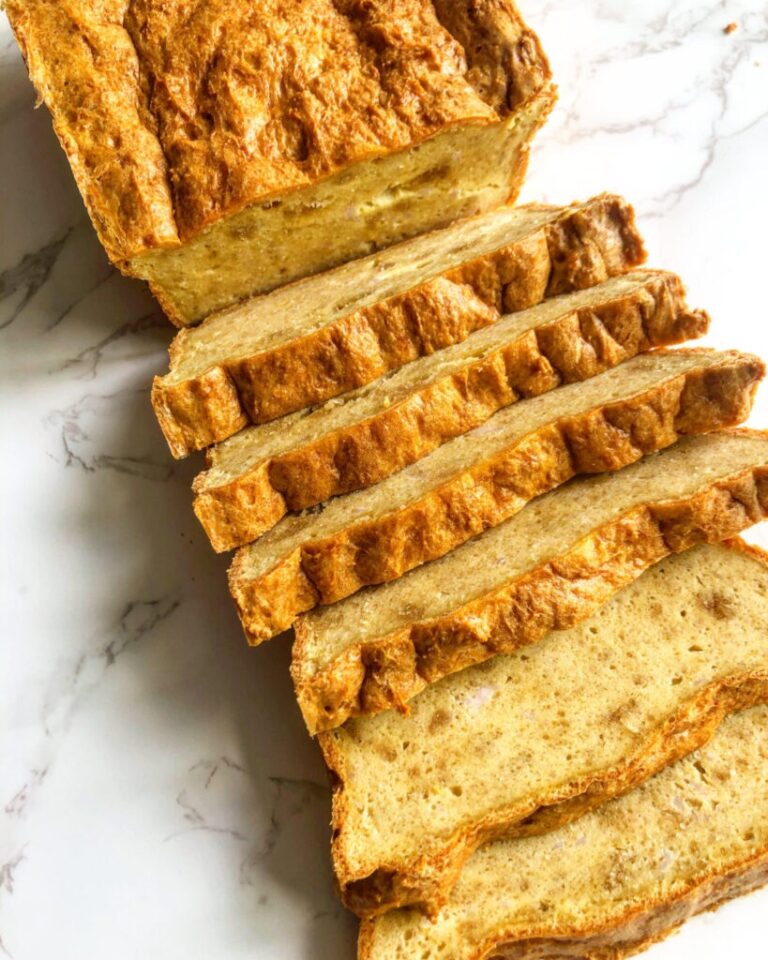
Carnivore Sandwich Bread Recipe

Crunchy on the outside, soft on the inside, this savory, carnivore, pork-based sandwich bread is perfect for sandwiches, spreads, or can be toasted and eaten alone.

Do not skip any of the steps. In the past, I sometimes would not follow the texture instructions (i.e. beat egg whites until frothy, separate these two ingredients into a separate bowl and mix, etc.)

for recipes, and it makes a difference. Each step in the recipe is important for maintaining texture.

Ingredients

  • 8 eggs
  • 1 lb raw ground pork (Can’t tolerate pork? Make Carnivore Sandwich Bread [Beef Version] instead.)
  • 5 oz pork rinds (pre-ground)
  • 1/4 cup grass-fed ghee (or butter)
  • 1 tsp sea salt

Instructions

Start the oven.

  • Preheat the oven to 375 degrees.

Make the batter.

  • Crack the eggs into a mixing bowl. Separate the egg whites from the egg yolks. Place the egg yolks in your blender (for later use).
  • With a hand mixer, beat the whites on high until the mixture is very frothy and you have soft peaks. The mixture should be light like foam.
  • Melt the ghee on your stovetop.
  • In a blender, mix the raw ground pork, melted ghee, and egg yolks until a smooth paste forms.
  • Note: the mixture may be a bit hard to blend due to the meat. I usually have to stop my blender, stir the mixture, and turn it back on 3-4 times.
  • With a hand mixer, blend the frothy egg whites and the pork-ghee-egg yolk paste until the mixture becomes smooth like batter.
  • In a blender or food processor, crush the pork rinds to a fine powder.
  • Fold the pork rind powder and sea salt (ASHLEYRfor 15% off) into the batter.
  • Note: if you go through tons of salt in your household like we do, check out this salt purchasing hack that will save you money + make things more efficient. We started this last year, and I’m so happy we did!

Bake the loaf.

  • Pour the batter into your bread pan and bake in the oven for 60 minutes at 375 degrees.
  • Note: You’ll know it’s done when the texture is consistent, dry, grainy, and bread-like throughout. When you cut into the loaf, if it has slimy patches that look like chunks of egg, it’s not done.
  • Once done, remove the loaf from the oven and allow it to cool for 10-15 minutes.

Prepare and serve.

  • Slice the loaf into 1-inch thick slices, or whatever size you prefer.
  • Meal ideas: Make a Classic Carnivore Club Sandwich, Pulled Pork Sandwich, or toast a slice and top with Strawberry Glaze and Honey Butter or Onion-Free Guacamole.
  • Store in the fridge in an airtight container for up to 5 days. Enjoy!

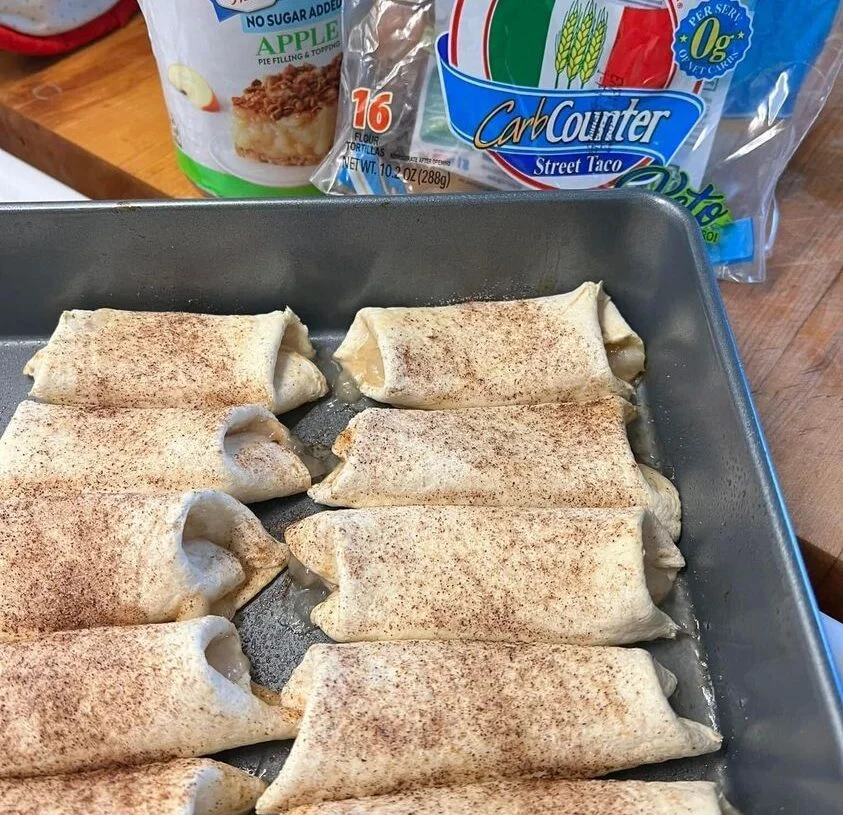
Apple enchilada Dessert

Introduction: Embark on a culinary journey with our delightful Weight Watchers Apple “Enchilada” dessert—a wholesome indulgence that satisfies your sweet cravings without compromising on your wellness goals. This innovative recipe transforms everyday ingredients into a delectable treat, earning a mere 2 SmartPoints per serving. Join us as we explore the intricacies of crafting these Apple “Enchiladas,” providing detailed instructions, culinary insights, and precise measurements for a guilt-free dessert experience.

Ingredients:

For the Apple Filling:

  1. 4 cups thinly sliced apples (peeled and cored)
  2. 2 tablespoons lemon juice
  3. 1/4 cup granulated sugar
  4. 1 teaspoon ground cinnamon
  5. 1/4 teaspoon nutmeg
  6. 1 tablespoon cornstarch
  7. 1/4 cup water

For the “Enchiladas”:

  1. 8 small whole wheat tortillas (6 inches in diameter)
  2. Cooking spray

For the Topping:

  1. 1/4 cup light whipped cream
  2. Ground cinnamon for dusting

Instructions:

  1. Apple Preparation Precision:
    • Begin the culinary journey with apple preparation precision. Peel, core, and thinly slice four cups of apples. Toss them in lemon juice to preserve freshness and prevent browning.
  2. Sugar and Spice Symphony:
    • In a bowl, orchestrate a sugar and spice symphony by combining granulated sugar, ground cinnamon, nutmeg, and cornstarch. This aromatic blend enhances the natural sweetness of the apples, creating a flavorful filling.
  3. Apple Coating Ballet:
    • Engage in an apple coating ballet by tossing the sliced apples in the sugar and spice mixture. Ensure each slice is evenly coated, allowing the flavors to meld harmoniously.
  4. Stovetop Elegance:
    • Bring the mixture to stovetop elegance by cooking the coated apples in a saucepan over medium heat. Add water to create a luscious syrup, simmering until the apples are tender yet maintain their shape.
  5. Tortilla Warming Ritual:
    • Embrace a tortilla warming ritual by lightly heating whole wheat tortillas. This step enhances their pliability, making them easier to roll and creating a delightful texture in the finished “Enchiladas.”
  6. Filling Distribution Artistry:
    • Distribute the apple filling with artistry, spooning a generous portion onto each warmed tortilla. Ensure an even distribution to guarantee a consistent flavor profile in every bite.
  7. Rolling Mastery:
    • Master the rolling technique by folding the sides of each tortilla toward the center and then rolling from the bottom to create a snug “Enchilada.” Place them seam-side down on a prepared baking dish.
  8. Cooking Spray Finale:
    • Conclude the preparation with a cooking spray finale, lightly coating the tops of the “Enchiladas.” This step promotes a golden brown finish in the oven while keeping the dish light and heart-healthy.
  9. Oven Baking Brilliance:
    • Bake the “Enchiladas” in a preheated oven at 350°F (175°C) for approximately 15-20 minutes or until they achieve a golden perfection. This oven baking brilliance allows the flavors to meld and intensify.
  10. Whipped Cream Elegance:
    • Present a whipped cream elegance by topping each “Enchilada” with a dollop of light whipped cream. This airy addition adds a delightful creaminess, complementing the warm apple filling.
  11. Cinnamon Dusting Extravaganza:
    • Embark on a cinnamon dusting extravaganza, sprinkling ground cinnamon over the whipped cream. This final touch not only enhances the visual appeal but adds an extra layer of warmth to the dessert.
  12. Serving Presentation Panache:
    • Showcase serving presentation panache by arranging the “Enchiladas” on a dessert platter. Consider drizzling any remaining apple syrup over the top for an added burst of flavor.
  13. SmartPoints Transparency:
    • Embrace SmartPoints transparency by calculating and sharing the nutritional information per serving. This transparency empowers your audience to make informed choices within their wellness journey.
  14. Portion Control Wisdom:
    • Offer portion control wisdom by highlighting that each “Enchilada” is a perfectly portioned delight, allowing for guilt-free enjoyment without compromising on dietary goals.
  15. Health-Conscious Ingredient Insights:
    • Provide insights into the health-conscious choices made in the recipe, such as whole wheat tortillas and light whipped cream. These choices align with the Weight Watchers philosophy of mindful and balanced eating.
  16. Versatility Exploration:
    • Encourage versatility exploration by suggesting variations to the recipe. Whether it’s adding a hint of vanilla to the whipped cream or incorporating a sprinkle of chopped nuts, invite your audience to personalize the dish.
  17. Storage and Reheating Recommendations:
    • Share storage and reheating recommendations for those who may want to enjoy the Apple “Enchiladas” at a later time. Proper storage ensures they maintain their texture and flavor upon reheating.
  18. Community Connection Invitation:
    • Transform your website into a community connection hub by inviting your audience to share their experiences with the Apple “Enchiladas.” Encourage them to experiment with different apple varieties or share creative presentations.
  19. Seasonal Ingredient Adaptations:
    • Offer seasonal ingredient adaptations, suggesting ways to modify the recipe based on the availability of different apple varieties or seasonal twists. This flexibility allows the dish to be enjoyed year-round.
  20. Culinary Conclusion Celebration:
    • Conclude the culinary celebration by inviting your audience to savor the delightful experience of Weight Watchers Apple “Enchiladas.” Emphasize the joy of indulging in a sweet treat that aligns with wellness goals, providing a perfect balance of flavor and nutrition.

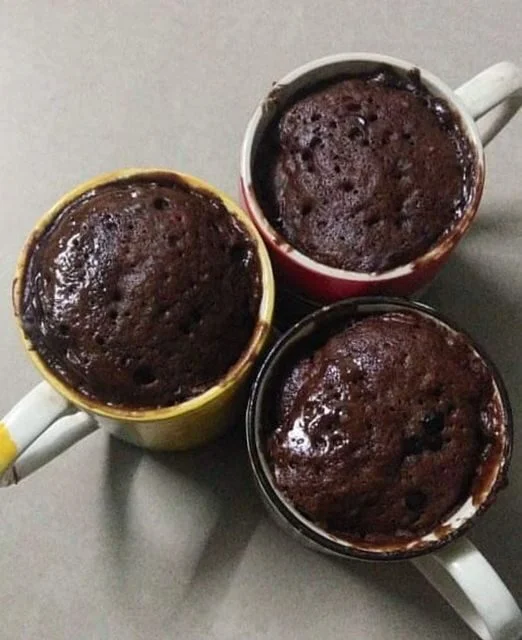
Weight Watchers Zero Point Chocolate Mug Cake

For those moments when a chocolate craving strikes and you’re on a Weight Watchers journey, this Zero Point Chocolate Mug Cake is the answer to your dessert dreams. With no added sugar and a Points value of zero, this quick and easy recipe allows you to indulge in the rich, chocolaty goodness without compromising your commitment to a healthy lifestyle. In just a few minutes, you can whip up a single-serving treat that’s both satisfying and figure-friendly.

Ingredients:

2 tablespoons unsweetened cocoa powder
1 teaspoon baking powder
3 tablespoons non-fat Greek yogurt
1 teaspoon vanilla extract
2 tablespoons water
A pinch of salt
1-2 packets of your preferred zero-calorie sweetener (adjust to taste)
Optional: Sugar-free whipped topping or a sprinkle of cocoa powder for garnish
Instructions:

Prepare the Mug: Start by selecting a microwave-safe mug. Make sure it’s large enough to accommodate the rising cake while cooking.
Mix Dry Ingredients: In the mug, combine the unsweetened cocoa powder, baking powder, and a pinch of salt. Stir the dry ingredients until well mixed.
Add Wet Ingredients: Add the non-fat Greek yogurt, vanilla extract, and water to the mug. Mix the ingredients thoroughly to form a smooth batter. Adjust the sweetness by adding zero-calorie sweetener to your liking.
Microwave for Instant Perfection: Microwave the mug on high for 1 to 2 minutes, depending on your microwave’s wattage. Keep an eye on it to prevent overflowing.
Cool and Garnish: Allow the mug cake to cool for a minute before diving in. Optionally, top it with sugar-free whipped topping or a sprinkle of cocoa powder for an extra touch of decadence.
Enjoy Your Zero Point Indulgence: Delight in the guilt-free pleasure of this Weight Watchers Zero Point Chocolate Mug Cake. The combination of cocoa richness, moist texture, and the absence of added sugar make it a perfect solution for satisfying your sweet tooth without derailing your wellness goals.
This recipe serves as a reminder that wholesome ingredients can come together to create a delicious treat, even within the constraints of a Weight Watchers program. Embrace the simplicity and enjoy the instant satisfaction of this zero-point chocolate mug cake whenever the need for a sweet escape arises.

Savoring the Sweet Simplicity: This Weight Watchers Zero Point Chocolate Mug Cake not only caters to your sweet cravings but does so without the guilt associated with traditional desserts. The beauty lies in its simplicity – a handful of pantry staples combined in a mug, microwaved to perfection, and voila! You have a warm, chocolatey indulgence that aligns with your wellness journey.

The Power of Non-Fat Greek Yogurt: One key player in this guilt-free creation is non-fat Greek yogurt. Its creamy texture not only contributes to the moistness of the cake but also adds a protein boost without extra fat. This ingredient swap is a game-changer, turning a standard mug cake into a satisfying treat that won’t compromise your commitment to healthier choices.

Zero Points, Maximum Flavor: The genius behind this recipe lies in its zero-point designation on the Weight Watchers scale. The absence of added sugar and the reliance on natural sweetness from ingredients like Greek yogurt and vanilla extract make this mug cake a smart choice for those mindful of their point allocation. It’s a testament to the idea that you can have your cake and eat it too, even on a weight management program.

A Quick Fix for Chocolate Cravings: One of the most appealing aspects of this recipe is its speed. In just a few minutes, you can whip up a single-serving delight that satisfies chocolate cravings without the need for extensive baking or cleaning up a kitchen full of utensils. It’s the perfect solution for those moments when you want a sweet treat without the time investment.

Customize to Your Liking: Feel free to make this mug cake your own by experimenting with toppings or mix-ins. Add a handful of sugar-free chocolate chips for extra decadence, or incorporate a dash of cinnamon for a unique twist. The flexibility of this recipe allows you to tailor it to your taste preferences, ensuring a personalized and enjoyable dessert experience.

A Lesson in Moderation and Mindful Eating: This Weight Watchers Zero Point Chocolate Mug Cake serves as a delightful reminder that wellness is not about deprivation but about making informed choices. By indulging in this treat, you’re practicing moderation and savoring the joy of dessert without compromising your health goals. It’s a small, delicious step towards a balanced and sustainable approach to mindful eating.