Carnivore Sausage Gravy

Ingredients:

  • 1 pound (450g) ground pork sausage (choose a fattier sausage for best flavor)

  • 4 ounces (½ block) cream cheese, cut into cubes

  • 1 cup heavy whipping cream

  • Salt and black pepper to taste (optional — sausage often has enough salt)


Instructions:

  1. Cook the sausage:

    • Heat a large skillet over medium heat.

    • Add the sausage and cook, breaking it apart with a spatula, until fully browned and cooked through (about 7-10 minutes).

    • Drain excess grease if desired, but leaving some fat will add flavor.

  2. Add cream cheese:

    • Reduce heat to low.

    • Add the cream cheese cubes directly into the skillet with the sausage.

    • Stir gently and continuously to soften and melt the cream cheese, combining it fully with the sausage.

  3. Add heavy cream:

    • Pour in 1 cup of heavy whipping cream.

    • Stir well to combine everything into a creamy mixture.

  4. Simmer and thicken:

    • Keep the heat low and cook, stirring occasionally, until the gravy thickens to your desired consistency (about 5-8 minutes).

    • If it gets too thick, you can add a little more cream or water to loosen it.

  5. Season:

    • Taste the gravy and add salt and pepper if needed (usually the sausage has enough salt).

  6. Serve:

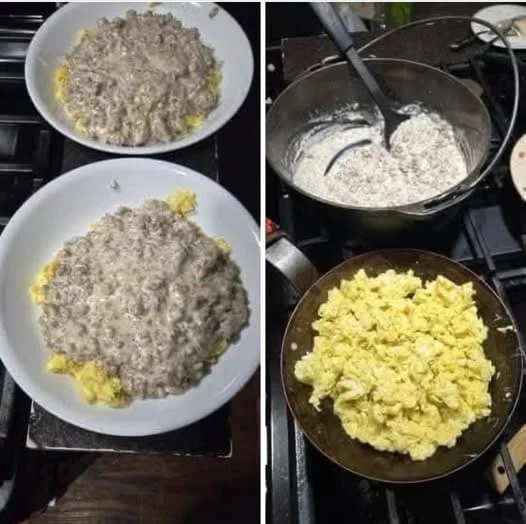
    • Serve hot over cooked eggs, steak, or as a dipping sauce for carnivore bread or pork rinds.


Tips:

  • For extra flavor, you can use breakfast sausage with herbs and spices, or keep it plain for a pure carnivore experience.

  • Keep the heat low after adding cream cheese and cream to avoid curdling.

  • This gravy is great for meal prep and stores well in the fridge for 3-4 days.


Would you like me to suggest a full carnivore meal plan using this gravy? Or ideas on what to pair it with?

Butterscotch Blondies

Soft, chewy, and full of butterscotch flavor — these easy blondies are a one-bowl dessert with rich caramel notes, a hint of vanilla, and optional crunchy pecans.

Prep Time: 10 minutes
Cook Time: 20–25 minutes
Total Time: 35 minutes
Servings: 12 bars
Dietary: Freezer-friendly, Nut-free adaptable

Ingredients

  • Unsalted butter – melted (½ cup / 1 stick)

  • Light brown sugar – packed (1 cup)

  • Large egg (1)

  • Vanilla extract (1 tsp)

  • All-purpose flour (1 cup)

  • Baking powder (½ tsp)

  • Salt (½ tsp)

  • Butterscotch chips (½ cup)

  • Chopped pecans – optional (½ cup)

Instructions

  1. Prep the pan: Preheat oven to 350°F (175°C). Grease an 8×8-inch baking dish or line with parchment.

  2. Mix wet ingredients: In a large bowl, stir melted butter and brown sugar until smooth. Add egg and vanilla; mix until creamy.

  3. Add dry ingredients: In another bowl, whisk flour, baking powder, and salt. Slowly add to the wet mixture, stirring just until combined.

  4. Fold in extras: Gently fold in butterscotch chips and pecans (if using).

  5. Bake: Spread batter evenly into the dish. Bake 20–25 minutes, until edges are golden and a toothpick comes out clean.

  6. Cool & slice: Cool completely in the pan. Cut into 12 bars.

Quick Notes & Pro Tips

  • Chewier bars: Pull from the oven as soon as the center sets.

  • Nut-free version: Simply skip the pecans.

  • Flavor swaps: Try chocolate chips, white chocolate, or toffee bits for variety.

  • Make ahead: These freeze beautifully — wrap tightly and store for up to 2 months.

  • Gluten-free: Substitute a 1:1 gluten-free flour blend.

Why You’ll Love It

These blondies are gooey, sweet, and buttery with that irresistible caramel-like butterscotch flavor. They’re perfect for bake sales, quick desserts, or pairing with coffee for an afternoon treat.

Step-by-Step Cooking Guide

1. Make the Base

  • Stir melted butter and brown sugar for a smooth, caramel-flavored base.

2. Add Dry Ingredients

  • Fold in flour mixture gently to avoid overmixing (which makes them dense).

3. Add Mix-Ins & Bake

  • Butterscotch chips bring richness; pecans add crunch. Bake until edges are golden.

Ingredient Details & Substitutions

  • Butterscotch chips: Swap for chocolate, peanut butter, or white chocolate chips.

  • Nuts: Pecans add texture, but walnuts or almonds work too.

  • Brown sugar: Use dark brown sugar for a deeper molasses flavor.

Variations & Serving Suggestions

  • Salted caramel: Sprinkle with flaky sea salt right after baking.

  • Dessert plate: Serve warm with vanilla ice cream for an indulgent treat.

  • Holiday twist: Add a pinch of cinnamon or nutmeg for cozy seasonal flavor.

Storage & Make-Ahead

  • Room temp: Store in an airtight container for up to 4 days.

  • Freezer: Wrap individual bars and freeze for up to 2 months.

  • Reheating: Microwave for 10–15 seconds for a fresh-from-the-oven feel.

FAQs

Q: Can I double this recipe?
A: Yes — bake in a 9×13-inch dish for about 25–28 minutes.

Q: Can I use dark brown sugar?
A: Absolutely — it adds deeper flavor and a bit more chewiness.

Q: How do I make them extra gooey?
A: Slightly underbake (around 20 minutes) and let cool in the pan.

Personal Note

These blondies are my go-to when I need a fast dessert that still feels special. Butterscotch brings a nostalgic, caramel-like sweetness that pairs perfectly with a cup of coffee or a scoop of ice cream.


Your turn!
If you try these Butterscotch Blondies, leave a comment or tag me on social media — I’d love to see your batch!

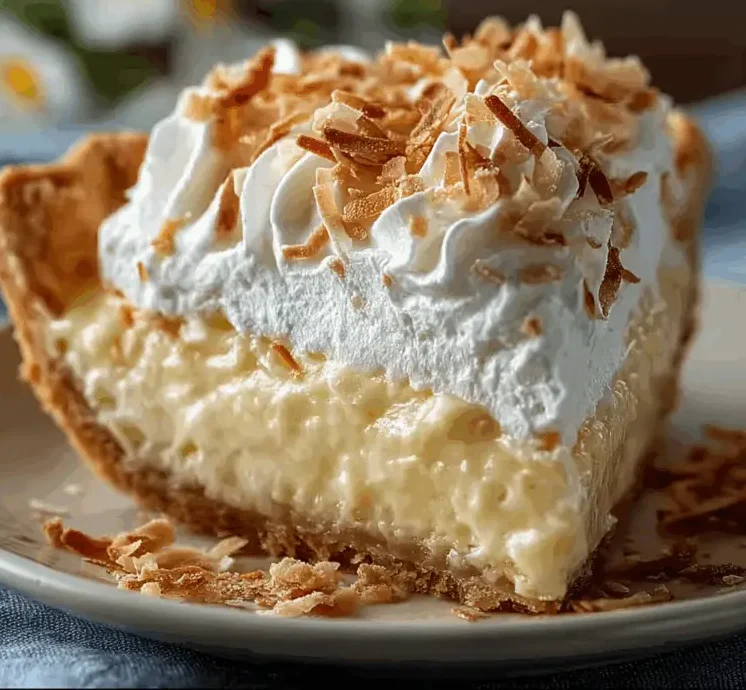
Coconut Cream Pie

A silky coconut custard filling in a buttery graham cracker crust, topped with fluffy whipped cream and toasted coconut — a tropical classic that’s creamy, light, and irresistible.

Prep Time: 25 minutes
Cook Time: 15 minutes
Chill Time: 4–6 hours
Total Time: ~5–6 hours
Servings: 8
Dietary: Vegetarian

Ingredients

For the crust:

  • Graham cracker crumbs (1 ½ cups)

  • Melted butter (⅓ cup)

  • Granulated sugar (¼ cup)

For the filling:

  • Whole milk (1 cup)

  • Coconut milk (1 cup)

  • Granulated sugar (⅔ cup)

  • Cornstarch (¼ cup)

  • Salt (¼ tsp)

  • Egg yolks (4 large)

  • Butter (1 tbsp)

  • Vanilla extract (1 tsp)

  • Sweetened shredded coconut (1 ½ cups)

For the topping:

  • Heavy whipping cream (1 cup)

  • Powdered sugar (2 tbsp)

  • Vanilla extract (½ tsp)

  • Toasted coconut (¼ cup)

Instructions

  1. Bake the crust: Preheat oven to 350°F (175°C). Combine graham cracker crumbs, melted butter, and sugar. Press evenly into a 9-inch pie plate. Bake for 10 minutes. Let cool completely.

  2. Make the custard: In a saucepan over medium heat, whisk together milk, coconut milk, sugar, cornstarch, and salt. In a separate bowl, lightly beat the egg yolks.

  3. Temper the yolks: Slowly pour ½ cup of the hot milk mixture into the yolks while whisking constantly. Return the yolk mixture to the saucepan.

  4. Cook & thicken: Continue whisking over medium heat until thickened and bubbling. Remove from heat and stir in butter, vanilla, and shredded coconut.

  5. Fill the crust: Pour custard into the cooled crust and smooth the surface. Cover with plastic wrap (press against the custard to prevent skin). Chill at least 4 hours, preferably overnight.

  6. Whip the topping: Beat heavy cream, powdered sugar, and vanilla until stiff peaks form. Spread over the chilled pie.

  7. Finish & serve: Sprinkle with toasted coconut. Slice and serve cold.

Quick Notes & Pro Tips

  • Extra coconut flavor: Replace more whole milk with coconut milk or coconut cream.

  • Firm crust: Press crumbs firmly and evenly into the pan for a solid base.

  • Yolk safety: Temper yolks slowly to prevent curdling.

  • Best texture: Chill overnight for perfect slicing and flavor melding.

Why You’ll Love It

This pie combines buttery crunch, creamy coconut custard, and airy whipped topping — it’s indulgent yet refreshing. The contrast of textures makes every bite feel like a treat.

Step-by-Step Cooking Guide

1. Graham Cracker Crust

  • Combine crumbs, butter, and sugar. Bake to set and let cool.

2. Coconut Custard Filling

  • Whisk, temper, thicken, then fold in shredded coconut for texture and flavor.

3. Whipped Topping

  • Beat cream until stiff peaks form and spread generously over the set custard.

Ingredient Details & Substitutions

  • Coconut milk: Use full-fat for richer custard.

  • Crust options: Swap graham crackers for shortbread cookies or a baked pastry crust.

  • Topping: Stabilize whipped cream with gelatin if making ahead for events.

Variations & Serving Suggestions

  • Tropical twist: Add crushed pineapple to the filling for a piña colada pie.

  • Chocolate lovers: Drizzle melted chocolate over the whipped cream for a decadent touch.

  • Mini pies: Prepare in individual tart shells for easy entertaining.

Storage & Make-Ahead

  • Refrigerate: Cover and store for up to 3 days.

  • Crust tip: If storing longer, bake the crust an extra 5 minutes for extra crispness.

  • Reheating crust: Pop individual slices into a 300°F (150°C) oven for 3 minutes to re-crisp the crust.

FAQs

Q: Can I make this ahead?
A: Yes — prepare the crust and filling a day ahead, then whip and add topping just before serving.

Q: Can I use a store-bought crust?
A: Absolutely — a pre-made graham cracker or pastry crust works.

Q: How do I keep whipped cream stable?
A: Add 1 tsp cornstarch or use stabilized whipped cream for longer-lasting topping.

Personal Note

This coconut cream pie is one of my go-to holiday desserts. It’s tropical yet cozy, light yet rich — a beautiful balance of flavors that makes it a showstopper at any gathering.

Your turn!
Tried this Coconut Cream Pie? Leave a review or tag me on social media — I’d love to see your creation!

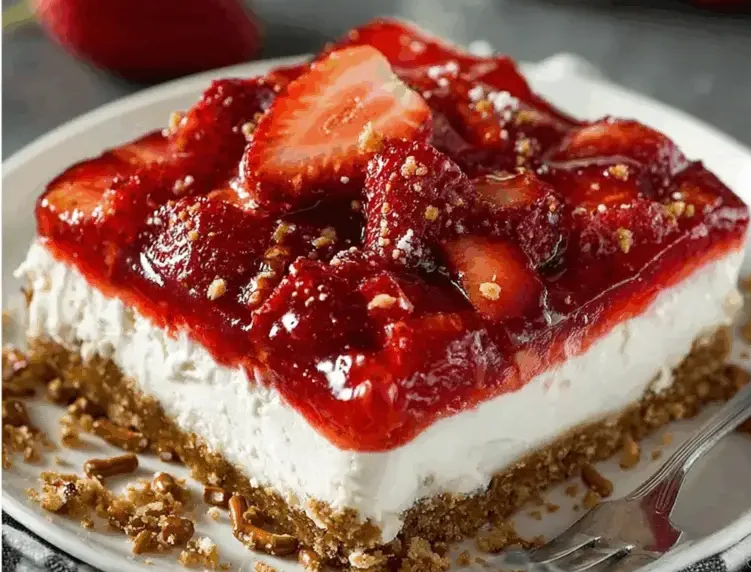
Strawberry Pretzel Salad

A classic layered dessert with a crunchy-salty pretzel crust, creamy cheesecake filling, and sweet strawberry gelatin topping — perfect for picnics, potlucks, and holidays.

Prep Time: 20 minutes
Cook Time: 10 minutes
Chill Time: 4–5 hours
Total Time: ~5 hours
Servings: 12–15
Dietary: Vegetarian (contains dairy)

Ingredients

For the crust:

  • Crushed pretzels (2 cups)

  • Melted butter (¾ cup)

  • Granulated sugar (3 tbsp)

For the filling:

  • Cream cheese (8 oz / 225 g), softened

  • Granulated sugar (¾ cup)

  • Whipped topping (1 tub / 8 oz, like Cool Whip), thawed

For the topping:

  • Boiling water (2 cups)

  • Strawberry gelatin (1 box / 6 oz)

  • Fresh strawberries (2 cups), sliced

Instructions

  1. Make the pretzel crust – Preheat oven to 350°F (175°C). Mix crushed pretzels, melted butter, and sugar. Press firmly into the bottom of a 9×13-inch baking dish. Bake for 10 minutes. Cool completely.

  2. Prepare the cream filling – Beat cream cheese and sugar until smooth. Gently fold in whipped topping. Spread evenly over the cooled crust, sealing all edges to prevent leaks. Refrigerate for 30 minutes.

  3. Make the gelatin layer – Dissolve gelatin in boiling water. Stir well until completely dissolved. Cool to room temperature.

  4. Add strawberries & assemble – Stir sliced strawberries into cooled gelatin. Carefully pour over the cream layer.

  5. Chill & serve – Refrigerate at least 4 hours (preferably overnight) until the gelatin is fully set. Slice and serve chilled.

Quick Notes & Pro Tips

  • Seal edges: Spread the cream layer fully to the edges to keep the gelatin from seeping through.

  • Pat berries dry: Remove excess moisture to avoid watery gelatin.

  • Cool the gelatin: Let it reach room temperature before pouring so it doesn’t melt the cream layer.

  • Crunchy crust: Press pretzels firmly and let them cool fully before adding the filling.

Why You’ll Love It

This Strawberry Pretzel Salad is a perfect mix of sweet, salty, creamy, and fruity. It’s refreshing, easy to assemble, and a nostalgic crowd-pleaser at summer BBQs, potlucks, or holiday dinners.

Step-by-Step Cooking Guide

1. Build the Pretzel Crust

  • Mix pretzels, butter, and sugar. Press into a 9×13 dish and bake. Cooling is key for a firm crust.

2. Add the Cream Layer

  • Blend cream cheese and sugar until smooth, then fold in whipped topping. Seal to the edges for a leak-proof layer.

3. Top with Gelatin & Berries

  • Dissolve gelatin, let it cool, and combine with sliced strawberries. Pour carefully over the cream layer.

Ingredient Details & Substitutions

  • Gelatin: Swap strawberry for raspberry or lime for fun flavor variations.

  • Crust: Replace pretzels with crushed graham crackers or vanilla wafers for a sweeter base.

  • Fruit: Use mixed berries or peaches for a creative twist.

Variations & Serving Suggestions

  • Festive version: Use different gelatin colors (red & green) for holiday gatherings.

  • Mini servings: Assemble in individual cups for parties.

  • Topping: Add a dollop of whipped cream before serving for extra indulgence.

Storage & Make-Ahead

  • Refrigerate: Cover tightly and store up to 3 days.

  • Make-ahead: Prepare crust and cream layer a day in advance; add gelatin layer the same day as serving.

  • Freezing: Not recommended (gelatin will lose texture).

FAQs

Q: Can I make this with frozen strawberries?
A: Yes — thaw and drain them well before adding to the gelatin.

Q: Can I use homemade whipped cream?
A: Yes, but stabilize it with a little powdered sugar or gelatin so it holds its shape.

Q: Why did my gelatin seep into the cream layer?
A: The cream layer wasn’t fully sealed to the crust or the gelatin was too warm when poured.

Personal Note

This is a family favorite at our summer barbecues — my grandmother’s go-to dessert that always disappears first. The salty pretzel crust with the creamy filling and bright berry topping is the perfect balance of flavors.

Your turn!
Tried this Strawberry Pretzel Salad? Leave a review or tag me on social media — I’d love to see your version!

Would you like me to create a “mini dessert cups” version (great for parties) or a no-bake version (for when you don’t want to turn on the oven)?

Ask ChatGPT

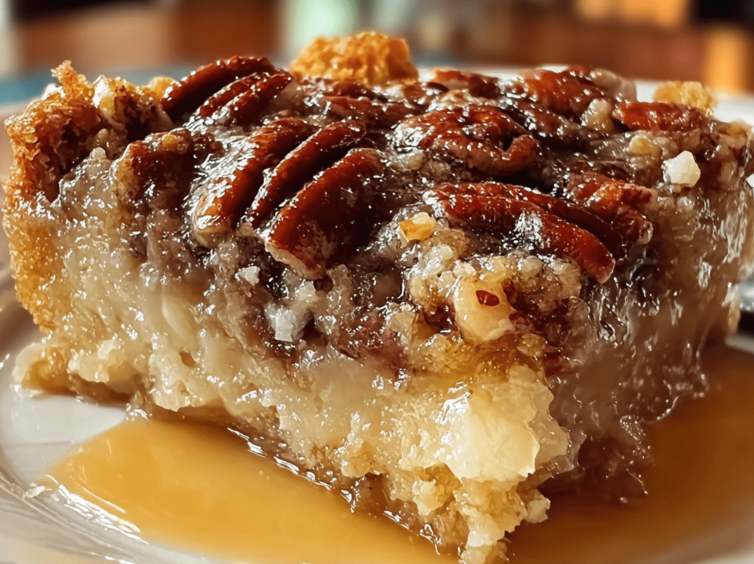
Pecan Praline Dump Cake

A rich, gooey, caramel-like pecan dessert layered with yellow cake mix and buttery praline flavor — this easy “dump-and-bake” cake is perfect for holidays or casual gatherings.

Prep Time: 10 minutes
Cook Time: 50–60 minutes
Total Time: ~1 hour 10 minutes
Servings: 12
Dietary: Kid-friendly, Make-ahead friendly

Ingredients

  • Chopped pecans (1 cup) – toasted for enhanced flavor

  • Sweetened condensed milk (1 can / 14 oz)

  • Light or dark corn syrup (1 cup)

  • Unsalted butter – melted (½ cup / 1 stick)

  • Pure vanilla extract (1 tsp)

  • Yellow cake mix (1 box / 15.25 oz) – dry, unprepared

  • Unsalted butter – cold, sliced thinly (½ cup / 1 stick)

  • Water (1 cup)

Instructions

  1. Preheat the oven: Set to 350°F (175°C). Grease a 9×13-inch baking dish.

  2. Layer pecans: Sprinkle chopped pecans evenly across the bottom of the dish.

  3. Pour wet ingredients: In order, pour condensed milk, corn syrup, melted butter, and vanilla evenly over the pecans. Do not stir.

  4. Add cake mix: Sprinkle dry cake mix evenly over the wet layer, gently spreading to cover. Do not stir.

  5. Dot with butter: Place cold butter slices evenly over the surface of the cake mix.

  6. Add water: Slowly and evenly pour 1 cup of water over the entire dish to help moisten the cake mix.

  7. Bake: Bake for 50–60 minutes, until the top is golden brown and bubbling around the edges.

  8. Cool & serve: Let cool for 10 minutes to set. Serve warm with vanilla ice cream or whipped cream.

Quick Notes & Pro Tips

  • Toasting pecans: Toast in a dry skillet for 3–5 minutes for a richer flavor.

  • Butter matters: Use real butter (not margarine) for best texture and taste.

  • Do not stir: Keeping layers distinct creates the gooey praline texture.

Why You’ll Love It

This cake gives you the best of both worlds: the rich, gooey texture of pecan pralines and the fluffy sweetness of yellow cake. Best of all, it comes together with almost no effort — no mixing bowls required!

Step-by-Step Cooking Guide

Layering the Base

  • Pecans first, then the “gooey” mix (condensed milk, corn syrup, melted butter, vanilla).

Adding the Cake Layer

  • Gently sprinkle cake mix to cover the top, then dot with butter slices to create a golden crust.

Baking to Perfection

  • Bake until golden brown and bubbling, letting the flavors meld into a praline-like filling.

Ingredient Details & Substitutions

  • Cake mix: Swap yellow cake for spice cake or butter pecan cake for seasonal flair.

  • Add-ins: Try chocolate chips, butterscotch chips, or sweetened coconut flakes for a flavor twist.

  • Corn syrup: Use dark for a deeper caramel flavor.

Variations & Serving Suggestions

  • Holiday twist: Add a pinch of cinnamon or nutmeg for a festive touch.

  • Serve it à la mode: Pair with vanilla ice cream or dollops of whipped cream.

  • Make it tropical: Add shredded coconut and a splash of rum extract to the wet layer.

Storage & Make-Ahead

  • Refrigerate: Store covered at room temperature for 2 days or refrigerate up to 5 days.

  • Make-ahead: Bake a day ahead; reheat in the oven at 300°F until warm.

  • Reheat: Microwave individual slices for 30–45 seconds for that fresh-from-the-oven feel.

FAQs

Q: Can I use a different nut?
A: Yes — walnuts or almonds work, though pecans give the most praline-like flavor.

Q: Can I make this without corn syrup?
A: Substitute with maple syrup or honey for a different flavor profile (texture may vary slightly).

Q: Can I halve the recipe?
A: Yes — use an 8×8-inch dish and reduce bake time by 10–15 minutes.

Personal Note

This is one of those “effortless showstopper” desserts I make for family gatherings — it feels like a praline cobbler meets cake, and it always disappears fast.

Your turn!
If you try this Pecan Praline Dump Cake, leave a review or tag me on social media — I’d love to see your creation!

Would you like me to make a “holiday version” (like a pecan pie + spice cake combo) or a “mini dessert version” (baked in ramekins for individual servings)?
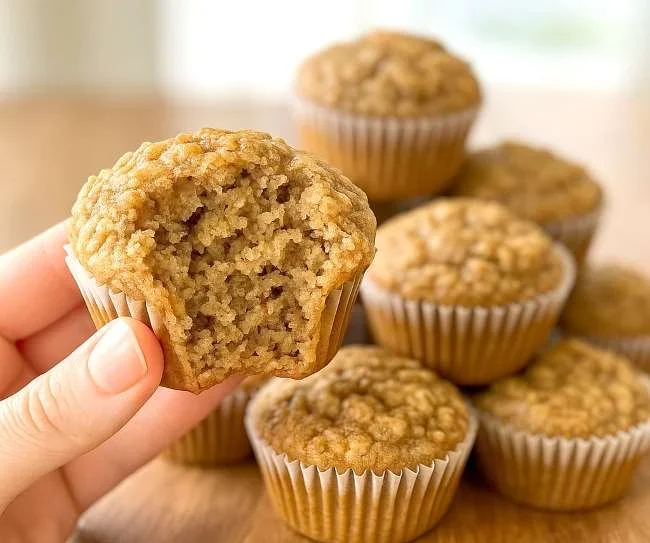
Three Ingredient Oatmeal muffins

Oatmeal Muffins Directions:

  • Preheat the oven to 350°F.
  • Mash the bananas in a large bowl.
  • Add the oats and vanilla extract, mixing everything together until well combined.
  • Spoon the mixture into a muffin tin lined with paper cups.
  • Bake for 15 minutes or until golden and a toothpick inserted comes out clean.

WW Points Calculation:

  • 4 bananas: 0 pts
  • 1 cup old-fashioned rolled oats: 7 pts
  • 1 tsp vanilla extract: 0 pts

Total Points: 7
Servings: 12
Per Serving: 0.58 points

Nutrition Information:

  • Calories: 60
  • Fat: 1g
  • Protein: 1g
  • Carbohydrates: 14g
  • Sugar: 7g
  • Sodium: 0mg

I’m waiting for your comments! Enjoy!