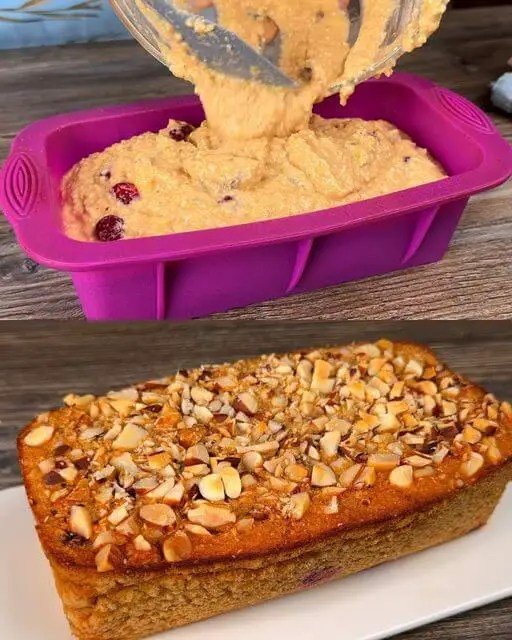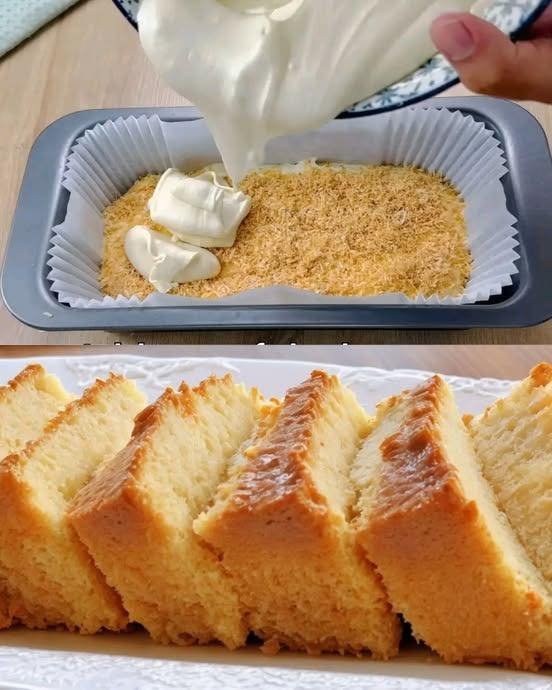
Quick Coconut Loaf Cake

Quick Coconut Loaf Cake

A soft, buttery loaf with a rich coconut flavor

This coconut loaf cake comes together quickly using simple pantry ingredients. It has a tender, slightly dense crumb and a gentle coconut aroma, making it a lovely choice for tea time, breakfast, or a light dessert.


Ingredients

Cake Batter

  • Granulated sugar — 175 g (¾ cup + 2 tablespoons)

  • Unsalted butter — 110 g (½ cup), softened to room temperature

  • Vegetable oil — 30 ml (2 tablespoons)

  • Eggs — 2 large, room temperature

  • All-purpose flour — 190 g (1½ cups)

  • Baking powder — 1 teaspoon

  • Desiccated coconut — ½ cup

  • Milk or coconut milk — 60 ml (¼ cup)

  • Vanilla extract — 1 teaspoon


For the Pan

  • Butter or oil for greasing

  • Extra desiccated coconut for coating the pan


Step-by-Step Instructions

1. Prepare the Oven and Pan

  • Preheat the oven to 175°C (350°F).

  • Grease a standard loaf pan with butter or oil.

  • Sprinkle desiccated coconut evenly over the greased pan, tilting and tapping to coat the bottom and sides.

    • This adds texture and a lightly toasted coconut layer on the outside of the cake.


2. Cream the Butter and Sugar

  • In a large mixing bowl, add the softened butter and sugar.

  • Beat together for 2–3 minutes until the mixture looks pale and creamy.

  • Add the vegetable oil and vanilla extract.

  • Mix until fully combined.


3. Add the Eggs

  • Add the eggs one at a time, mixing well after each addition.

  • The batter should look smooth and well blended.


4. Combine Dry Ingredients

  • In a separate bowl, whisk together:

    • Flour

    • Baking powder


5. Make the Batter

  • Add half of the dry ingredients to the butter mixture and mix gently.

  • Pour in the milk or coconut milk and mix until incorporated.

  • Add the remaining dry ingredients and the ½ cup desiccated coconut.

  • Fold gently with a spatula until just combined.

    • Avoid overmixing to keep the loaf soft.


6. Bake

  • Pour the batter into the prepared loaf pan.

  • Smooth the top evenly.

  • Bake for 40–45 minutes, or until a toothpick inserted in the center comes out clean.


7. Cool

  • Remove the cake from the oven.

  • Let it cool in the pan for 10 minutes.

  • Transfer to a wire rack to cool completely before slicing.


Optional Finishing Touch

  • While the cake is still warm, lightly brush the top with a small amount of milk or coconut milk for added softness and shine.


Helpful Tips

  • Room-temperature ingredients help create a smooth batter

  • Coconut milk gives a deeper coconut flavor, while regular milk keeps it lighter

  • If the top browns too quickly, loosely cover with foil during the last 10 minutes


Storage

  • Store at room temperature for 2–3 days in an airtight container

  • Refrigerate for up to 5 days

  • Can be frozen (wrapped well) for up to 1 month
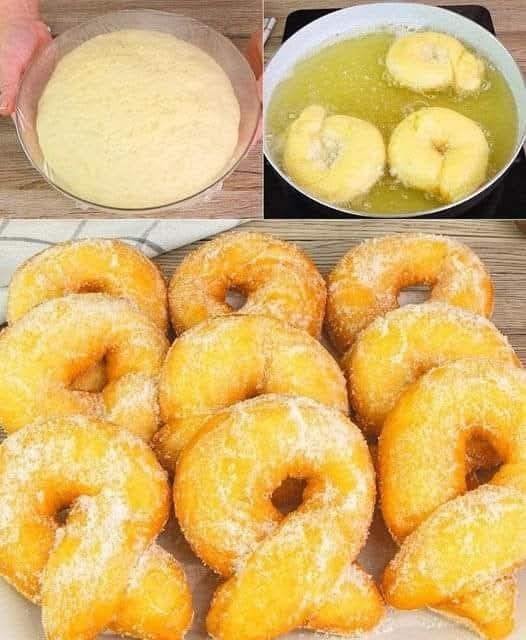
Soft Homemade Donuts (Simple & Beginner-Friendly)

Soft Homemade Donuts (Simple & Beginner-Friendly)

These homemade donuts are soft on the inside, lightly crisp on the outside, and coated with sugar for a classic finish. While the active preparation is quick, the dough needs resting time to achieve the best texture.


Ingredients

  • 2 large eggs (room temperature)

  • 180 ml (¾ cup) milk (lukewarm, not hot)

  • 10 g fresh yeast (about 1 tablespoon)

  • 500 g all-purpose flour (about 3⅓ cups)

  • 60 g butter (¼ cup), softened

  • 30 g sugar (2 tablespoons)

  • 1 teaspoon salt

  • Oil for frying (vegetable or sunflower oil)

  • Extra sugar for coating


Step-by-Step Preparation

1. Prepare the Yeast Mixture

  • In a small bowl, add the eggs, lukewarm milk, and fresh yeast.

  • Mix gently until the yeast dissolves completely.

  • Set aside for 5 minutes.


2. Make the Dough

  • In a large mixing bowl, add:

    • Flour

    • Butter

    • Sugar

    • Salt

  • Pour in the yeast mixture.

  • Mix with your hands or a spoon until a soft dough forms and no dry flour remains.


3. Knead the Dough

  • Transfer the dough to a clean work surface.

  • Knead for 8–10 minutes until smooth, elastic, and soft.

  • Shape into a ball.


4. First Rest (Rising)

  • Place the dough in a lightly greased bowl.

  • Cover with a clean cloth or plastic wrap.

  • Let it rest in a warm place for 2 hours, or until doubled in size.


5. Shape the Donuts

  • Gently press the air out of the dough.

  • Divide into 9 equal pieces.

  • Roll each piece into a smooth ball.

  • Use your fingers to gently shape each piece into a donut or oval fritter shape.


6. Second Rest (Proofing)

  • Place shaped donuts on a tray lined with baking paper.

  • Cover loosely.

  • Let them rest in a warm place (around 30°C / 86°F) for 1 hour until puffy.

(This step helps the donuts become light and airy — this is not baking.)


7. Fry the Donuts

  • Heat oil in a deep pan over medium heat.

  • Fry donuts in small batches.

  • Cook 1–2 minutes per side, turning gently, until evenly golden.

  • Remove and place on paper towels to drain excess oil.


8. Sugar Coating

  • While still warm, roll each donut in sugar until fully coated.


Serving Suggestions

  • Enjoy warm with tea, coffee, or milk

  • Add cinnamon to the sugar for extra flavor

  • Serve plain or with jam on the side


Helpful Tips

  • Do not overheat the oil; medium heat ensures even cooking

  • Lukewarm milk helps yeast work properly

  • Resting time is essential for soft texture

Butter Castella Cake Recipe

🍰 Butter Castella Cake Recipe

Ingredients (for one 8-inch loaf pan or a small square pan)

  • 1 cup (120 g) cake flour
    (You can use all-purpose flour sifted 2–3 times for extra lightness.)
  • 6 large eggs, at room temperature
  • ¾ cup (150 g) granulated sugar
  • 3 tbsp (45 ml) honey (or golden syrup)
  • 4 tbsp (60 g) unsalted butter, melted
  • 3 tbsp (45 ml) whole milk, warmed
  • 1 tsp vanilla extract

Instructions

1. Prepare the Pan and Oven

  • Preheat oven to 325°F (160°C).
  • Line your baking pan with parchment paper, leaving some extra on the sides so the cake can be lifted out easily after baking.
  • In a small bowl, mix the warm milk, melted butter, and honey. Set aside.

2. Beat Eggs and Sugar

  • In a heatproof bowl, combine eggs and sugar.
  • Place the bowl over a pot of simmering water (double boiler style).
  • Whisk constantly until the mixture is warm to the touch and the sugar granules have dissolved.
  • Remove from heat and beat using an electric mixer on high speed for about 5–7 minutes, until the mixture becomes pale, thick, and tripled in volume.

3. Fold in the Flour

  • Sift the cake flour in 2–3 additions into the whipped egg mixture.
  • Gently fold with a spatula each time, being careful not to deflate the airy batter.

4. Add Flavoring

  • Pour in the butter-milk-honey mixture and vanilla extract.
  • Fold gently until just combined. Avoid overmixing — this keeps the cake soft and fluffy.

5. Bake the Cake

  • Pour the batter into the prepared pan and tap lightly to remove large air bubbles.
  • Bake for 35–45 minutes, or until the top is golden brown and a skewer inserted in the center comes out clean.

6. Cool and Set

  • Remove the cake from the oven and, while still warm, cover the top with plastic wrap to retain moisture.
  • Once completely cooled, wrap the entire cake in plastic wrap and refrigerate overnight.
    This resting time gives the Castella its signature moist, dense, and slightly sticky texture.
  • Slice into thick pieces and serve at room temperature.

Tips & Variations

  • For a chewier texture, substitute bread flour for cake flour.
  • For a different flavor, replace honey with maple syrup or golden syrup.
  • For Matcha Castella, add 1–2 tsp of matcha powder when sifting the flour.
  • To ensure even baking, place the pan on the middle rack and avoid opening the oven during the first 30 minutes.

Healthy Apple & Oat Breakfast Cake

Healthy Apple & Oat Breakfast Cake

Moist, naturally sweet, and packed with fiber and healthy fats—perfect for breakfast or a wholesome snack


Recipe Overview

  • Prep Time: 15 minutes

  • Bake Time: 35–45 minutes

  • Pan Size: 20×8 cm (8×3 inch loaf pan)

  • Yield: 8–10 slices


Ingredients

  • 150 g (1 ½ cups) oat flakes (use certified gluten-free if needed)

  • 2 large apples, peeled and chopped into small cubes

  • 2 large eggs, at room temperature

  • 50 g (1/3 cup) raisins

  • 30 g (¼ cup) walnuts, chopped (for topping)

  • 1 tsp ground cinnamon

  • 1 ½ tsp (6 g) baking powder

  • Hot water (enough to soak the raisins)

  • Optional: 1 tsp vanilla extract or 1 tbsp honey for extra sweetness


Step-by-Step Instructions

1. Hydrate the Raisins

  • Place the raisins in a small bowl and cover them with hot water.

  • Let them soak for 10 minutes to plump up, then drain thoroughly.


2. Prepare the Oat Base

  • For a smoother, cake-like texture, pulse the oat flakes in a blender for a few seconds until they resemble flour.

  • For a more rustic, chewy texture, leave the oats whole.


3. Mix the Wet Ingredients

  • In a large bowl, whisk the eggs until well combined.

  • If using honey or vanilla extract, stir it in at this stage.


4. Incorporate the Fruit

  • Fold the chopped apples, soaked raisins, and ground cinnamon into the egg mixture.

  • The moisture from the apples will naturally hydrate the oats during baking.


5. Combine with Oats and Baking Powder

  • Add the oats and baking powder to the wet mixture.

  • Mix gently until all the oats are evenly moistened and the fruit is distributed throughout the batter.

  • Avoid overmixing, which can make the loaf dense.


6. Prepare the Pan

  • Preheat your oven to 350°F (180°C).

  • Grease a 20×8 cm loaf pan with a small amount of vegetable oil or butter, or line it with parchment paper for easier removal.


7. Top and Bake

  • Pour the batter into the prepared pan and smooth the top with a spatula.

  • Evenly sprinkle the chopped walnuts over the surface.

  • Bake for 35–45 minutes, or until the top is golden brown and a toothpick inserted in the center comes out clean.


8. Cool

  • Let the cake cool in the pan for at least 15 minutes.

  • This allows the oats to set so the slices remain firm when cut.

  • Slice and enjoy warm, or let it cool completely for later.


Tips for Success

  • Texture Variation: Blend oats for a fine crumb or leave them whole for extra chewiness.

  • Natural Sweetness: The combination of apples and raisins provides enough natural sugar; additional sweeteners are optional.

  • Healthy Fats: Walnuts add crunch and heart-healthy omega-3s.

  • Storage: Keep leftovers in an airtight container in the refrigerator for 3–4 days.

  • Flavor Enhancements: Add a pinch of nutmeg, cardamom, or a handful of shredded coconut for extra aroma.

Apple & Banana Oatmeal Breakfast Loaf

Apple & Banana Oatmeal Breakfast Loaf

A moist, naturally sweet loaf perfect for breakfast or a snack

This wholesome breakfast loaf combines the fiber of oats with the natural sweetness of apples and banana. Raisins, cherries, and a crunchy nut topping make it a satisfying treat for mornings or anytime you want a nutritious snack.


Recipe Overview

  • Prep Time: 15 minutes

  • Bake Time: 45–50 minutes

  • Total Time: About 1 hour 5 minutes

  • Yield: 1 loaf


Ingredients

  • 1 cup (100 g) rolled oats or oatmeal

  • 2 medium apples, peeled and grated

  • 1 ripe banana, mashed

  • 2 large eggs

  • 100–120 ml water

  • 100 g raisins (or sultanas)

  • 100 g pitted cherries

  • 1 teaspoon baking powder

  • 50 g Brazil nuts, chopped (for topping)

  • Vegetable oil (for greasing the pan)


Step-by-Step Instructions

1. Hydrate the Oats

  • In a large mixing bowl, combine the oats with 100–120 ml of water.

  • Let the mixture sit for about 10 minutes so the oats soften and absorb moisture.


2. Prepare the Fruit

  • Peel and grate the apples.

  • In a small bowl, mash the banana with a fork until smooth.


3. Mix the Batter

  • Add the mashed banana and eggs to the soaked oatmeal. Whisk together until fully incorporated.

  • Stir in the grated apples, raisins, and cherries. Mix gently to combine.


4. Add Baking Powder

  • Sprinkle the baking powder over the mixture.

  • Fold everything together carefully with a spatula until evenly distributed. Avoid overmixing, which can make the loaf dense.


5. Prepare the Pan

  • Preheat your oven to 350°F (180°C).

  • Grease a loaf pan with vegetable oil.

  • Optional: Line a standard metal pan with parchment paper for easier removal.


6. Top and Bake

  • Pour the batter into the prepared pan and smooth the surface.

  • Evenly sprinkle the chopped Brazil nuts on top.

  • Bake for 45–50 minutes, or until the loaf is golden brown and a toothpick inserted into the center comes out clean.


7. Cool and Serve

  • Allow the loaf to cool in the pan for at least 10 minutes.

  • Remove from the pan and slice.

  • Serve warm or at room temperature.


Tips for Success

  • Smoother texture: Pulse the oats in a blender for a few seconds before hydrating to create a finer, cake-like crumb.

  • Storage: Store leftovers in an airtight container in the refrigerator for 3–4 days.

  • Nut swaps: Use walnuts, almonds, or pecans instead of Brazil nuts for a different flavor.

  • Optional additions: Add a pinch of cinnamon or nutmeg for extra warmth, or a handful of sunflower seeds for extra texture.


This loaf works well for meal prep, breakfast on the go, or as a wholesome afternoon snack.

Turkish Milk Flatbread (Pan-Cooked)

Turkish Milk Flatbread (Pan-Cooked)

Soft, pillowy flatbread with a subtle milk flavor, perfect for sandwiches or dipping

This Turkish milk bread is cooked on a stovetop pan rather than baked, giving it a soft, tender texture with a slightly crisp exterior. A touch of milk enriches the dough, and a drizzle of oil with fresh parsley and chili flakes finishes it beautifully.


Recipe Overview

  • Prep Time: 15 minutes

  • Rising Time: 1 hour

  • Cook Time: 5–6 minutes per flatbread

  • Yield: 6 medium flatbreads


Ingredients

Dough

  • 500 g (about 1 pound) all-purpose flour

  • 150 ml (5 fl. oz) warm milk

  • 150 ml (5 fl. oz) warm water

  • 1 teaspoon salt

  • 2 tablespoons dry yeast

  • 3 tablespoons olive oil

Optional Topping

  • 1–2 tablespoons olive oil or melted butter (for brushing)

  • 2 tablespoons chopped fresh parsley

  • A pinch of chili flakes (optional)


Step-by-Step Instructions

1. Prepare the Dough

  • In a large mixing bowl, combine the flour, salt, and dry yeast. Whisk briefly to distribute evenly.

  • Add the warm milk and warm water. Mix gently with a wooden spoon or your hands until the liquids are mostly absorbed.


2. Knead

  • Add the olive oil.

  • Knead the dough for about 8–10 minutes until it is smooth, soft, and slightly elastic.

  • Shape the dough into a ball.


3. First Rise

  • Lightly oil the mixing bowl. Place the dough ball inside and turn it to coat it with a thin layer of oil.

  • Cover with a clean kitchen towel or plastic wrap.

  • Set aside in a warm place for about 1 hour, or until the dough doubles in size.


4. Divide and Shape

  • Once risen, gently punch down the dough to release air.

  • Divide it into 6 equal pieces.

  • Roll each piece into a smooth ball.

  • Using a rolling pin, roll each ball into a flat circle about ½–1 cm thick.


5. Cook the Flatbreads

  • Heat a non-stick pan or cast-iron skillet over medium-high heat.

  • Place one flatbread in the pan. Cook for 2.5–3 minutes, until bubbles start to form.

  • Flip and cook the other side for another 2.5–3 minutes.

  • The flatbread should puff slightly and form a small pocket in the center.

  • Repeat with the remaining dough, adjusting heat as needed to prevent burning.


6. Finish and Serve

  • Brush each hot flatbread lightly with olive oil or melted butter.

  • Sprinkle with chopped parsley and a pinch of chili flakes, if using.

  • Serve warm as a side, for sandwiches, or with dips.


Tips for Success

  • Warm liquids: Make sure milk and water are warm (not hot) to activate the yeast without killing it.

  • Even thickness: Roll flatbreads to a consistent thickness for even cooking.

  • Pan choice: A heavy-bottomed or non-stick pan helps prevent sticking and ensures even browning.

  • Soft bread: Cover cooked flatbreads with a towel to keep them soft until serving.