Classic Carrot Cake with Creamy Frosting 🍰🥕

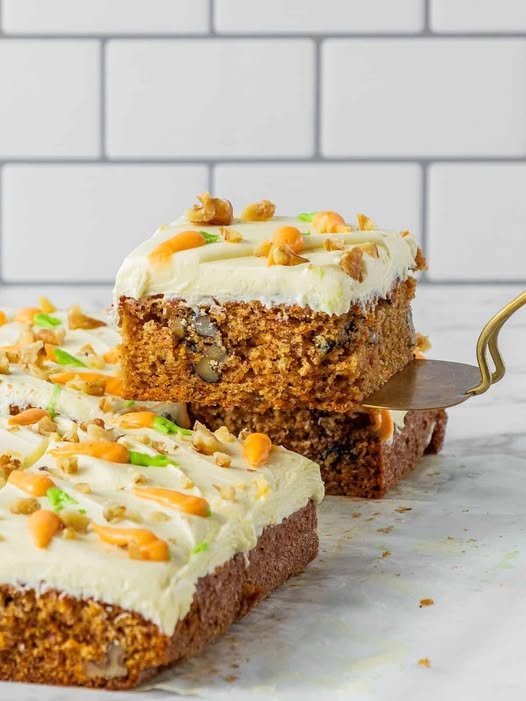
Classic Carrot Cake with Creamy Frosting 🍰🥕

This classic carrot cake is soft, moist, and warmly spiced, with a tender crumb and a smooth, creamy frosting that brings everything together beautifully. Made with freshly grated carrots and simple pantry ingredients, it’s a timeless dessert perfect for gatherings, celebrations, or a comforting homemade treat.


⏱️ Time & Yield

  • Prep Time: 20 minutes

  • Bake Time: 30–40 minutes

  • Cooling & Frosting: 45 minutes

  • Yield: 1 large rectangular cake or 2 round layers (10–12 servings)


🧾 Ingredients

For the Cake

  • 2 cups (250 g) all-purpose flour

  • 1½ teaspoons baking powder

  • 1 teaspoon baking soda

  • ½ teaspoon salt

  • 1 teaspoon ground cinnamon

  • ½ teaspoon ground nutmeg (optional, for warmth)

  • 1 cup (200 g) white granulated sugar

  • ½ cup (100 g) brown sugar

  • 3 large eggs, room temperature

  • ¾ cup vegetable oil or melted coconut oil

  • 2 cups freshly grated carrots (about 3–4 medium carrots)

  • ½ cup chopped walnuts or pecans (optional)


For the Frosting

  • 8 oz (225 g) cream cheese, softened

  • ½ cup (115 g) unsalted butter, softened

  • 2–3 cups powdered sugar (adjust to taste)

  • 1 teaspoon vanilla extract


👩‍🍳 Step-by-Step Instructions

1️⃣ Prepare the Oven and Pan

Preheat your oven to 350°F (175°C).
Grease a 9×13-inch pan or two 8-inch round pans.
Line the bottom with parchment paper for easy removal.


2️⃣ Mix the Dry Ingredients

In a medium bowl, whisk together:

  • Flour

  • Baking powder

  • Baking soda

  • Salt

  • Cinnamon

  • Nutmeg (if using)

Set aside.


3️⃣ Combine the Wet Ingredients

In a large bowl, whisk the eggs with the white sugar and brown sugar until smooth and slightly lighter in color.
Slowly pour in the oil while whisking, until fully blended.


4️⃣ Make the Batter

Add the dry ingredients to the wet mixture in batches.
Stir gently until just combined—avoid overmixing.

Fold in:

  • Grated carrots

  • Chopped nuts (if using)

The batter will be thick and evenly textured.


5️⃣ Bake

Pour the batter evenly into the prepared pan(s).
Bake for 30–40 minutes, depending on pan size.

The cake is ready when:

  • The top springs back lightly

  • A toothpick inserted in the center comes out clean


6️⃣ Cool Completely

Let the cake cool fully in the pan.
Cooling is important so the frosting spreads smoothly.


🍥 Make the Creamy Frosting

In a bowl, beat the softened cream cheese and butter together until smooth and creamy.
Add the vanilla extract.
Gradually mix in the powdered sugar until you reach your desired sweetness and spreadable consistency.


7️⃣ Assemble and Decorate

Spread an even, generous layer of frosting over the cooled cake.
If desired, decorate with:

  • Extra chopped nuts

  • Simple piped designs

  • Light sprinkles of cinnamon


🧊 Storage & Helpful Tips

  • Storage: Keep covered in the refrigerator for up to 4–5 days

  • Flavor tip: This cake tastes even better after resting overnight

  • Carrots: Freshly grated carrots provide the best moisture and texture

Blueberry Lemon Almond Flour Bread (Detailed & Gentle Recipe) 🫐🍋

Blueberry Lemon Almond Flour Bread (Detailed & Gentle Recipe) 🫐🍋

This blueberry lemon bread is soft, fragrant, and naturally satisfying, with bright citrus notes and bursts of juicy blueberries in every slice. Made with almond flour and simple pantry ingredients, it’s perfect for breakfast, afternoon tea, or a light dessert. The lemon glaze is optional but adds a lovely finishing touch.


⏱️ Time & Yield

  • Prep Time: 15 minutes

  • Bake Time: 45–55 minutes

  • Cooling Time: 30–40 minutes

  • Yield: 1 loaf (8–10 slices)


🧾 Ingredients

For the Bread

  • 2½ cups super-fine almond flour
    Fine texture gives the best crumb.

  • ½ cup granulated erythritol or monk fruit sweetener
    Choose one with a texture similar to sugar.

  • 1½ teaspoons baking powder

  • ¼ teaspoon salt

  • 3 large eggs, room temperature

  • ⅓ cup butter, melted and cooled slightly
    (Coconut oil may also be used.)

  • ¼ cup unsweetened almond milk

  • 2 tablespoons fresh lemon juice

  • 1 tablespoon lemon zest (from about 1 large lemon 🍋)

  • 1 teaspoon vanilla extract

  • 1 cup fresh blueberries
    Toss with 1 teaspoon almond flour to help distribute them evenly.


Optional Lemon Glaze

  • ½ cup powdered sweetener

  • 1–2 tablespoons fresh lemon juice


👩‍🍳 Step-by-Step Instructions

1️⃣ Prepare the Pan and Oven

Preheat your oven to 350°F (175°C).
Grease an 8×4-inch loaf pan or line it with parchment paper, leaving overhang on the sides for easy lifting.


2️⃣ Mix the Dry Ingredients

In a large bowl, whisk together:

  • Almond flour

  • Sweetener

  • Baking powder

  • Salt

Break up any lumps so the mixture is light and even.


3️⃣ Mix the Wet Ingredients

In a separate bowl, whisk together:

  • Eggs

  • Melted butter (make sure it’s warm, not hot)

  • Almond milk

  • Lemon juice

  • Lemon zest

  • Vanilla extract

Whisk until smooth and well combined.


4️⃣ Combine the Batter

Pour the wet mixture into the bowl with the dry ingredients.
Stir gently with a spatula until just combined—do not overmix.

Carefully fold in the blueberries, using a light hand to keep them whole.


5️⃣ Bake

Pour the batter into the prepared loaf pan and smooth the top.
Bake for 45–55 minutes, until:

  • The top is lightly golden

  • A toothpick inserted in the center comes out clean

👉 If the top browns too quickly, loosely cover with foil during the last 15 minutes.


6️⃣ Cool Completely

Let the bread cool in the pan for at least 20 minutes, then gently transfer to a wire rack.
Allow it to cool fully before slicing—this helps the loaf set properly.


7️⃣ Add the Lemon Glaze (Optional)

In a small bowl, whisk powdered sweetener with lemon juice until smooth.
Drizzle over the completely cooled loaf and let it set before slicing.


🍽️ Serving Ideas

  • Enjoy plain or with a little butter

  • Serve with tea or coffee

  • Slice and warm gently before serving for extra aroma


🧊 Storage Tips

  • Store in an airtight container in the refrigerator for up to 5 days

  • For longer keeping, slice and freeze; thaw at room temperature


💡 Helpful Notes

  • If using frozen blueberries, add them directly without thawing

  • Super-fine almond flour gives the best texture

  • Lemon flavor deepens after the bread rests overnight

2-Ingredient Homemade Condensed Milk (Detailed & Gentle Method)

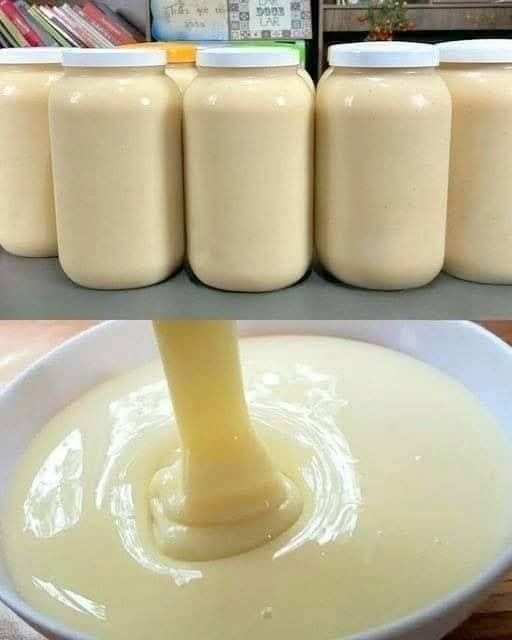
2-Ingredient Homemade Condensed Milk (Detailed & Gentle Method) ✨🥛

Making condensed milk at home is easy, budget-friendly, and gives you full control over the ingredients. With just two simple items, you can create a smooth, creamy condensed milk perfect for desserts, drinks, and baking—no additives, no extras.

This method uses slow, gentle heat and patience to naturally thicken the milk and develop its rich texture.


🧾 Ingredients

  • 2 cups (500 ml) whole milk
    Full-cream milk gives the best creamy body and smooth mouthfeel.

  • ⅔ cup (150 g) granulated sugar
    Sweetens the milk and helps it thicken naturally as it reduces.


👩‍🍳 Step-by-Step Instructions

1️⃣ Combine the Ingredients

Pour the milk into a heavy-bottomed saucepan. Add the sugar and gently stir to combine.
Using a thick pan helps the milk heat evenly and stay smooth.


2️⃣ Dissolve the Sugar

Place the saucepan over medium-low heat.
Stir slowly and continuously until the sugar fully dissolves into the milk.
This step is important for a silky texture later.


3️⃣ Gentle Simmer & Reduce

Once the sugar has dissolved, reduce the heat slightly so the milk stays at a very gentle simmer (small bubbles at the edges, not active bubbling).

  • Let it cook for 35–45 minutes

  • Stir every few minutes to keep the mixture smooth

  • If light foam forms on top, gently skim it off with a spoon

As it cooks, you’ll notice:

  • The color changing from white to a soft creamy tone

  • The volume gradually reducing to about half

  • The texture becoming thicker and glossy


4️⃣ Check the Consistency

The condensed milk is ready when it:

  • Looks smooth and shiny

  • Feels lightly thick and coats the back of a spoon

👉 Keep in mind: it will become thicker as it cools.


5️⃣ Cool and Smooth

Remove the pan from heat and let the condensed milk cool completely.
If you notice tiny lumps:

  • Strain through a fine sieve or

  • Blend briefly for a perfectly smooth finish


6️⃣ Store

Pour into clean, dry glass jars.
Store covered in the refrigerator for up to 2 weeks.


🌟 Helpful Tips & Variations

  • 🥥 Dairy-free option: Full-fat coconut milk works very well and gives a rich result

  • 🍯 Flavor boost: Add a small splash of vanilla after cooling

  • 🧁 Uses: Perfect for desserts, no-bake treats, tea, coffee, and baking

  • ❄️ Texture tip: If it thickens too much in the fridge, stir in a little warm milk to loosen


❓ Common Questions

Can I use sugar alternatives?
Yes, but the texture may be lighter since regular sugar thickens more naturally.

How long does it last?
Up to 2 weeks when kept cold in a sealed container.

Golden Turmeric Anti-Inflammatory Custard

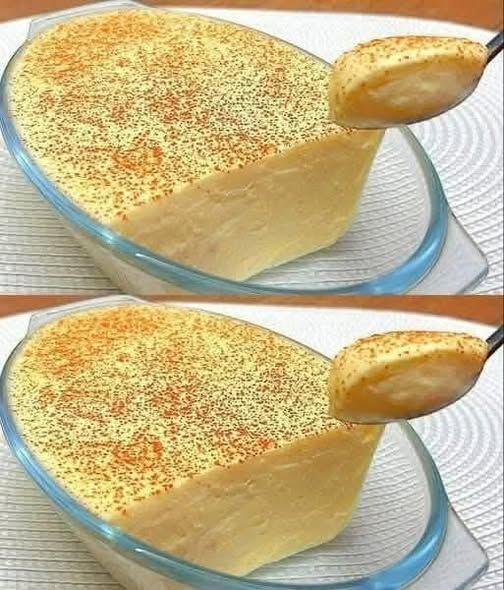
Golden Turmeric Anti-Inflammatory Custard (Dairy-Free & Refined Sugar-Free)

 Description

This silky, golden custard is a soothing, anti-inflammatory dessert made with plant-based milk and warming spices. It’s naturally sweetened, easy to digest, and perfect as a light dessert, healing snack, or bedtime treat. Creamy, comforting, and nourishing—without eggs, dairy, or refined sugar.

 Time & Yield

  • Prep time: 5 minutes

  • Cook time: 10 minutes

  • Chill time (optional): 1–2 hours

  • Total time: ~15 minutes (+ chilling)

  • Servings: 4

 Ingredients

  • 2 cups almond milk (or coconut milk for extra creaminess)

  • 2 tbsp cornstarch

  • 1 tbsp raw honey or maple syrup

  • ½ tsp turmeric powder

  • ¼ tsp ginger powder

  • 1 pinch black pepper (enhances turmeric absorption)

  • ½ tsp vanilla extract

  • Cinnamon or turmeric, for topping

 Instructions

  1. Make slurry

    • In a small bowl, whisk cornstarch with ¼ cup of the almond milk until smooth.

  2. Heat milk & spices

    • In a saucepan over medium heat, add remaining milk, turmeric, ginger, and black pepper.

    • Warm gently, stirring often (do not boil).

  3. Thicken custard

    • Add the cornstarch slurry to the saucepan.

    • Stir continuously for 5–7 minutes until thick and creamy.

  4. Sweeten & flavor

    • Remove from heat.

    • Stir in honey/maple syrup and vanilla extract.

  5. Set & serve

    • Pour into serving dishes.

    • Sprinkle with cinnamon or turmeric.

    • Serve warm or chill for a firmer texture.

 Tips for Best Results

  • Stir constantly to prevent lumps

  • Use full-fat coconut milk for ultra-creamy texture

  • Taste and adjust sweetness before pouring

  • If too thick, whisk in a splash of warm milk

  • For smoothest texture, strain before chilling

 Variations

  • Protein boost: Stir in collagen or plant protein after cooking

  • Golden latte flavor: Add ¼ tsp cardamom

  • Sugar-free: Use monk fruit or stevia

  • Chocolate version: Add 1 tsp cocoa powder

 Nutritional Information (Per Serving – Approx.)

  • Calories: 120

  • Carbohydrates: 16 g

  • Protein: 2 g

  • Fat: 5 g

  • Fiber: 1 g

  • Sugar: 6 g

(Values vary based on milk and sweetener used.)

Health Benefits

  • Turmeric: Powerful anti-inflammatory & antioxidant

  • Black pepper: Boosts curcumin absorption up to 2000%

  • Ginger: Aids digestion & reduces nausea

  • Dairy-free: Gentle on digestion

  • Low sugar: Supports balanced blood sugar

Q & A

Q: Can I make this ahead of time?
A: Yes! Store covered in the fridge for up to 3 days.

Q: Why add black pepper?
A: It dramatically increases turmeric’s bioavailability.

Q: Can I use regular milk?
A: Yes, dairy milk works perfectly if tolerated.

Q: Is this safe daily?
A: Yes, in moderate amounts—especially helpful for inflammation.

Q: Can kids eat this?
A: Absolutely—reduce turmeric slightly if sensitive to spice.

Tomato Basil Garlic Bread

Tomato Basil Garlic Bread

Ingredients

  • Bread: 1 large baguette or Italian loaf

  • Tomatoes: 3 ripe tomatoes, finely diced

  • Garlic: 4 cloves, minced

  • Fresh Basil: 1/4 cup leaves, chopped

  • Cheese: 1/4 cup grated Parmesan (optional) or sliced fresh Mozzarella

  • Oil: 1/4 cup olive oil

  • Vinegar: 1 tablespoon balsamic vinegar

  • Seasoning: Salt and freshly cracked black pepper to taste


Instructions

1. Prepare the Topping

  • In a medium bowl, combine the diced tomatoes, minced garlic, chopped basil, olive oil, and balsamic vinegar.

  • Season with salt and pepper. Let this mixture sit for at least 15 minutes at room temperature; this allows the tomatoes to release their juices and the garlic flavor to mellow.

2. Prepare the Bread

  • Preheat your oven to 400°F (200°C).

  • Slice the baguette or Italian loaf in half lengthwise, or cut it into thick individual slices.

  • Place the bread on a baking sheet. For extra flavor, you can lightly brush the cut side of the bread with a little extra olive oil or butter.

3. Assemble

  • Using a slotted spoon (to avoid too much liquid soaking the bread), distribute the tomato mixture evenly over the bread.

  • Top with the grated Parmesan or slices of Mozzarella cheese.

4. Bake and Broil

  • Bake for 8 to 10 minutes, or until the bread is toasted and the cheese is melted.

  • For a golden, bubbly finish (as seen in the image), turn the oven to Broil for the last 1–2 minutes. Watch closely to prevent burning!

5. Garnish and Serve

  • Remove from the oven and top with an additional sprinkle of fresh basil if desired. Serve warm while the bread is at its crunchiest.


Chef’s Tips

  • Avoid Soggy Bread: If your tomatoes are very juicy, seed them before dicing. This keeps the topping flavorful without making the bread soft.

  • The Bread Choice: A sturdier Italian loaf or sourdough works better than a soft sandwich loaf because it holds up under the weight of the tomatoes.

  • Rub with Garlic: For an even deeper garlic flavor, rub a raw, halved garlic clove directly onto the toasted bread before adding the tomato topping.

Easy One-Bowl Chocolate Cake

Easy One-Bowl Chocolate Cake

A soft, moist chocolate cake made with yogurt

This one-bowl chocolate cake is simple to prepare and uses everyday ingredients. Yogurt helps create a tender texture, while a small amount of coffee powder (optional) deepens the chocolate flavor without tasting like coffee.


Ingredients

  • All-purpose flour — 1 cup (120 g)

  • Baking powder — 2 teaspoons

  • Unsweetened cocoa powder — ¾ cup

  • Coffee powder — 1 teaspoon (optional)

  • Granulated sugar — 1 cup

  • Plain yogurt (or Greek yogurt) — 1 cup

  • Vegetable oil — ½ cup

  • Vanilla extract — 1 teaspoon

  • Eggs — 3 large, at room temperature


Step-by-Step Instructions

1. Prepare the Pan and Oven

  • Preheat the oven to 175°C (350°F).

  • Grease a 9-inch round cake pan or a standard loaf pan.

  • Line the base with parchment paper for easy removal.


2. Mix the Wet Ingredients

  • In a large mixing bowl, add:

    • Eggs

    • Sugar

    • Yogurt

    • Vegetable oil

    • Vanilla extract

  • Whisk until the mixture is smooth and well combined.


3. Add the Dry Ingredients

  • Place a sieve over the bowl.

  • Sift in:

    • Flour

    • Cocoa powder

    • Baking powder

    • Coffee powder (if using)

Sifting helps remove cocoa lumps and creates a smoother batter.


4. Combine Gently

  • Fold or whisk gently until no dry flour remains.

  • Stop mixing as soon as the batter is smooth.

    • Overmixing can make the cake dense.


5. Bake

  • Pour the batter into the prepared pan.

  • Smooth the top evenly.

  • Bake:

    • 30–35 minutes for a round pan

    • 40–45 minutes for a loaf pan

Doneness Test:
Insert a toothpick into the center. It should come out clean or with a few moist crumbs.


6. Cool

  • Let the cake rest in the pan for 10 minutes.

  • Run a knife around the edges.

  • Turn out onto a wire rack and allow to cool completely before slicing or frosting.


Helpful Tips

  • Room-temperature eggs blend more easily into the batter

  • Coffee powder is optional and does not create a coffee flavor

  • For a lighter finish, dust with powdered sugar

  • For a richer dessert, serve with chocolate sauce or fresh fruit


Storage

  • Store at room temperature for 2 days in an airtight container

  • Refrigerate for up to 5 days

  • Can be frozen (wrapped well) for up to 1 month