Chocolate Peanut Butter Crunch Balls

Chocolate Peanut Butter Crunch Balls

No-bake treats with a crisp center and smooth chocolate coating

These Chocolate Peanut Butter Crunch Balls are easy, no-bake treats made with simple pantry ingredients. A creamy peanut butter center mixed with crisp rice cereal is coated in smooth melted chocolate, creating a balanced texture that is both crunchy and tender. They are ideal for gatherings, gifting, or make-ahead snacks.


Recipe Overview

  • Yield: About 30–35 balls

  • Prep Time: 20 minutes

  • Chill Time: 1 hour

  • Total Time: About 1 hour 20 minutes


Ingredients

Peanut Butter Center

  • 1 cup creamy peanut butter

  • 2 cups crispy rice cereal

  • 1 cup powdered sugar, sifted

  • 2 tablespoons unsalted butter, melted

  • ¼ teaspoon salt

Chocolate Coating

  • 1½ cups semi-sweet or milk chocolate chips

  • 1 tablespoon coconut oil or shortening

Optional Topping

  • A light sprinkle of sea salt flakes


Step-by-Step Instructions

1. Prepare the Peanut Butter Mixture

  • In a large mixing bowl, combine the peanut butter, melted butter, and salt.

  • Stir until smooth and evenly blended.

  • Gradually add the powdered sugar, mixing until a thick, smooth mixture forms.


2. Add the Crunch

  • Gently fold in the crispy rice cereal using a spatula.

  • Mix carefully to keep the cereal intact, ensuring even distribution throughout the mixture.


3. Shape the Balls

  • Scoop about 1 tablespoon of the mixture and roll it between your palms to form a ball approximately 1 inch in size.

  • Place each ball onto a baking sheet lined with parchment paper.

Tip:
If the mixture feels too soft to shape, refrigerate it for 10–15 minutes before rolling.


4. Chill the Centers

  • Transfer the baking sheet to the freezer for 20–30 minutes.

  • This step helps the balls hold their shape during coating.


5. Melt the Chocolate

  • Place the chocolate chips and coconut oil in a microwave-safe bowl.

  • Heat in 30-second intervals, stirring after each, until fully melted and smooth.

  • Allow the chocolate to cool slightly before dipping.


6. Coat the Balls

  • Using a fork or toothpick, dip each chilled ball into the melted chocolate.

  • Lift out, allowing excess chocolate to drip off.

  • Return the coated balls to the parchment-lined tray.

  • Sprinkle lightly with sea salt if desired.


7. Set and Store

  • Let the chocolate set at room temperature or refrigerate until firm.

  • Store in an airtight container in the refrigerator for freshness.


Helpful Tips & Variations

  • Chocolate choice: Dark, milk, or dairy-free chocolate all work well.

  • Smoother finish: Tap the fork gently on the bowl edge to remove excess coating.

  • Flavor option: Add a small pinch of cinnamon or vanilla to the peanut butter mixture.

  • Storage: These treats keep well for several days when chilled.
Chef’s Italian Christmas Bread

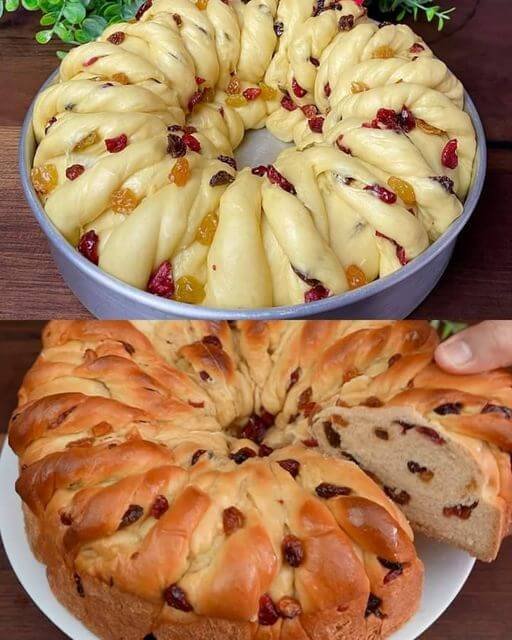
Chef’s Italian Christmas Bread

This traditional Italian Christmas bread is softly enriched with butter, eggs, citrus zest, and dried fruit. A slow-rise method allows the dough to develop flavor while keeping the crumb tender and light for several days. Shaped into a festive wreath, it is perfect for celebrations, gifting, or enjoying with coffee or tea.


Recipe Overview

  • Cuisine: Italian

  • Category: Sweet Bread / Holiday Baking

  • Prep Time: 30 minutes (plus rising time)

  • Rising Time: About 2½–3 hours total

  • Bake Time: 30–35 minutes

  • Total Time: About 4 hours

  • Yield: 1 large wreath (10–12 slices)


Ingredients

For the Dough

  • 500 g strong bread flour (about 4 cups)

  • 250 ml warm milk (lukewarm, not hot)

  • 7 g active dry yeast (1 standard sachet)

  • 80 g granulated sugar

  • 1 teaspoon salt

  • 1 large egg + 1 egg yolk, at room temperature

  • 100 g unsalted butter, very soft and cubed

  • Zest of 1 orange

  • Zest of 1 lemon


For the Fruit Filling

  • 150 g mixed dried fruit (raisins, sultanas, dried cranberries)

  • 50 g candied orange peel (optional)

  • 2 tablespoons dark rum or fresh orange juice


For the Glaze & Finish

  • 1 egg beaten with 1 tablespoon milk

  • Pearl sugar or powdered sugar, for topping


Step-by-Step Instructions

1. Soak the Dried Fruit

  • At least 30 minutes before mixing the dough, place the dried fruit and candied peel (if using) in a bowl.

  • Pour over the rum or orange juice and stir.

  • Let soak, then drain well before adding to the dough.

  • This step keeps the fruit soft and prevents it from drawing moisture from the bread.


2. Activate the Yeast

  • In a small bowl, combine:

    • Warm milk

    • Yeast

    • 1 tablespoon of the sugar

  • Stir gently and let stand for 10 minutes, until foamy and slightly bubbly.

  • If no foam appears, the yeast may not be active.


3. Mix the Dough

  • In a large bowl or stand mixer, combine:

    • Flour

    • Remaining sugar

    • Salt

    • Orange and lemon zest

  • Add the yeast mixture, whole egg, and egg yolk.

  • Mix until a rough, shaggy dough forms.


4. Add the Butter (Key to Soft Texture)

  • Begin kneading the dough.

  • Add the softened butter one cube at a time, allowing each piece to fully blend before adding the next.

  • Knead:

    • By hand: about 10 minutes

    • By mixer: 6–7 minutes on medium speed

  • The dough should be smooth, elastic, and slightly tacky but not sticky.

  • Gently knead in the drained dried fruit at the very end.


5. First Rise

  • Shape the dough into a ball and place it in a lightly greased bowl.

  • Cover with a clean cloth.

  • Let rise in a warm place for 1½ to 2 hours, until doubled in size.


6. Shape the Wreath

Option 1: Braided Wreath

  • Gently press down the dough to release excess air.

  • Divide into three equal portions and roll each into a long rope.

  • Braid loosely and join the ends to form a circle.

Option 2: Twisted Wreath

  • Roll the dough into a large rectangle.

  • Roll up tightly into a log.

  • Slice lengthwise down the center.

  • Twist the two halves together, keeping the cut sides facing outward.

  • Shape into a circle and seal the ends.


7. Second Rise

  • Place the shaped wreath on a parchment-lined baking tray or in a greased bundt pan.

  • Cover lightly and let rise for 45 minutes, until puffy.


8. Bake

  • Preheat oven to 180°C (350°F).

  • Brush the top gently with the egg-and-milk glaze.

  • Bake for 30–35 minutes, until:

    • Deep golden brown

    • Bread sounds hollow when tapped underneath


9. Cool and Finish

  • Remove from the oven and allow to cool completely on a wire rack.

  • Finish with pearl sugar or a light dusting of powdered sugar before serving.


Helpful Tips & Variations

  • Extra aroma: Add a pinch of ground cardamom or cinnamon to the dough.

  • Alcohol-free: Use orange juice instead of rum.

  • Storage: Wrap well; the bread stays soft for up to 3 days at room temperature.

  • Serving: Slice and enjoy plain or lightly toasted with butter.

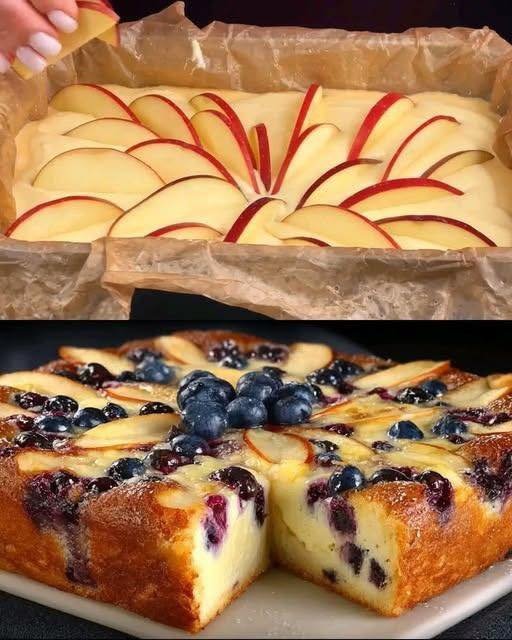
Apple & Blueberry Yogurt Cake

Apple & Blueberry Yogurt Cake

A soft, fruit-filled cake with a tender crumb and gentle sweetness

This Apple & Blueberry Yogurt Cake is a simple, rustic dessert made with everyday ingredients. Yogurt gives the cake a moist, creamy texture, while fresh apple slices and blueberries add natural sweetness and bursts of fruit flavor. It’s ideal for tea time, family gatherings, or a light dessert after meals.


Recipe Overview

  • Cuisine: European-style home baking

  • Category: Dessert

  • Prep Time: 15 minutes

  • Bake Time: 40–45 minutes

  • Total Time: About 1 hour

  • Servings: 8–10 slices


Ingredients

Wet Ingredients

  • 1 cup plain Greek yogurt (room temperature)

  • 3 large eggs (room temperature)

  • ¾ cup granulated sugar

  • ½ cup vegetable oil (or light olive oil)

  • 1 teaspoon vanilla extract

Dry Ingredients

  • 1½ cups all-purpose flour

  • 2 teaspoons baking powder

  • 1 pinch salt

Fruit Topping

  • 1 medium apple, peeled if desired and thinly sliced

  • ½ cup fresh blueberries (washed and dried)

Optional

  • Powdered sugar, for light dusting before serving


Step-by-Step Instructions

1. Prepare the Pan and Oven

  • Preheat your oven to 350°F (175°C).

  • Line the bottom of an 8-inch round cake pan with parchment paper.

  • Lightly grease the sides to prevent sticking.


2. Mix the Wet Ingredients

  • In a large mixing bowl, add the yogurt, eggs, sugar, oil, and vanilla extract.

  • Whisk until the mixture is smooth, pale, and well blended.

  • Make sure there are no visible egg streaks.


3. Combine the Dry Ingredients

  • In a separate bowl, sift together the flour, baking powder, and salt.

  • This helps keep the cake light and evenly textured.


4. Make the Batter

  • Gradually add the dry ingredients to the wet mixture.

  • Gently fold using a spatula or whisk just until combined.

  • Do not overmix; stop as soon as the batter is smooth.


5. Assemble the Cake

  • Pour the batter evenly into the prepared pan.

  • Arrange the apple slices neatly on top in a circular or fan pattern.

  • Scatter the blueberries evenly over the surface, pressing them slightly into the batter.


6. Bake

  • Place the pan in the center of the oven.

  • Bake for 40–45 minutes, or until:

    • The top is lightly golden

    • A toothpick inserted in the center comes out clean or with a few moist crumbs


7. Cool and Serve

  • Remove from the oven and allow the cake to cool in the pan for 15 minutes.

  • Transfer to a wire rack and cool completely before slicing.

  • Dust lightly with powdered sugar if desired.


Tips & Variations

  • Flavor boost: Add lemon zest or a small pinch of cinnamon to the batter.

  • Fruit options: Replace blueberries with raspberries, pears, peaches, or plums.

  • Texture choice:

    • Greek yogurt gives a richer, denser crumb

    • Regular plain yogurt makes the cake lighter and softer

  • Serving idea: Serve slightly chilled or at room temperature with fresh fruit or cream.

Biscoff Creamy Pudding Parfaits

Biscoff Creamy Pudding Parfaits

Smooth • No-Bake • Ready in Minutes

These Biscoff Creamy Pudding Parfaits are an easy, no-bake dessert that comes together quickly while still looking elegant and indulgent. Layers of finely crushed Biscoff cookies, smooth vanilla pudding blended with Biscoff spread, and fluffy whipped cream create a perfectly balanced dessert that’s sweet, creamy, and comforting.

Ideal for family gatherings, celebrations, or anytime you want a quick dessert that feels special.


🧾 Yield & Time

  • Servings: 4–6 parfaits

  • Preparation Time: About 10 minutes

  • Chilling Time (Optional): 30 minutes


🧺 Ingredients

Cookie Layers

  • Biscoff Cookies (Speculoos) – 1 pack (about 200 g)

  • Butter – 2 tablespoons, melted (optional, for a richer cookie base)

Creamy Pudding Layer

  • Instant Vanilla Pudding Mix – 1 standard box

  • Cold Milk – As directed on pudding package (usually 2 cups)

  • Biscoff Spread – 2 tablespoons, gently warmed until smooth

Topping

  • Whipped Cream – 1 cup (store-bought or homemade)

  • Extra Biscoff Cookies or Crumbs – for garnish


🥣 Step-by-Step Instructions

1️⃣ Prepare the Cookie Crumbs

Place about 15 Biscoff cookies into a zip-top bag or food processor. Crush until you have fine, even crumbs.

If you prefer a more structured base:

  • Transfer crumbs to a bowl

  • Stir in the melted butter until evenly combined

Set aside.


2️⃣ Make the Creamy Pudding Filling

In a medium mixing bowl, add the instant vanilla pudding mix and cold milk. Whisk for about 2 minutes, until the mixture thickens and becomes smooth.

Add the gently warmed Biscoff spread and whisk again until fully blended. The pudding should be creamy, evenly colored, and glossy.

Tip: Warming the spread slightly helps it blend smoothly without lumps.


3️⃣ Assemble the Parfaits

Use clear glasses or dessert cups so the layers are visible.

Layering order:

  • Bottom Layer:
    Add about 2 tablespoons of cookie crumbs to each glass. Gently press down with a spoon.

  • Middle Layer:
    Spoon or pipe the pudding mixture over the crumbs until the glass is about halfway full.

  • Second Cookie Layer:
    Sprinkle a thin layer of cookie crumbs on top of the pudding.

  • Top Layer:
    Finish with a generous spoonful or piped swirl of whipped cream.


4️⃣ Garnish and Finish

Sprinkle extra cookie crumbs over the whipped cream.
For a polished look, place one whole cookie gently into the cream at a slight angle.


5️⃣ Serve or Chill

  • These parfaits can be enjoyed immediately

  • For a softer, more blended texture, refrigerate for 30 minutes before serving

Chilling allows the cookie layers to gently soften, creating a dessert that feels smooth and cake-like.


⭐ Helpful Tips for Best Results

  • Use cold milk for the pudding so it thickens properly

  • Fine cookie crumbs give a smoother texture

  • Mini dessert cups are perfect for portion control

  • Keep covered if chilling longer than 30 minutes


🔄 Easy Variations

🍰 Cheesecake-Style

Fold 4 oz (115 g) softened cream cheese into the pudding for a richer, slightly tangy flavor.

🍌 Fruit Addition

Add a thin layer of sliced bananas between the pudding and whipped cream for a naturally sweet contrast.

🍫 Chocolate Touch

Drizzle melted chocolate over the whipped cream or mix chocolate chips into the pudding.

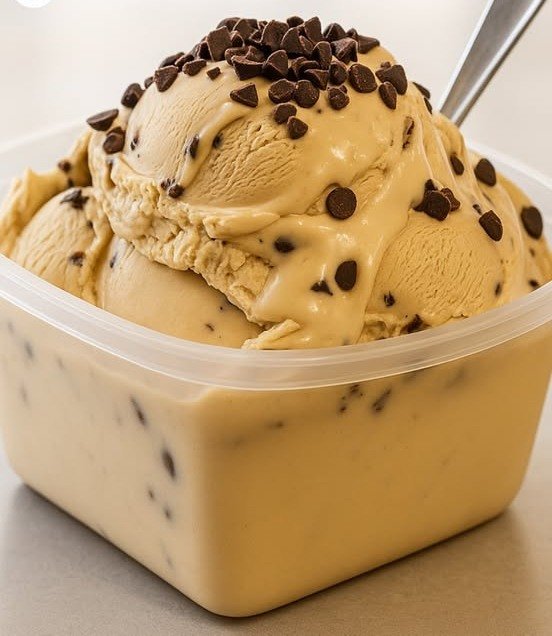
No-Churn Coffee Chocolate Chip Ice Cream

No-Churn Coffee Chocolate Chip Ice Cream

Creamy • Smooth • No Machine Needed

This No-Churn Coffee Chocolate Chip Ice Cream is rich, silky, and incredibly easy to make at home—no special equipment required. The combination of lightly sweetened cream, smooth coffee flavor, and chocolate chips creates a dessert that feels indulgent yet simple. Because it uses condensed milk instead of eggs, the texture stays soft and scoopable straight from the freezer.

Perfect for summer days, family treats, or anytime you crave a café-style frozen dessert at home.


🧾 Ingredients

Base Ingredients

  • Whipping Cream – 450 ml (about 2 cups), very cold

  • Sweetened Condensed Milk – 200 g (about ¾ cup), chilled

  • Instant Coffee – 2 tablespoons + 2 teaspoons
    (Adjust to taste for lighter or stronger coffee flavor)

  • Warm Water or Warm Milk – 1 to 2 tablespoons (for dissolving coffee)

Mix-Ins

  • Chocolate Chips – ½ cup

  • Extra Chocolate Chips – for topping (optional)

Optional Enhancers

  • A small pinch of salt (balances sweetness)

  • Cocoa Powder – 1 tablespoon (for mocha flavor)


🥣 Step-by-Step Instructions

1️⃣ Prepare the Coffee Mixture

In a small bowl, add the instant coffee and warm water or milk. Stir well until the coffee is fully dissolved and the mixture looks smooth, with no granules remaining.

Set aside and allow it to cool completely to room temperature.
(Adding warm coffee directly to cream can affect texture, so cooling is important.)


2️⃣ Whip the Cream

Pour the cold whipping cream into a large mixing bowl.
Using a hand mixer or stand mixer, whip on medium-high speed until the cream becomes thick and holds its shape.

How to tell it’s ready:
When you lift the beaters, the cream should stand upright and keep its form without falling over.

Tip: Stop mixing as soon as this stage is reached to maintain a light, smooth texture.


3️⃣ Combine the Base

Gently add the chilled condensed milk to the whipped cream.
Next, pour in the cooled coffee mixture.

Using a spatula, fold gently by scooping from the bottom and turning the mixture over itself. Continue until the color is even and the mixture looks smooth and airy.


4️⃣ Add Chocolate Chips

Sprinkle in the chocolate chips and gently fold again just until evenly distributed.

At this stage, you may also add:

  • A pinch of salt

  • Cocoa powder (sifted) for a mocha-style flavor


5️⃣ Transfer and Freeze

Spoon the mixture into a freezer-safe container.
Smooth the top with the back of a spoon and sprinkle extra chocolate chips if desired.

Cover tightly with a lid or wrap to keep the surface fresh and smooth.


6️⃣ Freeze Until Set

Place the container in the freezer for at least 6 hours, or preferably overnight.

Thanks to the condensed milk, the ice cream will remain soft and easy to scoop once frozen.


🍦 Serving Tips

  • Let the ice cream sit at room temperature for 2–3 minutes before scooping for best texture

  • Serve in bowls, cones, or alongside brownies or cookies

  • Sprinkle with cocoa powder or drizzle with chocolate syrup if desired


⭐ Pro Tips for Best Results

  • Cold Tools Matter: Chill your bowl and beaters for 10–15 minutes before whipping for maximum volume

  • Flavor Control: Adjust coffee quantity to suit your taste

  • Texture Boost: Mini chocolate chips distribute more evenly

  • Storage: Keep covered tightly to maintain smoothness

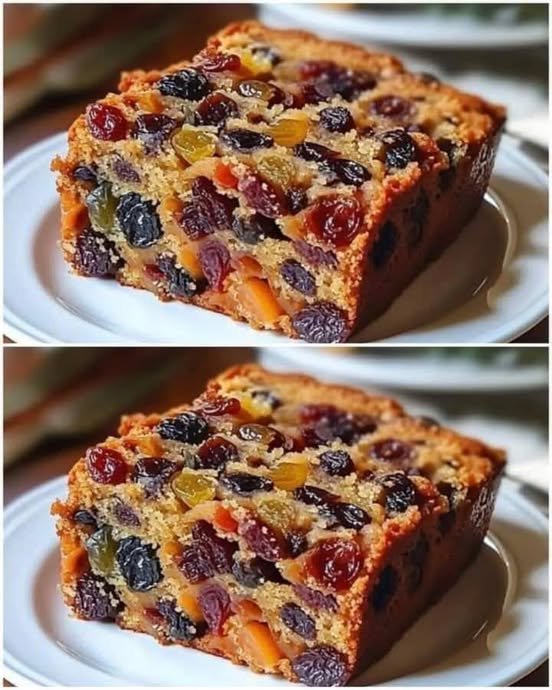
Mary Berry–Style Boiled Fruit Cake

Mary Berry–Style Boiled Fruit Cake

A classic, moist fruit loaf made with a simple boiling method

Why You’ll Love This Cake

This traditional boiled fruit cake is loved for its deep flavor, soft texture, and easy preparation. The gentle simmering step plumps the dried fruit and blends the flavors beautifully, resulting in a cake that improves with time.

  • Naturally moist from simmered fruit

  • Simple method — no mixer needed

  • Perfect for make-ahead baking

  • Great for tea time, gifting, or celebrations

  • Customizable with fruit, citrus, or nuts


Ingredients

For the Cake

  • 225 g (1 cup) unsalted butter

  • 225 g (1 cup) soft brown sugar

  • 225 g (1½ cups) mixed dried fruit
    (raisins, currants, sultanas, or chopped dates)

  • Zest and juice of 1 orange

  • 1 teaspoon ground cinnamon

  • 1 teaspoon mixed spice

  • 2 large eggs, lightly beaten

  • 225 g (1¾ cups) self-raising flour

Optional flavor boost (non-alcoholic):

  • 1 teaspoon orange extract or vanilla extract


Equipment Needed

  • Medium saucepan

  • Mixing spoon

  • 900 g (2 lb) loaf tin

  • Baking parchment


Step-by-Step Instructions

Step 1: Prepare the Oven and Tin

  • Preheat your oven to 160°C (325°F) or 140°C fan

  • Grease and line a 900 g loaf tin with parchment paper


Step 2: Boil the Fruit Mixture

  • Place the butter in a medium saucepan over low heat

  • Add the brown sugar, dried fruit, orange zest, orange juice, cinnamon, and mixed spice

  • Stir gently until the butter melts

  • Bring to a gentle simmer and cook for 5 minutes, stirring occasionally

  • Remove from heat and allow to cool for 10–15 minutes

This step softens the fruit and evenly distributes sweetness throughout the cake.


Step 3: Make the Batter

  • Once the mixture is warm (not hot), stir in the beaten eggs

  • Add the optional extract, if using

  • Sift in the self-raising flour

  • Fold gently until smooth and fully combined


Step 4: Bake

  • Spoon the batter into the prepared loaf tin

  • Smooth the top evenly

  • Bake for 1½ to 1¾ hours, or until a skewer inserted in the center comes out clean

  • If the top browns too quickly, loosely cover with foil during the final baking time


Step 5: Cool and Rest

  • Cool in the tin for 10 minutes

  • Transfer to a wire rack and cool completely

  • Wrap the cake in parchment and store in an airtight container

  • Resting the cake for 1–2 days improves flavor and texture


Tips for Best Results

  • Use fresh spices for the best aroma

  • Chop larger dried fruits for even distribution

  • Do not rush cooling — the structure sets as it cools

  • This cake slices best the next day


Variations

  • Nut version: Add ½ cup chopped walnuts or almonds

  • Fruit swap: Use dried apricots, cranberries, or figs

  • Citrus twist: Add lemon zest along with orange

  • Festive style: Add a small amount of candied peel


Storage

  • Room temperature (airtight): up to 7 days

  • Refrigerator: up to 2 weeks

  • Freezer: up to 3 months (wrap well)


Serving Suggestions

  • Enjoy with tea or coffee

  • Serve lightly warmed with butter

  • Pair with fresh fruit or mild cheese

  • Slice thinly for afternoon snacks