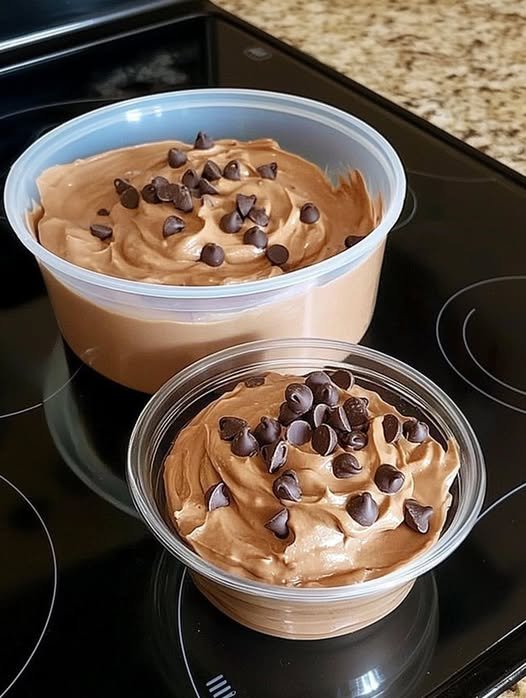
3-Ingredient Double Chocolate Mousse

🍫 Keto 3-Ingredient Double Chocolate Mousse

This decadent dessert provides a luxurious, silky texture with a deep chocolate punch, all while keeping the net carbs to just 4g per serving.

  • Servings: 4

  • Prep Time: 10 minutes

  • Chill Time: 1 hour

  • Total Time: 1 hour 10 minutes

  • Diet: Keto, Low-Carb, Sugar-Free, WW-friendly


📝 Ingredients

Base Mousse

  • 1 cup heavy whipping cream

  • ½ cup sugar-free keto chocolate chips (dark or milk chocolate)

  • 2 tbsp powdered erythritol (or preferred keto sweetener)

For the “Double Chocolate” Effect

  • 1 tbsp unsweetened cocoa powder OR 2 tbsp shaved keto chocolate


👩‍🍳 Detailed Instructions

  1. Melt the Chocolate: Place the keto chocolate chips in a microwave-safe bowl. Heat for 20–30 seconds at a time, stirring between intervals until smooth. Set aside to cool for 1–2 minutes (this prevents the heat from melting the whipped cream).

  2. Whip the Cream: In a separate large bowl, combine the heavy whipping cream and powdered sweetener. Using a hand mixer, beat until stiff peaks form (about 2–3 minutes).

  3. Combine: Slowly drizzle the slightly cooled melted chocolate into the whipped cream while mixing on a low speed to maintain the airy volume.

  4. Add the Double Chocolate: Gently fold in your cocoa powder or chocolate shavings to create that deeper, layered chocolate flavor.

  5. Chill: Spoon the mixture into serving glasses or ramekins. Refrigerate for at least 1 hour to allow the mousse to set and the flavors to develop.

  6. Garnish and Serve: Top with extra chocolate curls, a dusting of cocoa, or a few fresh raspberries before serving.


đź’ˇ Pro-Tips for Success

  • Troubleshooting: If the chocolate seizes (becomes grainy) when melting, stir in 1 teaspoon of warm cream until it smooths out.

  • Texture Control: For a denser, truffle-like mousse, reduce the heavy cream to Âľ cup. For a lighter, fluffier mousse, ensure your cream is very cold before whipping.

  • Storage: Keep in an airtight container in the fridge for up to 3–4 days.


📊 Nutrition Facts (Per Serving)

Calories Fat Net Carbs Fiber Protein Sugar
210 20g 4g 2g 3g 0g

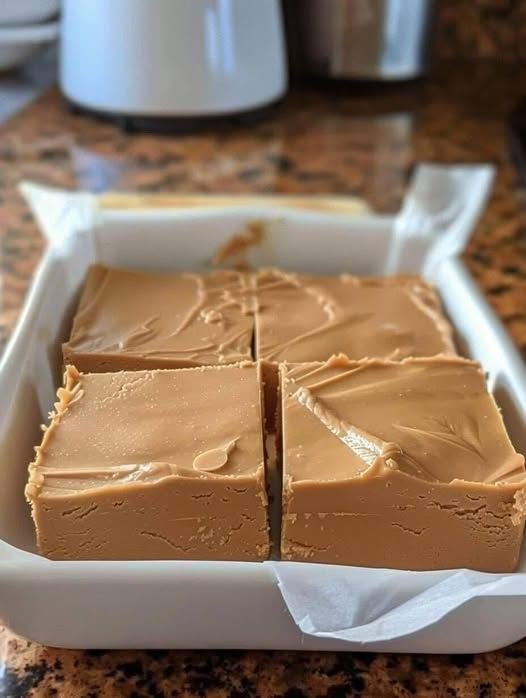
2-Ingredient Peanut Butter Fudge — Creamy, No-Bake, and Melt-in-Your-Mouth Delicious

This 2-Ingredient Peanut Butter Fudge is a total game-changer if you want a rich, creamy dessert without the hassle of candy thermometers or boiling sugar. Using store-bought vanilla frosting gives you a pre-mixed “sugar and fat” base that, when combined with peanut butter, transforms into a perfectly smooth, melt-in-your-mouth fudge. Minimal effort, maximum reward!

Sugar cookies

2-Ingredient Peanut Butter Fudge

Ingredients

Core Ingredients Amount
Smooth peanut butter 2 cups
Vanilla frosting (16 oz tub) 1 container

Equipment

  • 8Ă—8-inch baking dish
  • Parchment paper

How to Make It

Discover more
Peanut
Butter
sugar
peanut butter
Peanut Butter
fudge
Fudge
peanut
cookie
butter

Step 1: Prep the Pan
Line your 8Ă—8-inch dish with parchment paper, leaving a little overhang. This makes it easy to lift the fudge out once set.

Step 2: Mix the Magic
In a large bowl, combine the peanut butter and vanilla frosting. Stir for about 30 seconds until smooth and fully blended. The mixture will be thick, like soft cookie dough.

Step 3: Press and Smooth
Transfer the mixture to your prepared pan. Press firmly into the corners and smooth the top with a spoon or spatula.

Step 4: Chill
Refrigerate for 1½–2 hours until firm. For a faster set, freeze for 45–60 minutes.

Step 5: Slice and Serve
Use the parchment overhang to lift the fudge out of the pan. Cut into bite-sized squares with a sharp knife and enjoy!

LOW CALORIE WENDY’S FROSTY

This recipe is a fantastic way to hit that “Frosty” craving without the heavy sugar load of the original. Since you like having the full recipe on hand, I’ve cleaned up the formatting and added a few “Pro-Tips” to help you get that iconic, thick consistency.


🍦 Low-Calorie Wendy’s Frosty

Prep time: 5 minutes | Yields: 1 Serving

Calories: 153 kcal

Ingredients

  • 1 cup Unsweetened Almond Milk

  • 2 tbsp Sugar-Free Fat-Free Chocolate Pudding Mix (or Vanilla/Butterscotch/Pistachio)1


  • 1 tsp Unsweetened Cocoa Powder

  • 1 tsp Vanilla Extract

  • 2 packets Stevia (or sweetener of choice)

  • 10-12 Ice Cubes

  • Optional: 2 tbsp Cool Whip Lite (for extra creaminess)

Instructions

  1. Combine: Add the almond milk, pudding mix, cocoa powder, vanilla, stevia, and Cool Whip (if using) into your blender or Nutribullet.

  2. Add Ice: Add the ice cubes last.

  3. Blend: Blitz on high for approximately one minute. You want the ice to be completely pulverized into a smooth, “soft-serve” texture.

  4. Check Consistency: if it’s too thin, add 2-3 more ice cubes and blend again. If it’s too thick to pour, add a splash more almond milk.

  5. Serve: Pour into a chilled glass and enjoy immediately with a spoon or a straw!


đź’ˇ Pro-Tips for the Best Texture

  • The “Frosty” Secret: For a more authentic “malty” taste, you can add a tiny pinch of salt. It helps bring out the chocolate flavor against the sweetener.

  • Freeze the Milk: If you want it even thicker without diluting the flavor with ice, try freezing your almond milk into ice cubes beforehand.

  • Pulse First: If you aren’t using a high-powered blender like a Nutribullet, pulse the ice a few times first to break it down before running the blender continuously.


Nutritional Profile (Per 1 Cup Serving)

Nutrient Amount
Calories 153
Total Fat 3.1 g
Carbohydrates 28.3 g
Sugar 25.7 g*
Protein 1.9 g
Sodium 187 mg

> Note: The sugar content listed in the original text (25.7g) seems high for “Sugar-Free” ingredients. If using truly Sugar-Free pudding mix and Stevia, the actual sugar count is likely much lower (closer to 1-2g from the almond milk and cocoa).

Cheesy Baked Potato Casserole

Cheesy Baked Potato Casserole

Creamy • Comforting • Oven-Baked

Servings: 6–8
Prep Time: 15 minutes
Bake Time: 25–30 minutes

Ingredients

Potatoes

  • 2 lbs (about 1 kg) Yukon Gold or Russet potatoes

  • Peeled and sliced into rounds or cut into cubes

Cream Sauce

  • 1½ cups heavy cream

  • 2 garlic cloves, finely minced

  • 1 teaspoon salt

  • ½ teaspoon black pepper

Cheese

  • 2 cups shredded cheddar or mozzarella cheese

Topping

  • ½ cup cooked and crumbled bacon

  • ÂĽ cup freshly chopped dill or chives


Instructions

1. Boil the Potatoes

  1. Place the sliced or cubed potatoes into a large pot.

  2. Cover with salted water.

  3. Bring to a boil and cook for 8–10 minutes, just until slightly tender.

  4. Drain well and set aside.


2. Prepare the Baking Dish

  1. Preheat oven to 375°F (190°C).

  2. Lightly grease a baking dish.


3. Layer the Casserole

  1. Arrange half of the potatoes evenly in the baking dish.

  2. Sprinkle with half of the cheese and half of the bacon.

  3. Add the remaining potatoes on top.


4. Add the Cream Sauce

  1. In a bowl, whisk together the cream, garlic, salt, and black pepper.

  2. Pour evenly over the layered potatoes.


5. Bake

  1. Sprinkle the remaining cheese over the top.

  2. Bake uncovered for 25–30 minutes, until the sauce is bubbling and the top is golden.


6. Garnish and Serve

  • Sprinkle with fresh dill or chives before serving.

  • Serve warm as a side dish or main course.

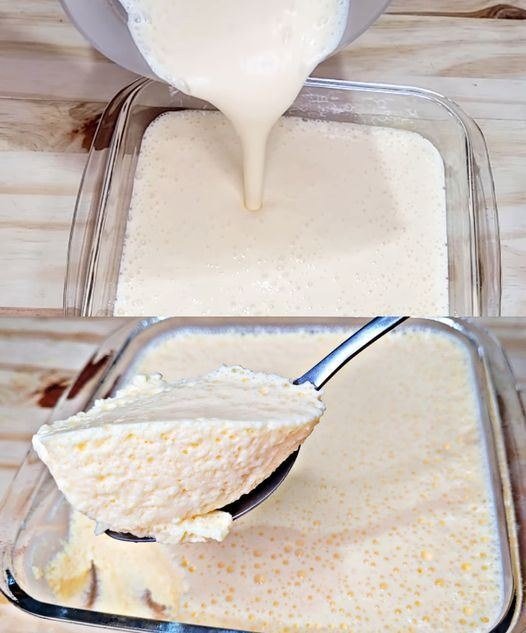
No-Bake Pineapple Cloud Mousse

No-Bake Pineapple Cloud Mousse

Prep time: 10 minutes | Chill time: 3–4 hours | Servings: 6-8


Ingredients

  • 2 packets (approx. 80g each) Pineapple-flavored gelatin (Jell-O)

  • 2 cups (500 ml) Boiling water

  • 2 cans (approx. 170g each) Table cream (media crema) or chilled heavy whipping cream

    • Note: If using heavy cream, whip it to soft peaks first for an even fluffier texture.

  • Optional: 1 can of crushed pineapple (well-drained) for added texture.


Instructions

  1. Dissolve the Gelatin: In a large bowl, pour the boiling water over the two packets of pineapple gelatin. Stir vigorously until the powder is completely dissolved and the liquid is clear.

  2. Cool Slightly: Let the mixture sit for about 5 minutes so it is no longer piping hot but still liquid.

  3. Blend/Mix: * Method A (Blender): Pour the gelatin liquid and the table cream into a blender. Blend on high for 2 minutes until very bubbly and pale. This creates those signature air bubbles seen in your photo.

    • Method B (Hand Mixer): Add the cream to the bowl of gelatin and beat with an electric mixer for 3–5 minutes until the mixture doubles in volume and becomes frothy.

  4. Add Fruit (Optional): If you are using crushed pineapple, fold it in gently with a spatula now.

  5. Set: Pour the mixture into a glass Pyrex dish (as shown in your image) or individual ramekins.

  6. Chill: Refrigerate for at least 3 to 4 hours, or until completely firm and “bouncy” to the touch.


Success Tips

  • The Bubbles: To get the aerated look on top, make sure you blend or whip the mixture long enough to incorporate air before it starts to set.

  • Cream Temperature: If using “Table Cream” (Media Crema), it blends best at room temperature or slightly cool. If using “Heavy Whipping Cream,” make sure it is very cold.

  • Serving: This is best served cold directly from the fridge. You can top it with a dollop of whipped cream or a maraschino cherry for a retro look.

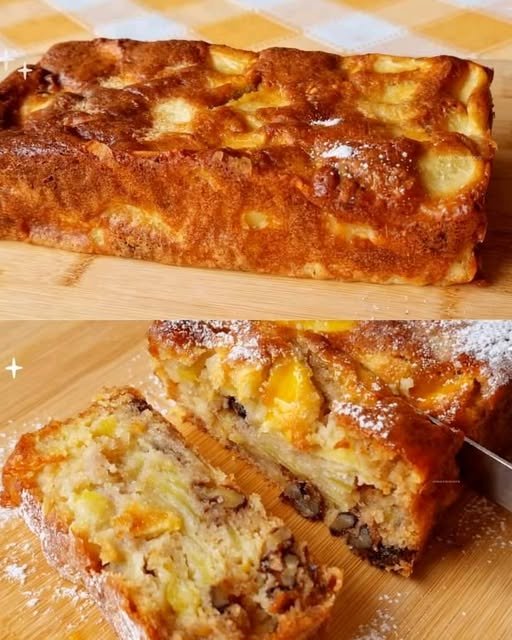
Quick 5-Minute Apple Pie (Apple Cake Style)

Quick 5-Minute Apple Pie (Apple Cake Style)

This apple pie–style dessert is simple and comforting, with a soft, moist texture similar to an apple cake or clafoutis. It comes together quickly and highlights the natural sweetness and juiciness of fresh apples. Perfect when you want a homemade dessert with minimal effort and ingredients.


Ingredients

  • 3 large apples, finely chopped (peeled or unpeeled as preferred)

  • 2 large eggs

  • A pinch of salt

  • 4 tablespoons sugar

  • Zest of 1 lemon

  • 50 grams (about 3½ tablespoons) butter, melted and slightly cooled

  • 4 tablespoons all-purpose flour

  • 1 tablespoon baking powder

Optional topping:

  • Powdered sugar for sprinkling


Instructions

1. Prepare the Oven and Pan
Preheat the oven to 350°F (175°C). Lightly grease a loaf pan or small round baking dish, or line it with parchment paper.

2. Prepare the Apples
Wash, core, and finely chop the apples. Set aside.

3. Mix the Base
In a mixing bowl, whisk the eggs with the sugar and salt until the mixture becomes pale and lightly airy.

4. Add Flavor
Stir in the lemon zest, then add the melted butter, mixing until fully combined.

5. Add Dry Ingredients
Sift in the flour and baking powder. Whisk gently until a smooth, thin batter forms.

6. Add the Apples
Fold the chopped apples into the batter, making sure all pieces are evenly coated.

7. Bake
Pour the mixture into the prepared pan and spread evenly.
Bake for 30–35 minutes, or until the top is lightly golden and a toothpick inserted in the center comes out clean.

8. Serve
Let the dessert cool slightly before slicing. Sprinkle with powdered sugar if desired.


Helpful Tips

  • Firm apples like Granny Smith or Honeycrisp work best

  • The dessert will be very moist due to the high apple content

  • Serve warm or at room temperature