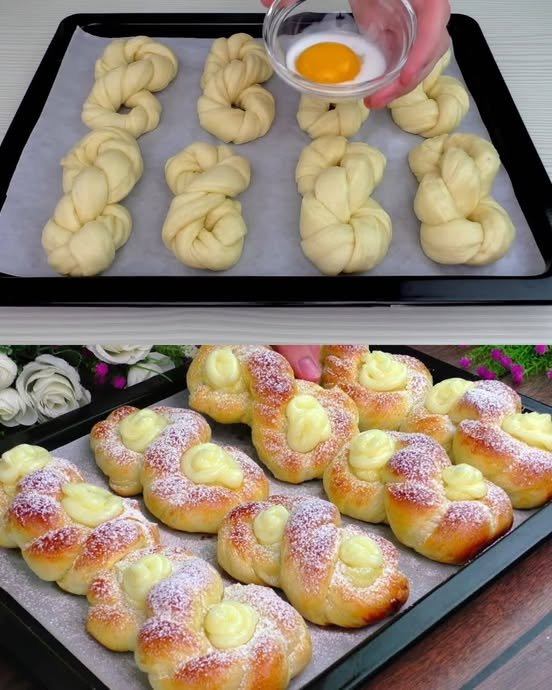
Fluffy Custard-Filled Braid Buns

🥐 Fluffy Custard-Filled Braid Buns

Soft, lightly sweet yeast buns filled with smooth vanilla custard and finished with a light dusting of powdered sugar.


📝 Ingredients

For the Dough

  • 180 ml lukewarm milk

  • 1 egg (room temperature)

  • 3 tablespoons sugar

  • 1 teaspoon instant dry yeast

  • ½ teaspoon salt

  • 40 g (2 tablespoons) unsalted butter, melted and cooled

  • 400 g all-purpose flour (about 2½ cups)

For the Custard Filling

  • 250 ml milk

  • 1 egg yolk

  • 2 tablespoons sugar

  • 1 tablespoon cornstarch

  • ½ teaspoon vanilla extract

For Brushing & Finishing

  • 1 egg yolk

  • 1 teaspoon milk

  • Powdered sugar (for dusting)


👩‍🍳 Instructions

1️⃣ Prepare the Dough

  1. In a large bowl, mix:

    • Lukewarm milk

    • Sugar

    • Yeast

  2. Let sit for 5 minutes until slightly foamy.

  3. Add:

    • Egg

    • Melted butter

  4. Mix well.

  5. Gradually add flour and salt and mix until a dough forms.

  6. Knead for 8–10 minutes until smooth and elastic.

  7. Place dough in a lightly greased bowl, cover, and let rise for 1 hour or until doubled in size.


2️⃣ Make the Custard Filling

  1. In a saucepan, whisk together:

    • Egg yolk

    • Sugar

    • Cornstarch

  2. Slowly add milk while whisking.

  3. Cook over medium heat, stirring constantly, until thick and smooth.

  4. Remove from heat and stir in vanilla.

  5. Cover the custard with plastic wrap touching the surface and allow to cool completely.


3️⃣ Shape the Buns

  1. Gently deflate the risen dough.

  2. Divide into 8–10 equal pieces.

  3. Roll each piece into a rope about 25–30 cm (10–12 inches) long.

  4. Fold rope in half and twist the strands together.

  5. Join the ends to form a braided loop or figure-eight shape.

  6. Place on parchment-lined baking tray.

  7. Cover and let rise for 20 minutes.


4️⃣ Fill and Bake

  1. Preheat oven to 180°C (350°F).

  2. Mix egg yolk with milk.

  3. Brush dough lightly with egg wash.

  4. Transfer cooled custard to a piping bag.

  5. Pipe custard into the open centers or loops of each braid.

  6. Bake for 20–25 minutes until golden brown.


5️⃣ Finish

  1. Cool slightly.

  2. Dust edges lightly with powdered sugar (avoid custard centers).


🧁 Tips

✔️ Custard must be fully cooled before piping
✔️ Do not overfill
✔️ Keep buns covered while resting
✔️ Best eaten fresh
✔️ Store in airtight container up to 2 days
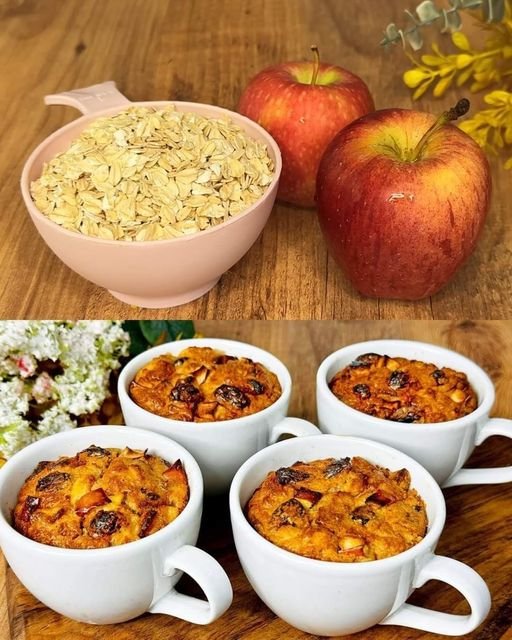

Sugar-Free Apple & Oat Mug Cakes

🍎 Sugar-Free Apple & Oat Mug Cakes

Soft, naturally sweet mug cakes made with oats, apple, and dried fruit. These are quick to prepare and suitable for microwave or oven baking.


📝 Ingredients

  • 1 cup (100 g) oatmeal (rolled oats or quick oats)

  • 1 large egg

  • ½ teaspoon ground cinnamon

  • 1 teaspoon baking powder

  • 1 pinch salt

  • 3 tablespoons raisins

  • 10–12 dried apricots

  • 1 medium apple, grated or finely diced

  • ¼ cup milk (optional, use only if batter is too dry)

  • Small amount of butter or oil for greasing mugs


👩‍🍳 Instructions

1️⃣ Prepare the Fruit

  1. Place raisins and dried apricots in hot water for 5 minutes to soften.

  2. Drain well.

  3. Finely chop the apricots.

  4. Core the apple and grate it or cut into very small cubes.


2️⃣ Mix the Batter

  1. In a mixing bowl, combine:

    • Oats

    • Cinnamon

    • Baking powder

    • Salt

  2. Add:

    • Egg

    • Grated apple

  3. Stir until well mixed.

  4. Fold in:

    • Raisins

    • Chopped apricots

  5. If batter seems too thick or dry, add milk a little at a time until you get a thick, spoonable batter.


3️⃣ Fill the Mugs

  1. Lightly grease 2–3 microwave-safe mugs or ramekins.

  2. Divide batter evenly between mugs.

  3. Fill only up to ¾ full to allow rising.


4️⃣ Cook

Microwave Method

  • Cook each mug on high power for 1½ to 2 minutes.

  • The top should look set and spring back lightly when touched.

Oven Method

  • Preheat oven to 180°C (350°F).

  • Bake for 15–20 minutes until lightly golden and firm in the center.


🍽 Serving Ideas

  • Serve warm

  • Top with yogurt

  • Sprinkle with extra cinnamon

  • Add sliced apples


🧁 Tips

✔️ Finely chopped fruit gives better texture
✔️ Do not overcook or cakes will dry out
✔️ Best eaten fresh
✔️ Can be made with pears instead of apples
✔️ Use almond or oat milk if desired

3-Ingredient Lemon Cream Ice Cream

🍋 3-Ingredient Lemon Cream Ice Cream

A smooth, creamy, no-churn ice cream with a fresh lemon flavor. This recipe requires no ice cream machine and uses only simple ingredients.


📝 Ingredients

  • 400 ml (1 can) sweetened condensed milk, well chilled

  • 500 ml (2 cups) heavy whipping cream (35% fat or higher), very cold

  • 60 ml (¼ cup) freshly squeezed lemon juice

  • Optional: 1 tablespoon finely grated lemon zest


👩‍🍳 Instructions

1️⃣ Whip the Cream

  1. Place the cold whipping cream into a large chilled mixing bowl.

  2. Using an electric mixer, whip on medium-high speed until stiff peaks form.

  3. Stop as soon as the cream holds its shape. Do not over-whip.


2️⃣ Mix the Lemon Base

  1. In a separate bowl, combine:

    • Sweetened condensed milk

    • Lemon juice

    • Lemon zest (if using)

  2. Whisk gently until smooth.

  3. The mixture will naturally thicken slightly due to the lemon juice.


3️⃣ Combine

  1. Pour the lemon mixture into the whipped cream.

  2. Using a spatula, fold gently:

    • Cut down the center

    • Lift and fold over

    • Rotate the bowl and repeat

Mix just until evenly blended while keeping the mixture light and airy.


4️⃣ Freeze

  1. Transfer the mixture to a freezer-safe container or loaf pan.

  2. Smooth the top evenly.

  3. Cover tightly, pressing the covering directly against the surface to reduce ice crystals.

  4. Freeze for at least 6 hours, preferably overnight.


🍨 Serving Suggestions

  • Scoop directly from the freezer

  • Serve with fresh berries

  • Garnish with mint leaves

  • Use as a filling for lemon sandwiches or cake layers


🧁 Tips

✔️ Use very cold cream for best volume
✔️ Fresh lemon juice gives the best flavor
✔️ Do not stir once frozen
✔️ Keeps well frozen for up to 2 weeks
✔️ Let sit 2–3 minutes before scooping if very firm

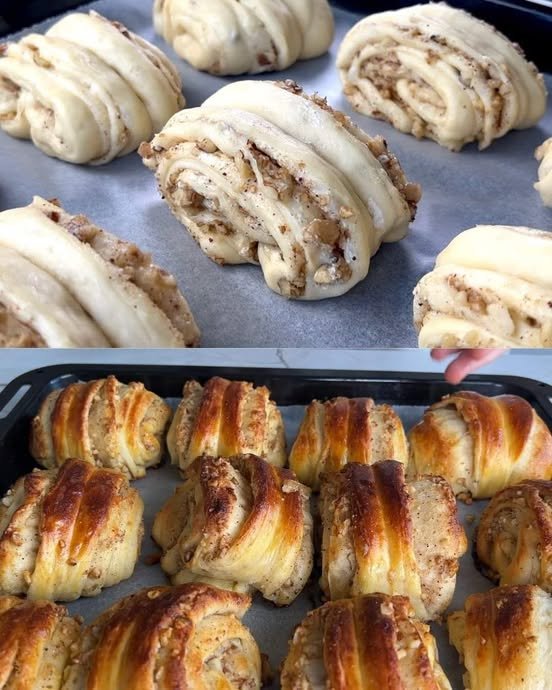
Walnut Cinnamon Sweet Buns

Walnut Cinnamon Sweet Buns

Soft, fluffy buns filled with buttery cinnamon sugar and crunchy walnuts, twisted into beautiful knots and baked until golden.


📝 Ingredients

For the Dough

  • 200 ml lukewarm milk

  • 100 ml lukewarm water

  • 5 tbsp (60 g) sugar

  • 1 packet (7 g) instant dry yeast

  • ½ cup (115 g) unsalted butter, melted and cooled

  • 1 large egg (room temperature)

  • 550–600 g all-purpose flour (about 4½ cups)

  • ½ tsp salt

For the Filling

  • 1½ cups walnuts, finely chopped

  • ½ cup brown sugar (or white sugar)

  • 1 tbsp ground cinnamon

  • 4 tbsp butter, softened

For Brushing

  • 1 egg yolk

  • 1 tbsp milk


👩‍🍳 Instructions

1️⃣ Prepare the Dough

  1. In a large bowl, combine:

    • Lukewarm milk

    • Lukewarm water

    • Sugar

    • Yeast

  2. Mix gently and let stand for 5–10 minutes until foamy.

  3. Add:

    • Melted butter

    • Egg
      Whisk until well combined.

  4. Gradually add flour and salt. Mix until a soft dough forms.

  5. Knead for 8–10 minutes until:

    • Smooth

    • Elastic

    • Slightly tacky but not sticky

  6. Place dough in a lightly greased bowl. Cover and let rise in a warm place for 1 to 1½ hours, or until doubled in size.


2️⃣ Prepare the Filling

In a bowl, mix:

  • Walnuts

  • Sugar

  • Cinnamon

Set aside.


3️⃣ Shape the Buns

  1. Punch down the dough.

  2. Roll into a large rectangle about ¼ inch thick.

  3. Spread softened butter evenly over the dough.

  4. Sprinkle the walnut-cinnamon mixture evenly over the surface.

  5. Fold dough into thirds (like a letter).

  6. Cut into strips about 1–2 inches wide.


4️⃣ Twist and Form

  1. Stretch each strip slightly.

  2. Twist several times.

  3. Roll into a spiral or knot.

  4. Tuck ends underneath.

Place on parchment-lined baking tray.

Cover and rest for 30 minutes.


5️⃣ Bake

  1. Preheat oven to 180°C (350°F).

  2. Brush buns with egg yolk and milk mixture.

  3. Bake for 20–25 minutes until golden brown.


✨ Optional Sugar Syrup Finish (for shine & softness)

Heat together:

  • ¼ cup sugar

  • ¼ cup water

Simmer 2–3 minutes until clear.
Brush over hot buns after baking.

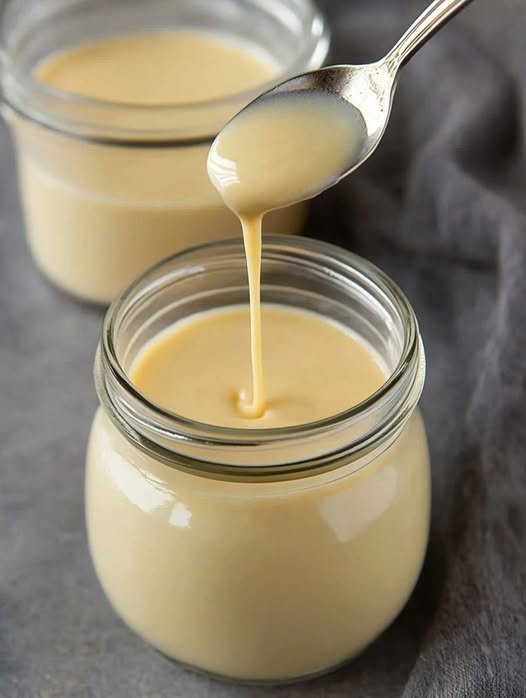
Keto Sugar-Free Condensed Milk

Keto Sugar-Free Condensed Milk

This creamy, thick, and versatile condensed milk is perfect for coffee, keto baking, or making sugar-free ice cream.

  • Prep time: 5 minutes

  • Cook time: 30 minutes

  • Yields: Approx. 1.5 cups

Ingredients

  • 2 cups Heavy whipping cream

  • 3 tbsp Butter (softened, unsalted preferred)

  • ¼ cup Powdered Swerve (or preferred powdered erythritol)

  • 1 tbsp Allulose (helps prevent crystallization)

  • ¼ tsp Xanthan gum (thickening agent)

  • ½ tsp Vanilla essence

  • Pinch of salt (optional; omit if using salted butter)

Equipment

  • Non-stick saucepan

  • Rubber or wooden spatula

  • Glass jar (for storage)


Instructions

  1. Combine Base Ingredients: In a large non-stick saucepan over medium-high heat, combine the heavy whipping cream, Allulose, and powdered sweetener.

  2. Dissolve: Stir constantly with your spatula until the sweetener is fully dissolved and the mixture is well combined.

  3. Simmer: Watch for small bubbles to appear around the edges of the pan. Once the mixture reaches a light simmer, immediately reduce the heat to medium-low.

  4. Thicken: Continue to simmer the mixture for 25 to 30 minutes. Stir frequently with your spatula, scraping the sides and bottom to prevent the cream from scorching or forming a skin. The liquid should reduce by about half.

  5. Add Fat and Flavor: Once reduced, stir in the softened butter and vanilla essence. Mix until the butter is completely melted and incorporated.

  6. The Xanthan Finish: Sprinkle the xanthan gum over the surface and whisk or stir vigorously. This will provide that signature “gloopy” condensed milk texture.

  7. Cool and Store: Remove from heat. The mixture will continue to thicken significantly as it cools. Pour it into a glass jar.

  8. Storage: Once it reaches room temperature, seal the jar and store it in the refrigerator. It will stay fresh for up to 2 weeks.


Quick Tips for Success

  • Avoid Granules: Always use powdered sweetener. Granulated erythritol will become “gritty” once the condensed milk is refrigerated.

  • The “Slow” Method: If you have time, simmering on very low heat for a longer period results in a deeper, more caramelized flavor.

  • Substitution Note: If you do not have xanthan gum, you can use a small amount of cornstarch (though this will slightly increase the carb count).

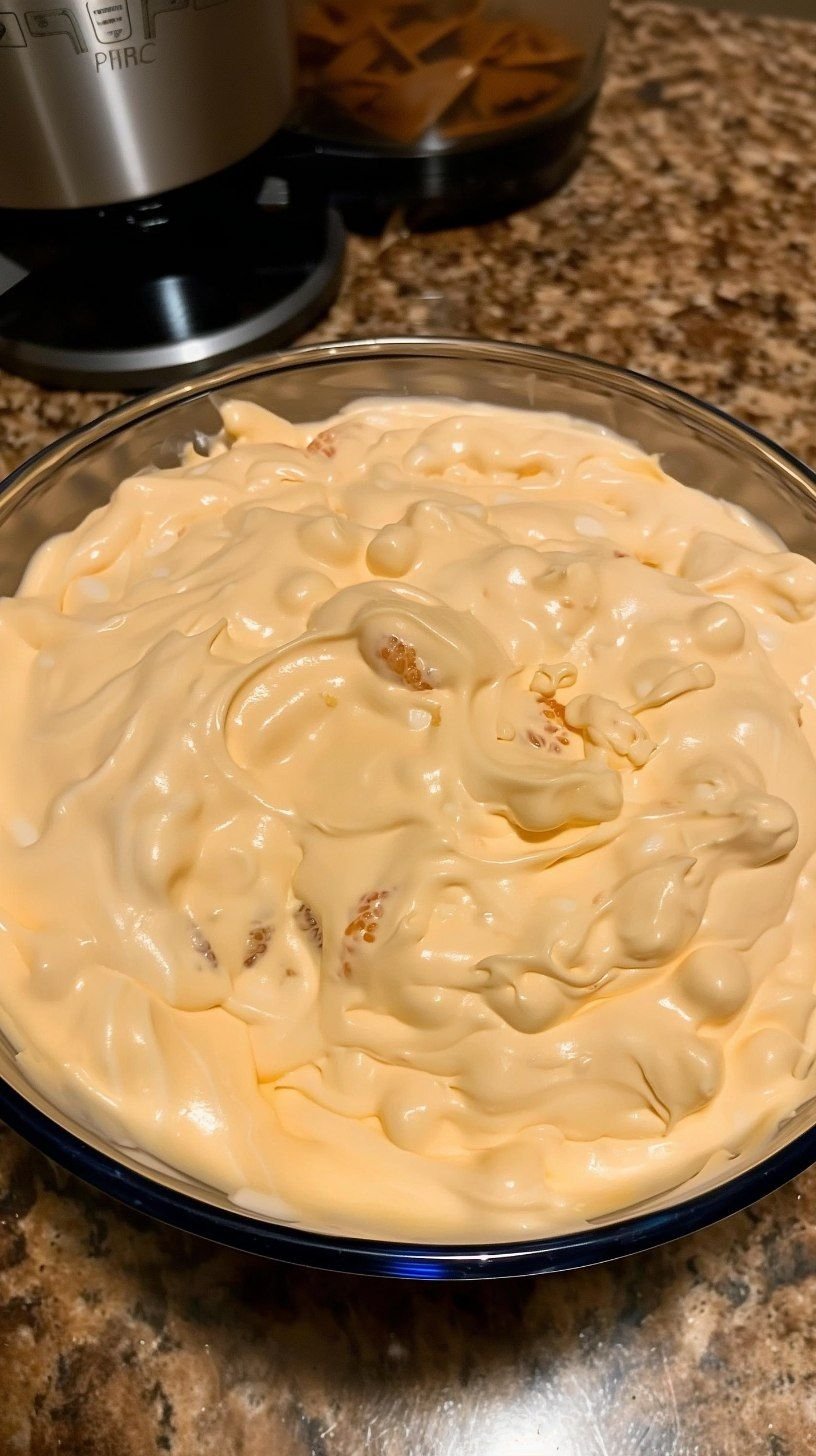
: 🍊 Orange Citrus & Vanilla Fluff (No-Bake Creamsicle Dessert)

🍊 Orange Citrus & Vanilla Fluff (No-Bake Creamsicle Dessert)

Why You’ll Love It

  • Tastes just like a creamsicle

  • No oven required

  • Light, fluffy, and refreshing

  • Perfect for summer BBQs & potlucks

  • Budget-friendly and kid-approved


🧾 Ingredients

  • 1 package (3 oz) orange gelatin powder

  • 1 package (3.4 oz) instant vanilla pudding mix

  • 1 cup boiling water

  • ½ cup cold water

  • 1 tub (8 oz) whipped topping, thawed

  • 1 can (11 oz) mandarin oranges, drained well

  • 1 cup mini marshmallows


👩‍🍳 Instructions

  1. Dissolve the Gelatin
    In a large bowl, whisk the orange gelatin powder into the boiling water until fully dissolved.

  2. Cool the Mixture
    Stir in the cold water. Place the bowl in the refrigerator and chill for about 15–20 minutes, until cool but not set.

  3. Add the Pudding Mix
    Remove from fridge and whisk in the vanilla pudding mix until completely smooth.

  4. First Chill
    Return to the refrigerator for 15–20 minutes, until slightly thickened (soft-set stage).

  5. Fold in the Fluff
    Gently fold in:

    • Whipped topping

    • Mandarin oranges

    • Mini marshmallows

  6. Final Chill
    Cover and refrigerate for at least 1–2 hours, preferably overnight, until fully set and fluffy.

  7. Serve Cold
    Scoop into bowls and enjoy your creamsicle-style fluff!


💡 Tips & Variations

  • Flavor Swap: Use strawberry or lime gelatin for new flavors

  • Crunch Add-In: Crushed vanilla wafers

  • Lighter Version: Sugar-free gelatin & whipped topping

  • Storage: Refrigerate up to 4 days

  • Freezer Option: Can be frozen, but texture may slightly change when thawed


❓ FAQ

Why chill twice?
The first chill cools the gelatin. The second chill activates the pudding. Adding whipped topping too early will make it melt.

Can I use fresh whipped cream?
Yes, but only fold it in when the base is thick, or it will become runny.

Why did mine turn watery?
The gelatin base was too warm or not thick enough before adding whipped topping.

How long before serving?
Minimum 1–2 hours, best overnight.