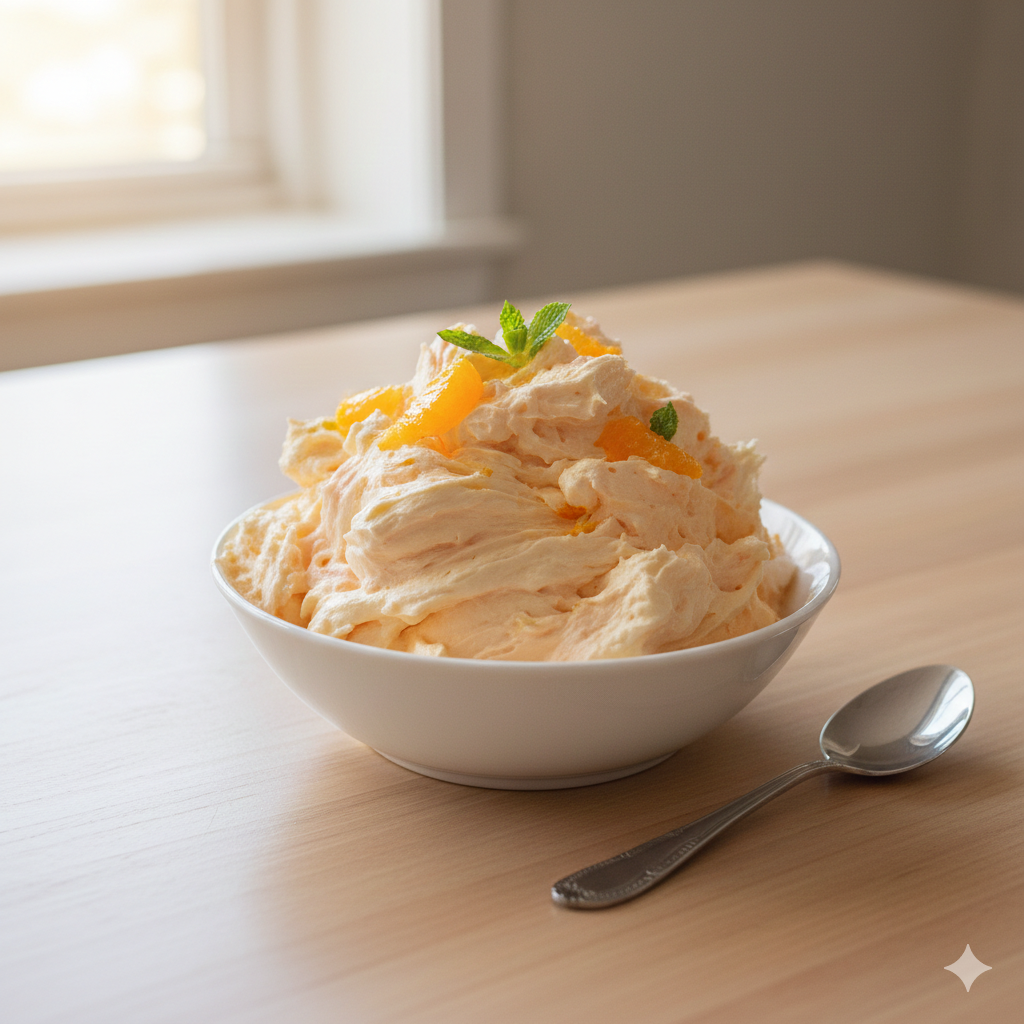
Orange Yogurt Cloud Dessert

Light, Creamy, No-Bake & Protein-Packed

If you’re craving something sweet, refreshing, and guilt-free, this Orange Yogurt Cloud Dessert is about to become your new favorite. It’s one of those magical recipes that feels indulgent but is incredibly simple and light. With just a few ingredients and no baking required, this dessert comes together in minutes and chills into a fluffy, mousse-like treat that tastes like a creamsicle in cloud form.

The combination of tangy Greek yogurt and bright orange gelatin creates a perfectly balanced flavor—sweet, citrusy, and refreshing. The optional whipped topping adds volume and softness, giving it that signature “cloud” texture, but even without it, this dessert is creamy, satisfying, and packed with protein. It’s ideal for warm weather, busy days, or anytime you want a quick dessert without turning on the oven.

Ingredients

  • 2 cups Greek yogurt (plain or vanilla)
  • 1 small box (0.3 oz) sugar-free orange gelatin mix
  • 1 cup whipped topping (optional) – such as Cool Whip, for extra fluff

Optional additions:

  • A drop of stevia or 1–2 teaspoons honey (if using plain yogurt)
  • Orange zest for garnish
  • Mandarin orange segments or berries for topping

Instructions

  1. Prepare the Yogurt
    Add the Greek yogurt to a large mixing bowl. If you’re using plain yogurt and prefer a sweeter dessert, add a small amount of sweetener to taste. Keep in mind that the gelatin mix already provides sweetness, so a little goes a long way.
  2. Add the Gelatin Powder
    Sprinkle the dry orange gelatin mix directly over the yogurt. Do not dissolve the gelatin in water—this recipe relies on the powder blending directly into the yogurt to create its creamy, airy texture.
  3. Mix Until Smooth
    Using a whisk or hand mixer, beat the yogurt and gelatin together until fully combined. The mixture should be smooth, evenly colored, and slightly thickened.
  4. Fold in Whipped Topping (Optional)
    If you’re using whipped topping, gently fold it into the yogurt mixture using a spatula. This step adds volume and creates a light, mousse-like consistency. Fold slowly to keep as much air in the mixture as possible.
  5. Chill to Set
    Cover the bowl and refrigerate for at least 30 minutes. As it chills, the dessert will set slightly and develop its signature “cloud” texture—soft, fluffy, and spoonable.
See also  Healthy and Delicious: Energy Cookies Without Sugar or Flour

Serving Suggestions

Spoon the dessert into small bowls, dessert cups, or ramekins. Garnish with fresh orange zest, mandarin slices, or a sprinkle of crushed vanilla cookies for texture. For a frozen treat, place the mixture in the freezer for 1–2 hours and enjoy it like a light creamsicle mousse.

Why You’ll Love It

This Orange Yogurt Cloud Dessert is quick, customizable, and perfect for meal prep. It’s high in protein, low in effort, and endlessly adaptable—swap the gelatin flavor, add fruit, or enjoy it plain. One bite, and you’ll understand why it’s called a cloud. ☁️🍊
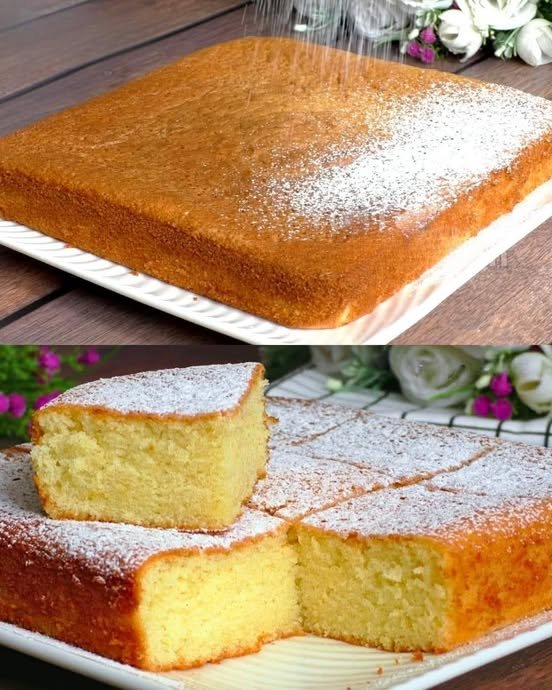

Italian 12-Spoon Sponge Cake

Italian 12-Spoon Sponge Cake

A light and tender cake made using tablespoons for easy measuring. Perfect for everyday baking, even without a kitchen scale.


Ingredients

  • Eggs: 3 large, room temperature

  • Sugar: 12 tablespoons

  • Vanilla sugar or vanilla extract: 1 teaspoon

  • Salt: a small pinch

  • Milk: 12 tablespoons

  • Vegetable oil: 12 tablespoons

  • All-purpose flour: 12 tablespoons

  • Baking powder: 1 teaspoon

  • Powdered sugar: for dusting (optional)


Instructions

1. Prepare the Baking Pan

  • Preheat the oven to 180°C (350°F).

  • Grease a 21 × 21 cm (8 × 8 inch) baking pan.

  • Line the base with parchment paper for easy removal.


2. Whisk the Eggs and Sugar

  • In a large mixing bowl, add the eggs, sugar, vanilla sugar, and salt.

  • Whisk for 3–4 minutes until the mixture becomes pale, thick, and slightly foamy. This helps create a soft texture.


3. Add Liquid Ingredients

  • Pour in the milk and vegetable oil.

  • Whisk gently until fully combined and smooth.


4. Add Dry Ingredients

  • Sift together the flour and baking powder.

  • Gradually fold the dry ingredients into the batter using a spatula or whisk.

  • Mix just until smooth, avoiding overmixing.


5. Bake the Cake

  • Pour the batter evenly into the prepared pan.

  • Tap the pan lightly on the counter to release air bubbles.

  • Bake for 25–30 minutes, or until a toothpick inserted into the center comes out clean.


6. Cool and Serve

  • Remove the cake from the oven and allow it to cool in the pan for 10–15 minutes.

  • Transfer to a serving plate and let cool completely.

  • Lightly dust with powdered sugar before slicing, if desired.


Helpful Tips

  • Use the same tablespoon for all measurements to keep proportions accurate.

  • Serve plain or pair with fresh fruit, yogurt, or jam.

  • Store covered at room temperature for up to 2 days, or refrigerate for longer freshness.

Apricot Custard Cake

Apricot Custard Cake

A tender cake layered with smooth vanilla custard and topped with fresh apricot slices. Light, flavorful, and perfect for everyday baking or special occasions.


Ingredients

For the Vanilla Custard

  • Egg yolk: 1 (reserve the white for the cake batter)

  • Milk: 350 ml (1½ cups)

  • Cornstarch: 2 heaped tablespoons

  • Sugar: 50 g (¼ cup)

  • Vanilla extract: 1 teaspoon


For the Cake Batter

  • Eggs: 3 whole eggs + 1 reserved egg white

  • Salt: a small pinch

  • Sugar: 130 g (⅔ cup)

  • Neutral oil (sunflower or vegetable): 140 ml (¾ cup)

  • All-purpose flour: 350 g (2½ cups)


For Topping

  • Fresh apricots: washed, pitted, and sliced


Instructions

1. Prepare the Custard

  • In a saucepan, whisk together the egg yolk, sugar, and cornstarch until smooth.

  • Add a small amount of the milk and whisk to remove any lumps.

  • Pour in the remaining milk and vanilla extract.

  • Cook over medium heat, stirring constantly, until the mixture thickens to a smooth custard.

  • Remove from heat, transfer to a bowl, cover the surface with plastic wrap, and allow to cool completely.


2. Prepare the Cake Batter

  • Preheat the oven to 180°C (350°F).

  • Grease a 22–24 cm (9-inch) springform pan and line the base with parchment paper.

  • In a large bowl, whisk the eggs, reserved egg white, sugar, and salt for 3–5 minutes until pale and slightly thickened.

  • Slowly pour in the oil while whisking continuously.

  • Gently fold in the flour until just combined. Avoid overmixing.


3. Assemble the Cake

  • Pour the cake batter evenly into the prepared pan.

  • Transfer the cooled custard to a piping bag or spoon.

  • Pipe or drizzle the custard in a spiral or decorative pattern over the batter.

  • Arrange apricot slices neatly along the custard lines.


4. Bake

  • Place the cake in the preheated oven.

  • Bake for 35–45 minutes, or until the top is lightly golden and a toothpick inserted into the cake portion comes out clean.

  • If the top browns too quickly, loosely cover with foil during the last 10 minutes.


5. Cool and Serve

  • Allow the cake to cool in the pan for 15 minutes, then remove the sides of the springform.

  • Let cool completely before slicing for clean layers.


Serving Tips

  • Serve plain or lightly dusted with powdered sugar.

  • Pairs well with tea or coffee.

  • Store covered at room temperature for 1 day or refrigerated for up to 3 days.

Lemon Jam Cake with Coconut Topping

Lemon Jam Cake with Coconut Topping

A soft lemon-flavored cake with a fruit jam center and coconut finish

Yield

1 round cake (20–22 cm / 8–9 inches)
Serves 8–10

Oven Temperature

180°C (350°F)


Ingredients

Cake Batter

  • 2 large eggs, at room temperature

  • 100 g (½ cup) granulated sugar

  • 1 packet vanilla sugar (or 1 teaspoon vanilla extract)

  • Juice of 1 lemon

  • 50 ml (¼ cup) vegetable oil

  • 50 ml (¼ cup) milk

  • 200 g (1⅓ cups) all-purpose flour

  • 10 g (2 teaspoons) baking powder

Filling and Topping

  • Fruit jam (apricot, strawberry, or preferred variety)

  • Shredded coconut, for topping


Instructions


1. Prepare the Batter

  1. In a large mixing bowl, combine the eggs, granulated sugar, and vanilla sugar.

  2. Whisk for 2–3 minutes, until the mixture becomes pale and slightly thickened.

  3. Add the lemon juice, vegetable oil, and milk. Mix until fully combined.

  4. Sift the flour and baking powder together.

  5. Gradually fold the dry ingredients into the wet mixture using a spatula, mixing just until smooth and free of lumps.


2. Assemble the Cake

  1. Preheat the oven to 180°C (350°F).

  2. Lightly grease a round baking pan and line the base with parchment paper if desired.

  3. Pour half of the batter into the prepared pan and spread evenly.

  4. Spoon the jam over the batter in small portions, keeping a slight margin from the edges of the pan.

  5. Carefully pour the remaining batter over the jam layer and smooth the surface gently.


3. Bake

  1. Place the pan in the preheated oven.

  2. Bake for 25–30 minutes, until the cake is evenly golden and a skewer inserted into the cake portion comes out clean.

  3. Remove from the oven and allow the cake to rest in the pan for 10 minutes.


4. Finish the Cake

  1. While the cake is still warm, spread a thin, even layer of jam over the surface.

  2. Sprinkle shredded coconut evenly across the top.

  3. Allow the cake to cool further before slicing.


Storage

  • Store at room temperature in a covered container for up to 2 days

  • Refrigerate for longer storage if preferred


Serving Notes

This cake can be served warm or at room temperature. The lemon flavor provides balance to the sweetness of the jam, while the coconut topping adds texture.

Chocolate Banana Oat Cookies

Chocolate Banana Oat Cookies

Soft baked cookies made with oats, banana, cocoa, and nuts

Yield

Approximately 10–12 cookies

Oven Temperature

180°C (350°F)


Ingredients

  • 1 ripe banana, mashed until smooth

  • 1 cup oatmeal (quick or rolled oats)

  • 30 g oat flakes (additional, for texture)

  • 160 ml water

  • 1 tablespoon unsweetened cocoa powder

  • 30 g walnuts, finely chopped

  • 30 g ground almonds

Optional Flavor Additions

  • A small pinch of ground cinnamon

  • A small amount of sugar-free chocolate chips


Instructions


1. Prepare the Oat Base

  1. Place the oatmeal and water into a mixing bowl.

  2. Stir to combine, then allow the mixture to stand for 5–10 minutes, until the oats absorb the liquid and soften.


2. Prepare the Banana

  1. Peel the banana and place it in a separate bowl.

  2. Mash thoroughly with a fork until smooth and evenly textured.


3. Combine the Ingredients

  1. Add the mashed banana to the softened oats and mix until evenly combined.

  2. Stir in the cocoa powder until the mixture takes on a uniform color.

  3. Add the ground almonds, chopped walnuts, and the additional oat flakes.

  4. Mix with a spatula until a thick, cohesive dough forms.

    • If the mixture is too loose, add a small amount of oats or ground almonds until the dough holds its shape.


4. Shape the Cookies

  1. Preheat the oven to 180°C (350°F).

  2. Line a baking tray with parchment paper.

  3. Portion the dough using approximately 2 tablespoons per cookie.

  4. Shape each portion into a ball, then gently flatten into a thick round shape.

  5. Arrange the cookies on the prepared baking tray, leaving space between them.


5. Bake

  1. Place the tray in the preheated oven.

  2. Bake for 15–20 minutes, until the cookies are set on the outside and hold their shape.

  3. Remove from the oven and allow the cookies to rest on the tray for 10 minutes before transferring.


6. Finish and Serve

  • Allow the cookies to cool further before serving.

  • If desired, lightly dust the tops with a small amount of coconut flour or powdered sweetener for decoration.


Storage

  • Store in an airtight container in the refrigerator

  • Best consumed within 5 days

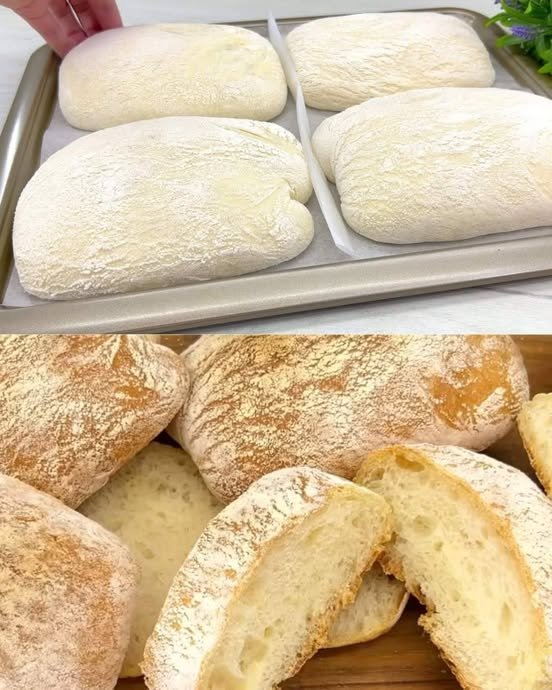
No-Knead Italian High-Hydration Bread

No-Knead Italian High-Hydration Bread

A rustic Italian-style bread with an open crumb and crisp, lightly floured crust

Yield

2 large loaves or 4–6 small loaves

Total Time

Approximately 60–70 minutes (excluding cooling)

Oven Temperature

220°C (430°F)


Ingredients

Yeast Starter

  • 100 ml water, lukewarm

  • 1 teaspoon granulated sugar

  • 8 g dry yeast

  • 3 tablespoons wheat flour (all-purpose or bread flour)

Main Dough

  • 500 g wheat flour, sifted

  • 1½ teaspoons salt

  • 350 ml water, lukewarm

  • 30 ml vegetable oil


Instructions


1. Prepare the Yeast Starter

  1. In a small bowl, combine the lukewarm water, sugar, and dry yeast.

  2. Add the flour and whisk until a smooth mixture forms.

  3. Cover the bowl and allow it to stand at room temperature for 10–15 minutes, until the mixture becomes foamy and visibly active.


2. Mix the Dough

  1. Place the sifted flour and salt into a large mixing bowl and stir to distribute evenly.

  2. Create a well in the center of the flour.

  3. Pour in the prepared yeast starter, the remaining lukewarm water, and the vegetable oil.

  4. Mix using a sturdy spoon or spatula until all ingredients are combined and a very soft, sticky dough forms.

  5. The dough should be fluid and elastic rather than firm; this high moisture content is essential for an open internal structure.

  6. Cover the bowl and allow the dough to rise in a warm, draft-free environment for 30–40 minutes, until it has doubled in volume and shows visible air bubbles on the surface.


3. Shape the Bread

  1. Generously flour a clean work surface.

  2. Carefully transfer the risen dough onto the floured surface, handling it gently to preserve the air inside.

  3. Lightly dust the top of the dough with additional flour.

  4. Using a dough scraper or lightly floured hands, divide the dough into 2 large portions or 4–6 smaller rectangular portions.

  5. Place the shaped pieces onto a baking tray lined with parchment paper, leaving space between each loaf to allow for expansion.


4. Bake

  1. Preheat the oven to 220°C (430°F).

  2. Place the baking tray on the center rack of the oven.

  3. Bake for 20–25 minutes, until the bread is evenly golden and the crust is firm.

  4. Remove from the oven and transfer the loaves to a wire rack.

  5. Allow the bread to cool for at least 15 minutes before slicing to allow the crumb to stabilize.


Storage

  • Best consumed on the day of baking

  • Can be stored at room temperature for up to 24 hours

  • Freeze once fully cooled for longer storage