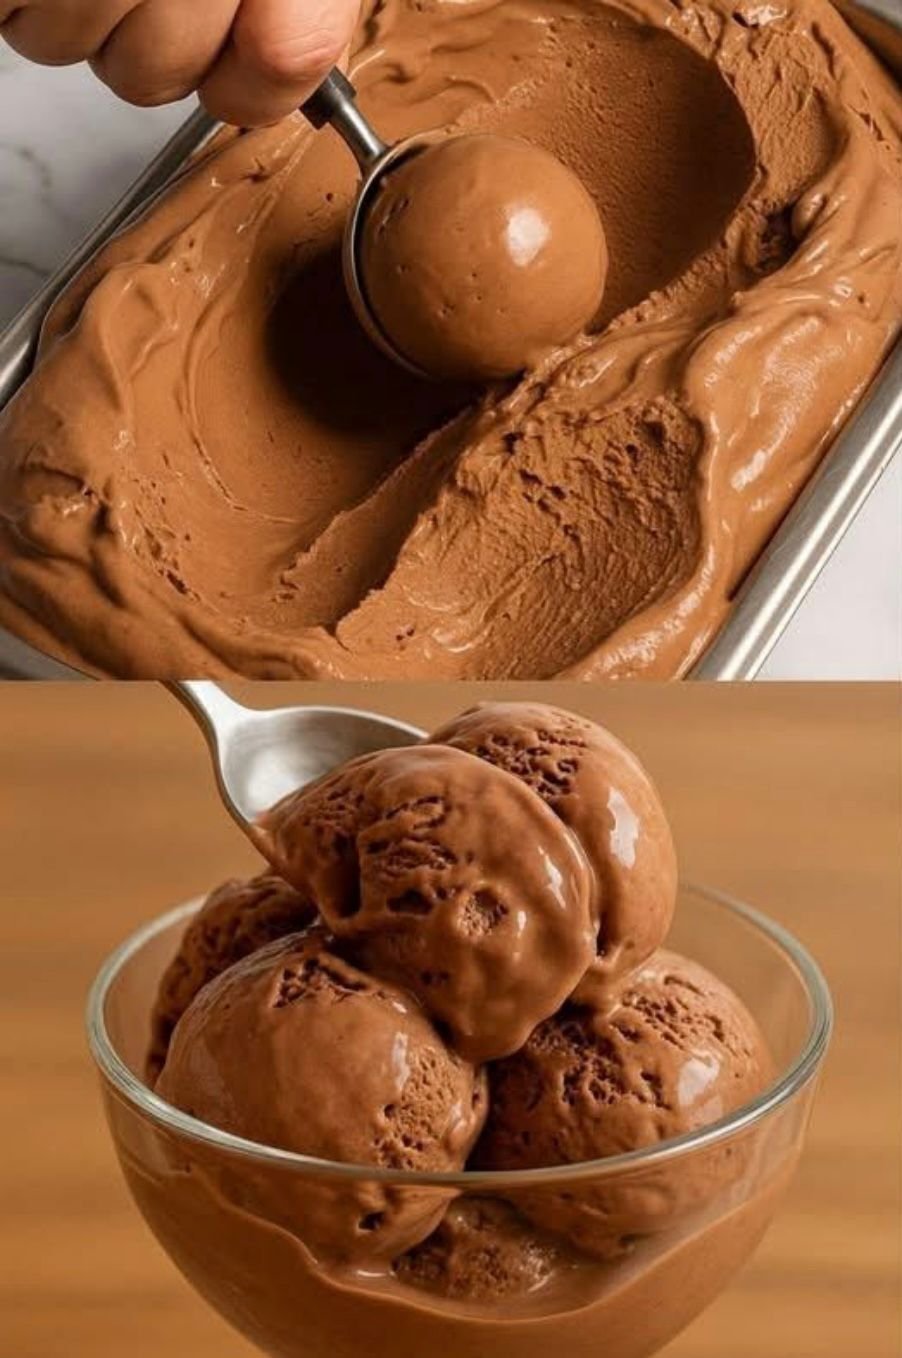
Silky Deep Chocolate Gelato

Silky Deep Chocolate Gelato

Indulge in rich, velvety chocolate perfection with this custard-based gelato. Dense, smooth, and intensely chocolatey, it’s a homemade treat that rivals any gelateria.


Ingredients (Serves 4–6)

  • 2 cups (480 ml) whole milk

  • 1 cup (240 ml) heavy cream

  • 1/2 cup (100 g) granulated sugar, divided

  • 1/4 cup (25 g) unsweetened cocoa powder (Dutch-processed for a darker color)

  • 4 oz (115 g) high-quality dark chocolate (60% cacao or higher), finely chopped

  • 4 large egg yolks

  • 1 teaspoon vanilla extract

  • 1/4 teaspoon sea salt


Instructions

1. Heat the Dairy

  1. In a medium saucepan, combine the milk, heavy cream, and half of the sugar (1/4 cup).

  2. Sift in the cocoa powder to prevent lumps.

  3. Heat over medium heat, stirring occasionally, until the mixture begins to steam gently. Do not allow it to boil.


2. Melt the Chocolate

  1. Remove the pan from the heat.

  2. Add the chopped dark chocolate and sea salt. Let it sit for 1 minute.

  3. Whisk until the chocolate is fully melted and the mixture is smooth and glossy.


3. Temper the Egg Yolks

  1. In a separate bowl, whisk the egg yolks with the remaining sugar until pale yellow and slightly thickened.

  2. Slowly pour about 1/2 cup of the hot chocolate mixture into the yolks while whisking constantly.

  3. This gradual process, called tempering, prevents the eggs from cooking too quickly.


4. Thicken the Custard

  1. Pour the tempered egg mixture back into the saucepan with the remaining chocolate dairy.

  2. Place over low heat and stir constantly with a wooden spoon or silicone spatula.

  3. Cook until the custard thickens enough to coat the back of a spoon (about 77°C–82°C / 170°F–180°F).

Tip: Do not let the custard boil, or it may curdle.


5. Chill the Base

  1. Strain the custard through a fine-mesh sieve into a clean bowl to remove any lumps.

  2. Stir in the vanilla extract.

  3. Cover the surface directly with plastic wrap to prevent a skin from forming.

  4. Refrigerate for at least 4–6 hours, or preferably overnight, for full flavor and texture.


6. Churn the Gelato

  1. Pour the chilled custard into an ice cream maker.

  2. Churn according to the manufacturer’s instructions (usually 20–25 minutes) until the gelato reaches a soft, creamy consistency.


7. Freeze for Scoopable Texture

  1. Transfer the gelato to a pre-chilled container.

  2. Cover and freeze for an additional 2 hours for a scoopable texture that holds shape beautifully.


Pro Tips for the Perfect Gelato

  • Serving Temperature: Gelato is best served slightly warmer than ice cream. Let it sit 5 minutes at room temperature before scooping to reveal those smooth ridges.

  • Prevent Ice Crystals: Press a piece of parchment paper directly onto the gelato surface before sealing the container.

  • Chocolate Choice: Use high-quality chocolate for a richer, more complex flavor. Avoid low-cacao blends.

  • Optional Add-Ins: Stir in chocolate chips, caramel swirls, or toasted nuts after churning for extra texture.


This gelato has a deep, luxurious chocolate flavor and a texture so smooth it practically melts in your mouth. Perfect for a decadent dessert or a special treat for chocolate lovers!
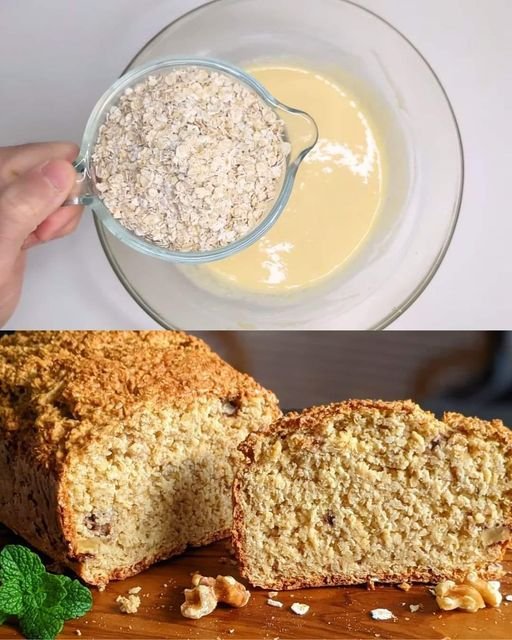
Fast Flourless Oatmeal Breakfast Bread

Fast Flourless Oatmeal Breakfast Bread

Caption: ✨ Healthy breakfast has never been this easy! This flourless, butter-free oatmeal bread is a total game-changer for your morning routine. Just three main ingredients to create a gluten-free loaf that is hearty, wholesome, and perfectly golden! 🍞🥣🌿


Ingredients (Makes 1 loaf)

  • 280 g (3 cups) rolled oats (use certified gluten-free if needed)

  • 2 large eggs

  • 250 g (1 cup) plain yogurt or Greek yogurt

  • 1 tsp baking powder (optional, for extra lift)

  • ½ tsp salt (optional, to enhance flavor)

Optional Mix-ins:

  • Chopped walnuts, pumpkin seeds, or sunflower seeds

  • Extra oats for topping


Instructions

1. Prep Oven and Pan

  1. Preheat your oven to 350°F (180°C).

  2. Line a standard loaf pan with parchment paper or lightly grease it to ensure the bread comes out easily.


2. Mix Wet Ingredients

  1. In a large bowl, whisk the eggs until smooth.

  2. Stir in the yogurt until the mixture is creamy and well combined.


3. Add the Oats

  1. Gradually add the oats to the wet mixture.

  2. If using, add baking powder and salt.

  3. Stir thoroughly until the oats are fully moistened.

  4. If adding nuts or seeds, fold them in now.


4. Let the Batter Rest

  • Let the batter sit for 10 minutes.

  • This allows the oats to absorb moisture, creating a better texture in the bread.


5. Bake

  1. Pour the batter into the prepared loaf pan and smooth the top with a spatula.

  2. Bake in the oven for 35–45 minutes, or until the top is golden brown and firm to the touch.


6. Cool and Slice

  1. Let the bread cool in the pan for 10 minutes.

  2. Transfer to a wire rack and cool completely before slicing.


Serving Suggestions

  • Savory: Toast a slice and top with avocado, tomato, or a poached egg.

  • Sweet: Serve warm with honey, nut butter, or a sprinkle of cinnamon.


Why You’ll Love This

  • Flourless & Gluten-Free: Perfect for sensitive stomachs or gluten-free diets.

  • Quick & Easy: Just 3 main ingredients and 10 minutes prep time.

  • Healthy & Hearty: Rolled oats provide fiber and yogurt adds protein, making it a filling breakfast.

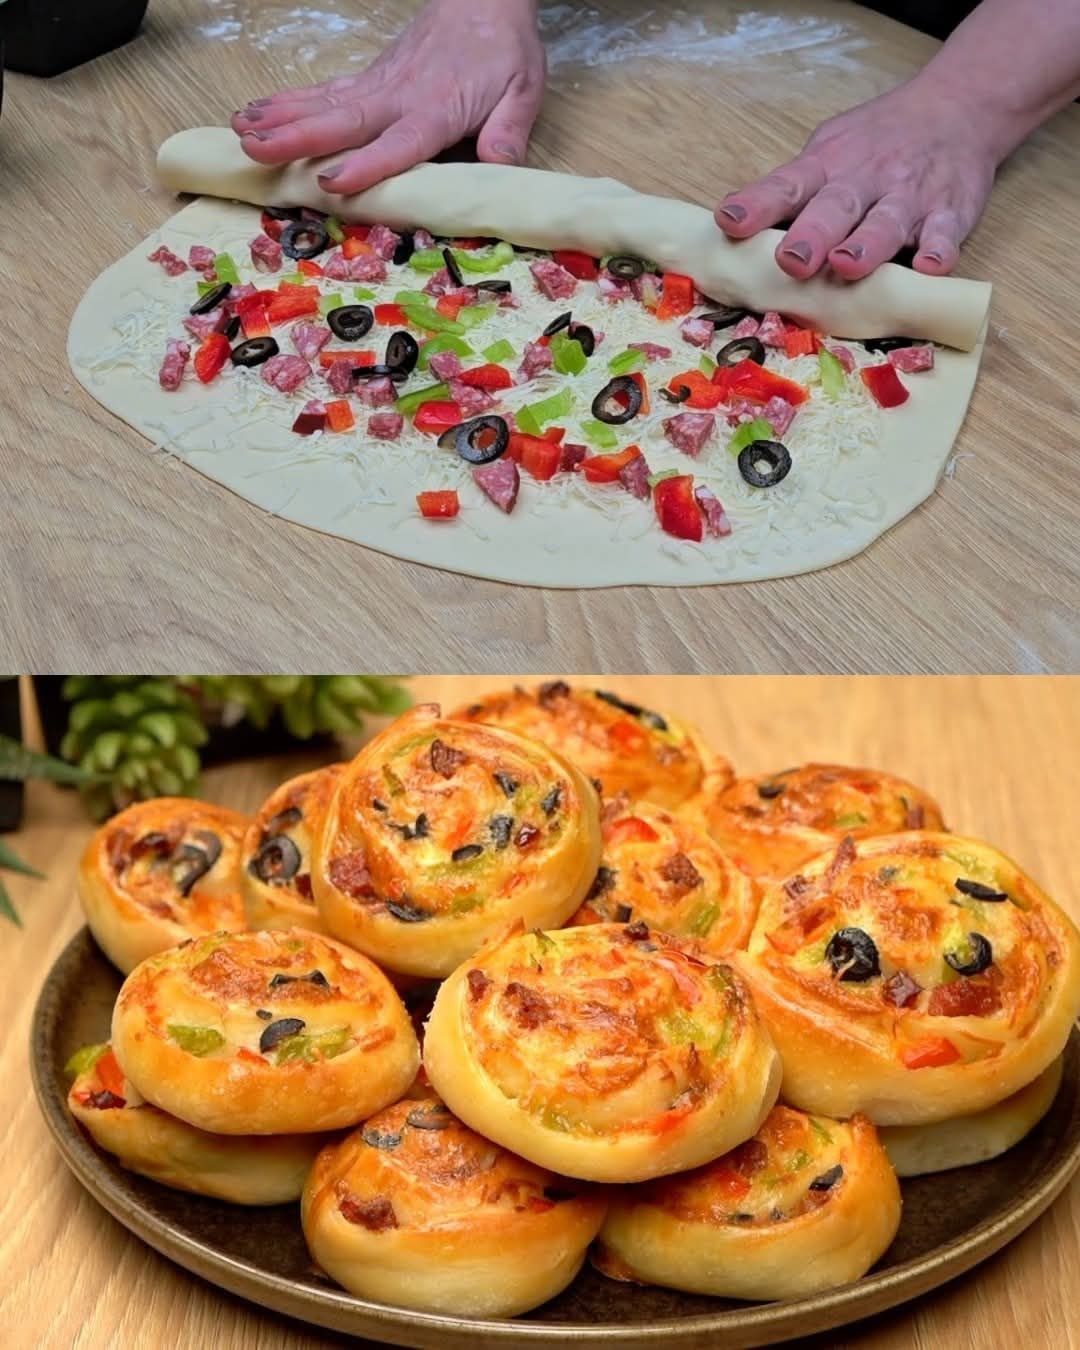
Fluffy Mini Pizza Soft Rolls

Fluffy Mini Pizza Soft Rolls

Caption: 🍕✨ The perfect snack for pizza lovers! These “Mini Pizza Soft Rolls” combine a cloud-like homemade dough with all your favorite savory toppings. They’re fun to make, beautiful to serve, and guaranteed to disappear in minutes! ☁️🥨

Ingredients

For the Homemade Dough:

  • 200 ml (¾ cup) warm milk (ensure it is warm to the touch, not hot)

  • 10 g (2 tsp) active dry yeast

  • 1 tablespoon (12 g) sugar

  • 60 ml (¼ cup) vegetable oil

  • 4 g (¾ tsp) salt

  • 420 g (3 ½ cups) all-purpose flour

For the Filling & Toppings (Based on Images):

  • Shredded Mozzarella cheese (for that perfect melt)

  • Diced Salami or Pepperoni

  • Black Olives, sliced

  • Red and Green Bell Peppers, finely diced

  • Optional: A light spread of pizza sauce or pesto


Preparation Steps

  1. Activate the Yeast:

    • In a large mixing bowl, combine the warm milk, sugar, and yeast.

    • Stir gently and let it sit for about 5–10 minutes until it becomes frothy.

  2. Mix the Dough:

    • Add the oil and salt to the yeast mixture.

    • Gradually sift in the flour and mix until a dough starts to form.

    • Knead the dough on a lightly floured surface for 5–7 minutes until it is smooth and elastic.

    • Place the dough in a greased bowl, cover with a warm damp cloth, and let it rise in a warm spot for about 1 hour or until doubled in size.

  3. Roll and Fill:

    • Punch down the risen dough and roll it out into a large, thin rectangle on a floured surface.

    • Spread a thin layer of sauce (if using) and sprinkle a generous amount of mozzarella cheese over the dough.

    • Evenly distribute the salami, peppers, and black olives across the surface.

  4. Shape the Rolls:

    • Starting from one of the long edges, carefully roll the dough into a tight log.

    • Use a sharp knife or a piece of unflavored dental floss to cut the log into 8–10 equal slices.

  5. Bake to Perfection:

    • Preheat your oven to 375°F (190°C).

    • Place the rolls onto a baking sheet lined with parchment paper, leaving space for them to expand.

    • Bake for 20–25 minutes until the edges are golden brown and the cheese is bubbly.

  6. Cool and Serve:

    • Let the rolls rest for 5 minutes before serving. Enjoy them warm for the softest texture!

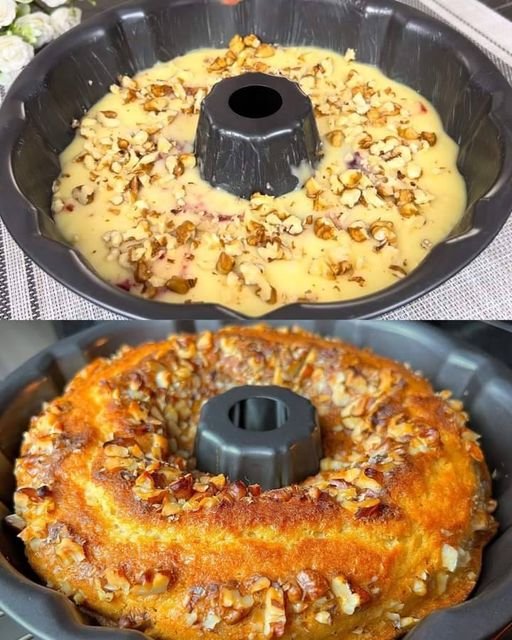
Golden Walnut & Jam Swirl Cake

Golden Walnut & Jam Swirl Cake

Caption: ✨ The cake of your dreams is only 5 minutes away! This soft, fluffy sponge features a sweet jam swirl and a crunchy walnut topping. It’s incredibly simple and absolutely delicious! 🍰🥨

Ingredients

  • Eggs: 2 large

  • Vanilla Sugar: 1 packet (8g)

  • Salt: A pinch

  • Sugar: 120g (2/3 cup)

  • Oil: 120ml (1/2 cup)

  • Milk: 120ml (1/2 cup)

  • Flour: 220g (1 ¾ cups)

  • Baking Powder: 1 tablespoon

  • Jam: 50g (your favorite variety, like strawberry or apricot)

  • Walnuts: 50g, chopped

  • Baking Dish: 24 cm Bundt or round pan


Preparation Steps

  1. Prep the Pan and Oven:

    • Preheat your oven to 350°F (180°C).

    • Grease your 24 cm baking dish with a little oil or butter and dust lightly with flour to prevent sticking.

  2. Mix the Batter:

    • In a large bowl, whisk the 2 eggs, vanilla sugar, salt, and 120g of sugar until the mixture is light and frothy.

    • Pour in the 120ml of oil and 120ml of milk. Whisk until well combined.

  3. Add Dry Ingredients:

    • Sift the 220g of flour and 1 tablespoon of baking powder into the wet mixture.

    • Gently whisk until you have a smooth batter with no lumps.

  4. Assemble with Jam and Nuts:

    • Pour the batter into your prepared baking dish.

    • Drop small spoonfuls of the 50g of jam over the surface of the batter. Use a toothpick or knife to gently swirl it in for a marbled effect.

    • Sprinkle the 50g of chopped walnuts evenly over the top.

  5. Bake to Perfection:

    • Bake for 35–40 minutes.

    • The cake is ready when it is golden brown and a toothpick inserted into the center comes out clean.

  6. Cool and Serve:

    • Let the cake cool in the pan for 10 minutes before carefully turning it out onto a wire rack to cool completely.

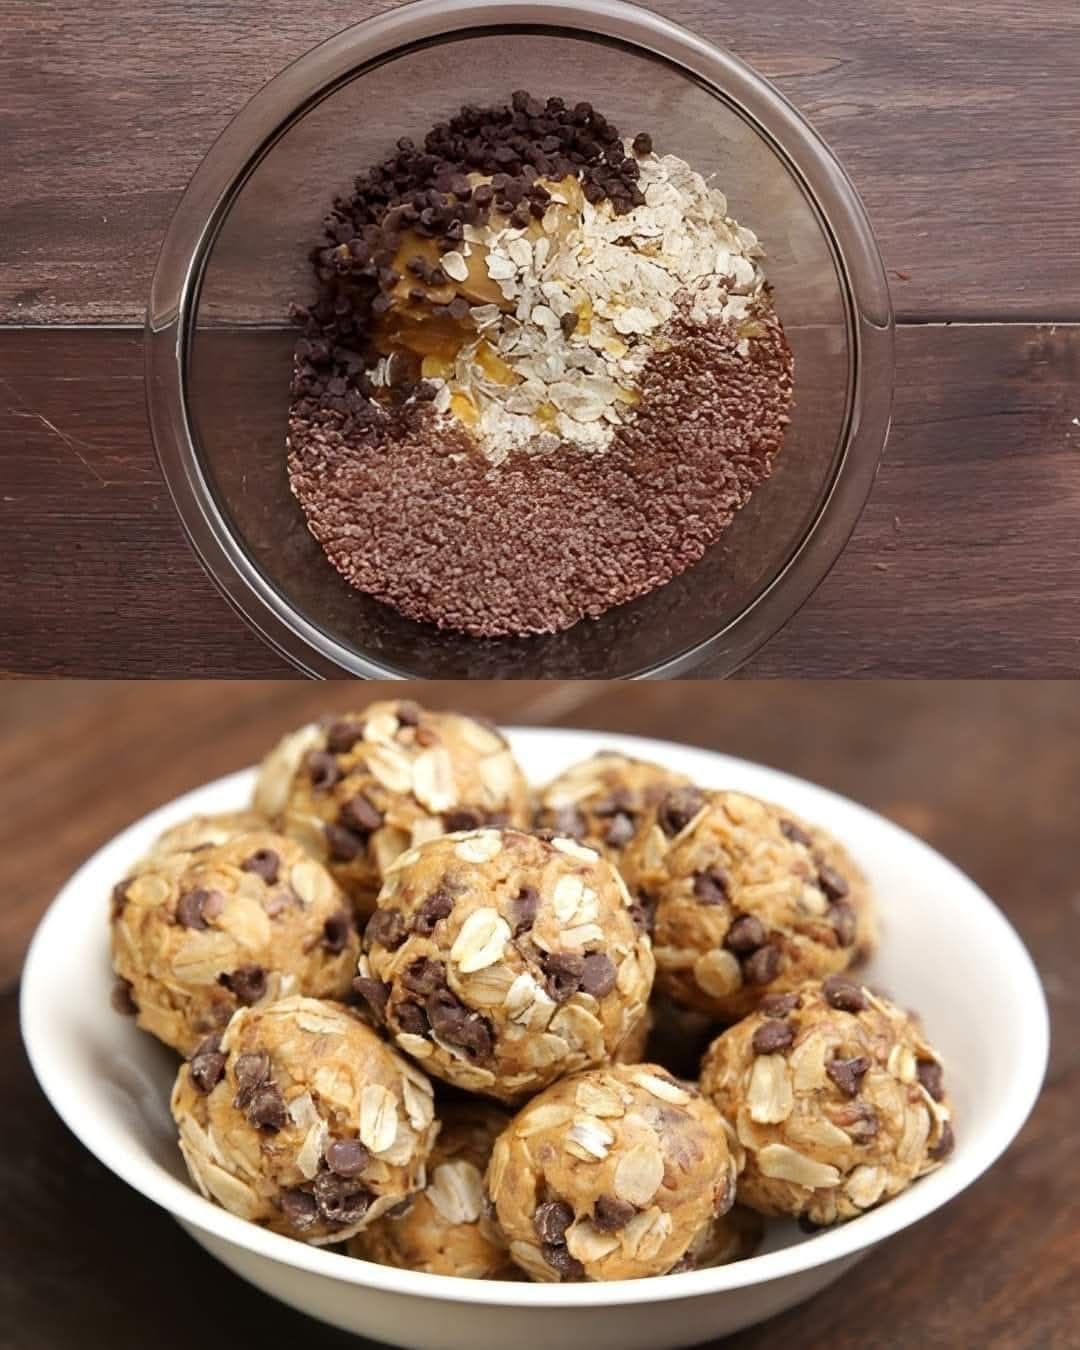
Peanut Butter Oat Energy Balls (No-Bake Snack)

🥜 Peanut Butter Oat Energy Balls (No-Bake Snack)

These soft and chewy peanut butter energy balls are quick to prepare and made with simple ingredients. They are perfect for snacks, lunchboxes, or a small sweet bite during the day.


📝 Ingredients

  • ⅔ cup creamy peanut butter

  • 1 cup old-fashioned oats (plus extra for rolling, if desired)

  • 1½ tablespoons honey

  • ¼ cup mini dark chocolate chips (optional)

  • 1 tablespoon flax seeds or chia seeds (optional)


👩‍🍳 Step-by-Step Instructions

1️⃣ Mix the Base

In a medium mixing bowl, add:

  • Peanut butter

  • Honey

Stir well until smooth and evenly blended.


2️⃣ Add the Dry Ingredients

Add the oats to the peanut butter mixture.
If using chocolate chips or seeds, add them now.

Mix thoroughly until everything is well combined and the mixture becomes thick and slightly sticky.


3️⃣ Chill the Mixture (Optional but Helpful)

Place the bowl in the refrigerator for 15–30 minutes.
This helps the mixture firm up and makes shaping easier.


4️⃣ Shape the Balls

Scoop about 1 tablespoon of the mixture at a time.
Roll it gently between your palms to form a small ball (about 2.5 cm / 1 inch wide).

If desired, roll each ball in dry oats for extra texture.


5️⃣ Set and Store

Place the balls on a tray or plate.
Refrigerate for 30 minutes until firm.

Transfer to an airtight container.


📦 Storage

  • Refrigerator: up to 7 days

  • Freezer: up to 1 month


⭐ Helpful Tips

  • Use smooth peanut butter for easy mixing

  • Add a little extra oats if mixture feels too soft

  • Add a small splash of milk if mixture feels too dry

  • Keep chilled for best texture


💛 Why You’ll Enjoy This Recipe

  • No baking needed

  • Made with simple pantry ingredients

  • Easy to prepare

  • Soft, chewy, and lightly sweet

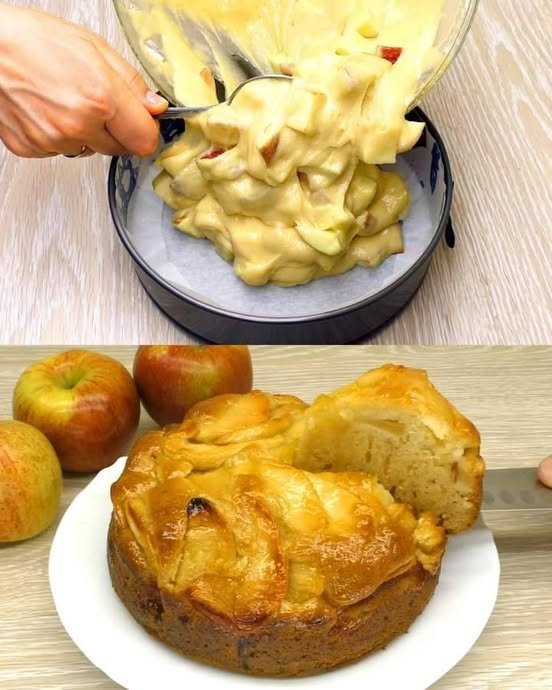
Golden Apple Sponge Pie (Soft & Light)

Golden Apple Sponge Pie (Soft & Light)

This apple sponge pie has a fluffy cake base topped with tender, lightly sweetened apples. It’s made with simple pantry ingredients and has a beautiful golden finish.


📝 Ingredients

For the Apple Topping

  • 2 large apples, peeled and sliced

  • 25 g butter

  • 1 tablespoon lemon juice

  • 20 g sugar

For the Sponge Batter

  • 2 large eggs

  • 130 g sugar

  • 60 ml milk

  • 150 g self-rising flour
    (or 150 g all-purpose flour + 1 teaspoon baking powder)


👩‍🍳 Step-by-Step Instructions

1️⃣ Prepare the Apples

  • Peel and core the apples.

  • Slice them evenly so they cook uniformly.

  • Heat a pan over medium heat and melt the butter.

  • Add the apple slices, lemon juice, and sugar.

  • Cook gently for 3–5 minutes, stirring lightly, until the apples soften and become lightly golden.

  • Remove from heat and allow them to cool slightly.


2️⃣ Make the Batter

  • In a large bowl, whisk the eggs and sugar together until pale and fluffy.

  • Add the milk and mix gently until combined.


3️⃣ Add the Flour

  • Sift the flour (and baking powder if using).

  • Fold it into the batter gently using a spatula.

  • Mix only until combined to keep the batter light and airy.


4️⃣ Assemble the Pie

  • Preheat oven to 180°C (350°F).

  • Line a round baking tin with parchment paper.

  • Pour the batter evenly into the tin.

  • Arrange the cooked apple slices on top in a neat pattern.


5️⃣ Bake

  • Bake for 30–35 minutes or until a toothpick inserted in the center comes out clean.

  • The surface should be golden in color.


6️⃣ Cool and Serve

  • Let the pie cool in the pan for 10 minutes, then remove carefully.

  • Serve warm or at room temperature.

Optional toppings:
✔ Light dusting of powdered sugar
✔ Spoon of whipped cream
✔ Vanilla ice cream


⭐ Helpful Tips

  • Slice apples evenly for even cooking

  • Do not overmix the batter

  • Let the pie cool slightly before slicing

  • Store in an airtight container for up to 2 days


✨ Optional Finish

For a shiny top, lightly brush the warm apples with a little apricot jam or honey after baking.