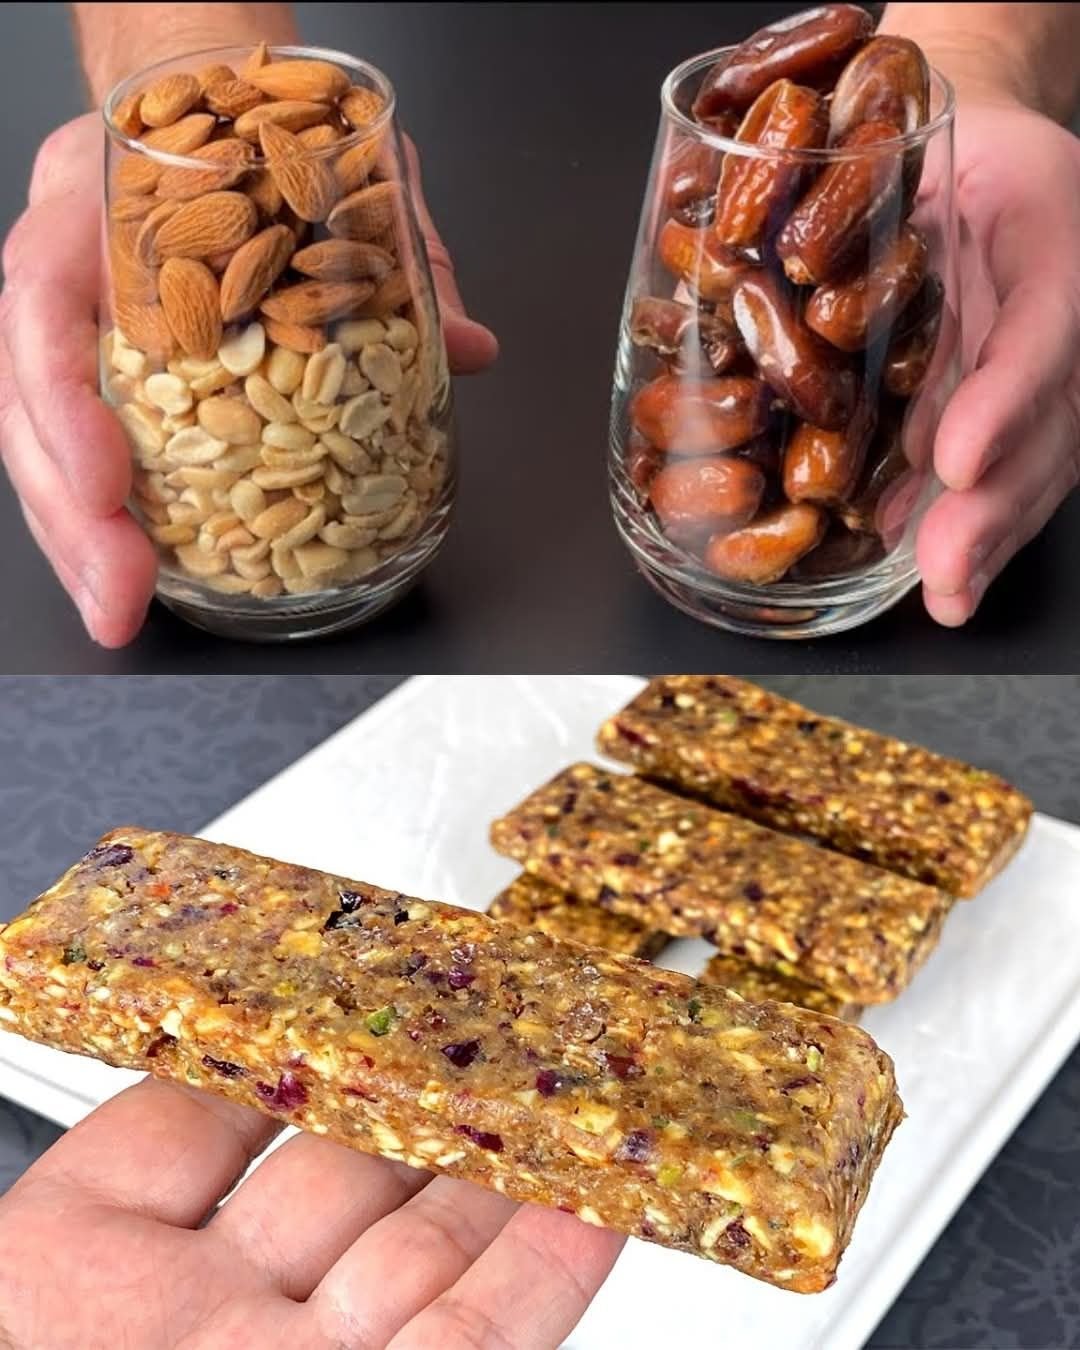
No-Bake Nut & Date Bars

No-Bake Nut & Date Bars

Prep Time: 15 minutes
Chilling Time: 1โ€“2 hours
Yield: 8โ€“10 bars

Naturally sweet, rich in texture, and packed with nuts and fruit, these no-bake bars are perfect for quick snacks or healthy treats. No oven needed and very easy to prepare.


๐Ÿงพ Ingredients

  • 75 g (ยฝ cup) almonds

  • 50 g (ยฝ cup) walnuts

  • 50 g (ยฝ cup) pumpkin seeds

  • 250 g (1โ…” cups) dates, pitted

  • 100 g (โ…“ cup) natural peanut butter (creamy or crunchy)

  • 40 g (ยผ cup) dried cranberries

  • Optional: a small pinch of sea salt (for flavor balance)


๐Ÿ‘ฉโ€๐Ÿณ Step-by-Step Instructions

๐Ÿฅœ Step 1: Prepare the Nuts & Seeds

  1. Add almonds, walnuts, and pumpkin seeds to a food processor.

  2. Pulse several times until they are chopped into small, chunky pieces.
    (Do not grind into powder โ€” a little texture gives a better bite.)

  3. Transfer the chopped mixture to a large mixing bowl.


๐Ÿฏ Step 2: Process the Dates

  1. Make sure all dates are pitted.

  2. If they are firm, soak them in warm water for 5 minutes, then drain well.

  3. Place the dates in the food processor and blend until they form a thick, sticky paste.


๐Ÿฅฃ Step 3: Combine the Mixture

  1. Add the date paste to the bowl with the nuts and seeds.

  2. Add peanut butter and dried cranberries.

  3. Mix using a strong spoon or lightly oiled hands until:

    • All ingredients are evenly combined

    • The mixture holds together when pressed


๐Ÿ“ Step 4: Press into the Pan

  1. Line a small rectangular or square pan (about 8 ร— 4 inches) with parchment paper, leaving extra paper on the sides.

  2. Transfer the mixture into the pan.

  3. Press down firmly and evenly using:

    • A spatula

    • Or the bottom of a flat glass

This helps the bars hold their shape when sliced.


โ„ Step 5: Chill to Set

  1. Place the pan in the refrigerator for 1โ€“2 hours until firm.
    (For faster setting, you can freeze for 30 minutes.)


๐Ÿ”ช Step 6: Slice and Store

  1. Lift the firm block out using the parchment paper.

  2. Cut into bars or small squares with a sharp knife.


๐ŸงŠ Storage Tips

Refrigerator:
Store in an airtight container for up to 2 weeks.

Freezer:
Wrap bars individually in parchment paper and store in a freezer-safe bag for up to 3 months.
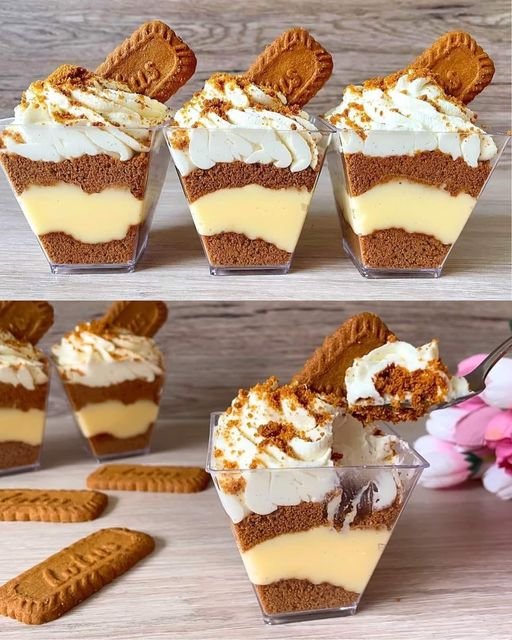
Lotus Biscoff Dessert Cups

Lotus Biscoff Dessert Cups

Prep Time: 20 minutes
Chilling Time: 1โ€“2 hours
Servings: 4โ€“6 cups (depending on cup size)

Creamy, layered dessert with crunchy Biscoff biscuit base, smooth custard, and fluffy whipped cream. Simple, elegant, and perfect for serving in cups.


๐Ÿงพ Ingredients

Biscuit Layer

  • 200 g Lotus Biscoff biscuits

Custard Layer

  • 300 ml milk

  • 1ยฝ tablespoons custard powder

  • 1 tablespoon sugar

Cream Layer

  • 300 ml whipping cream (well chilled)

  • 1 tablespoon sugar

  • Pinch of vanilla powder or a few drops of vanilla essence

Decoration

  • Extra Lotus Biscoff biscuits

  • Extra biscuit crumbs (optional)


๐Ÿ‘ฉโ€๐Ÿณ Step-by-Step Instructions

๐Ÿฅ„ Step 1: Prepare the Biscuit Base

  1. Place the Lotus Biscoff biscuits into a food processor and grind into fine crumbs.
    (You can also crush them in a sealed bag using a rolling pin.)

  2. Divide about two-thirds of the crumbs between your serving cups.

  3. Press gently with a spoon to form an even base.

  4. Keep the remaining crumbs aside for the middle layer.


๐Ÿฎ Step 2: Make the Custard

  1. In a saucepan, add custard powder and sugar.

  2. Add a few tablespoons of milk and mix until smooth.

  3. Pour in the remaining milk and mix well.

  4. Place over medium heat and cook while stirring continuously.

  5. Cook until the custard becomes thick and smooth.

  6. Remove from heat and let it cool slightly.
    Stir occasionally so it stays creamy.


๐Ÿง Step 3: Whip the Cream

  1. In a cold bowl, add whipping cream, sugar, and vanilla.

  2. Beat with an electric mixer until soft, fluffy peaks form.

  3. Stop mixing once it holds shape.


๐Ÿ— Step 4: Assemble the Dessert Cups

Layer 1: Spoon custard over the biscuit base.
Layer 2: Sprinkle the reserved biscuit crumbs over the custard.
Layer 3: Pipe or spoon whipped cream generously on top.


โ„ Step 5: Decorate and Chill

  1. Decorate each cup with:

    • One whole Lotus biscuit

    • A light sprinkle of crumbs

  2. Refrigerate for at least 1 hour before serving.


๐ŸŒŸ Serving Tips

โœ” Serve chilled
โœ” Use clear cups to show layers
โœ” Can be prepared 1 day in advance
โœ” Keep refrigerated until serving

Apple Hurricane Cakeย 

Apple Hurricane Cake

Prep Time: 20 minutes
Bake Time: 35โ€“40 minutes
Servings: 8 slices
Pan Size: 8โ€“9 inch (20โ€“22 cm) round pan

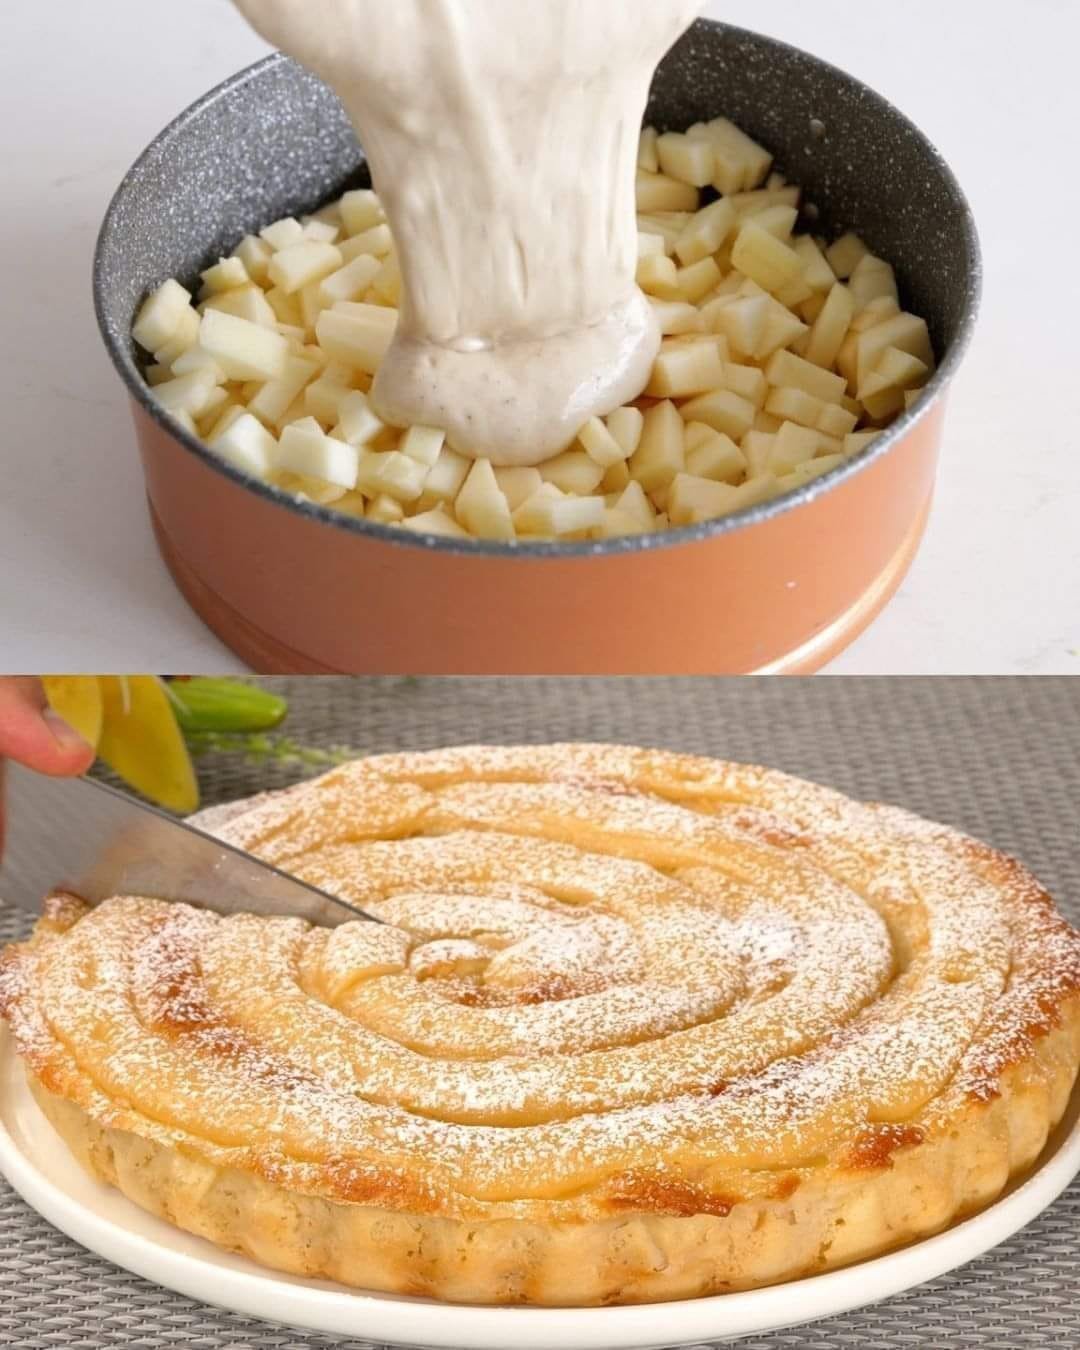
A soft apple cake with a beautiful custard spiral baked right on top. Moist inside, lightly golden outside, and stunning when sliced.


๐Ÿฅš Cream Filling (Custard Spiral)

Ingredients

  • 2 egg yolks

  • ยผ cup (60 g) sugar

  • 1 tablespoon (15 g) cornstarch

  • 1 cup (240 ml) milk

  • 1 teaspoon vanilla essence

Method

  1. In a small saucepan, whisk together the egg yolks, sugar, and cornstarch until smooth.

  2. Slowly pour in the milk while whisking continuously to prevent lumps.

  3. Place the pan over medium heat and stir constantly using a whisk or spatula.

  4. Cook until the mixture thickens into a smooth, creamy custard.

  5. Remove from heat and stir in the vanilla essence.

  6. Transfer to a bowl and cover with plastic wrap touching the surface.

  7. Allow it to cool completely before using.


๐Ÿ Apple Preparation

Ingredients

  • 3 medium apples (peeled and diced)

Method

  1. Peel, core, and cut the apples into small cubes (about 1 cm).

  2. Set aside for later use.


๐Ÿฐ Cake Batter

Ingredients

  • 2 whole eggs

  • 2 egg whites (leftover from custard)

  • ยฝ cup (100 g) sugar

  • Pinch of salt

  • ยฝ cup (120 ml) milk

  • โ…“ cup (80 ml) vegetable oil or melted butter

  • 2 cups (250 g) all-purpose flour

  • 1 tablespoon (12 g) baking powder

  • Prepared diced apples

Method

  1. In a large bowl, beat the whole eggs, egg whites, sugar, and salt until pale and frothy.

  2. Add the milk and oil and mix until smooth.

  3. Sift in the flour and baking powder.

  4. Fold gently until just combined. Do not overmix.

  5. Fold in the diced apples evenly.


๐ŸŒช Assembly (Hurricane Design)

  1. Preheat oven to 350ยฐF (180ยฐC).

  2. Grease and line an 8โ€“9 inch round pan with parchment paper.

  3. Pour the apple batter into the pan and level the top.

  4. Transfer the cooled custard to a piping bag or plastic bag with the tip cut off.

  5. Starting from the center, pipe the custard in a spiral pattern moving outward to the edge.


๐Ÿ”ฅ Baking

  1. Place the pan in the center of the oven.

  2. Bake for 35โ€“40 minutes.

  3. The cake is ready when:

    • The top is lightly golden

    • A toothpick inserted into the cake portion comes out clean


๐Ÿฝ Cooling & Serving

  1. Let the cake cool in the pan for 10 minutes.

  2. Remove from the pan and cool completely on a rack.

  3. Dust generously with powdered sugar to highlight the spiral pattern.

  4. Slice and serve.


โœ… Tips

  • Use firm apples for best texture.

  • Custard must be fully cooled before piping.

  • Store covered at room temperature for 1 day or refrigerate up to 3 days.

  • Best served slightly warm or at room temperature.

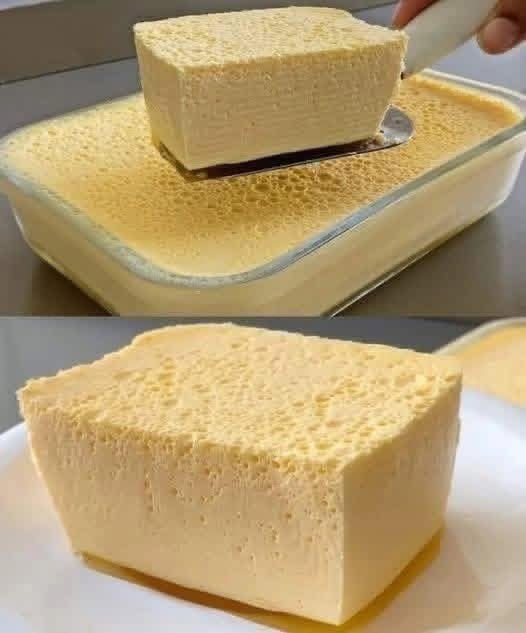
Carnivore Blender Dessert (No-Bake, No Plants

Carnivore Blender Dessert (No-Bake, No Plants)
Description
This rich and creamy carnivore dessert is a simple, no-bake treat made entirely from animal-based ingredients. Everything goes into the blender, making it quick, easy, and perfect for satisfying cravings while staying fully carnivore. Smooth, filling, and naturally indulgent, itโ€™s ideal as a dessert or high-fat snack.
๐Ÿฅฉย Ingredients (Carnivore)
1 cup heavy cream
3โ€“4 egg yolks (raw or gently pasteurized)
2 tbsp unsalted butter (softened or melted)
1โ€“2 tbsp collagen peptides (optional)
Pinch sea salt (optional)
๐Ÿ”„ย Instructions
Add all ingredients to a blender.
Blend until completely smooth and creamy (30โ€“60 seconds).
Pour into a bowl or glass.
Chill for 30โ€“60 minutes for a thicker texture, or enjoy immediately.
๐Ÿฝ๏ธย Serving Suggestions
Serve cold with a spoon
Freeze for 1โ€“2 hours for an ice-cream-like texture
Portion into small jars for meal prep
๐Ÿ”„ย Variations
Extra Rich: Add 1 more egg yolk
Frozen Treat: Freeze in silicone molds
Dairy-Light: Reduce cream and add melted butter
๐Ÿ“Šย Nutrition (Approx. per serving)
Calories: 350โ€“400
Fat: 35โ€“40g
Protein: 8โ€“10g
Carbs: ~0g
โ“ย Related Questions
Is this safe with raw egg yolks?
Use fresh, high-quality eggs or pasteurized yolks if preferred.
Is this a strict carnivore?
Yesโ€”only animal-based ingredients.
How often can I eat it?
Great as an occasional dessert or fat-boosting snack.
๐Ÿง ย Final Thoughts
This blender carnivore dessert proves that staying carnivore doesnโ€™t mean giving up indulgence. Itโ€™s fast, satisfying, and easy enough to make twice a weekโ€”or more.
If you liked this recipeโ€ฆ

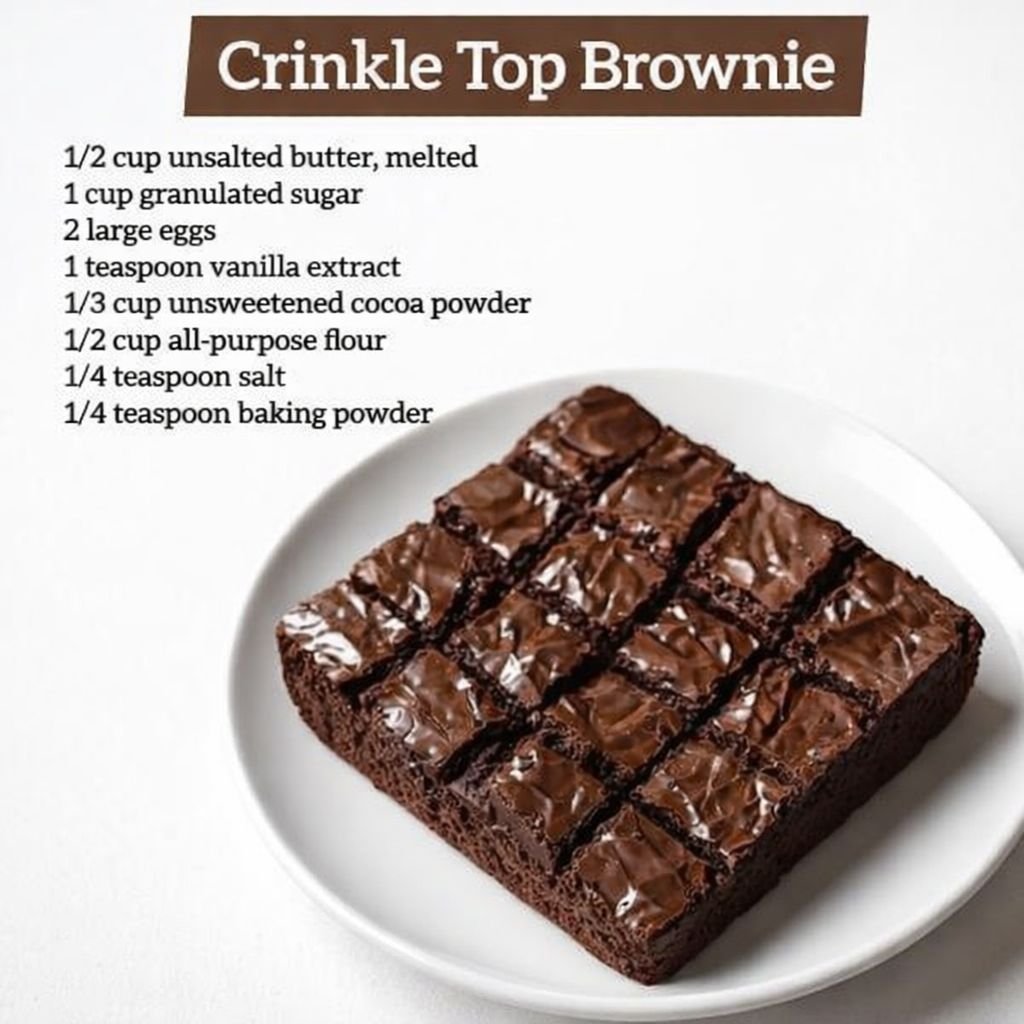
Perfect Crinkle Top Brownies

Perfect Crinkle Top Brownies

Rich, fudgy, and decadent, these brownies feature a dense, chewy center topped with the classic paper-thin, crackly crust that makes every bite irresistible.


Ingredients (8×8-inch pan, 16 squares)

  • 1/2 cup (115 g) unsalted butter, melted

  • 1 cup (200 g) granulated sugar

  • 2 large eggs

  • 1 teaspoon vanilla extract

  • 1/3 cup (35 g) unsweetened cocoa powder

  • 1/2 cup (60 g) all-purpose flour

  • 1/4 teaspoon salt

  • 1/4 teaspoon baking powder


Instructions

1. Preheat and Prep

  1. Preheat the oven to 175ยฐC (350ยฐF).

  2. Grease an 8×8-inch square baking pan or line it with parchment paper, leaving a slight overhang for easy removal of the brownies after baking.


2. Cream the Butter and Sugar

  1. In a large mixing bowl, combine the melted butter and granulated sugar.

  2. Whisk vigorously for 1โ€“2 minutes until the mixture looks glossy and slightly thickened.

Tip for the Crinkle Top: Thoroughly whisking the sugar into the butter helps dissolve the sugar, which is key to forming that signature shiny, crackly crust.


3. Add Wet Ingredients

  1. Add the eggs and vanilla extract to the butter-sugar mixture.

  2. Whisk for another minute until the batter turns pale and smooth.


4. Incorporate Dry Ingredients

  1. Sift together the cocoa powder, flour, salt, and baking powder.

  2. Using a spatula, gently fold the dry ingredients into the wet mixture.

  3. Mix only until the streaks of flour disappear. Overmixing can make brownies tough instead of fudgy.


5. Bake

  1. Pour the batter into the prepared pan and smooth the top with a spatula.

  2. Bake in the preheated oven for 20โ€“25 minutes.

Toothpick Test: Insert a toothpick in the center; it should come out with a few moist crumbs. A fully clean toothpick may indicate the brownies are slightly overbaked.


6. Cool and Slice

  1. Allow the brownies to cool completely in the pan. This ensures the fudgy interior sets and the crinkle top firms up.

  2. Lift the brownies out using the parchment paper and cut into 16 equal squares.


Why This Recipe Works

  • Cocoa Ratio: Using 1/3 cup of cocoa powder gives a deep chocolate flavor without drying out the brownies.

  • Fudgy Texture: The combination of 1/2 cup flour and 2 eggs creates a dense, chewy texture rather than a cake-like structure.

  • Shiny Crinkle Top: Thoroughly whisking the sugar into melted butter and eggs ensures that classic crackly surface.


Pro Tips for Perfect Brownies

  • Do not overbake: Even a minute too long can dry out the edges. Keep an eye on the toothpick test.

  • Let them cool fully: Cutting brownies too soon can result in crumbling and a less defined top.

  • Optional add-ins: Fold in chocolate chips, nuts, or a swirl of caramel for extra indulgence.

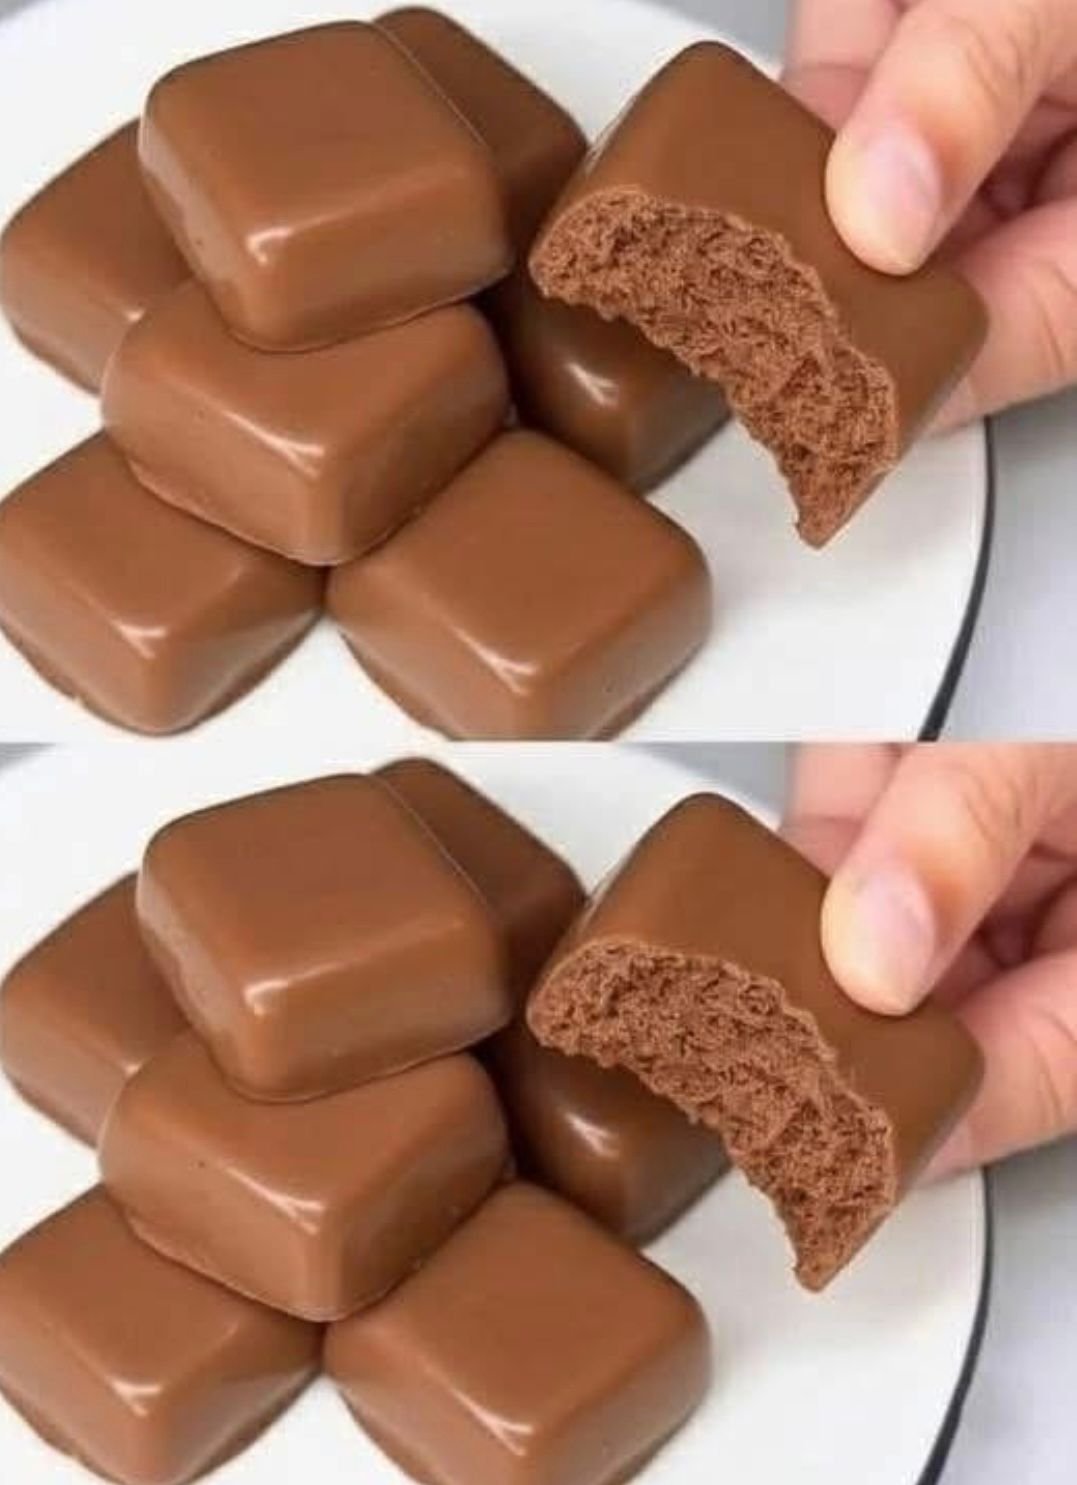
Chocolate-Covered Marshmallow Mousse Squares

Chocolate-Covered Marshmallow Mousse Squares

Indulgent, airy, and rich, these mousse squares have a delicate marshmallow-mousse interior coated in a crisp chocolate shell. Perfect for dessert platters, gifts, or a special treat.


Ingredients (Makes about 16 squares)

For the Mousse Filling

  • 1 cup (240 ml) whole milk

  • 1 ยฝ cups (150 g) mini marshmallows (white)

  • 4 oz (115 g) semisweet chocolate, finely chopped

  • 1 tablespoon unsweetened cocoa powder

  • 1 teaspoon gelatin powder, bloomed in 1 tablespoon cold water

For the Chocolate Coating

  • 8 oz (225 g) milk or dark chocolate melting wafers

  • 1 tablespoon coconut oil (helps coating stay smooth and snap cleanly)


Instructions

1. Prepare the Cocoa Base

  1. In a small saucepan over medium-low heat, combine the milk and cocoa powder.

  2. Whisk gently until the cocoa dissolves and the milk is steaming but not boiling.


2. Melt the Marshmallows and Chocolate

  1. Add the mini marshmallows and chopped chocolate to the warm milk.

  2. Stir constantly with a whisk until the marshmallows and chocolate are fully melted and the mixture is silky smooth.


3. Add the Gelatin

  1. Remove the pan from heat.

  2. Stir in the bloomed gelatin while the mixture is still hot.

  3. Whisk vigorously for 1 minute to ensure the gelatin is fully incorporated and to introduce tiny air bubbles for a light, porous texture.

Tip: For an even airier texture, you can whip the mixture with a hand mixer for 1โ€“2 minutes before pouring into the mold.


4. Set the Mousse

  1. Line an 8×8 inch square baking dish with parchment paper, leaving an overhang on the sides for easy removal.

  2. Pour the mousse mixture into the dish and tap lightly on the counter to level it.

  3. Refrigerate for at least 4 hours, or until firm to the touch.


5. Cut into Squares

  1. Lift the mousse block from the dish using the parchment overhang.

  2. Use a sharp, warm knife to cut the block into equal squares.

  3. Wipe the knife clean between cuts for crisp, clean edges.


6. Dip and Coat

  1. Melt the chocolate wafers and coconut oil in a microwave-safe bowl in 30-second intervals, stirring each time until smooth.

  2. Using a fork, dip each mousse square into the melted chocolate.

  3. Shake off excess chocolate and place the squares on parchment paper.

  4. Let the coating harden at room temperature, or refrigerate for 5 minutes.


Pro Tips for Perfection

  • Airier Texture: Whipping the chocolate-marshmallow mixture slightly before setting creates a more porous interior, similar to a premium aerated chocolate bar.

  • Clean Edges: Warm your knife slightly and wipe it after each cut to maintain perfect square shapes.

  • Chocolate Shell: Adding coconut oil to the melted chocolate ensures a smooth finish that snaps when bitten.

  • Storage: Keep the mousse squares in an airtight container in the refrigerator for up to 5 days.