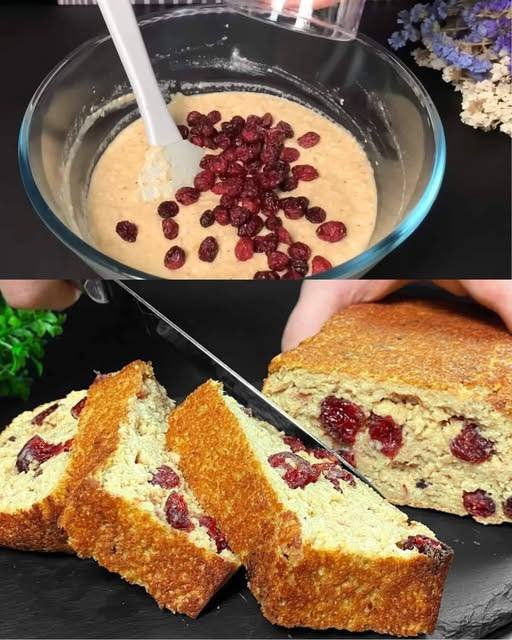
Healthy Diet Cake with Oats and Apples – Ready in Just 5 Minutes Prep

Healthy Diet Cake with Oats and Apples – Ready in Just 5 Minutes Prep

Ingredients:

    • 1 cup oats
      • 2 apples, grated
      • 100 ml water
      • 1 banana, mashed
    • 2 eggs
    • 80g cranberries
    • 1 teaspoon baking powder
  • 1/4 teaspoon cinnamon
  • Butter for greasing the pan

Instructions:

    1. Preheat the Oven:
      • Preheat your oven to 180°C (360°F).
  1. Prepare the Batter:
      • In a large mixing bowl, combine the oats, grated apples, water, mashed banana, and eggs. Mix well until all ingredients are evenly incorporated.


      • Add the cranberries, baking powder, and cinnamon to the mixture. Stir until everything is well combined.
  2. Prepare the Pan:
        • Grease a baking dish with butter to prevent the cake from sticking.


    • Pour the batter into the prepared baking dish, spreading it out evenly.
  3. Bake the Cake:
        • Place the baking dish in the preheated oven and bake for 40 minutes, or until the cake is golden brown and a toothpick inserted into the center comes out clean.


  4. Cool and Serve:
        • Allow the cake to cool in the pan for a few minutes before transferring it to a wire rack to cool completely.
      • Slice and serve warm or at room temperature.


Cooking Tips:

      • For added texture, you can include chopped nuts or seeds in the batter.
    • Use ripe bananas for a sweeter cake without adding any sugar.
    • If you don’t have cranberries, you can substitute them with raisins, dried cherries, or chopped dates.

Nutritional Benefits:

      • Oats are rich in fiber, which aids in digestion and helps keep you feeling full longer.
      • Apples provide vitamins and antioxidants that are beneficial for overall health.
      • Bananas are a good source of potassium, which is essential for heart health.
  • Eggs add high-quality protein and essential nutrients to the cake.

Why You’ll Love This Recipe:

      • It’s a quick and easy recipe that fits perfectly into a busy lifestyle.
      • The natural sweetness from fruits means no added sugar is needed.
      • It’s a healthy, nutritious option that can be enjoyed any time of the day.
    • The cake is moist and flavorful, with a delightful mix of textures from the oats and cranberries.

Dietary Information:

    • This cake is free from added sugar and flour, making it suitable for those on a sugar-free or gluten-free diet (ensure oats are certified gluten-free if necessary).
  • It contains eggs, so it’s not suitable for a vegan diet, but you can substitute the eggs with a flaxseed or chia seed egg replacement.
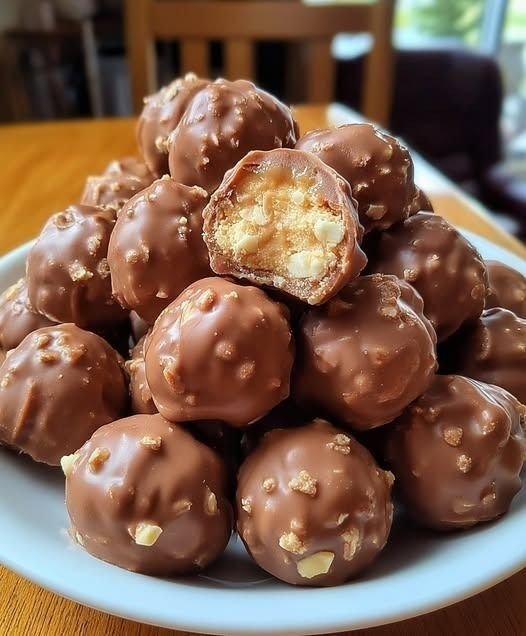
Butterfinger Balls (No-Bake Candy Bites)

Butterfinger Balls (No-Bake Candy Bites)

Yield: 20 balls
Prep Time: 15 minutes
Chill Time: 30 minutes
Total Time: About 45 minutes
Course: Dessert
Cuisine: American

These no-bake Butterfinger Balls combine creamy peanut butter, crunchy graham cracker crumbs, and crushed Butterfinger candy, all coated in smooth chocolate. They’re easy to make, freezer-friendly, and perfect for parties or gifting.


🧾 Ingredients

For the filling:

  • 4 tablespoons (56 g) unsalted butter, softened

  • 1 cup (240 g) creamy peanut butter (use regular creamy peanut butter, not natural)

  • 1 teaspoon vanilla extract

  • 1 cup (120 g) powdered (confectioners’) sugar, sifted

  • ¾ cup (75 g) graham cracker crumbs (about 6 full crackers, crushed)

  • ½ cup (about 50 g) Butterfinger bars, crushed (2–3 regular bars)

For coating:

  • 8 ounces (225 g) chocolate chips, melting wafers, or chocolate bark

Optional toppings:

  • Extra crushed Butterfinger

  • Sprinkles

  • Pinch of coarse sea salt


👩‍🍳 Instructions

1️⃣ Mix the base

In a medium bowl, beat together:

  • Softened butter

  • Peanut butter

Mix until smooth and fully blended.


2️⃣ Add sugar and vanilla

  • Stir in vanilla extract.

  • Gradually add powdered sugar (in 2–3 parts), mixing well after each addition.
    You should get a soft, moldable dough that holds together.


3️⃣ Add crumbs and candy

  • Fold in graham cracker crumbs.

  • Gently mix in crushed Butterfinger pieces.
    (Reserve 1 tablespoon of candy for topping, if desired.)


4️⃣ Shape the balls

  • Scoop about 1 to 1½ tablespoons of mixture.

  • Roll into smooth balls using your palms.

  • Place on a parchment-lined tray.


5️⃣ Chill

Refrigerate or freeze for 30 minutes until firm.
(Cold balls are much easier to dip in chocolate.)


6️⃣ Melt the chocolate

Melt chocolate:

  • In the microwave: 20–30 second bursts, stirring each time
    OR

  • Over a double boiler until smooth


7️⃣ Dip the balls

  • Dip each chilled ball into melted chocolate using a fork.

  • Tap gently to remove excess chocolate.

  • Place back on parchment paper.

Optional: sprinkle crushed Butterfinger, sprinkles, or sea salt on top before chocolate sets.


8️⃣ Set the coating

Chill for 10–20 minutes until chocolate hardens.


🧠 Troubleshooting

Too sticky?
➜ Add 1–2 tablespoons powdered sugar or graham crumbs.

Too dry?
➜ Add 1 teaspoon peanut butter or softened butter.

Chocolate too thick?
➜ Stir in 1 teaspoon vegetable oil or coconut oil.

Candy lost crunch?
➜ Do not over-crush Butterfinger; leave some small chunks.


❄️ Storage

Refrigerator:
Store in airtight container for up to 7 days

Freezer:
Freeze up to 5–6 months
Thaw overnight in fridge before serving.


💡 Expert Tips

✔ Use cookie scoop for equal sizes
✔ Let balls sit 5 minutes before dipping to prevent cracking
✔ For extra crunch, press candy on top after dipping
✔ Add espresso powder to chocolate for mocha flavor
✔ For nut-free: use sunflower seed butter and nut-free candy


🧮 Nutrition (Approximate per ball)

  • Calories: ~140

  • Fat: 9–10 g

  • Carbohydrates: 12–14 g

  • Protein: 3–4 g


📌 Important Note

Use regular creamy peanut butter.
Natural peanut butter can make the mixture too oily and soft.

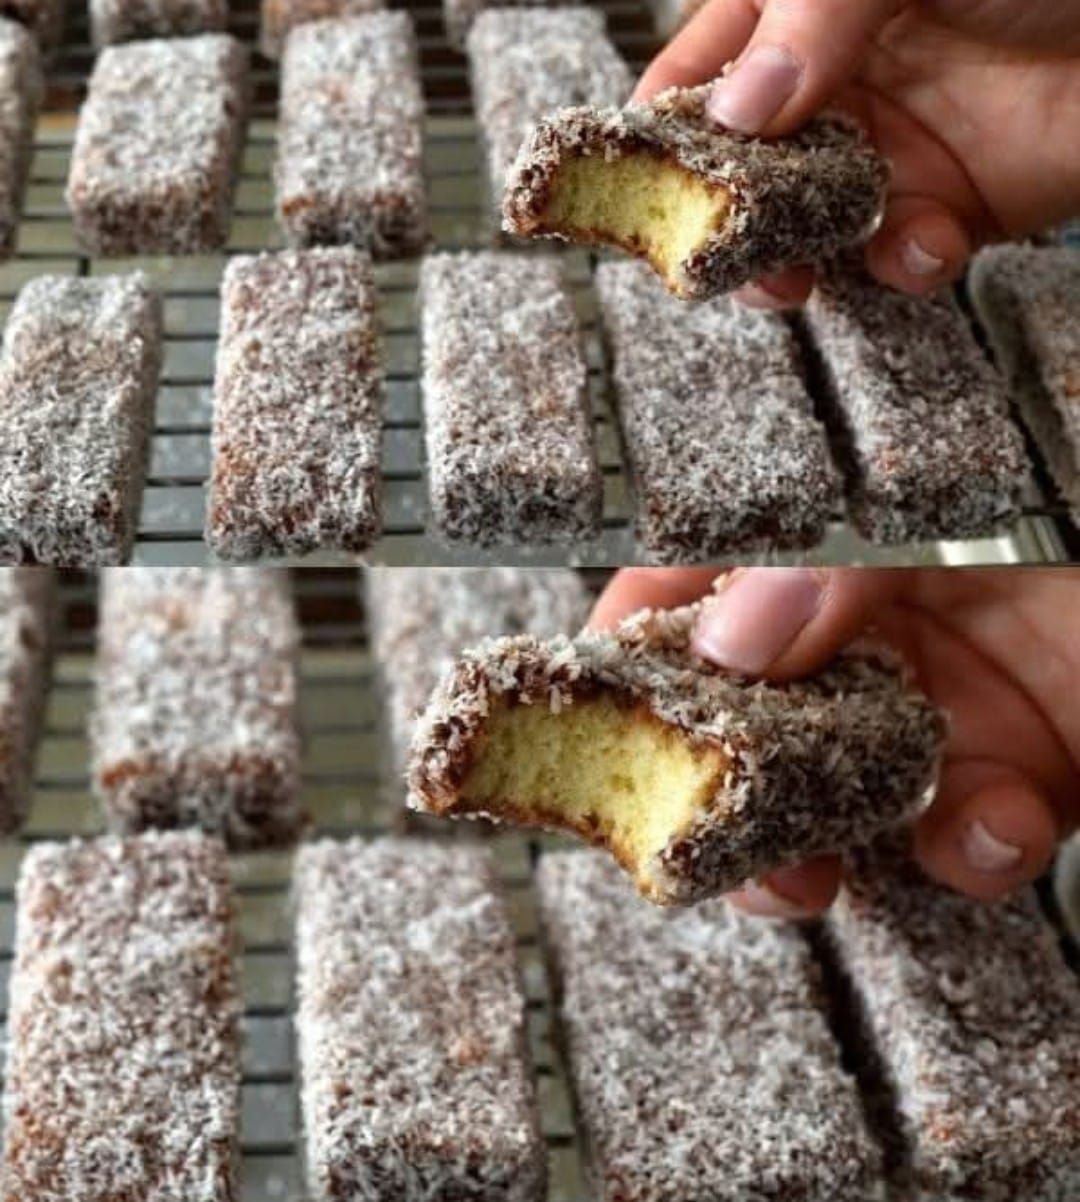
Honey & Coconut Cake Bars

Honey & Coconut Cake Bars

Soft honey sponge covered in smooth chocolate and coated with coconut

Ingredients

For the Cake

  • 1 large egg

  • 200 ml milk

  • 200 g sugar

  • 2 tablespoons honey

  • 1 tablespoon cooking oil

  • 300 g all-purpose flour

  • 1 teaspoon baking powder

For the Coating

  • 150 g dark or milk chocolate

  • ½ cup milk

  • 2 cups desiccated coconut


Instructions

Step 1: Make the Batter

In a large bowl, whisk the egg and sugar together until the mixture becomes light in color and slightly airy.

Add the milk, honey, and oil. Stir well until the honey is completely blended into the liquid.

Sift the flour and baking powder over the wet mixture.
Gently fold everything together until a smooth batter forms with no dry spots or lumps.


Step 2: Bake the Cake

Preheat the oven to 180°C (350°F).

Lightly grease a rectangular baking pan and line it with parchment paper.

Pour the batter evenly into the pan and level the top with a spoon or spatula.

Bake for 20–25 minutes, or until a toothpick inserted into the center comes out clean.

Let the cake cool fully in the pan before moving to the next step.


Step 3: Prepare the Coating

Place the chocolate and milk in a heat-safe bowl.
Warm gently (using a microwave or a bowl set over warm water) and stir until smooth and glossy.

Spread the coconut on a plate or shallow tray.


Step 4: Cut and Coat

Once the cake is completely cool, cut it into equal-sized rectangular bars.

Dip each cake bar into the chocolate mixture, turning gently so all sides are covered.

Immediately roll each coated bar in the coconut until evenly coated.


Step 5: Rest and Serve

Place the coated bars on a wire rack or parchment paper.
Let them rest for about 15 minutes until the chocolate layer firms up.

Serve with tea, coffee, or milk.


Helpful Tips

✔ For a lighter sponge, separate the egg and whip the egg white until fluffy, then fold it into the batter at the end
✔ For extra flavor, add a little vanilla or orange zest to the batter
✔ Store in an airtight container once set

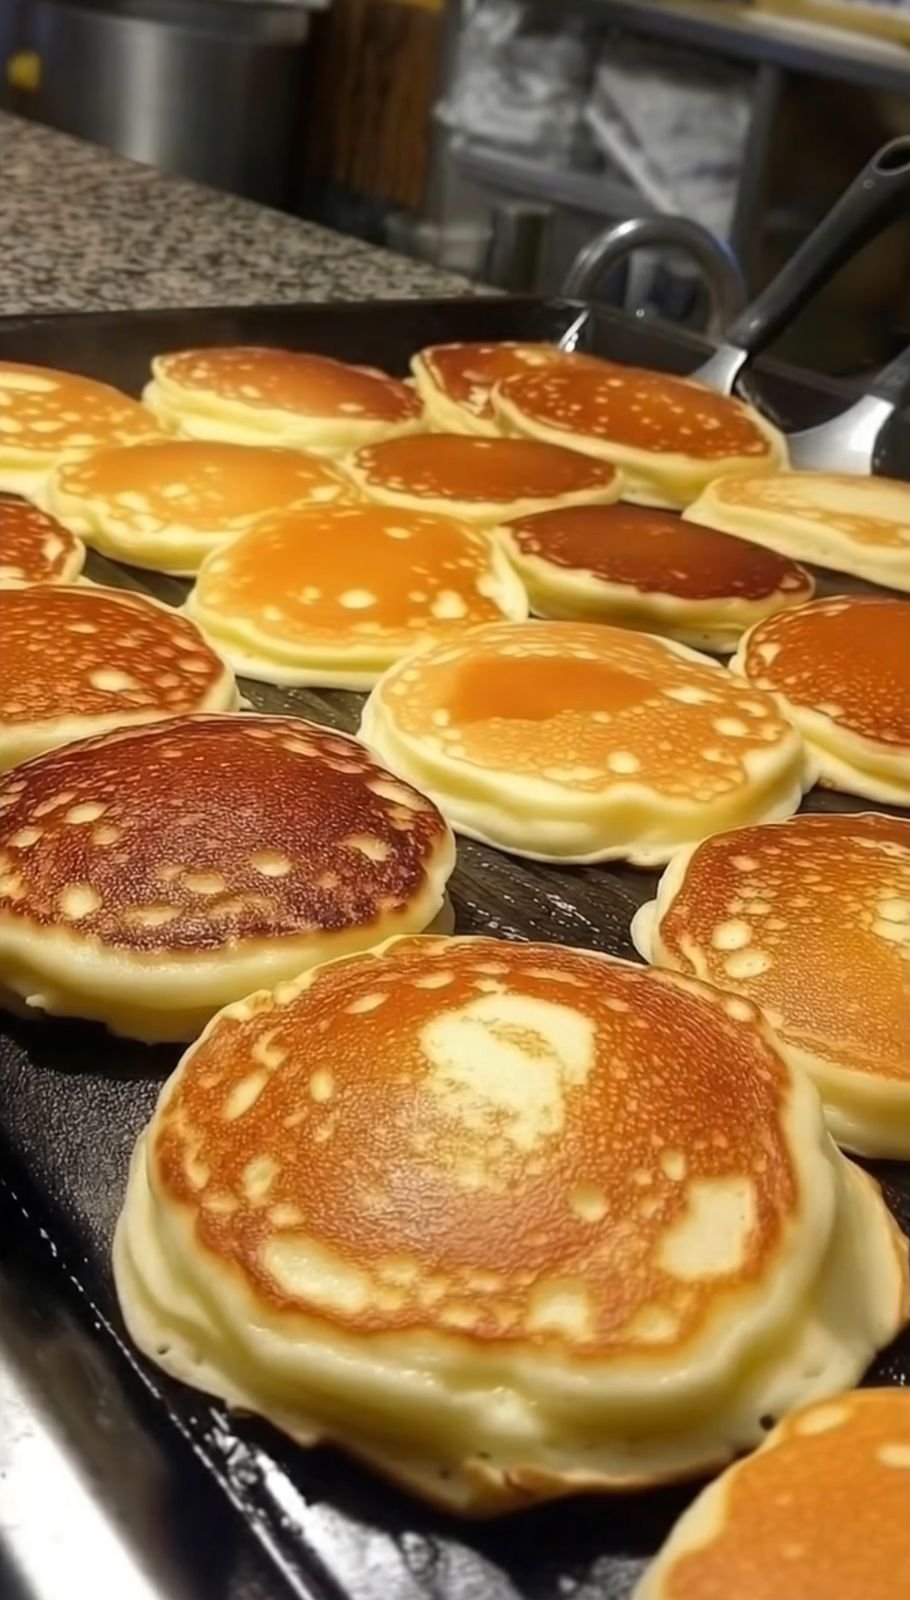
Ultimate Low-Carb Cream Cheese Pancakes

Ultimate Low-Carb Cream Cheese Pancakes

Fluffy, buttery, and made with zero grains

These pancakes are soft, lightly sweet, and perfect for anyone following a low-carb or gluten-free lifestyle. They cook gently, stay tender inside, and taste amazing with both sweet and savory toppings.


🧾 Ingredients

  • 4 oz (115 g) cream cheese, softened to room temperature

  • 4 large eggs

  • ½ cup almond flour (super-fine gives the best texture)

  • 1 teaspoon baking powder

  • 1 teaspoon vanilla extract

  • 1 tablespoon erythritol or stevia (optional, for sweetness)

  • ½ teaspoon cinnamon (optional, for aroma and warmth)

  • Butter or light oil for the pan


🥣 Step-by-Step Instructions

1️⃣ Prepare the Batter

Add the cream cheese, eggs, almond flour, baking powder, vanilla, sweetener, and cinnamon into a blender or food processor.
Blend for about 30 seconds until the mixture becomes smooth and creamy with no visible lumps.


2️⃣ Rest the Batter

Let the batter rest for 2–3 minutes.
This helps the almond flour absorb moisture and makes the pancakes stronger and easier to handle while cooking.


3️⃣ Warm the Pan

Place a non-stick pan or griddle over medium-low heat.
Add a small amount of butter or oil and spread it evenly across the surface.

💡 Low-carb batters cook faster than regular pancake batter, so gentle heat gives the best results.


4️⃣ Pour the Pancakes

Scoop 2–3 tablespoons of batter per pancake onto the pan.
Keep pancakes small for easy turning and better shape.


5️⃣ Cook the First Side

Cook for about 2 minutes until:

  • The edges look firm

  • Small bubbles appear on the surface


6️⃣ Flip Carefully

Use a thin spatula to gently turn each pancake over.
Cook for 1 more minute until lightly golden and cooked through.


7️⃣ Serve Warm

Serve immediately with:

  • Sugar-free syrup

  • Fresh berries

  • A spoon of whipped cream

  • Or a little melted butter


⭐ Pro Tips

✔ Room Temperature Cream Cheese
Cold cream cheese can cause small lumps.
If needed, warm it in the microwave for 15 seconds before blending.

✔ Steam Trick for Fluffiness
Cover the pan with a lid for the first 60 seconds of cooking.
The trapped steam helps the pancakes rise and stay soft.

✔ Extra Flavor Ideas

  • Add lemon zest for freshness

  • Add a pinch of nutmeg for bakery-style aroma

  • Add cocoa powder for chocolate pancakes


🥞 Texture & Taste

These pancakes are:
✔ Soft inside
✔ Light and fluffy
✔ Mildly sweet
✔ Great for low-carb or gluten-free diets

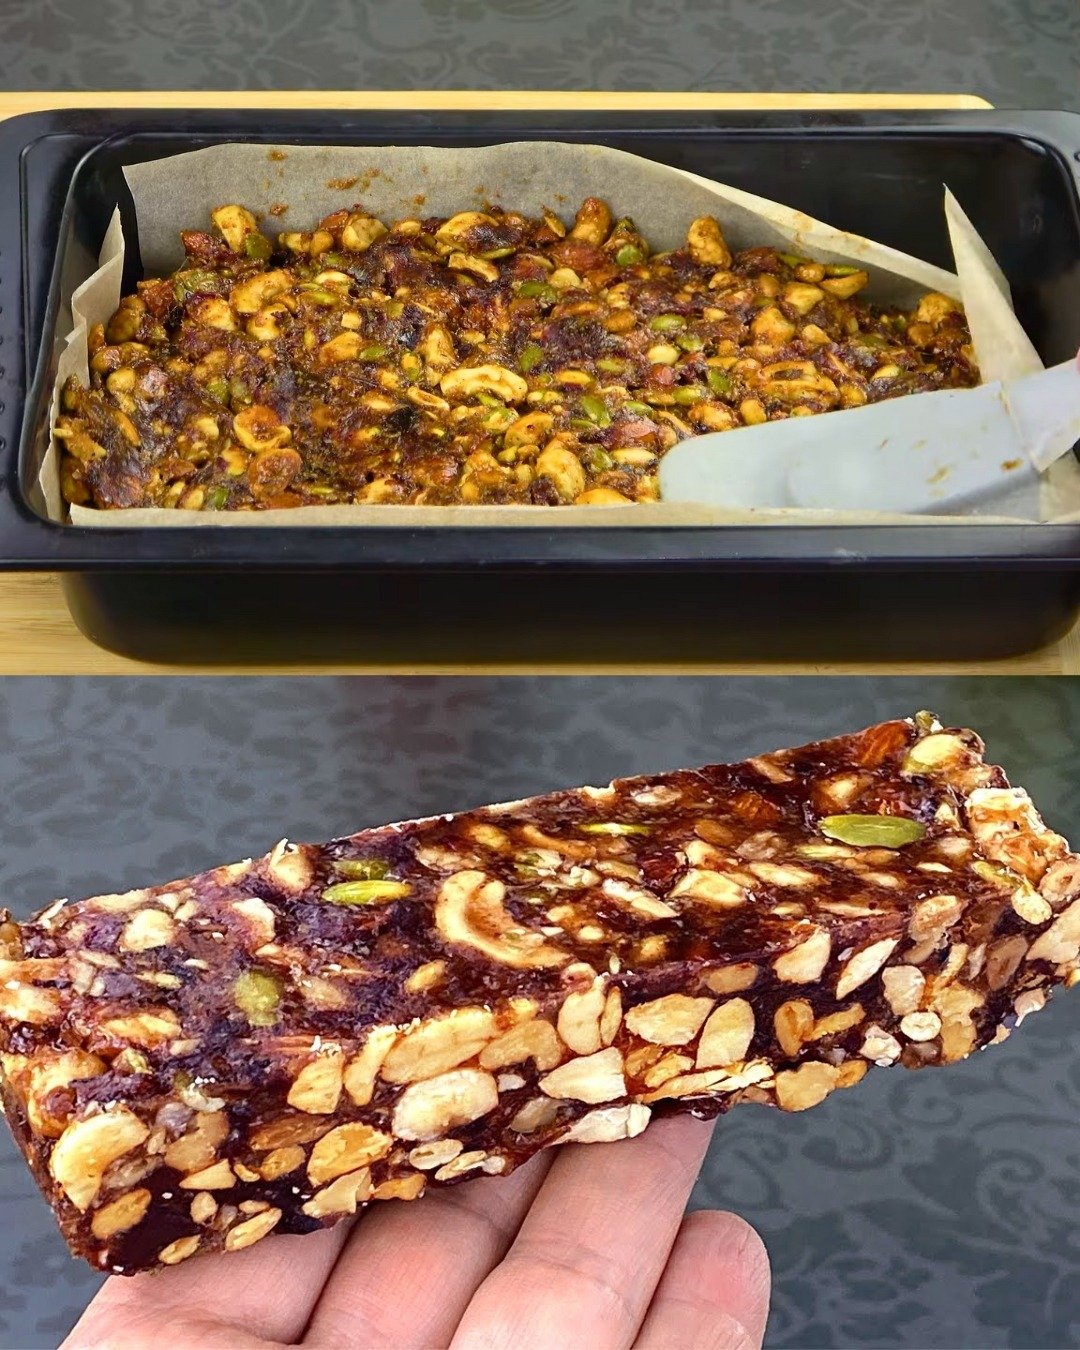
Homemade Nut and Date Energy Bars

Homemade Nut and Date Energy Bars

Yields: 8–10 bars | Prep time: 15 mins | Chilling time: 1 hour

Ingredients

The Nut & Seed Base:

  • 70 g (1/2 cup) Cashews

  • 70 g (1/2 cup) Walnuts

  • 70 g (1/2 cup) Almonds

  • 70 g (1/2 cup) Hazelnuts

  • 40 g (1/4 cup) Pine nuts

  • 70 g (1/3 cup) Pumpkin seeds

The Natural Binder:

  • 150 g (1 cup) Dates, pitted

  • Cold water (for soaking)


Instructions

1. Prepare the Dates

  • Soak: Place the pitted dates in a small bowl and cover them with cold water. Let them soak for about 15 minutes to soften.

  • Blend: Drain the water and place the softened dates into a food processor. Blend until they form a thick, smooth paste. If the mixture is too dry to move, add 1 tablespoon of the soaking water back in.

2. Toast and Chop the Nuts

  • Toast (Optional but recommended): For a deeper flavor, spread all the nuts and pumpkin seeds on a baking sheet and toast them in a preheated oven at 325°F (160°C) for 8–10 minutes. Watch closely so they don’t burn.

  • Chop: Roughly chop the larger nuts (walnuts, almonds, hazelnuts, cashews) into smaller pieces. You want a variety of sizes to ensure the bars hold together well while still having a great crunch.

3. Combine the Ingredients

  • In a large mixing bowl, combine the chopped nuts, pine nuts, and pumpkin seeds.

  • Add the date paste to the bowl.

  • Mix: Use a sturdy spatula or clean hands to thoroughly mix the ingredients. Ensure every nut and seed is well-coated in the sticky date paste, as this is what prevents the bars from crumbling.

4. Press and Chill

  • Line the Pan: Line a small rectangular baking dish or loaf pan with parchment paper, leaving some overhang on the sides for easy removal.

  • Press: Transfer the mixture into the pan. Use a spatula or the bottom of a heavy glass to press the mixture down as firmly and evenly as possible. The more you compress it, the better the bars will hold their shape.

  • Chill: Place the pan in the refrigerator for at least 1 hour (or 30 minutes in the freezer) to allow the date paste to set firmly.

5. Slice and Serve

  • Use the parchment paper “handles” to lift the block out of the pan.

  • Place it on a cutting board and use a sharp knife to slice it into bars or bite-sized squares.


Storage Tip

Store these bars in an airtight container in the refrigerator for up to two weeks, or in the freezer for up to two months. They are best served chilled.

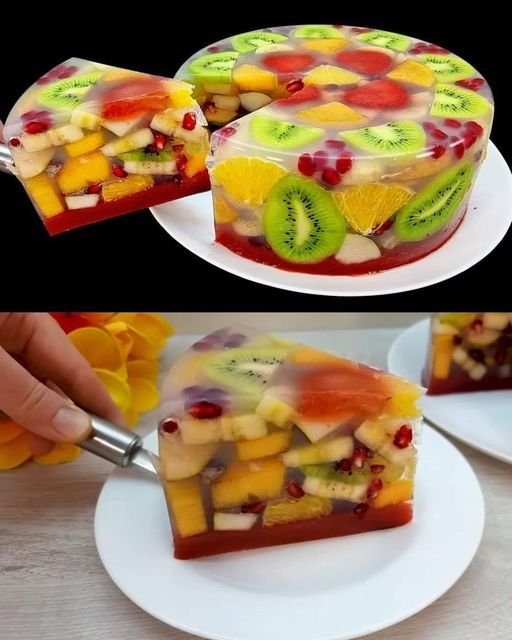
Fresh and Fruity Jelly Cake

Fresh and Fruity Jelly Cake

A colorful, multi-layered jelly cake filled with fresh fruit, perfect for a light dessert or celebratory treat.

Prep Time: 30 minutes
Chill Time: 4–6 hours (or overnight)
Servings: 6–8


🧺 Ingredients

Jelly Base

  • 3 cups water

  • 1 cup sugar (adjust to taste depending on the sweetness of your fruit)

  • 4 tablespoons (approx. 40 g) unflavored gelatin powder (or use clear agar-agar for a vegan version)

  • 1 tablespoon lemon juice

Fruit Selection

  • 2 kiwis, peeled and sliced into rounds

  • 1 cup strawberries, hulled and sliced

  • 2 bananas, sliced

  • 1 orange or 1 mango, peeled and cut into segments

  • ½ cup pomegranate seeds


👩‍🍳 Instructions

1️⃣ Prepare the Fruit

  1. Wash all fruit thoroughly.

  2. Slice the kiwis, strawberries, bananas, and oranges/mangoes into uniform pieces.

  3. For an attractive presentation, place the visually appealing slices (like kiwi and strawberries) against the sides and bottom of your mold or silicone pan first.


2️⃣ Make the Jelly Mixture

  1. Bloom the Gelatin: In a small bowl, mix the gelatin with ½ cup cold water. Let it sit for 5 minutes until soft.

  2. Dissolve the Sugar: In a saucepan, combine the remaining 3 cups of water and sugar. Heat gently over medium heat until the sugar fully dissolves.

  3. Combine: Remove from heat and stir in the bloomed gelatin until the mixture is fully clear.

  4. Add the lemon juice for brightness.

  5. Cool: Let the mixture reach room temperature. Avoid pouring hot jelly directly over the fruit to prevent softening or cloudiness.


3️⃣ Assemble the Cake

  1. Arrange the prepared fruit in your mold, layering carefully to fill any gaps.

  2. Pour the cooled jelly mixture gently over the fruit until fully covered.

  3. Lightly tap the mold on the counter to release any trapped air bubbles.


4️⃣ Chill and Set

Place the mold in the refrigerator for at least 4–6 hours, or ideally overnight, until the jelly is firm and set.


5️⃣ Unmold and Serve

  1. Briefly dip the bottom of the mold into warm water for 5–10 seconds to loosen the edges.

  2. Place a serving plate over the mold and gently flip it to release the jelly cake.

  3. Slice into wedges with a sharp, warm knife for clean edges.


💡 Tips for Success

  • For a sparkling “jeweled” look, add the pomegranate seeds last so they settle into the smaller gaps between the fruit.

  • Use fruits that are firm and fresh for best results.

  • Serve chilled for a refreshing dessert.