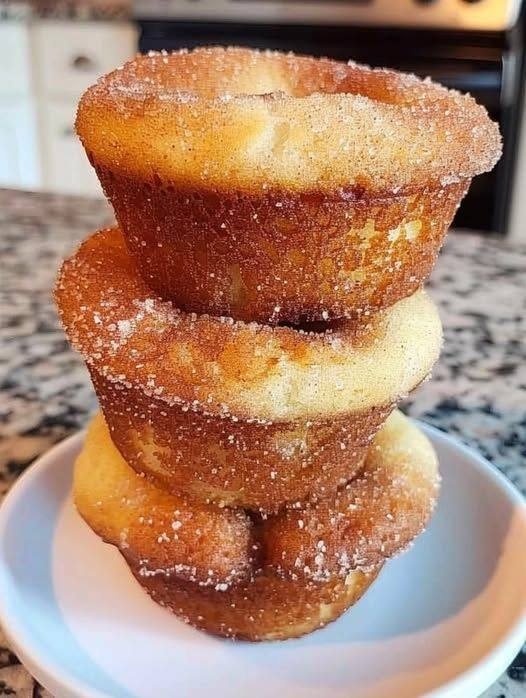
Easy Mini Cinnamon Sugar Muffins

🧁 Easy Mini Cinnamon Sugar Muffins (WW Friendly)

Soft, bite-sized, and lightened up with applesauce.

Yields: About 24 mini muffins
WW Points: ~3 points per mini muffin

📝 Ingredients

  • 1½ cups all-purpose flour

  • ½ cup sugar or sugar substitute

  • 1 tbsp baking powder

  • ½ tsp salt

  • 1 tsp cinnamon

  • ½ cup unsweetened applesauce

  • ½ cup milk (skim or almond)

  • 1 large egg

  • 1 tsp vanilla extract

Topping

  • 2 tbsp sugar or sugar substitute

  • 1 tsp cinnamon


🥣 Instructions

1️⃣ Prep:
Preheat oven to 350°F (175°C). Spray a mini muffin pan with nonstick spray.

2️⃣ Dry Mix:
In a bowl, combine flour, sugar, baking powder, salt, and cinnamon.

3️⃣ Wet Mix:
In another bowl, whisk together applesauce, milk, egg, and vanilla.

4️⃣ Combine:
Stir wet ingredients into dry ingredients just until combined. Do not overmix.

5️⃣ Fill:
Fill mini muffin cups about ⅔ full.

6️⃣ Top:
Mix topping ingredients and sprinkle evenly over batter.

7️⃣ Bake:
Bake for 12–15 minutes, until a toothpick inserted comes out clean.

8️⃣ Cool & Serve:
Let cool slightly and enjoy warm or room temperature.
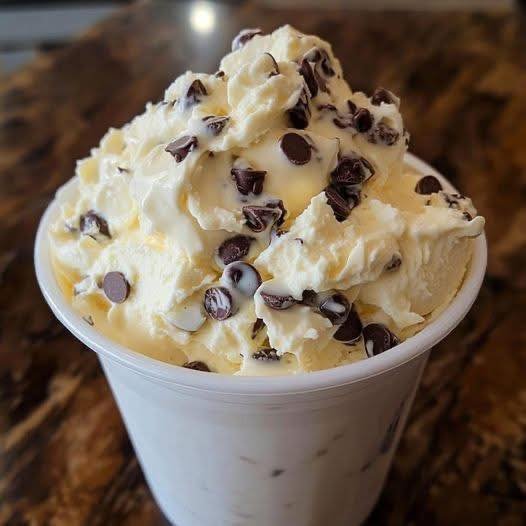
No-Churn Chocolate Chunk Ice CreamRich, Easy, and Diet-Friendly Homemade Treat in Minutes

Servings: 6
Total Time: 15 minutes prep + 4 hours freezing
Difficulty: Easy
Calories per Serving: ~180 kcal (varies by diet)
Macros per Serving (approx):
  • WW: Protein: 5g | Carbs: 15g | Fat: 10g | Fiber: 2g | SmartPoints: 5
  • Keto: Protein: 5g | Carbs: 6g | Fat: 15g | Fiber: 2g
  • Slimming : Syns: 0–2 (depending on chocolate choice)
  • Mediterranean: Protein: 5g | Carbs: 12g | Fat: 12g | Fiber: 2g

Introduction

Creamy, chocolatey, and unbelievably simple—this No-Churn Chocolate Chunk Ice Cream is a dessert you can enjoy any day of the week without an ice cream machine. It’s a multi-diet-friendly treat for Weight Watchers, Keto, Slimming World, and Mediterranean lifestyles, allowing you to indulge without guilt.

The combination of rich chocolate chunks and smooth, velvety ice cream makes each bite irresistible. Best of all, this recipe requires just a few wholesome ingredients and minimal prep. Whether it’s a hot summer day or a quick dessert after dinner, this ice cream is your answer to guilt-free, homemade indulgence.


Why You’ll Love This Recipe

  • Sensory Appeal: Smooth, creamy base studded with chocolate chunks for the perfect bite.
  • Flavor Highlight: Deep chocolate flavor balanced with subtle vanilla notes.
  • Diet-Friendly Benefit: Low-carb for Keto, SmartPoints-conscious for WW, Syn-free for Slimming World, and clean, nutrient-rich ingredients for Mediterranean eaters.

Ingredients Needed

Base Ingredients:

  • 2 cups heavy whipping cream (or coconut cream for Keto/Mediterranean)
  • 1 can (14 oz / 400 g) sweetened condensed milk (use sugar-free for WW/Keto)
  • 1 tsp pure vanilla extract

Chocolate Chunks:

  • 1/2 cup dark chocolate chunks (sugar-free for WW/Keto, or high-quality dark for Mediterranean/Slimming World)

Optional Enhancements:

  • 1–2 tbsp cocoa powder for extra chocolate richness
  • Pinch of sea salt

How to Make Our No-Churn Chocolate Chunk Ice Cream

  1. Whip the cream in a large bowl until stiff peaks form.
  2. Gently fold in condensed milk and vanilla extract until smooth and uniform.
  3. Fold in chocolate chunks, keeping the mixture airy.
  4. Pour the mixture into a freezer-safe loaf pan or container. Smooth the top.
  5. Freeze for at least 4 hours or until firm.
  6. Serve chilled, optionally garnished with extra chocolate chunks or a drizzle of sugar-free chocolate sauce.

Storage & Serving Suggestions

  • Storing: Freeze in an airtight container for up to 2 weeks.
  • Serving: Let ice cream sit 5 minutes at room temperature before scooping for creamier texture.
  • Freezing: No special preparation needed.
  • Serving Pairings: Fresh berries, chopped nuts, or a drizzle of sugar-free chocolate or caramel sauce.

Tips & FAQs

Q1: Can I make this dairy-free?
Yes! Use coconut cream and dairy-free chocolate chunks.

Q2: How can I reduce WW SmartPoints?
Use sugar-free condensed milk and chocolate chunks to keep points low.

Q3: Can I add mix-ins?
Yes! Add nuts, low-carb cookies, or dried fruit while folding in the chocolate chunks.

Q4: Do I need an ice cream machine?
No! This is a true no-churn recipe, perfect for quick homemade ice cream.

Q5: How do I get a creamier texture?
Whip the cream thoroughly and fold in the milk gently to maintain airiness.

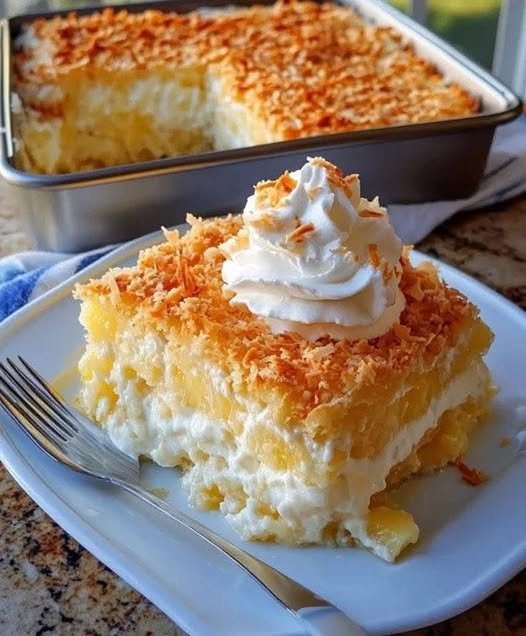
Pineapple Coconut Dream Cake

Pineapple Coconut Dream Cake

Yield: 10–12 slices
Prep Time: 25 minutes
Bake Time: 30–35 minutes
Assembly Time: 15 minutes
Total Time: About 1½ hours
Course: Dessert

This cake is soft, moist, and packed with tropical flavor from pineapple and coconut. It has fluffy layers, creamy coconut filling, and a smooth coconut frosting with toasted coconut on the outside.


🧾 Ingredients

For the Pineapple Cake:

  • 2½ cups all-purpose flour

  • 2 cups granulated sugar

  • 1 teaspoon baking soda

  • 1 teaspoon salt

  • 2 large eggs

  • 1 can (20 oz / 565 g) crushed pineapple with juice

  • ½ cup coconut milk (full-fat recommended)

  • ½ cup vegetable oil

  • 1 teaspoon vanilla extract


For the Coconut Cream Filling:

  • 1 cup heavy cream (cold)

  • 1 cup powdered sugar

  • 1 cup sweetened shredded coconut

  • 4 oz (115 g) cream cheese, softened


For the Coconut Frosting:

  • 1 cup unsalted butter, softened

  • 4 cups powdered sugar

  • 2 tablespoons coconut milk

  • 1 teaspoon vanilla extract

  • 1½ cups toasted coconut flakes (for coating)


👩‍🍳 Instructions


1️⃣ Bake the Cake Layers

  1. Preheat oven to 175°C (350°F).

  2. Grease and flour two 9-inch round pans.

  3. In a bowl, whisk together:

    • Flour

    • Sugar

    • Baking soda

    • Salt

  4. In another bowl, mix:

    • Eggs

    • Crushed pineapple (with juice)

    • Coconut milk

    • Oil

    • Vanilla

  5. Combine wet and dry ingredients. Mix until smooth.

  6. Divide batter evenly between pans.

  7. Bake for 30–35 minutes or until a toothpick comes out clean.

  8. Cool completely before assembling.


2️⃣ Make Coconut Cream Filling

  1. Beat heavy cream with powdered sugar until stiff peaks form.

  2. In a separate bowl, beat cream cheese until smooth.

  3. Stir shredded coconut into cream cheese.

  4. Gently fold whipped cream into coconut mixture.


3️⃣ Make Coconut Frosting

  1. Beat butter until creamy.

  2. Gradually add powdered sugar.

  3. Mix in coconut milk and vanilla.

  4. Stir in ½ cup toasted coconut (reserve rest for coating).


4️⃣ Assemble the Cake

  1. Place one cake layer on a plate.

  2. Spread coconut cream filling evenly on top.

  3. Place second cake layer on top.

  4. Frost entire cake with coconut frosting.

  5. Press remaining toasted coconut flakes onto sides and top.

Optional garnish:

  • Pineapple slices

  • Cherries

  • Extra coconut flakes


🍽 Serving

Serve chilled or at room temperature.


💡 Tips

✔ Use pineapple with juice (do not drain)
✔ Let cake cool fully before frosting
✔ Toast coconut lightly for best flavor
✔ Chill cake 30 minutes before slicing

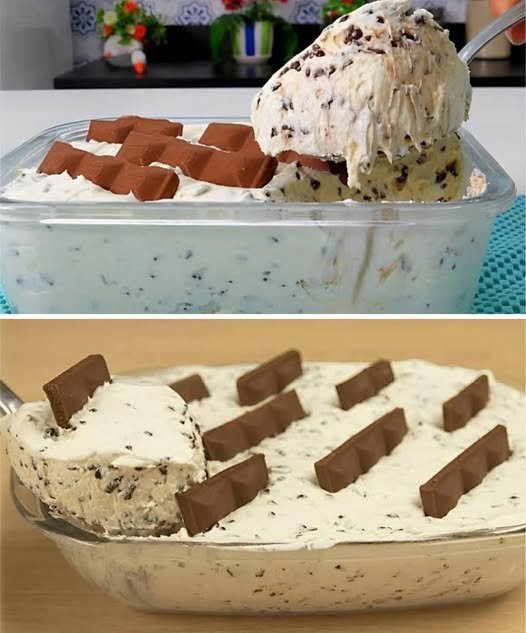
Creamy Iced Dessert (No-Bake Frozen Treat)

Creamy Iced Dessert (No-Bake Frozen Treat)

Yield: 6–8 servings
Prep Time: 15 minutes
Chill/Freeze Time: 3–4 hours
Total Time: About 4 hours
Course: Dessert

This creamy frozen dessert is made with a rich milk base, folded with whipped cream, and finished with chocolate pieces. It’s smooth, refreshing, and perfect for special occasions.


🧾 Ingredients

  • ¾ cup (200 ml) whipped cream (prepared)

  • ½ cup powdered milk

  • 1 can (395 g / 14 oz) sweetened condensed milk

  • 1 carton (240 ml / 8 oz) heavy cream

  • 1 cup chocolate flakes or chocolate chips

  • 1 chocolate bar, chopped (for topping)


👩‍🍳 Instructions


1️⃣ Prepare the Cream Base

  • In a saucepan, add:

    • Sweetened condensed milk

    • Heavy cream

    • Powdered milk

  • Stir until fully combined.


2️⃣ Thicken the Mixture

  • Place saucepan over medium heat.

  • Stir constantly to prevent sticking.

  • Cook until mixture thickens slightly and coats the back of a spoon.

  • Do not boil.


3️⃣ Cool Completely

  • Remove from heat.

  • Transfer to a bowl and let cool to room temperature.


4️⃣ Whip the Cream

  • Prepare whipped cream according to package instructions.

  • Whip until soft peaks form.


5️⃣ Combine

  • Gently fold whipped cream into the cooled milk mixture.

  • Use slow folding motions to keep the mixture airy.


6️⃣ Add Chocolate

  • Stir in chocolate flakes gently.


7️⃣ Assemble

  • Pour mixture into a glass dish.

  • Sprinkle chopped chocolate bar on top.


8️⃣ Chill

  • Refrigerate or freeze for at least 3 hours until firm and cold.


🍽 Serving

Serve well chilled or semi-frozen.


💡 Tips & Variations

✔ Add vanilla extract for extra flavor
✔ Use white chocolate or dark chocolate
✔ Add crushed cookies or nuts
✔ Use molds for individual portions
✔ Add fruit pieces for a fresh twist


❄️ Storage

  • Freezer: Up to 1 month

  • Refrigerator (soft texture): Up to 3 days


🧮 Nutrition (Approximate per serving)

  • Calories: 320–380

  • Fat: 18–22 g

  • Carbohydrates: 35–40 g

  • Protein: 6–7 g

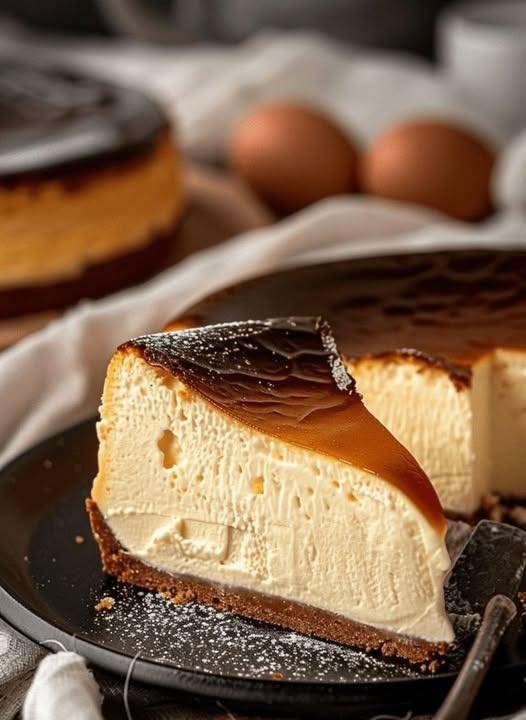
Basque Burnt Cheesecake

Basque Burnt Cheesecake

Yield: 6–8 servings
Pan Size: 6-inch (15 cm) round pan
Prep Time: 15 minutes
Bake Time: 30 minutes
Chill Time: 4 hours
Total Time: About 5 hours
Course: Dessert

Basque Burnt Cheesecake is famous for its dark, caramelized top and ultra-creamy center. It looks deeply browned on the outside but stays soft and custard-like inside. No crust is needed, and the recipe is very simple.


🧾 Ingredients

  • 340 g (12 oz) cream cheese, softened

  • 80 g (2.8 oz) white sugar

  • 3 large eggs, room temperature

  • 1 teaspoon vanilla extract

  • 1 g (about ¼ tsp) salt

  • 150 g (5.3 oz) whipping cream (heavy cream)

  • 10 g (0.4 oz) cornstarch or cake flour


👩‍🍳 Instructions


1️⃣ Prepare the Pan

  • Lightly grease a 6-inch round pan.

  • Line the bottom and sides with parchment paper, allowing paper to rise above the edges (this helps remove the cake easily).

  • Preheat oven to 210°C (415°F).


2️⃣ Soften the Cream Cheese

  • Place cream cheese in a bowl.

  • Mash with a spatula or mix on low speed until smooth and creamy.

  • Make sure there are no lumps.


3️⃣ Add Sugar

  • Add sugar to cream cheese.

  • Mix until fully combined and mixture looks lighter and smooth.


4️⃣ Add Eggs

  • Add eggs one at a time, mixing well after each addition.

  • The batter should look smooth and slightly fluffy after all eggs are added.


5️⃣ Add Flavor and Cream

  • Mix in vanilla extract and salt.

  • Add whipping cream and stir until fully blended.


6️⃣ Add Starch

  • Sift in cornstarch (or cake flour).

  • Mix gently until batter is completely smooth.


7️⃣ Pour and Remove Air

  • Pour batter into prepared pan.

  • Tap pan gently on the counter a few times to release air bubbles.


8️⃣ Bake

  • Place pan on the middle oven rack.

  • Bake at 210°C (415°F) for 30 minutes.

  • The top should be dark brown (almost burnt).

  • Center will still jiggle when shaken.


9️⃣ Cool and Chill

  • Let cheesecake cool at room temperature.

  • Refrigerate for at least 4 hours before slicing.

✔ Texture improves after chilling
✔ Flavor deepens after 1 day


🧠 Tips for Best Results

✔ All ingredients should be room temperature
✔ Do not overmix after adding eggs
✔ Do not bake longer than 30 minutes
✔ Dark top = correct result
✔ Use parchment paper, not foil


🔁 Variations

  • Stronger cheese flavor: Add 50 g more cream cheese

  • Softer texture: Add 20–30 ml more cream

  • Lemon version: Add 1 tsp lemon zest

  • Chocolate version: Add 80 g melted dark chocolate


❄️ Storage

  • Refrigerator: Up to 4 days

  • Freezer: Up to 1 month (wrap tightly)


🧮 Nutrition (Approximate per slice)

  • Calories: 280–320

  • Fat: 20–23 g

  • Carbohydrates: 18–22 g

  • Protein: 5–6 g

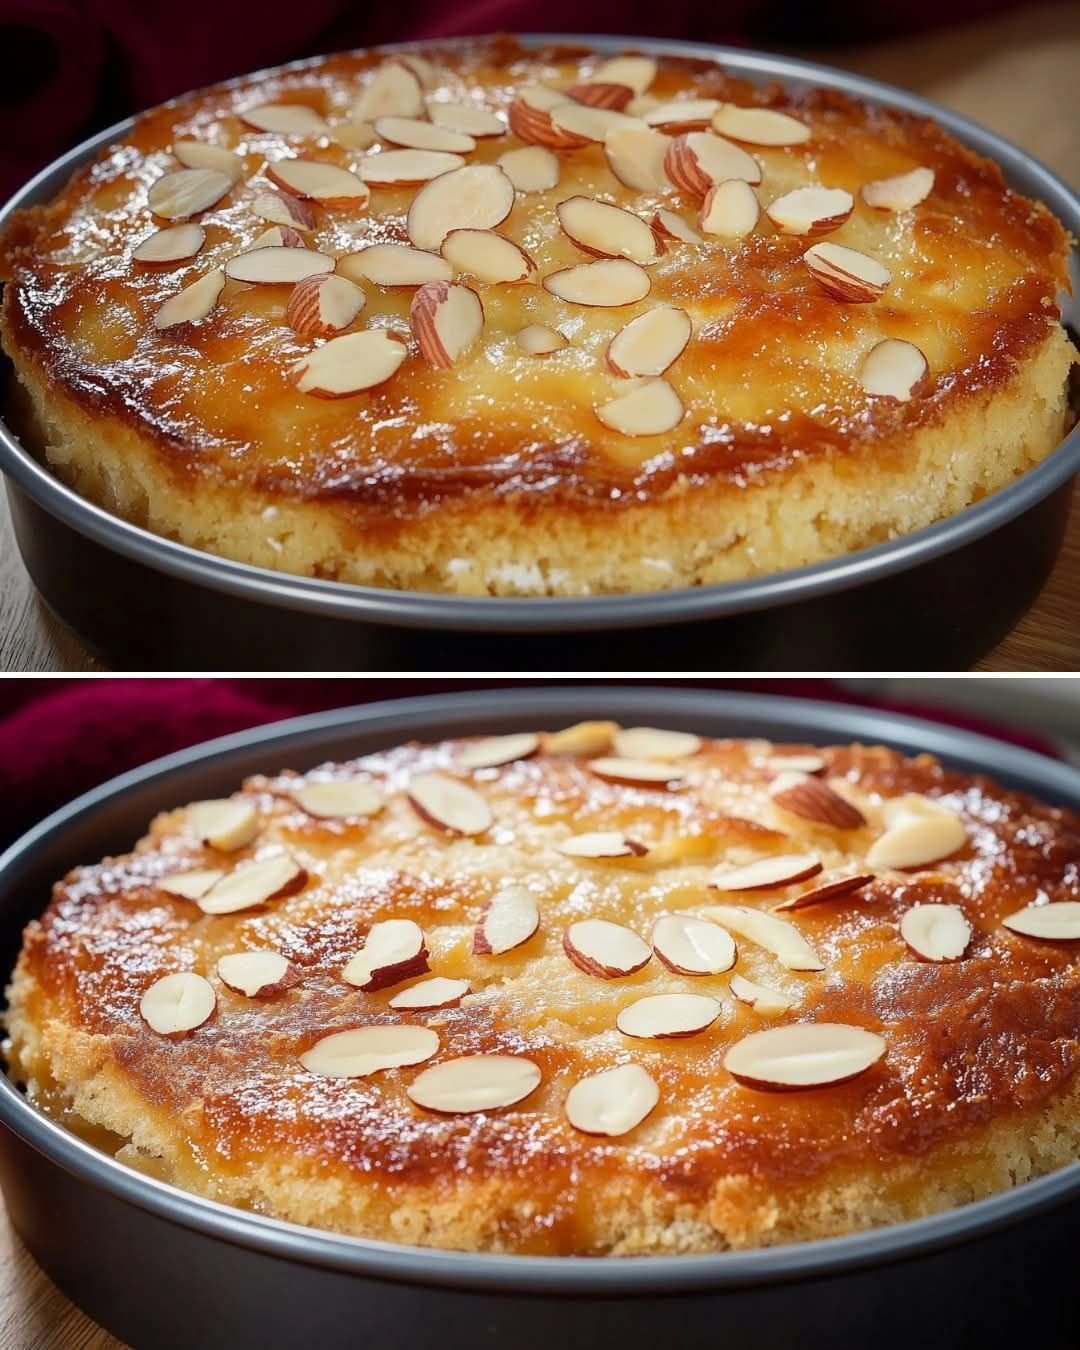
Almond Cream Cake (Yeast-Based Almond Cake)

Almond Cream Cake (Yeast-Based Almond Cake)

Yield: 12–16 slices
Prep Time: 30 minutes
Rising Time: 1 hour 20 minutes
Bake Time: 35–40 minutes
Total Time: About 3 hours
Course: Dessert

This soft, buttery yeast cake is topped with a sugar-butter crust, soaked with cream, and finished with almond flakes for a rich and tender texture. It’s similar to European bakery cream cakes and perfect for tea or special occasions.


🧾 Ingredients

For the Dough:

  • 200 ml (¾ cup + 1 tbsp) warm milk

  • 2 teaspoons active dry yeast

  • 2 tablespoons sugar

  • 2 large eggs (room temperature)

  • ½ teaspoon vanilla extract (or 2 g vanillin)

  • Pinch of salt

  • 120 g (½ cup) butter, melted and cooled

  • 470 g (about 4 cups) all-purpose flour

For the Topping:

  • 120 g (½ cup) sugar

  • 50 g (¼ cup) cold butter

  • Almond slices or almond flakes (as needed)

For the Cream Finish:

  • 125 ml (½ cup) heavy cream


👩‍🍳 Instructions


1️⃣ Activate the Yeast

  • Warm milk to about 43°C (110°F) — warm, not hot.

  • Add sugar and sprinkle yeast on top.

  • Stir gently and let sit 15–20 minutes until foamy.

✔ This step ensures a light, airy cake.


2️⃣ Prepare Wet Ingredients

In a large bowl, combine:

  • Activated yeast mixture

  • Eggs

  • Melted butter

  • Vanilla
    Whisk until smooth.


3️⃣ Make the Dough

  • Sift flour and add gradually to the wet mixture.

  • Add salt.

  • Knead for 10–15 minutes until soft and elastic.
    The dough should be smooth and slightly tacky, not sticky.


4️⃣ First Rise

  • Place dough in a greased bowl.

  • Cover and let rise in a warm place for 1 hour until doubled in size.


5️⃣ Prepare the Sugar-Butter Topping

  • Mix sugar with cold butter using fingers until crumbly.
    This creates a light crust during baking.


6️⃣ Shape and Second Rise

  • Grease a 9×13 inch (23×33 cm) pan.

  • Spread dough evenly into the pan.

  • Cover and let rise 20–30 minutes.

  • Preheat oven to 180°C (350°F).


7️⃣ Add Topping

  • Make small indentations with fingers across the dough.

  • Sprinkle sugar-butter mixture evenly on top.


8️⃣ Bake

  • Bake for 25–30 minutes until lightly golden.


9️⃣ Cream & Almond Finish

  • Remove cake from oven.

  • Pour heavy cream evenly over hot cake.

  • Sprinkle almond flakes on top.

  • Return to oven for 10 minutes.

✔ The cream soaks into the cake, making it moist and rich.


🔟 Cool and Serve

  • Cool completely in pan.

  • Cut into squares and serve at room temperature.


🧠 Helpful Tips

✔ Milk must be warm, not hot
✔ Use room-temperature eggs
✔ Bake on center rack
✔ Don’t skip second rise — it improves texture
✔ Let cake cool before slicing for best structure


🔁 Variations

  • Lemon version: Add 1 tsp lemon zest

  • Almond flavor: Add ½ tsp almond extract

  • Spiced: Add cinnamon or cardamom

  • Nut-free: Use coconut flakes instead of almonds

  • Dairy-free: Use plant milk, vegan butter, and coconut cream

  • Gluten-free: Use gluten-free baking flour blend


❄️ Storage

  • Room temperature (covered): 2–3 days

  • Refrigerator: Up to 5 days

  • Freezer: Up to 1 month (wrap tightly)


🧮 Nutrition (Approximate per slice)

  • Calories: 350–400

  • Fat: 18–22 g

  • Carbohydrates: 40–45 g

  • Protein: 6–7 g