Decadent Frozen Chocolate Peanut Bars

Decadent Frozen Chocolate Peanut Bars

Prep time: 20 mins | Freezing time: 2–3 hours | Yield: 6–8 bars

Ingredients

The Creamy Center

  • 300g cottage cheese: (or curd cheese/cream cheese for a smoother finish).

  • 40g coconut or cocoa butter: (regular butter works as a substitute).

  • 40g honey: Adjust to your preferred sweetness.

  • 1 tsp vanilla extract

  • 20g cocoa powder

The Crunchy Coating

  • 160g dark chocolate: High-quality chocolate melts most evenly.

  • 40g peanuts: Ground or finely chopped.


Instructions

1. Blend the Filling

In a food processor or high-speed blender, combine the cottage cheese, melted butter (coconut, cocoa, or regular), honey, vanilla extract, and cocoa powder. Blend until the mixture is completely smooth and no lumps from the cheese remain.

2. Shape the Bars

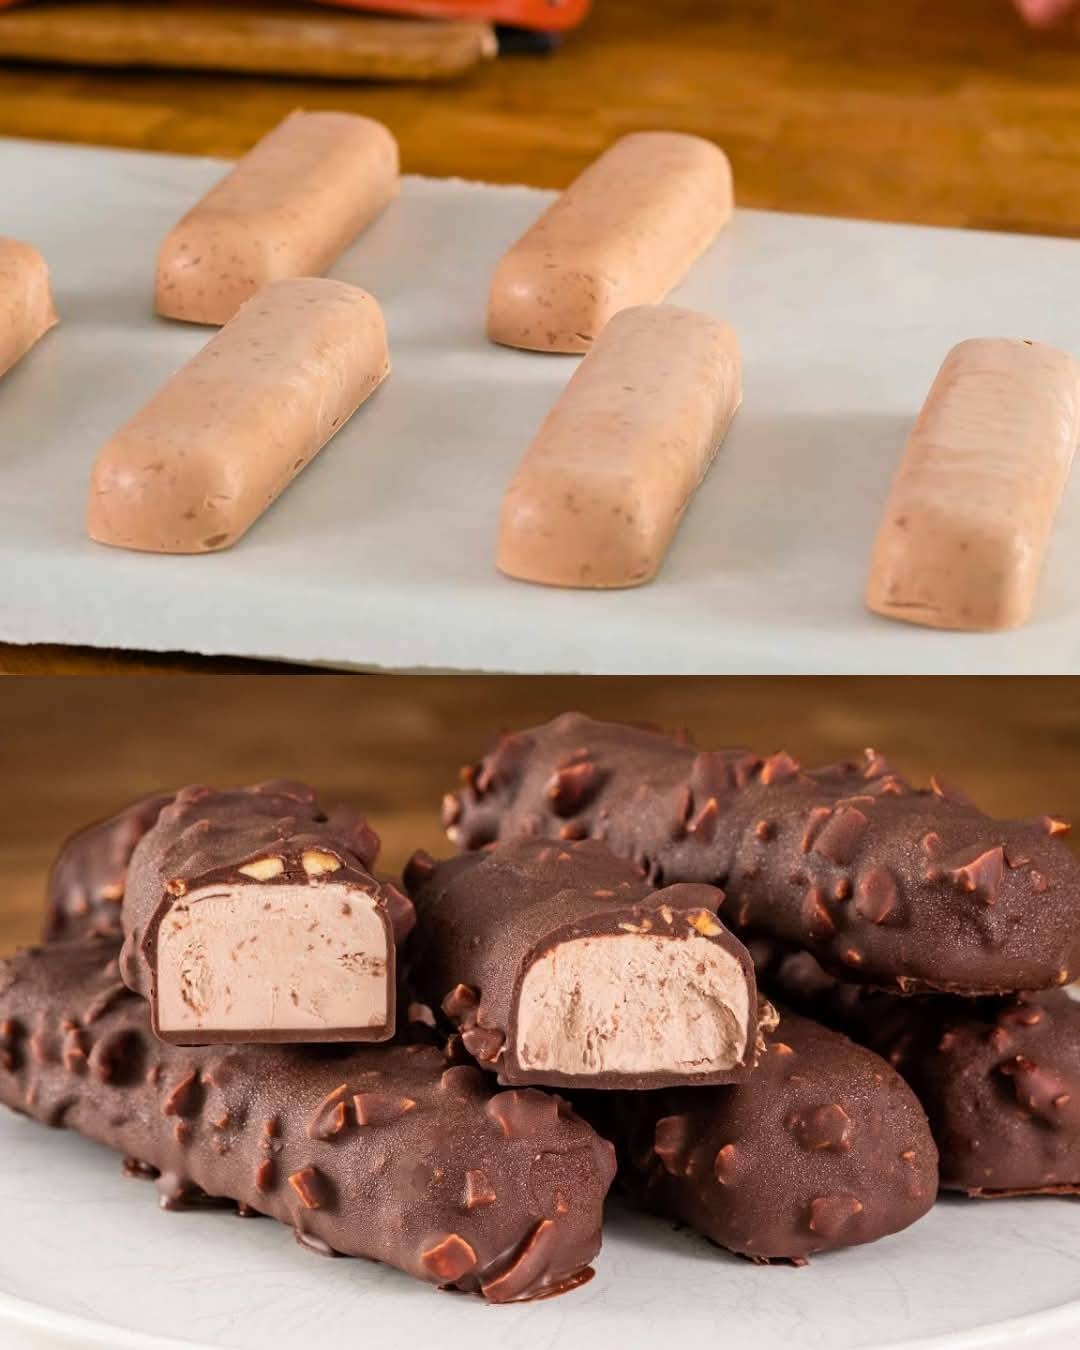
Pour the mixture into silicone bar molds. If you do not have molds, you can pour the mixture into a parchment-lined square pan and cut them into bars once partially frozen. Place in the freezer for at least 2 hours or until they are firm enough to handle.

3. Prepare the Coating

While the bars are freezing, melt the dark chocolate in a microwave-safe bowl in 30-second intervals or using a double boiler. Once smooth, stir in the ground peanuts. Pour the chocolate mixture into a tall glass; this makes dipping the bars much easier and ensures an even coat.

4. Dip and Set

Remove the frozen bars from their molds. Working quickly, dip each bar into the chocolate-peanut mixture until fully coated. Because the bars are frozen, the chocolate will set almost instantly.

5. Storage

Place the finished bars back in the freezer for another 15–20 minutes to fully set. Store them in an airtight container in the freezer.


Pro Tips for Success

  • Texture Secret: If using cottage cheese with large curds, pulsing the cheese by itself first before adding the other ingredients ensures the smoothest possible texture.

  • Butter Choice: Using coconut or cocoa butter will give the filling a firmer, “snap” quality when bitten into compared to regular butter.

  • Peanut Prep: Toast your peanuts slightly before grinding them to significantly enhance the nutty aroma of the coating.


Nutritional Highlight (Per Bar)

  • High Protein: Thanks to the cottage cheese base.

  • Antioxidants: Provided by the dark chocolate and cocoa powder.

  • Healthy Fats: From the peanuts and coconut butter.

Quick Strawberry Jam-Filled Muffins

Quick Strawberry Jam-Filled Muffins

Prep Time: 15 minutes
Bake Time: 20–25 minutes
Yield: 12 muffins

These muffins are soft and moist with a fruity jam center and a lightly crunchy almond topping. They are ideal for breakfast, snacks, or dessert.


📝 Ingredients

  • 2 large eggs

  • 100 g sugar

  • 8 g vanilla sugar (or 1 teaspoon vanilla extract)

  • Pinch of salt

  • 125 g vanilla yogurt

  • 50 ml milk

  • 100 ml vegetable or sunflower oil

  • 200 g all-purpose flour

  • 8 g baking powder

  • Strawberry jam (for filling and topping)

  • Chopped almonds (for topping)


👩‍🍳 Instructions

Step 1: Prepare the Oven and Pan

Preheat oven to 350°F (175°C).
Line a muffin tin with paper liners or lightly grease each cup.


Step 2: Mix the Eggs and Sugar

In a large bowl:

  • Add eggs, sugar, vanilla sugar, and salt.

  • Whisk until the mixture becomes pale and slightly thick.


Step 3: Add the Liquid Ingredients

Stir in:

  • Vanilla yogurt

  • Milk

  • Oil

Whisk until the mixture is smooth and evenly blended.


Step 4: Add the Dry Ingredients

Sift together:

  • Flour

  • Baking powder

Add them to the wet mixture.
Fold gently with a spatula until just combined.
Do not mix too much, as this can affect the texture.


Step 5: Fill the Muffin Cups

  • Spoon batter into each cup until half full.

  • Add 1 teaspoon strawberry jam in the center of each.

  • Cover with more batter until cups are about ¾ full.


Step 6: Add Toppings

  • Sprinkle chopped almonds on top of each muffin.

  • Add a small dot of jam on the top for appearance.


Step 7: Bake

Bake for 20–25 minutes, or until:

  • The tops are lightly golden

  • A toothpick inserted into the muffin (not the jam) comes out clean


Step 8: Cool

Let muffins cool in the pan for 5 minutes.
Transfer to a wire rack to cool completely or serve slightly warm.


🌟 Tips for Best Results

  • Yogurt: Vanilla or plain yogurt works well.

  • Jam options: Strawberry, raspberry, apricot, or mixed berry can be used.

  • Topping alternative: Use chopped walnuts or omit nuts if preferred.

  • Do not overfill: This prevents overflow during baking.


📦 Storage

  • Store in an airtight container at room temperature for up to 3 days.

  • Refrigerate for up to 5 days.

Soft Orange Sugar Cookie

Soft Orange Sugar Cookie

Prep Time: 15 minutes
Bake Time: 12–15 minutes
Yield: 20–24 cookies

These cookies are lightly crisp on the outside and soft on the inside, with a fresh orange flavor and gentle sweetness.


📝 Ingredients

  • 2 large eggs

  • 80 g sugar (plus extra for coating)

  • 120 ml sunflower oil (or any light vegetable oil)

  • 1 teaspoon vanilla extract

  • Zest of 1 orange, finely grated

  • 300 g all-purpose flour

  • 1 teaspoon baking powder

  • Pinch of salt


👩‍🍳 Instructions

Step 1: Prepare the Wet Mixture

In a large bowl:

  1. Add the eggs and sugar.

  2. Whisk until the mixture becomes pale and slightly thick.

  3. Add sunflower oil, vanilla extract, and orange zest.

  4. Mix well until evenly combined.


Step 2: Mix the Dry Ingredients

In another bowl:

  • Add flour, baking powder, and salt.

  • Whisk or sift together to distribute evenly.


Step 3: Make the Dough

  • Gradually add the dry mixture into the wet mixture.

  • Stir with a spatula or spoon until a soft dough forms.

Tip: If the dough feels too soft or sticky, place it in the refrigerator for 15 minutes to make shaping easier.


Step 4: Shape the Cookies

Preheat oven to 350°F (175°C).
Line a baking tray with parchment paper.

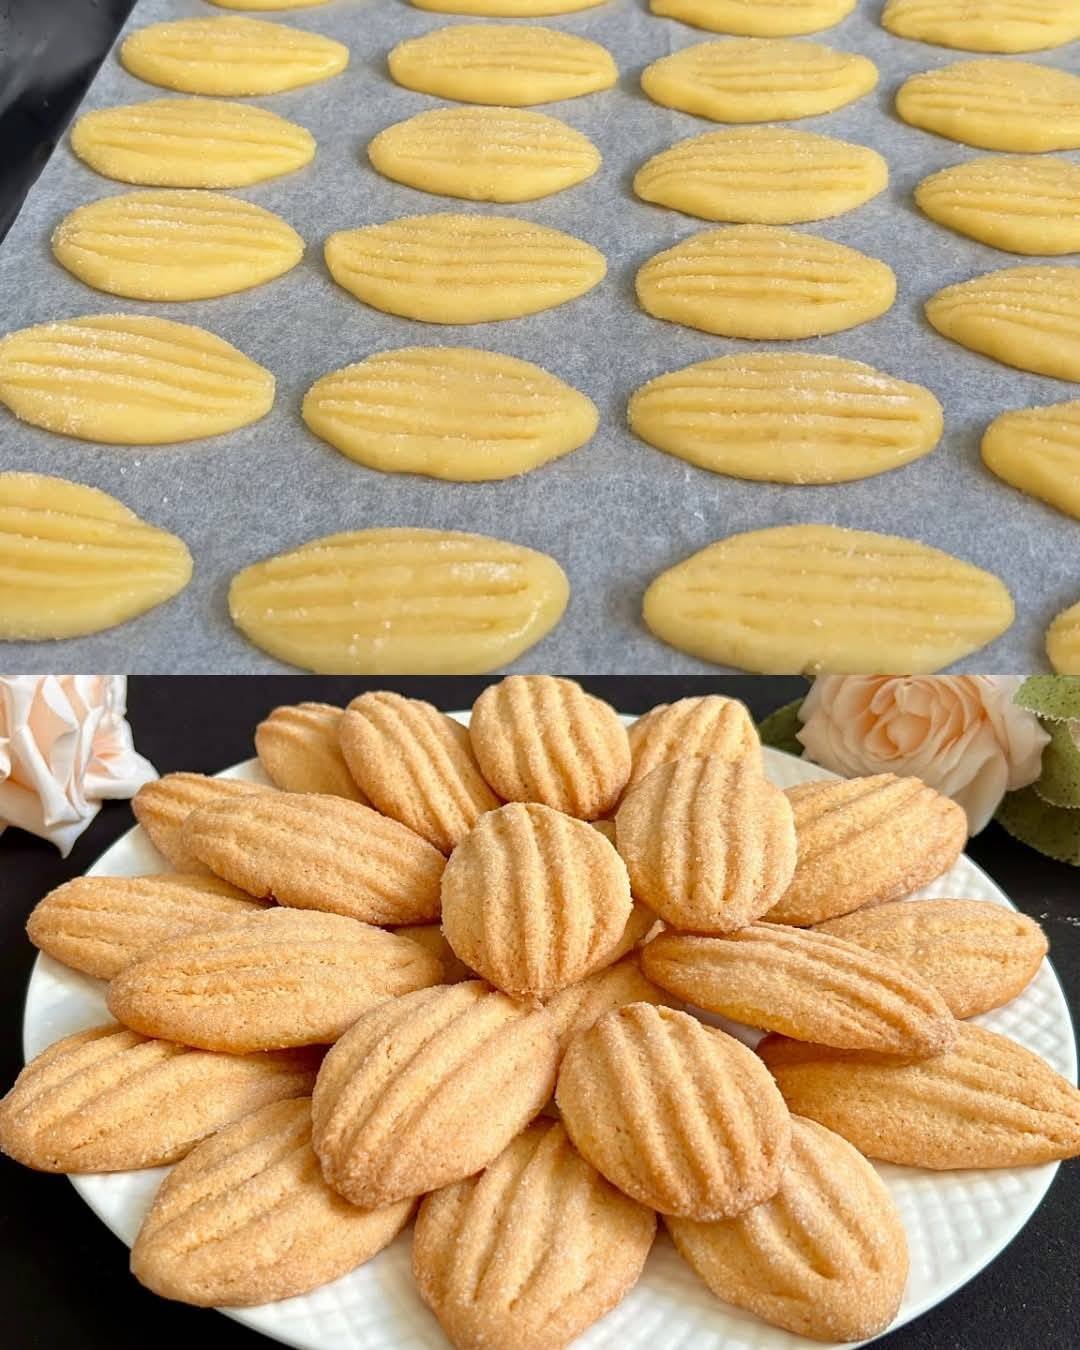
  1. Take about 1 tablespoon of dough and roll into a ball.

  2. Gently shape into a small oval.

  3. Press one side into granulated sugar.

  4. Place sugar-side up on the tray.

  5. Lightly press with a fork to make a pattern.

Leave space between cookies.


Step 5: Bake

Bake for 12–15 minutes until the edges turn light golden while the tops remain pale.

Do not overbake, or cookies will become dry.


Step 6: Cool

Let cookies rest on the tray for 5 minutes, then move to a wire rack to cool completely.

They will firm slightly as they cool.


🌟 Tips for Best Results

  • Zesting: Only grate the orange-colored peel. Avoid the white layer underneath.

  • Oil: Use a neutral-flavored oil for best taste.

  • Texture: For extra softness, do not brown the tops.

  • Storage: Keep in an airtight container for up to 7 days at room temperature.

Creamy Homemade Filled Donuts

Creamy Homemade Filled Donuts

Yield: 12–15 donuts
Prep Time: 20 minutes + rising time
Cook Time: 15 minutes

Soft fried donuts filled with smooth vanilla cream and coated in sugar.


📝 Ingredients

For the Dough

  • 500 g all-purpose or bread flour

  • 8 g dry yeast (or 12 g fresh yeast)

  • 200 g milk, lukewarm

  • 80 g sugar

  • 50 g butter, melted and cooled

  • 1 medium egg

  • 1 pinch salt

  • Oil for frying (vegetable or canola)

  • Granulated sugar (for coating)


For the Vanilla Cream Filling

  • 2 cups milk

  • ½ cup sugar

  • ¼ cup cornstarch

  • 4 egg yolks

  • 1 teaspoon vanilla extract


👩‍🍳 Instructions

Step 1: Activate the Yeast

In a large bowl, mix:

  • Lukewarm milk

  • Sugar

  • Yeast

Let sit for 5 minutes until slightly foamy.


Step 2: Make the Dough

Add to the yeast mixture:

  • Egg

  • Melted butter

Mix well.
Gradually add flour and salt.
Mix until a soft dough forms.

Transfer to a floured surface and knead for 8–10 minutes until smooth and elastic.


Step 3: First Rise

Place dough in a lightly greased bowl.
Cover with a clean cloth.
Let rise in a warm place for 1 to 1½ hours or until doubled in size.


Step 4: Shape the Donuts

Punch down the dough.
Roll out to ½ inch thickness.
Cut into circles using a cutter or glass.

Place on parchment paper.
Cover and let rise again for 30–45 minutes.


Step 5: Prepare the Cream Filling

In a bowl, whisk:

  • Egg yolks

  • Sugar

  • Cornstarch

Heat milk in a pan until warm (not boiling).
Slowly whisk hot milk into egg mixture.
Return to pan and cook on medium heat, stirring constantly until thick.

Remove from heat.
Add vanilla extract.
Transfer to a bowl and cover with plastic wrap touching the surface.
Cool completely.


Step 6: Fry the Donuts

Heat oil to 350°F (175°C).
Fry donuts in batches for about 2 minutes per side until golden.

Remove and drain on paper towels.


Step 7: Coat and Fill

Roll warm donuts in granulated sugar.

Make a small hole on the side of each donut using a knife or straw.
Fill a piping bag with cooled cream.
Pipe cream into each donut until filled.


⭐ Tips for Best Results

  • Milk temperature: Should be warm, not hot.

  • Oil temperature: Keep steady for even frying.

  • Do not overcrowd when frying.

  • Filling options: Jam, chocolate cream, or custard work well.

Banana Carrot Raisin Bread

Banana Carrot Raisin Bread

Prep Time: 15 minutes
Bake Time: 50–60 minutes
Yield: 1 standard loaf (9×5 inch pan)

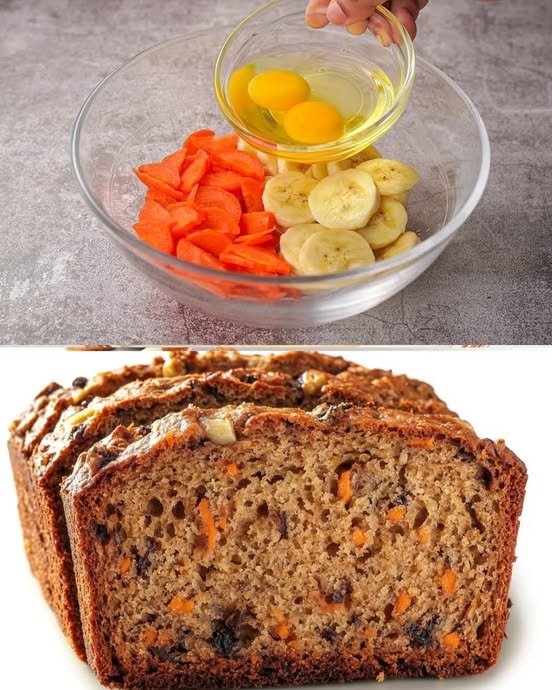
This bread is soft, naturally sweet from bananas and carrots, and dotted with juicy raisins. It’s perfect for breakfast, tea time, or a light dessert.


📝 Ingredients

Wet Ingredients

  • 2 medium ripe bananas, mashed well

  • 1 cup grated carrots (about 2 medium carrots)

  • 2 large eggs, at room temperature

  • ½ cup (120 ml) vegetable oil

  • ½ cup (100 g) brown sugar, packed

  • 1 teaspoon vanilla extract

Dry Ingredients

  • 1½ cups (190 g) all-purpose flour

  • 1 teaspoon baking soda

  • 1 teaspoon baking powder

  • ½ teaspoon salt

  • 1 teaspoon ground cinnamon

Mix-ins

  • ½ cup (80 g) raisins


👩‍🍳 Instructions

Step 1: Prepare the Pan and Oven

Preheat your oven to 350°F (175°C).
Grease a 9×5 inch loaf pan with oil or butter, or line it with parchment paper so the bread can be removed easily after baking.


Step 2: Mix the Wet Ingredients

In a large mixing bowl:

  1. Mash the bananas until smooth.

  2. Add grated carrots.

  3. Add eggs, vegetable oil, brown sugar, and vanilla extract.

  4. Whisk everything together until well blended and smooth.


Step 3: Mix the Dry Ingredients

In a separate bowl:

  • Add flour, baking soda, baking powder, salt, and cinnamon.

  • Whisk or sift them together so the leavening agents and spices are evenly mixed.


Step 4: Combine Wet and Dry

  • Gradually add the dry ingredients into the wet mixture.

  • Stir gently using a spatula or spoon until just combined.

  • Do not overmix; overmixing can make the bread dense instead of soft.


Step 5: Add the Raisins

  • Fold in the raisins gently so they are evenly spread throughout the batter.


Step 6: Bake

  • Pour the batter into the prepared loaf pan.

  • Smooth the top with a spatula.

  • Bake for 50–60 minutes.

  • Check doneness by inserting a toothpick into the center:

    • It should come out clean or with a few moist crumbs.


Step 7: Cool

  • Let the bread cool in the pan for 10 minutes.

  • Remove it and place it on a wire rack to cool completely before slicing.


🌟 Tips for Best Results

  • Carrots: Use the fine side of a grater for a smoother texture.

  • Extra texture (optional): Add ½ cup chopped walnuts or pecans along with raisins.

  • Sweetness: You may reduce sugar slightly if your bananas are very ripe.

  • Storage:

    • Keep in an airtight container at room temperature for 3–4 days.

    • Refrigerate for up to 1 week.

    • Freeze slices for up to 2 months.

Creamy Amish Baked Custard

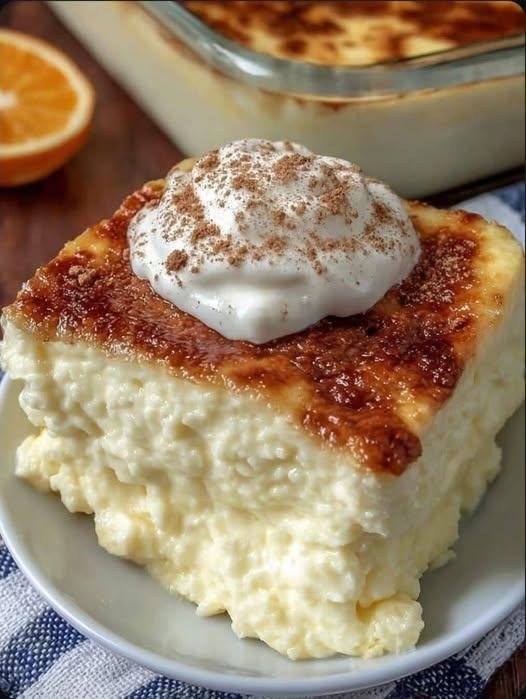
This Amish Baked Custard is a classic, simple dessert prized for its silky, melt-in-your-mouth texture and gentle sweetness. Unlike many modern custards that use heavy cream, this traditional version relies on sweetened condensed milk and a careful tempering method to create a light, airy consistency. Finished with a sprinkle of nutmeg, it’s comforting served warm from the oven or chilled for a cool treat.


Amish Baked Custard

Ingredients

Ingredient Amount
Sweetened condensed milk 1 can (14 oz)
Hot water 4 cups
Eggs 6
Vanilla extract 2 teaspoons
Salt ¼ teaspoon
Nutmeg For garnish

How to Make Amish Baked Custard

Step 1: Prep the Base
Preheat oven to 325°F. In a large bowl, combine the sweetened condensed milk and hot water, stirring until smooth.

Step 2: Beat the Eggs
In a separate bowl, beat the eggs until light and fluffy. This helps give the custard its signature lift.

Step 3: Temper the Eggs
Slowly add a small amount of the hot milk mixture to the eggs while whisking constantly to prevent scrambling. Once warmed, stir the eggs back into the main milk mixture. Add vanilla and salt.

Step 4: Set Up a Water Bath
Pour the mixture into individual ramekins or a 2-quart baking dish. Place the dishes in a larger, high-sided pan. Carefully add about ½ inch of hot water to the outer pan to ensure gentle, even cooking.

Step 5: Bake

  • Ramekins: Bake for 1 hour.
  • Large Dish: Bake for 1 hour 40 minutes.
    Custard is done when a knife inserted in the center comes out clean.

Step 6: Cool and Garnish
Let the custard cool for at least 1 hour to set. Sprinkle with nutmeg before serving. Serve warm, or refrigerate for a chilled version.