Lemon Blueberry Cream Cheese Pound Cake

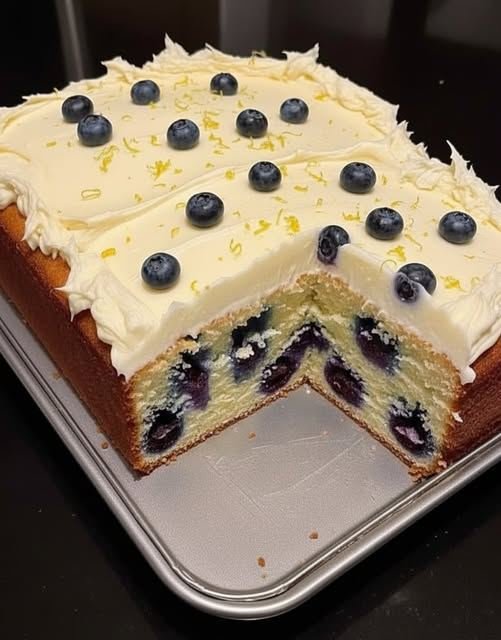
Spring has definitely arrived with this Lemon Blueberry Cream Cheese Pound Cake! This recipe balances zesty citrus with a rich, protein-friendly almond flour base for a dessert that feels indulgent but stays light.


Lemon Blueberry Cream Cheese Pound Cake

Zesty, moist, and perfectly topped with a tangy cream cheese frosting.

Prep time: 15 mins | Cook time: 35–40 mins | Yields: 1 loaf cake

Ingredients

The Cake Base

  • 4 Large Eggs

  • 4 oz Cream Cheese: Softened to room temperature.

  • 4 tbsp Unsalted Butter: Softened.

  • 2 tsp Vanilla Extract

  • 1 Lemon: Both the zest and the juice.

  • 1 ¼ cups Almond Flour

  • 3–4 tbsp powdered monk fruit or your preferred sugar-free sweetener.

  • 2 tsp Baking Powder

  • Pinch of Salt

  • ½ cup Blueberries: Fresh or frozen.

Tangy Lemon Frosting

  • 4 oz Cream Cheese: Softened.

  • 3 tbsp butter: softened.

  • ¼ cup Sweetener of choice

  • 1 tsp Vanilla Extract

  • 1–2 tsp Lemon Juice


Instructions

  1. Mix the Wet Base: In a large bowl, whisk together the eggs, softened cream cheese, butter, vanilla, lemon juice, and zest until the mixture is creamy and smooth.

  2. Incorporate Dry Ingredients: Add the almond flour, baking powder, salt, and sweetener one at a time. Stir gently until just combined.

  3. Prepare the Berries: Toss your blueberries lightly in a teaspoon of extra almond flour. This “secret” step keeps the blueberries from sinking to the bottom of your cake! Gently fold them into the batter.

  4. Bake: Pour the batter into a buttered loaf pan. Bake at 175°C (350°F) for 35–40 minutes until the top is golden and a toothpick comes out clean.

  5. Cool: Allow the cake to cool fully before frosting; otherwise, the cream cheese topping will melt!

  6. Frosting and Garnish: Beat the frosting ingredients until fluffy. Spread generously over the cake and garnish with extra blueberries and lemon zest for a professional finish.


Success Tip

For the best texture, ensure your cream cheese and butter are truly softened before mixing. This prevents lumps and ensures that beautiful, even crumb seen in the photo!
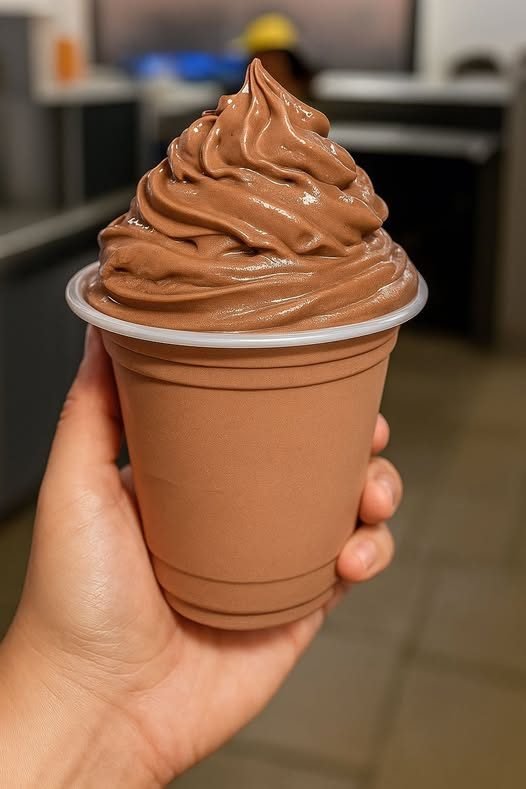
Easy Cottage Cheese Chocolate Mousse

Easy Cottage Cheese Chocolate Mousse

Creamy, chocolatey, and packed with protein.

Total Time: 5 minutes | Servings: 2

Ingredients

  • 1 cup Low-fat cottage cheese: Provides a creamy, protein-rich base.

  • 1–2 tbsp Unsweetened cocoa powder: Adjust based on how dark you like your chocolate.

  • 1–2 tbsp sweetener: Use stevia, monk fruit, or honey.

  • 1 tsp Vanilla extract: For depth of flavor.

  • 2 tbsp milk: almond milk or any milk of choice to help with blending.

  • Optional toppings: extra cocoa powder, dark chocolate shavings, or fresh berries.


Instructions

  1. Blend: Place the cottage cheese, cocoa powder, sweetener, vanilla, and milk into a blender or food processor. Blend for 30–60 seconds until the texture is completely smooth and creamy.

  2. Adjust: Give the mousse a taste. If you prefer it sweeter or more chocolatey, add a little extra sweetener or cocoa and blend briefly again.

  3. Chill (Optional): While you can eat this immediately, refrigerating it for 20–30 minutes will result in a firmer, chilled texture.

  4. Serve: Spoon the mixture into bowls and garnish with your favorite toppings like berries or chocolate shavings.


Quick Tips & Benefits

  • Texture Hack: For an extra light and fluffy mousse, fold in a tablespoon of light whipped cream after you’ve finished blending.

  • Effortless: This is a “no-bake” dessert with very minimal cleanup.

  • Diet Friendly: This is an excellent low-SmartPoints dessert, roughly 2–3 points per serving depending on your choice of sweetener.

  • Batch Prep: You can easily double or triple this recipe to have healthy snacks ready for the whole week.

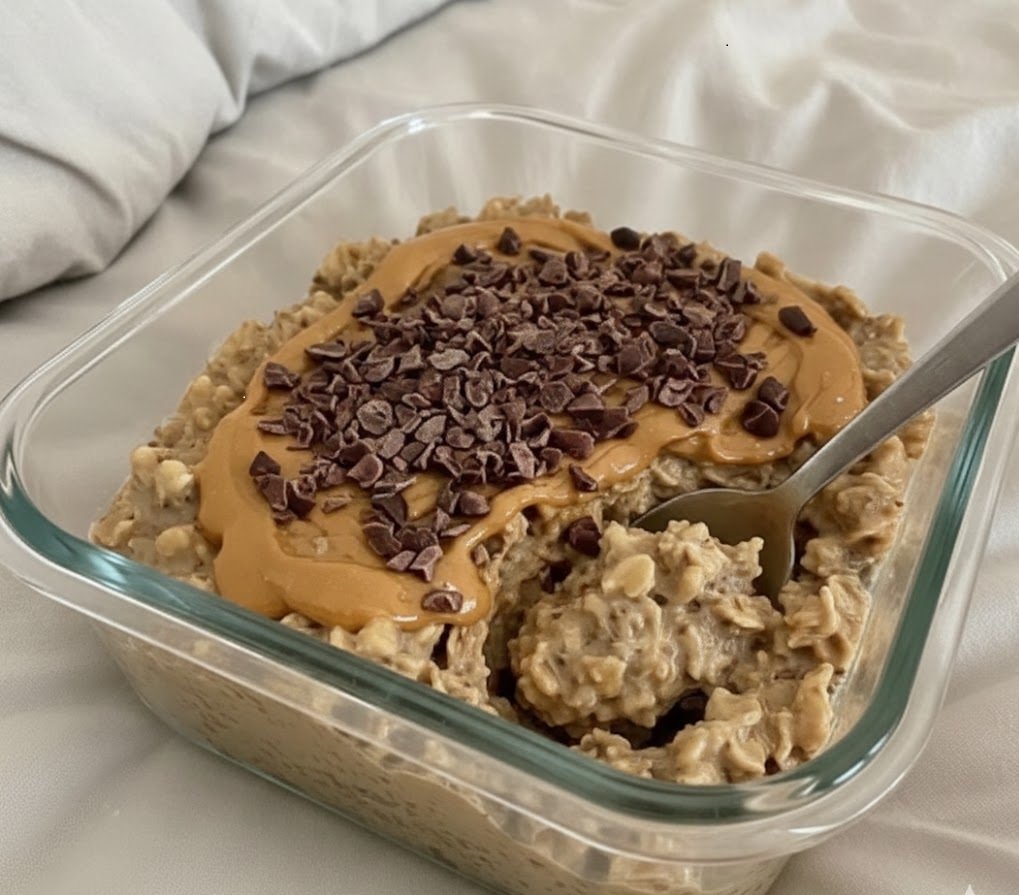
High-Protein Mocha Crunch Bowl

High-Protein Mocha Crunch Bowl

A creamy overnight oat bowl with chocolate–coffee flavor and a crunchy topping.

Prep Time: 5 minutes
Chill Time: 2 hours (or overnight)
Yield: 1 serving


📝 Ingredients

Base:

  • 1 cup rolled oats (old-fashioned oats work best for texture)

  • 1 cup non-fat plain Greek yogurt

  • 1 scoop chocolate protein powder (whey or whey-casein blend preferred)

  • 1 teaspoon instant coffee or espresso powder

  • 1 tablespoon hot water (to dissolve coffee)

  • ¼ cup unsweetened almond milk (or milk of choice)

Topping:

  • 1 tablespoon peanut butter

  • 1 tablespoon cacao nibs or dark chocolate chips (regular or sugar-free)

Optional Sweetener (to taste):

  • Stevia, monk fruit, honey, or maple syrup


👩‍🍳 Instructions

1️⃣ Dissolve the Coffee

In a small bowl, mix the instant coffee or espresso powder with 1 tablespoon hot water. Stir until fully dissolved.


2️⃣ Make the Mocha Base

In a jar or meal prep container, add:

  • Greek yogurt

  • Chocolate protein powder

  • Dissolved coffee

Whisk or stir until smooth and free of lumps.


3️⃣ Add the Oats

Add the rolled oats and almond milk to the container.
Mix well so all oats are evenly coated.

If the mixture seems very thick, add 1–2 more tablespoons of milk.


4️⃣ Taste and Adjust

Taste the mixture.
If needed, add a small amount of sweetener and stir again.


5️⃣ Add the Crunch Topping

Smooth the surface with a spoon.
Drizzle peanut butter over the top.
Sprinkle cacao nibs or chocolate chips evenly.


6️⃣ Chill

Cover tightly and refrigerate for at least 2 hours or overnight.
This allows the oats to soften and the flavors to blend.


💡 Optional Add-Ins

  • 1 tablespoon chia seeds or ground flaxseed

  • ½ teaspoon vanilla extract

  • A pinch of salt to enhance chocolate flavor

  • Banana or berries added before serving


🧊 Storage

Store covered in the refrigerator.
Best enjoyed within 2–3 days.

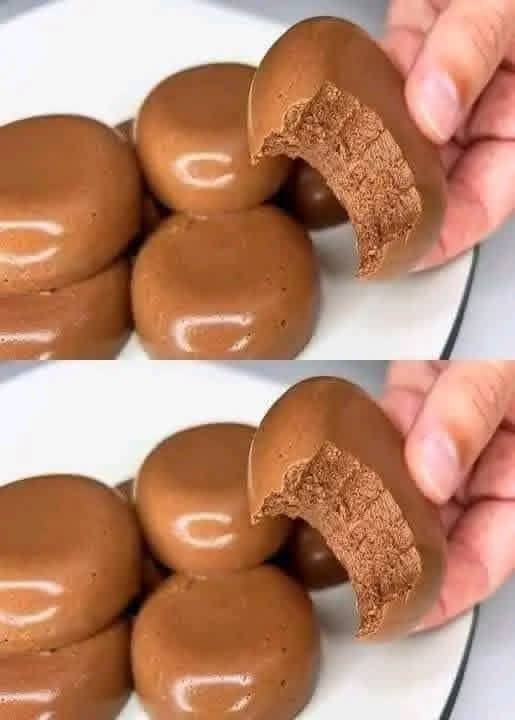
3-Ingredient Chocolate Cloud Bites

3-Ingredient Chocolate Cloud Bites

Soft, glossy chocolate bites with a texture between mousse and panna cotta.
Light, simple, and portion-controlled.

Prep Time: 10 minutes
Chill Time: 3–4 hours
Yield: 6–8 small bites


📝 Ingredients

1½ cups milk of choice
(Use skim milk, unsweetened almond milk, or oat milk for a lighter version)

1 packet (about 40 g / 1.4 oz) sugar-free chocolate instant pudding mix
OR
3 tablespoons cocoa powder + sweetener to taste (stevia, monk fruit, etc.)

1 packet (7 g / 2¼ tsp) unflavored gelatin

Optional:
Cooking spray or a few drops of oil (for molds)


👩‍🍳 Instructions

1️⃣ Bloom the Gelatin

Pour ¼ cup cold milk into a small bowl.
Sprinkle the gelatin evenly over the surface.
Let it sit 5 minutes until it becomes thick and spongy.


2️⃣ Heat the Chocolate Base

In a saucepan over medium heat, add:
• Remaining milk
• Chocolate pudding mix (or cocoa + sweetener)

Whisk continuously so it does not stick or burn.
Heat until steaming, not boiling.


3️⃣ Add the Gelatin

Add the bloomed gelatin into the warm chocolate mixture.
Whisk for 1–2 minutes until fully dissolved and smooth.


4️⃣ Pour into Molds

Lightly grease silicone molds or small cups.
Pour mixture evenly into molds.

Tap gently on the counter to remove air bubbles.


5️⃣ Chill

Refrigerate for 3 to 4 hours, or until fully set and firm.


6️⃣ Serve

Carefully remove from molds.
They should be:
• Smooth and shiny outside
• Soft and airy inside


💡 Optional Variations

Mousse-Style Texture:
Let mixture cool slightly, then gently fold in
½ cup whipped topping (sugar-free or regular) before molding.

Flavor Ideas:
• Add ½ tsp vanilla
• Add a pinch of salt
• Add espresso powder for mocha flavor


🧊 Storage

Store in an airtight container in the refrigerator.
Best consumed within 3–4 days.

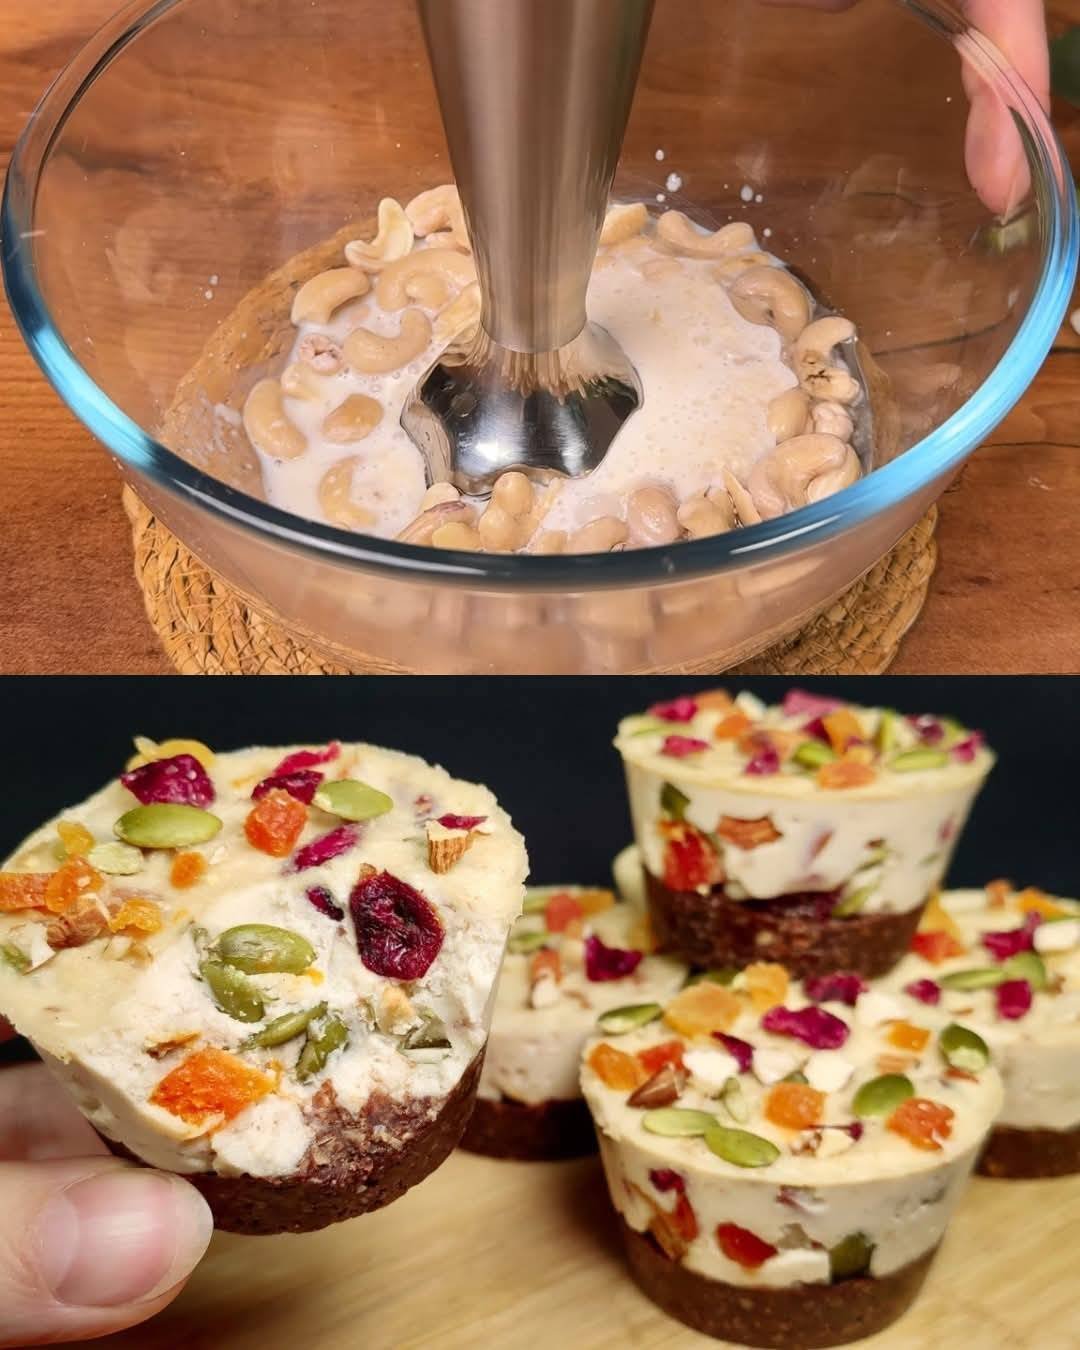
No-Bake Nutty Chocolate Energy Bars with Cashew Cream

No-Bake Nutty Chocolate Energy Bars with Cashew Cream


🧾 Ingredients

For the Chocolate Base:

  • 100 g (3½ oz) oats

  • 60 g (2 oz) dates, pitted

  • 2 tablespoons peanut butter

  • 1 teaspoon cocoa powder

  • ½ cup mixed nuts (almonds, hazelnuts, or walnuts), lightly roasted and chopped

For the Cashew Cream:

  • 150 g (5 oz) cashews (soaked in hot water for 30–40 minutes)

  • ¼ cup water or plant milk (add gradually)

  • 1 tablespoon honey or maple syrup (optional)

Topping (optional):

  • Pumpkin seeds

  • Dried cranberries

  • Chopped nuts


🧑‍🍳 Instructions

1️⃣ Prepare the Chocolate Base

  • Add oats, dates, peanut butter, and cocoa powder to a food processor.

  • Blend until the mixture becomes thick and sticky.

  • Transfer to a bowl and mix in the chopped nuts by hand.

  • Press the mixture firmly into the bottom of a lined square pan or muffin mold to form an even layer.


2️⃣ Make the Cashew Cream

  • Drain the soaked cashews.

  • Add them to a blender with a small amount of water or plant milk.

  • Blend until smooth and creamy. Add liquid slowly until desired texture is reached.


3️⃣ Assemble the Bars

  • Spread the cashew cream evenly over the chocolate base.

  • Sprinkle toppings over the surface if desired.


4️⃣ Chill and Set

  • Place in the freezer for 2 hours or until firm.

  • Remove and cut into bars or squares.


🍽 Storage

  • Store in an airtight container in the refrigerator for up to 7 days.

  • For longer storage, keep in the freezer and thaw slightly before eating.


✅ Helpful Tips

  • If dates are dry, soak them in warm water for 10 minutes before blending.

  • For a softer base, add 1–2 teaspoons of milk while blending.

  • Use parchment paper for easy removal.

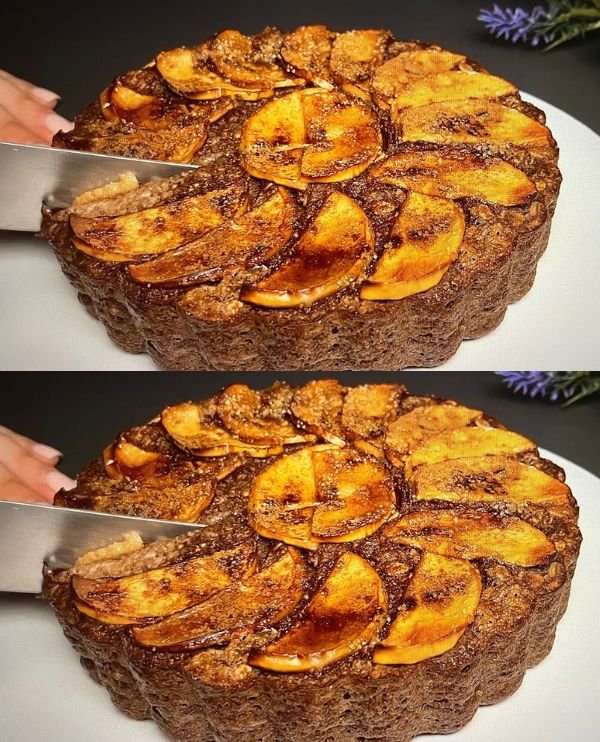
Easy & Delicious Oatmeal Apple Cake

Easy & Delicious Oatmeal Apple Cake


🧾 Ingredients

  • 200 g oat flakes

  • 250 ml milk

  • 3 eggs (room temperature)

  • 2 ripe bananas

  • 1 apple

  • Cinnamon, to taste

Optional (for extra flavor or texture):

  • 1 tablespoon honey or maple syrup (only if bananas are not sweet)

  • A handful of chopped walnuts or pecans


👩‍🍳 Instructions

1. Soak the Oats

Place the oat flakes in a large mixing bowl.

Pour in the milk and stir well.

Let the mixture rest for 10 minutes so the oats soften and absorb the liquid. This helps create a moist and tender cake texture.


2. Prepare the Fruit

Peel the bananas and mash them with a fork until smooth.

Wash the apple, remove the core, and slice it into thin, even slices. Set aside for topping.


3. Make the Batter

Add the mashed bananas to the soaked oats.

Crack in the eggs.

Add cinnamon according to your taste.

Mix everything thoroughly with a whisk or spoon until the batter is smooth and evenly combined.

If using honey or maple syrup, stir it in now.


4. Prepare for Baking

Preheat your oven to 180°C (350°F).

Grease a round cake pan or line it with baking paper.

Pour the batter into the pan and spread it evenly.

Arrange the apple slices neatly on top in a circular or decorative pattern.

If using nuts, sprinkle them over the top.


5. Bake

Place the pan in the preheated oven.

Bake for 35–40 minutes, or until:

  • The cake feels firm in the center

  • A toothpick inserted into the middle comes out clean

  • The apple slices on top are lightly golden

Remove from the oven and let the cake cool in the pan for about 10–15 minutes.


🍽 Serving Suggestions

Serve:

  • Warm or cold

  • With tea or coffee

  • With yogurt or a light drizzle of honey

  • As a breakfast cake or snack


⭐ Helpful Tips

✔ Use ripe bananas for natural sweetness
✔ Thin apple slices bake more evenly
✔ Do not overbake to keep the cake soft
✔ You can add raisins or dates for extra sweetness


📦 Storage

  • Store covered at room temperature for 1 day

  • Refrigerate for up to 3 days

  • Can be frozen in slices for up to 1 month