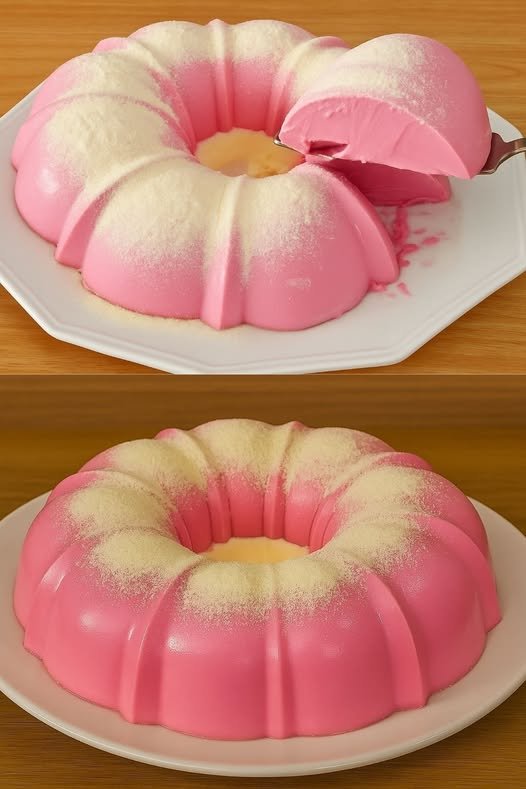
2-Ingredient Strawberry Cloud Mousse

2-Ingredient Strawberry Cloud Mousse

This dessert relies on the air bubbles whipped into the mixture to give it that “cake-like” structure while remaining a melt-in-your-mouth gelatin.

Ingredients

  • Strawberry Gelatin: 2 packets (about 80g-90g total).

  • Heavy Cream or Evaporated Milk: 2 cups (approx. 500 ml), chilled very cold.

    • Note: You will also need 2 cups of hot water to dissolve the gelatin, but since water is a pantry staple, it’s usually not counted in the “2-ingredient” claim!

Instructions

  1. Dissolve the Gelatin: In a large bowl, mix the 2 packets of strawberry gelatin with 2 cups of boiling water. Stir until completely dissolved and let it cool to room temperature (but don’t let it set).

  2. Whip the Base: In a separate bowl, whip the chilled heavy cream (or evaporated milk) until it is thick and doubled in volume.

  3. Combine: Slowly pour the room-temperature gelatin into the whipped cream while continuing to whisk at low speed until the color is uniform and the mixture is frothy.

  4. Mold: Lightly grease a Bundt pan or silicone mold with a tiny bit of neutral oil. Pour the mixture in.

  5. Chill: Refrigerate for at least 4 hours, or ideally overnight, until firm.

  6. Unmold: Carefully pull the edges away from the mold with your fingers to break the vacuum, then flip onto a plate.

  7. Finish: Dust the top with powdered milk (as seen in your photo) or powdered sugar for that snowy finish.


Pro-Tips for Success

  • The “Magic” Dust: That white powder on top is almost certainly powdered milk (like Nido). It adds a creamy sweetness that balances the tart strawberry without making it soggy like powdered sugar can.

  • Temperature is key: if the gelatin is too hot, it will melt your cream. If it’s too cold, it will clump. Aim for a “lukewarm” touch.
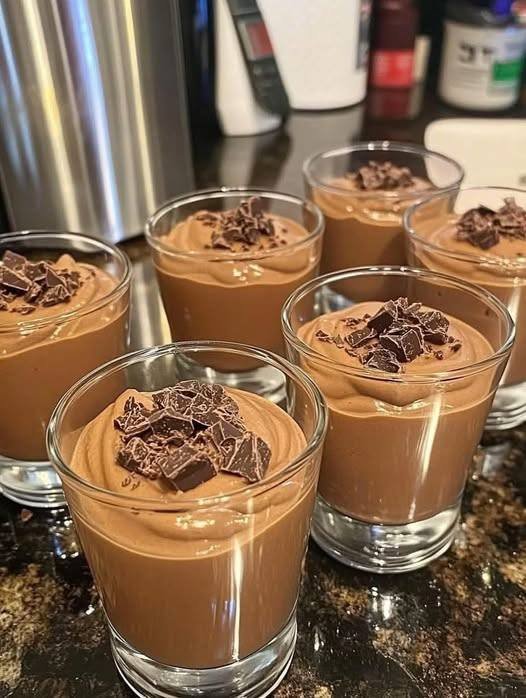
Whipped Chocolate Dessert

Whipped Chocolate Dessert

A chilled chocolate dessert with a soft, airy texture made by folding whipped topping into prepared pudding.

Prep Time: 5 minutes
Chill Time: 30 minutes
Servings: 4


🧾 Ingredients

• 1 box (about 1 oz / 28 g) chocolate instant pudding mix
• 2 cups milk (dairy or plant-based)
• 1 cup whipped topping, thawed

Optional garnish:
• Chocolate shavings
• Cocoa powder


👩‍🍳 Instructions

1. Mix the Pudding Base

In a large mixing bowl, add:

• Chocolate pudding mix
• Milk

Whisk vigorously for about 2 minutes, until:
• The mixture thickens
• Texture becomes smooth
• No dry powder remains


2. Fold in the Whipped Topping

Add the whipped topping to the thickened pudding.

Using a spatula:
• Gently fold it in
• Use slow, sweeping motions
• Avoid stirring hard

This keeps the dessert light rather than dense.


3. Portion the Dessert

Divide the mixture evenly into:
• 4 small bowls
• Or dessert cups
• Or ramekins

Smooth the tops if desired.


4. Add Garnish (Optional)

Sprinkle lightly with:
• Chocolate shavings
• Or a small amount of cocoa powder


5. Chill

Place in the refrigerator for at least 30 minutes, until:
• Slightly firm
• Spoonable
• Fully chilled


⭐ Helpful Tips

✔ Fold gently to keep texture airy
✔ Chill before serving for best structure
✔ Serve in clear cups for a layered look
✔ Add fresh fruit or crushed biscuits if desired


🧊 Storage

• Keep covered in the refrigerator
• Best consumed within 2 days
• Do not leave at room temperature for long periods

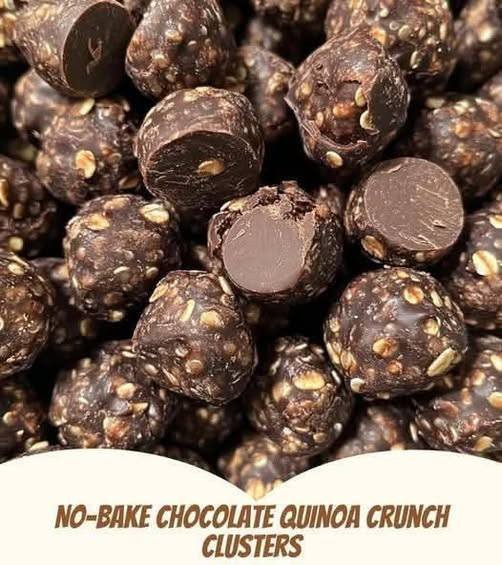
Chocolate Quinoa Crunch Clusters (No-Bake)

Chocolate Quinoa Crunch Clusters (No-Bake)

Simple no-bake clusters made with quinoa, oats, almond butter, and chocolate.

Prep Time: 15 minutes
Chill Time: 1 hour
Yield: 18–20 clusters


🧾 Ingredients

• 1 cup cooked quinoa (cooled and dry)
• 1 cup rolled oats
• 1 cup almond butter
• ½ cup honey or maple syrup
• ½ cup cocoa powder
• ½ cup dark chocolate chips
• ¼ teaspoon salt
• 1 teaspoon vanilla extract

Optional additions:
• ¼ cup chopped nuts
• ¼ cup shredded coconut


👩‍🍳 Instructions

1. Prepare the Dry Base

In a large mixing bowl, add:

• Cooked quinoa
• Rolled oats

If using optional nuts or coconut, add them now.

Stir to evenly distribute all dry ingredients.


2. Warm the Almond Butter Mixture

In a microwave-safe bowl or small saucepan over low heat, combine:

• Almond butter
• Honey or maple syrup

Heat gently until:
• The mixture is smooth
• Easy to stir
• Warm but not boiling

Remove from heat.


3. Make the Chocolate Mixture

Add to the warm almond butter mixture:

• Cocoa powder
• Vanilla extract
• Salt

Whisk until fully blended and glossy.


4. Combine Wet and Dry Ingredients

Pour the chocolate mixture over the quinoa and oats.

Using a spatula or wooden spoon, stir thoroughly until:
• All quinoa and oats are coated
• No dry patches remain
• Mixture is thick and sticky


5. Add Chocolate Chips

Fold in the dark chocolate chips.

If the mixture is still warm, the chips may soften slightly — this helps the clusters hold together.


6. Shape the Clusters

Line a baking tray with parchment paper.

Using a tablespoon or small scoop:
• Drop rounded portions onto the tray
• Press lightly to form compact clusters

Leave a small gap between each cluster.


7. Chill to Set

Place the tray in the refrigerator for at least 1 hour, until clusters are firm and hold their shape.


⭐ Helpful Tips

✔ Use fully cooled quinoa so excess moisture does not soften the mixture
✔ Stir thoroughly so coating is even
✔ Press clusters firmly so they don’t crumble
✔ If mixture feels loose, chill the bowl for 10 minutes before shaping


🧊 Storage

• Store in an airtight container in the refrigerator for up to 7 days
• Freeze for up to 1 month
• Best served chilled

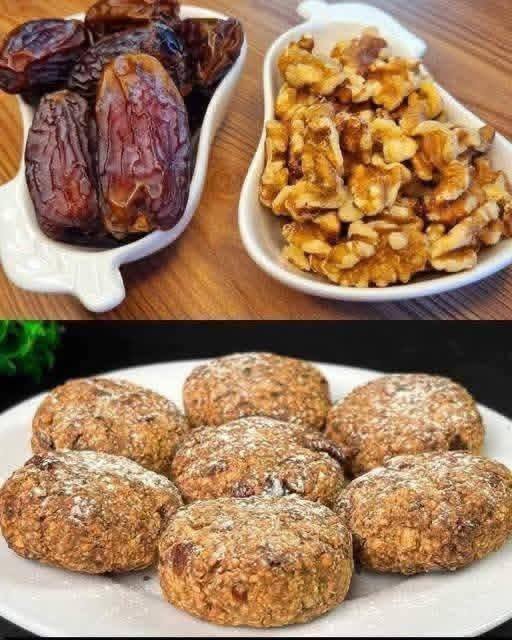
Zesty Oatmeal & Date Cookies

Zesty Oatmeal & Date Cookies

Soft baked cookies made with oats, dates, nuts, and lemon zest for a lightly sweet and citrusy flavor.

Prep Time: 10 minutes
Bake Time: 15–20 minutes
Yield: 6–8 cookies


🧾 Ingredients

• 1 cup (90 g) rolled oats or quick oats
• ¼ cup (35 g) dates, finely chopped
• ¼ cup (30 g) walnuts, chopped
• 50 g dried cranberries
• 1 large egg
• 2 tablespoons (30 g) butter, melted
• Zest of 1 lemon

Optional flavor additions:
• Pinch of ground cinnamon
• ½ teaspoon vanilla extract


👩‍🍳 Instructions

1. Preheat the Oven

Preheat oven to 180°C (350°F).

Line a baking sheet with parchment paper or a silicone baking mat to prevent sticking.


2. Combine Dry Ingredients

In a medium mixing bowl, add:

• Oats
• Chopped dates
• Chopped walnuts
• Dried cranberries

Stir until evenly mixed.


3. Add Lemon Zest

Using a fine grater, zest the lemon directly into the bowl.

Mix gently so the zest is distributed throughout the oat mixture.


4. Add Wet Ingredients

Pour the melted butter into the bowl.

Add the egg and any optional flavorings (cinnamon or vanilla).

Stir until:
• All oats are moistened
• The mixture is sticky and holds together

If the mixture seems loose, let it rest for 5 minutes so the oats absorb moisture.


5. Shape the Cookies

Scoop about 2 tablespoons of mixture per cookie.

Press and shape into thick, round discs with your hands.

Place on the baking sheet, leaving space between each cookie.

These cookies will not spread much while baking.


6. Bake

Bake for 15–20 minutes, until:
• Edges are lightly golden
• Centers feel firm when touched


7. Cool

Let cookies cool on the baking sheet for 10 minutes before transferring to a rack or plate.

This helps them firm up and hold their shape.


⭐ Helpful Tips

✔ Chop dates finely so they distribute evenly
✔ Let the dough rest if it feels wet
✔ Press cookies firmly so they do not crumble
✔ For softer cookies, bake closer to 15 minutes
✔ For firmer cookies, bake closer to 20 minutes


🧊 Storage

• Store in an airtight container at room temperature for up to 3 days
• Refrigerate for up to 1 week
• Can be frozen for up to 1 month

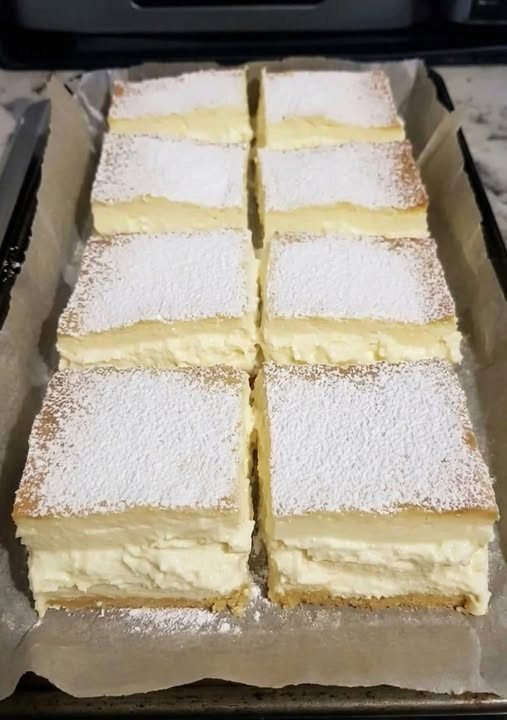
Vanilla Custard Slice

Vanilla Custard Slice

A baked dessert that naturally forms three textures while cooking: a soft base, a creamy custard center, and a light sponge top.

Prep Time: 15 minutes
Bake Time: 45–50 minutes
Chill Time: Minimum 3 hours
Yield: 12 squares


🧾 Ingredients

• 4 large eggs, separated (room temperature)
• 150 g (¾ cup) granulated sugar
• 125 g (½ cup) unsalted butter, melted and slightly cooled
• 115 g (¾ cup) all-purpose flour
• 500 ml (2 cups) whole milk, lukewarm
• 1 tablespoon vanilla extract or vanilla bean paste
• Pinch of salt

For topping:
• Powdered sugar, for dusting


👩‍🍳 Instructions

1. Prepare the Pan and Oven

Preheat oven to 160°C (325°F).

Grease an 8 × 8 inch (20 × 20 cm) baking pan.
Line with parchment paper, leaving excess paper hanging over the sides to help lift the dessert out later.


2. Beat the Egg Whites

Place egg whites and a pinch of salt in a clean, dry bowl.

Beat with a mixer until stiff peaks form (the whites should stand upright when the whisk is lifted).

Set aside.


3. Mix Egg Yolks and Sugar

In a separate large bowl, beat egg yolks and granulated sugar together for about 2 minutes, until:
• Pale in color
• Thickened slightly
• Smooth in texture


4. Add Butter and Vanilla

Add melted butter and vanilla extract to the yolk mixture.

Beat for 1 minute until fully blended.


5. Add Flour

Sift flour into the bowl.

Mix gently until just combined and no dry flour remains.


6. Add Milk

Slowly pour in the lukewarm milk while mixing on low speed.

The batter will be very thin and liquid-like — this is expected.


7. Fold in Egg Whites

Add the beaten egg whites in 2–3 portions.

Using a spatula, gently fold them into the batter.
Do not mix until fully smooth — small lumps or “clouds” of egg white should remain floating.

These help create the light top layer during baking.


8. Bake

Pour batter into the prepared pan.

Bake for 45–50 minutes, until:
• Top is light golden
• Center jiggles slightly when shaken
• Surface is set, not wet

If the top browns too quickly, loosely cover with foil during the last 10 minutes.


9. Cool and Chill

Let the pan cool completely at room temperature.

Then refrigerate for at least 3 hours (overnight is best) so the layers can fully firm up.


10. Finish and Slice

Lift the dessert out using parchment paper.

Dust generously with powdered sugar.

Slice into 12 even squares using a sharp knife.


⭐ Helpful Tips

✔ Eggs should be at room temperature for smoother mixing
✔ Milk should be lukewarm, not hot
✔ Do not overmix after adding egg whites
✔ Chill fully before cutting for clean layers


🧊 Storage

• Store covered in the refrigerator
• Best within 2–3 days
• Serve chilled

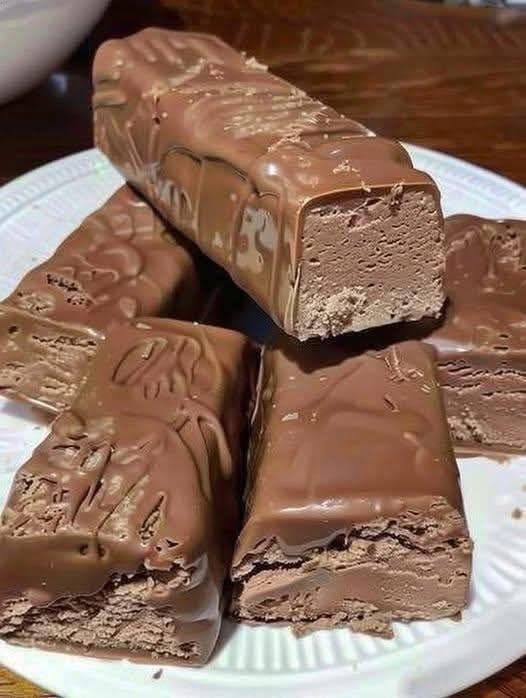
Chocolate Mousse Candy Bites

Chocolate Mousse Candy Bites

No-bake chocolate bars with a soft, airy center and a smooth chocolate coating — inspired by classic fluffy candy bars.

Prep Time: 15 minutes
Chill Time: 2 hours
Yield: 12–14 bites


🧾 Ingredients

For the Mousse Center:

• 1 cup whipped topping, thawed
• ¼ cup unsweetened cocoa powder
• 2 tablespoons powdered sweetener (or powdered sugar, to taste)
• ½ teaspoon vanilla extract

For the Chocolate Coating:

• ½ cup dark or milk chocolate chips
• 1 teaspoon coconut oil (for smooth melting)


👩‍🍳 Instructions

1. Make the Chocolate Mousse Filling

In a medium mixing bowl:

Add the whipped topping, cocoa powder, powdered sweetener, and vanilla extract.

Using a spatula or spoon, gently fold everything together.
Do not beat or stir aggressively — fold slowly to keep the mixture light and airy.

Mix until:
• The color is evenly chocolatey
• The texture is fluffy and smooth
• No streaks of cocoa remain


2. Shape and Freeze

Line a small rectangular dish or loaf pan with parchment paper.

Spread the mousse mixture evenly into the pan.
Smooth the top with a spatula so it is about 1 inch thick.

Place in the freezer for 1 hour, or until firm enough to cut cleanly.


3. Cut into Bites

Lift the frozen slab out using the parchment paper.

Using a sharp knife, cut into:
• Small rectangles
• Or bite-size squares

Return the pieces to the freezer while preparing the chocolate coating.


4. Melt the Chocolate

Place chocolate chips and coconut oil in a microwave-safe bowl.

Microwave in 20-second bursts, stirring between each round, until fully melted and smooth.

Do not overheat — stop as soon as the chocolate is fluid and glossy.


5. Coat the Bars

Using a fork:

Dip each frozen piece into the melted chocolate.
Lift it out and let excess chocolate drip off.

Place coated pieces on a parchment-lined tray.

💡 The frozen center will cause the chocolate to set quickly.


6. Final Set

Return the tray to the freezer for 15–20 minutes until the chocolate shell is firm.

Store in the refrigerator or freezer until ready to serve.


✨ Optional Enhancements

✔ For firmer texture:
Add 1 tablespoon milk powder or protein powder to the mousse mixture.

✔ For decorative finish:
Drizzle remaining melted chocolate over the bars for a candy-shop look.

✔ Flavor twist ideas:
• Add a pinch of salt
• Add espresso powder
• Add peppermint extract
• Add orange zest


🧊 Storage

• Refrigerator: up to 3 days
• Freezer: up to 2 weeks
Store in an airtight container.