Sugar-Free Apple Cocoa Cake

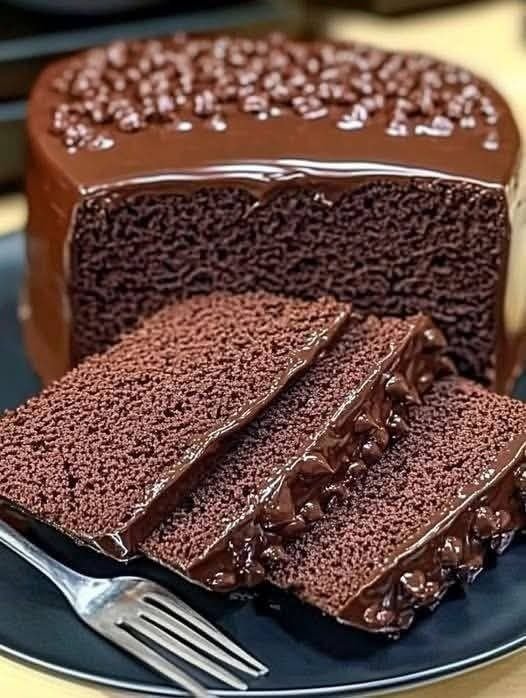
Sugar-Free Apple Cocoa Cake

Just Apples & Cocoa!

If you’ve been searching for a guilt-free dessert that’s naturally sweet, rich in flavor, and supports your health goals, this recipe is a game-changer. With only a few wholesome ingredients — apples, eggs, and cocoa — you can make a moist, chocolaty cake without a single grain of sugar. Perfect for breakfast, snacks, or dessert!

Ingredients

  • 4 medium sweet apples (Fuji, Honeycrisp, Gala) – naturally sweet and juicy.

  • 4 large eggs – for structure and protein.

  • 5 tablespoons unsweetened cocoa powder – deep chocolate flavor without sugar.

  • 1 teaspoon baking powder – for a light rise.

  • Olive oil – for greasing the baking mold.

Instructions

  1. Prepare the apples
    Wash, peel, and core the apples. Cut them into chunks and blend into a smooth purée.

  2. Make the batter
    In a large mixing bowl, combine the apple purée, eggs, cocoa powder, and baking powder. Whisk or blend until the mixture is lump-free and silky.

  3. Get the pan ready
    Lightly grease a baking pan with olive oil. Pour in the batter and smooth the top.

  4. Bake
    Preheat the oven to 180°C (350°F). Bake for 35–40 minutes, or until a toothpick inserted in the center comes out clean.

  5. Cool & enjoy
    Let the cake cool completely before slicing. Serve plain, or with a sprinkle of extra cocoa powder.

Why it’s great for weight loss

This cake is naturally sweet from apples, high in fiber, rich in protein, and low in calories. Cocoa adds flavor and antioxidants without sugar.

See also  Cabbage with Carrots

 Q&A

Q: Can I use green apples?
A: Yes, but they’re tart — the cake will be less sweet.

Q: How long does it keep?
A: Store in an airtight container in the fridge for up to 4 days, or freeze for 1 month.

Q: Can I make it vegan?
A: Replace each egg with 1 tbsp ground flaxseed + 3 tbsp water.

Q: Is it sweet like regular cake?
A: No, it’s mildly sweet — think of it as a healthy chocolate loaf.
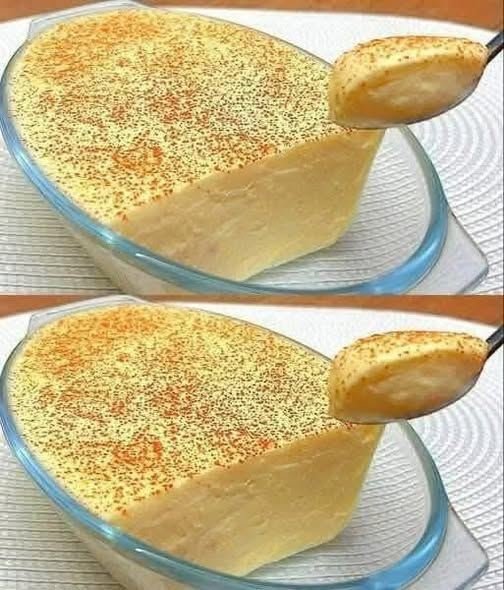
Golden Turmeric Custard (Creamy Spiced Pudding)

Golden Turmeric Custard (Creamy Spiced Pudding)

Prep Time: 5 minutes
Cook Time: 10 minutes
Chill Time (optional): 2 hours
Servings: 2

A warm, silky custard made with almond milk (or coconut milk), gently spiced with turmeric and ginger, and lightly sweetened for a cozy dessert or snack.


🛒 Ingredients

  • 2 cups almond milk
    (or full-fat coconut milk for a richer texture)

  • 2 tablespoons cornstarch
    (or arrowroot powder)

  • 1 tablespoon honey or maple syrup
    (adjust to taste)

  • ½ teaspoon ground turmeric

  • ¼ teaspoon ground ginger

  • 1 pinch black pepper

  • ½ teaspoon vanilla extract

  • Optional topping: ground cinnamon


👩‍🍳 Step-by-Step Instructions

1. Mix the Base

In a medium saucepan (while still cold), add:

  • almond milk

  • cornstarch

  • turmeric

  • ginger

  • black pepper

Whisk very well until the cornstarch is fully dissolved and the mixture is smooth with no visible lumps.

👉 This step is important to prevent clumping later.


2. Heat and Thicken

Place the saucepan over medium-low heat.

Stir constantly using a whisk or wooden spoon, making sure to scrape the bottom and sides of the pan.

After about 5–8 minutes, the mixture will:

  • become hot

  • thicken gradually

  • coat the back of a spoon

Once thick and smooth, remove from heat immediately.


3. Sweeten and Flavor

Stir in:

  • honey or maple syrup

  • vanilla extract

Mix until fully blended and smooth.

Taste and adjust sweetness if needed.


4. Portion and Set

Pour the custard into small bowls or ramekins.

You can enjoy it:

  • Warm for a soft pudding texture
    OR

  • Chilled by refrigerating for about 2 hours for a firmer custard


5. Finish and Serve

Before serving, lightly sprinkle:

  • cinnamon
    or

  • a tiny pinch of turmeric for color

Serve plain or with:

  • sliced bananas

  • berries

  • crushed nuts

  • coconut flakes


💡 Helpful Tips

  • If lumps appear, strain the hot custard through a fine mesh sieve before pouring into bowls.

  • For extra creaminess, use coconut milk instead of almond milk.

  • Stir constantly to prevent burning.

  • Do not boil hard—gentle heat gives the smoothest texture.


🍮 Texture & Flavor

✔ Smooth and creamy
✔ Lightly sweet
✔ Warm spice aroma
✔ Naturally golden in color

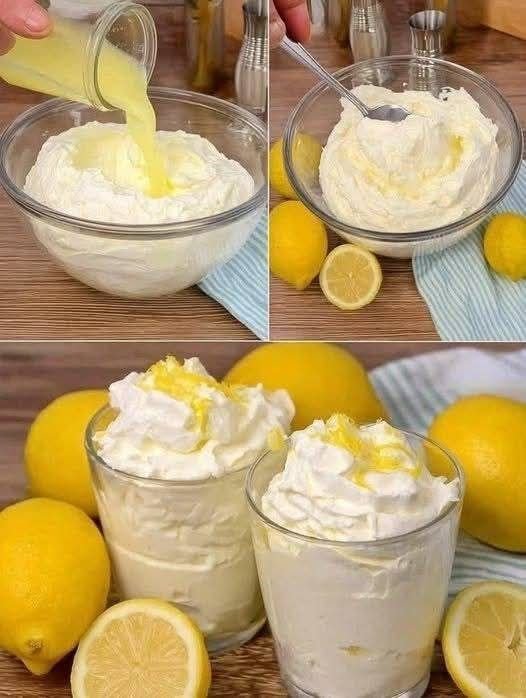
Lemon Cheesecake Mousse (Light, Creamy & Egg-Free)

Lemon Cheesecake Mousse (Light, Creamy & Egg-Free)

This Lemon Cheesecake Mousse is a dreamy, no-bake dessert that combines the rich creaminess of cheesecake with the light, airy texture of mousse. Brightened with fresh lemon juice and zest, it delivers the perfect balance of tangy and sweet in every spoonful. Best of all, it’s completely egg-free, requires no oven, and comes together in just minutes—making it ideal for entertaining, summer gatherings, or when you want an elegant dessert without the fuss.

Ingredients (Serves 4–6)

  • 8 oz (225 g) cream cheese, softened to room temperature

  • 1 cup (240 ml) heavy whipping cream, cold

  • ½ cup (100 g) granulated sugar

  • 1 teaspoon vanilla extract

  • 3 tablespoons fresh lemon juice

  • 1 tablespoon fresh lemon zest

  • Optional garnishes: extra lemon zest, whipped cream, crushed graham crackers, or shortbread crumbs

Instructions

1. Prepare the Cream Cheese Base
Place the softened cream cheese in a large mixing bowl. Add the granulated sugar and beat using a hand mixer or stand mixer on medium speed for 2–3 minutes, until the mixture is completely smooth and creamy. Scrape down the sides of the bowl as needed to avoid lumps. This step is key to achieving a silky mousse texture.

2. Add the Lemon Flavor
Pour in the fresh lemon juice, lemon zest, and vanilla extract. Beat again on low speed until everything is well combined. The mixture should be creamy, fragrant, and lightly tangy. Taste at this stage and adjust sweetness or lemon if desired.

See also  The Delicious Blueberry Cobbler

3. Whip the Cream
In a separate chilled bowl, pour in the cold heavy whipping cream. Using clean beaters, whip on medium-high speed until stiff peaks form. The cream should hold its shape when the beaters are lifted—this is what gives the mousse its light, airy structure.

4. Fold Gently
Add the whipped cream to the cream cheese mixture in two or three batches. Using a spatula, gently fold it in with slow, sweeping motions. Take care not to overmix, as this can deflate the mousse. The final mixture should be fluffy, smooth, and pale yellow.

5. Chill to Set
Spoon or pipe the mousse into individual serving glasses, bowls, or dessert cups. Smooth the tops, cover loosely, and refrigerate for at least 2 hours, or overnight for best texture and flavor.

6. Garnish and Serve
Just before serving, garnish with a dollop of whipped cream, a sprinkle of lemon zest, or crushed graham crackers for that classic cheesecake feel. Serve chilled and enjoy every creamy bite.

Tips & Variations

  • For a less sweet version, reduce sugar to ⅓ cup and add extra lemon juice

  • Turn it into a cheesecake parfait by layering mousse with cookie crumbs

  • Make it ahead—it keeps beautifully in the fridge for up to 2 days

Light, luscious, and bursting with citrus freshness, this Lemon Cheesecake Mousse is proof that simple ingredients can create a truly elegant dessert 🍋✨

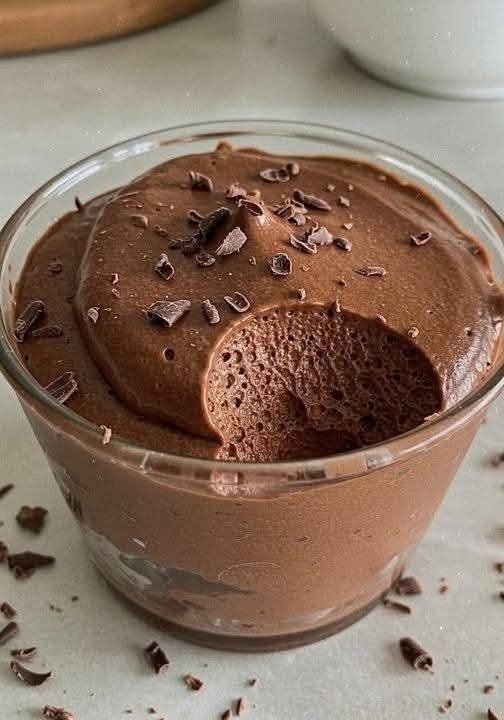
Cottage Cheese Chocolate Mousse

Cottage Cheese Chocolate Mousse

A smooth, creamy chocolate dessert made with blended cottage cheese and cocoa powder. High in protein and easy to prepare.

⏱ Prep Time: 5 minutes

🍨 Servings: 2–3


🧾 Ingredients

  • 1 cup cottage cheese (full-fat or low-fat)

  • ½ cup unsweetened cocoa powder

  • 3 tablespoons honey or maple syrup (adjust to taste)

  • 1 teaspoon vanilla extract

  • Pinch of salt

  • Optional topping: whipped cream, chocolate shavings, or berries


👩‍🍳 Instructions

1. Blend the Cottage Cheese

Place cottage cheese in a blender or food processor.
Blend for 1–2 minutes until completely smooth and creamy.
Scrape down the sides as needed.


2. Add Flavoring Ingredients

Add to the blender:

  • cocoa powder

  • honey or maple syrup

  • vanilla extract

  • salt

Blend again for 30–60 seconds until fully combined and silky.


3. Taste and Adjust

Taste the mousse.
Add more sweetener if desired or a splash of milk for a thinner texture.


4. Chill

Transfer mousse to serving cups.
Refrigerate for 30–60 minutes to improve texture and flavor.


5. Serve

Top with whipped cream or chocolate shavings if desired.
Serve cold.


📦 Storage

  • Store covered in the refrigerator for up to 3 days.

  • Stir before serving if needed.


🔄 Variations

  • Add 1 tablespoon peanut butter for a chocolate-peanut flavor

  • Add cinnamon or espresso powder for deeper chocolate taste

  • Blend with banana for natural sweetness

  • Use stevia or date syrup instead of honey


📝 Helpful Notes

✔ High in protein
✔ No baking required
✔ Can be dairy-free if made with plant-based cottage cheese
✔ Texture depends on blending — smoother blend = creamier mousse

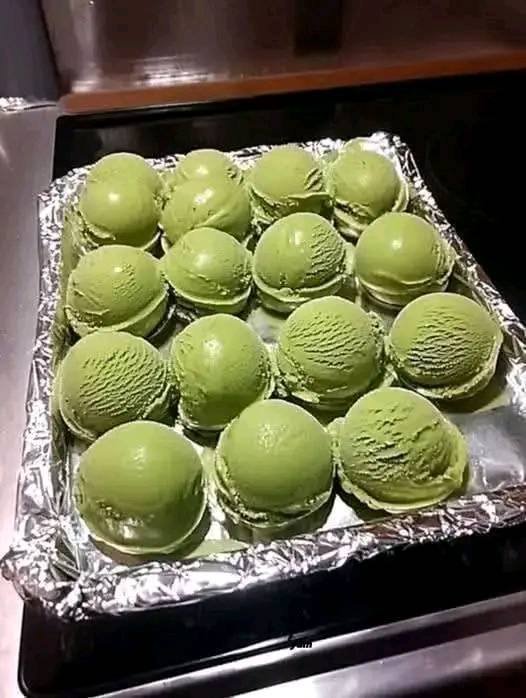
Frozen Avocado Scoops (Easy Meal-Prep Method)

Freezing mashed avocado in small portions is one of the simplest and most practical kitchen hacks for saving time and preventing food waste. Instead of watching perfectly good avocados turn brown on the counter or in the fridge, this method keeps them fresh, green, and ready to use whenever you need them. These frozen avocado scoops thaw beautifully and work perfectly in everything from toast and smoothies to guacamole and salads. With no additives or preservatives required, you can enjoy the natural flavor and creamy texture anytime.

Ingredients
4–6 ripe avocados
Pinch of salt (optional)

Instructions
Start by selecting ripe avocados that yield slightly when gently pressed. Cut each avocado in half, remove the pit, and scoop the flesh into a large mixing bowl. Using a fork or potato masher, mash until smooth or slightly chunky, depending on your preference. You can leave it plain or stir in a small pinch of salt for flavor, but no lemon juice or preservatives are necessary since freezing prevents browning.

Line a baking sheet or tray with parchment paper or foil. Using a small cookie scoop or tablespoon, portion the mashed avocado into evenly sized scoops and place them on the tray, leaving a little space between each scoop so they don’t stick together. Once the tray is filled, place it flat in the freezer for about 2–3 hours, or until the scoops are completely firm.

After frozen solid, transfer the avocado scoops into a large freezer-safe zip-top bag or airtight container. Remove as much air as possible before sealing to prevent freezer burn. Label the bag with the date and store for up to 2–3 months.

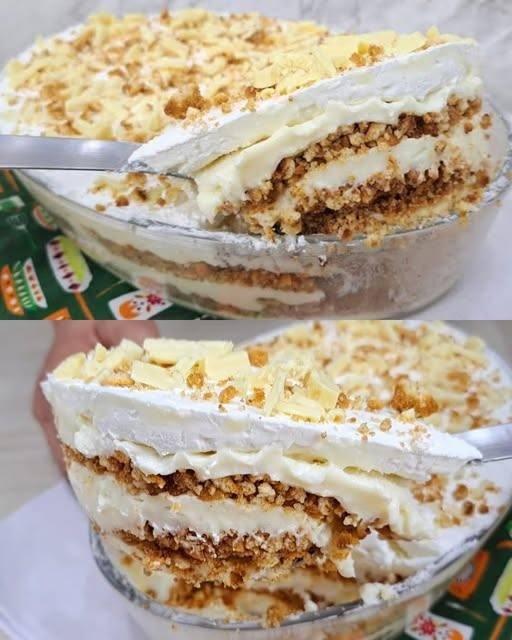
Creamy 4-Milk Ice Cream Pie

Creamy 4-Milk Ice Cream Pie

This recipe is designed to be assembled in layers, just like the one in your photo, using a “no-churn” method that stays soft even when frozen.

Ingredients

The 4-Milk Base:

  • 1 can (395g) Sweetened condensed milk

  • 1 can (300g) Heavy cream (table cream/crema de leite), chilled

  • 1 cup Whole milk

  • 1 ½ cups Powdered milk (like Ninho or any full-cream milk powder)

The Layers & Topping:

  • 1 pack (200g) Cornstarch biscuits or Maria cookies (crushed into coarse crumbs)

  • 1 cup Whipped topping or heavy whipping cream (beaten to stiff peaks)

  • White chocolate shavings and extra cookie crumbs for garnish


Instructions

1. Prepare the Cream

In a blender, combine the condensed milk, heavy cream, whole milk, and powdered milk. Blend on high for about 3–5 minutes.

Pro Tip: The longer you blend, the airier and “lighter” the final texture will be. If you want it extra thick, you can whisk it in a stand mixer instead.

2. The First Freeze

Pour the blended mixture into a plastic container and place it in the freezer for about 2 hours, or until it starts to firm up around the edges but is still soft in the middle.

3. Whip and Aerate

Remove the semi-frozen mixture and beat it in a mixer for 5 minutes until it doubles in volume. This step prevents ice crystals from forming and gives it that “ice cream” consistency.

4. Assembly (The Layers)

In a glass trifle bowl or rectangular dish (as seen in your image):

  1. Spread a layer of the creamy milk mixture at the bottom.

  2. Sprinkle a generous layer of crushed biscuits.

  3. Repeat the layers until the dish is nearly full.

  4. Top with a final layer of whipped cream or whipped topping to give it that bright white, fluffy finish.

5. Final Set

Cover with plastic wrap and freeze for at least 4 to 6 hours (overnight is best).

6. Garnish

Just before serving, sprinkle the top with white chocolate shavings and any remaining cookie crumbs. Let it sit at room temperature for 5 minutes before slicing so it’s easy to scoop.


Why this works

The high fat and sugar content from the condensed milk and powdered milk lowers the freezing point, ensuring the “pie” stays creamy rather than turning into a block of ice.