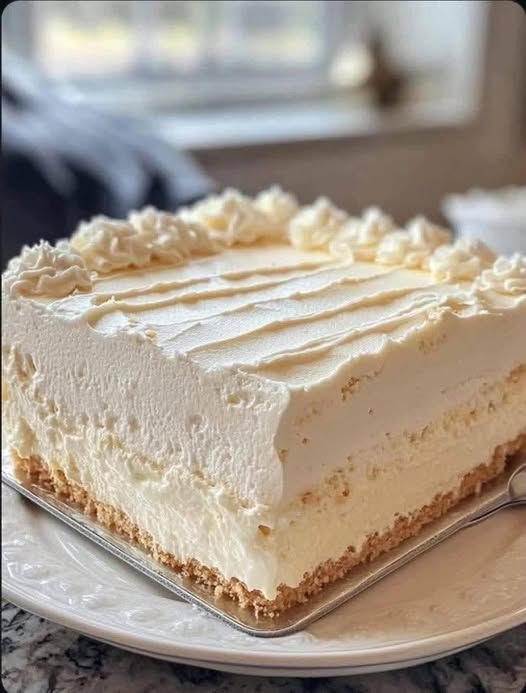
Creamy Vanilla Cream Slice Dessert

Creamy Vanilla Cream Slice Dessert

Prep Time: 20 minutes
Chill Time: 4 hours (or overnight)
Serves: 8–10 slices

A smooth, rich dessert with a biscuit base, creamy vanilla filling, and a soft whipped topping.


Ingredients

For the Base

  • 200 g (about 2 cups) crushed plain biscuits or graham crackers

  • 100 g (½ cup) melted butter

For the Cream Filling

  • 2 cups milk

  • ½ cup sugar

  • ¼ cup cornstarch

  • 2 egg yolks

  • 1 tablespoon butter

  • 1 teaspoon vanilla extract

For the Whipped Layer

  • 1½ cups heavy whipping cream

  • 3 tablespoons powdered sugar

  • ½ teaspoon vanilla extract


Instructions

1. Prepare the Base

In a bowl, mix the crushed biscuits with melted butter until evenly combined.
Press the mixture firmly into the bottom of a rectangular dish lined with parchment paper.
Refrigerate while preparing the filling.


2. Make the Cream Filling

In a saucepan, whisk together:

  • Milk

  • Sugar

  • Cornstarch

  • Egg yolks

Place over medium heat and stir constantly until thickened and smooth (about 5–7 minutes).
Remove from heat and stir in:

  • Butter

  • Vanilla extract

Let the mixture cool slightly, then pour over the biscuit base.
Spread evenly and refrigerate for at least 1 hour until set.


3. Prepare the Whipped Layer

In a chilled bowl, beat the heavy cream with powdered sugar and vanilla until soft peaks form.


4. Assemble

Spread the whipped cream evenly over the set cream layer.
Use a spatula to smooth the top or create decorative lines.


5. Chill

Refrigerate for 3 more hours or until fully firm and easy to slice.


6. Serve

Lift out using the parchment paper and cut into neat squares or slices.
Serve cold.


Helpful Tips

  • Neater slices: Dip your knife in hot water and wipe between cuts.

  • Flavor variation: Add lemon zest or a little almond extract to the cream filling.

  • Topping idea: Sprinkle shredded coconut or white chocolate curls on top.

  • Storage: Keep covered in the refrigerator for up to 3 days.
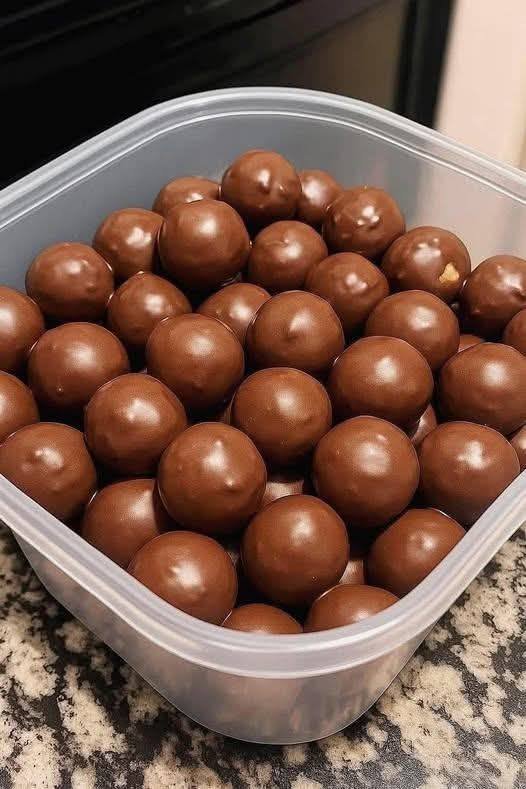
No-Bake Chocolate Peanut Butter Balls

No-Bake Chocolate Peanut Butter Balls

Prep Time: 10 minutes
Chill Time: 30 minutes
Yield: 20–24 balls

Creamy peanut butter centers coated in a smooth chocolate shell. These require no baking and are quick to prepare.


Ingredients

For the Filling

  • 1 cup creamy natural peanut butter (stirred well)

  • ½ cup protein powder (chocolate or vanilla)

  • ¼ cup ground flaxseed or almond flour

  • 2–3 tablespoons honey or maple syrup (to taste)

  • Pinch of salt

For the Chocolate Coating

  • ¾ cup dark chocolate chips

  • 1 teaspoon coconut oil


Instructions

1. Mix the Filling

In a large mixing bowl, add:

  • Peanut butter

  • Protein powder

  • Ground flaxseed or almond flour

  • Honey or maple syrup

  • Salt

Stir until a thick, dough-like mixture forms.

Texture adjustment:

  • If the mixture is too dry or crumbly, add 1 teaspoon milk or water at a time until smooth.

  • If it is too sticky, add a little more protein powder or flaxseed.


2. Shape the Balls

Scoop about 1 tablespoon of mixture at a time.
Roll between your palms to form smooth, round balls.
Place them on a tray lined with parchment paper.


3. Chill

Place the tray in the freezer for 10–15 minutes to firm up the balls.
This makes dipping easier and keeps them from falling apart.


4. Melt the Chocolate

In a microwave-safe bowl, combine the chocolate chips and coconut oil.
Microwave in 20-second intervals, stirring after each, until completely melted and smooth.


5. Coat the Balls

Using a fork or toothpick, dip each chilled ball into the melted chocolate.
Let excess chocolate drip off.
Return the coated balls to the parchment-lined tray.


6. Set the Chocolate

Place the tray in the refrigerator for 20 minutes, or until the chocolate coating is fully firm.


7. Store

Transfer to an airtight container.
Store in:

  • Refrigerator: up to 2 weeks

  • Freezer: for longer storage


Helpful Tips

  • Flavor variation: Add ½ teaspoon vanilla extract or a pinch of cinnamon to the filling.

  • Crunch option: Mix in chopped peanuts or crisp rice cereal.

  • Thinner shell: Add a little more coconut oil to the melted chocolate.

  • Easier dipping: Keep half the balls in the freezer while coating the rest.

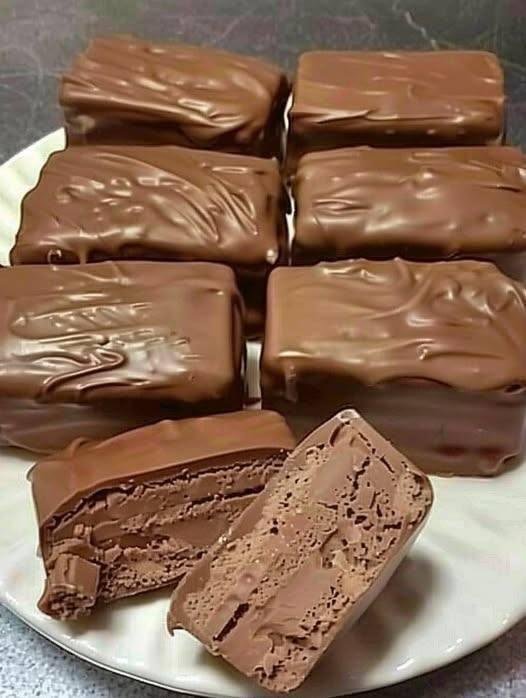
Homemade Whipped Chocolate Bars

Homemade Whipped Chocolate Bars

Prep Time: 15 minutes
Freeze Time: 2 hours
Yield: 8 bars

These creamy, airy chocolate bars have a soft whipped center and a smooth chocolate coating. They are easy to prepare and perfect for storing in the freezer for a quick dessert.


Ingredients

For the Filling

  • 1 cup thick Greek yogurt

  • ½ cup whipped topping, thawed

  • 2 tablespoons unsweetened cocoa powder

  • 2 to 3 tablespoons granulated sweetener (such as monk fruit or stevia, adjust to taste)

  • Optional: 1 scoop chocolate protein powder (for extra body and flavor)

  • Optional: ½ teaspoon vanilla extract

For the Chocolate Coating

  • ½ cup chocolate chips

  • 1 teaspoon coconut oil


Instructions

1. Prepare the Filling Base

In a medium mixing bowl, add the Greek yogurt, cocoa powder, sweetener, and vanilla extract (if using).
Whisk well until the mixture is completely smooth and free of lumps. Scrape down the sides of the bowl to ensure everything is evenly combined.


2. Make the Mixture Light and Fluffy

Add the whipped topping to the bowl.
Using a spatula, gently fold it into the chocolate yogurt mixture.
If using protein powder, fold it in at this stage.
Mix slowly and gently to keep the mixture airy and light.


3. Shape and Freeze

Line a small rectangular dish or loaf pan with parchment paper, leaving extra paper hanging over the sides for easy lifting.
Spread the mixture evenly into the pan, smoothing the top with a spatula.
Aim for about 1 inch thickness.

Place in the freezer for at least 2 hours, or until fully firm.


4. Slice into Bars

Once solid, lift the frozen slab out using the parchment paper.
Place it on a cutting board and slice into 8 equal bars.
Return the bars to the freezer while you prepare the chocolate coating.


5. Melt the Chocolate Coating

In a microwave-safe bowl, combine the chocolate chips and coconut oil.
Microwave in 30-second intervals, stirring between each round, until fully melted and smooth.


6. Coat the Bars

Working one at a time, dip each frozen bar into the melted chocolate using a fork.
Allow excess chocolate to drip off before placing the bar back onto parchment paper.
The chocolate will harden quickly because the bars are frozen.


7. Store

Once all bars are coated, place them in an airtight container and store in the freezer.


Helpful Tips

  • Flavor balance: If the filling tastes slightly tangy, vanilla extract helps round out the flavor.

  • Work fast: If the bars soften while dipping, return them to the freezer for 10 minutes before continuing.

  • Serving: Let each bar sit at room temperature for 3–5 minutes before eating for the best whipped texture.

  • Optional texture boost: Add a tablespoon of powdered peanut butter or almond butter powder to the filling for a richer taste.

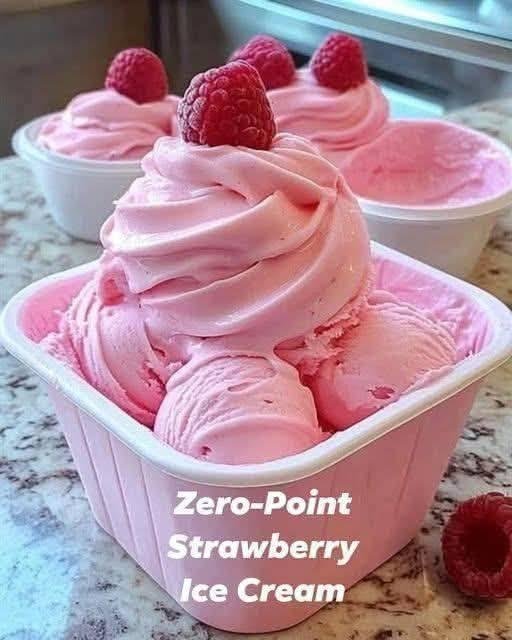
Homemade Strawberry Ice Cream — Sweet, Smooth, and Bursting with Berry Flavor”

  • Servings: 4
  • Total Time: 10 minutes prep (+ freezing 2–4 hours)
  • Difficulty: Very Easy
  • Calories per Serving: ~120 kcal
  • Macros (Per Serving): 6g Protein / 8g Net Carbs / 7g Fat / 2g Fiber

Introduction

Indulge in the sweet, fruity goodness of strawberry ice cream without any guilt. This healthy strawberry ice cream is creamy, refreshing, and naturally sweetened—perfect for keto, slimming, Weight Watchers, High-Protein, and Mediterranean diets.

Made with just a few wholesome ingredients, this recipe is ideal for quick dessert cravings, summer treats, or a post-workout snack. No added sugar, no heavy cream, and fully customizable for your diet preferences.

Every spoonful is packed with fresh strawberries and a smooth, creamy texture that feels indulgent but keeps your macros in check.


Look at the recipe.

  • Texture & Visual: Creamy, smooth, with bright pink strawberry swirls.
  • Flavor Highlight: Sweet-tart strawberries balanced with a hint of vanilla and natural creaminess.
  • Diet Benefit: Low in sugar, high in protein (optional), and keto/WW/SW friendly.

Ingredients Needed

  • 2 cups frozen strawberries
  • ½ cup Greek yogurt (or coconut yogurt for dairy-free Mediterranean version)
  • 2–3 tbsp sweetener of choice (erythritol, monk fruit, or honey for Mediterranean version)
  • 1 tsp vanilla extract
  • Optional: ½ scoop protein powder for extra protein

How to Make Our Healthy Strawberry Ice Cream

  1. Blend the ingredients:
    Place frozen strawberries, Greek yogurt, sweetener, vanilla, and protein powder (if using) into a blender or food processor. Blend until smooth and creamy.
  2. Adjust sweetness:
    Taste and add more sweetener if needed.
  3. Freeze for firmness:
    Transfer the mixture into a freezer-safe container. Freeze for 2–4 hours for a scoopable consistency.
  4. Serve:
    Scoop into bowls or cones. Top with fresh strawberries, nuts, or a drizzle of sugar-free chocolate if desired.

Storage & Serving Suggestions

  • Store: Keep in a covered container in the freezer for up to 1 week.
  • Serving Ideas:
    • Serve with fresh berries or sliced banana for extra fiber.
    • Pair with low-carb chocolate shavings for a keto/high-protein dessert.
    • Enjoy as a refreshing snack during warm weather or after a workout.

Tips & FAQs

1. Can I make this slimming-friendly?
Yes—use fat-free Greek yogurt and a syn-free sweetener. Each serving is roughly 0–1 syn, depending on sweetener choice.

2. How many Weight Watchers points per serving?
Approximately 2–3 points, depending on the yogurt and sweetener used.

3. Can I make it keto-friendly?
Yes—stick to Greek yogurt, frozen strawberries, and low-carb sweeteners like erythritol.

4. Can I make it dairy-free or Mediterranean-style?
Yes—use coconut or almond yogurt and natural sweeteners like honey.

5. How can I make it higher in protein?
Add a scoop of whey protein or collagen peptides into the blender.

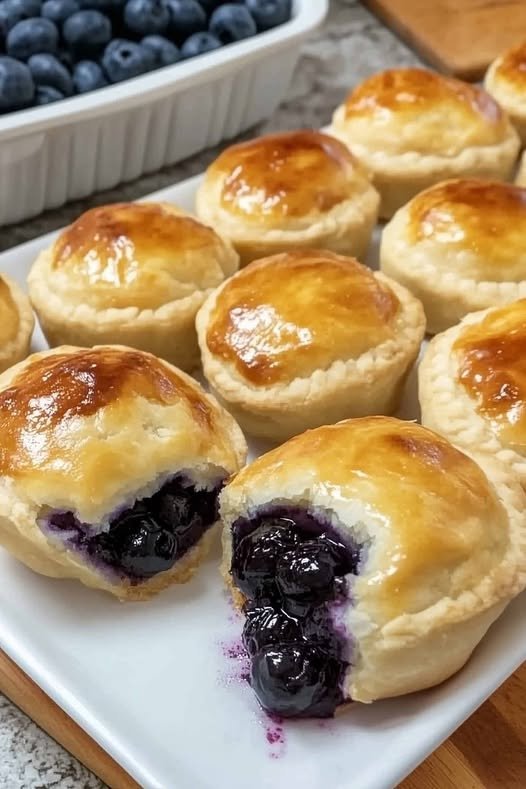
Blueberry Pie Bombs

Blueberry Pie Bombs

Prep time: 15 mins | Cook time: 15 mins | Total time: 30 mins Servings: 8 Bombs

Ingredients

  • 1 can (16.3 oz): Refrigerated flaky layers biscuit dough (8-count)

  • 1 cup: Blueberry pie filling

  • 4 oz: Cream cheese, softened

  • 2 tbsp: Powdered sugar

  • ½ tsp: Vanilla extract

  • 2 tbsp: Unsalted butter, melted

  • 1 tbsp: Granulated sugar (for topping)

  • Optional: Lemon zest (to mix into the cream cheese for brightness)


Instructions

  1. Prep the Oven and Pan: Preheat your oven to 375°F (190°C). Line a large baking sheet with parchment paper or lightly grease it.

  2. Prepare the Creamy Filling: In a small bowl, combine the softened cream cheese, powdered sugar, and vanilla extract. Whisk or stir until smooth and creamy.

  3. Flatten the Dough: Open the can of biscuits and separate them. Use your hands or a rolling pin to flatten each biscuit into a 4-inch or 5-inch circle.

  4. Assemble the Bombs: * Place about 1 tablespoon of the cream cheese mixture in the center of each dough circle.

    • Top the cream cheese with about 1 generous tablespoon of blueberry pie filling.

  5. Seal Them Up: Carefully gather the edges of the dough up over the filling, pinching them tightly together to create a sealed “bomb” or pouch. Ensure there are no gaps, or the filling will leak out!

  6. Coat and Bake: Place the bombs seam-side down on the prepared baking sheet. Brush the tops with melted butter and sprinkle with a little granulated sugar.

  7. Cook to Perfection: Bake for 12–15 minutes, or until the pastries are puffed and a deep golden brown.

  8. Serve: Let them cool for at least 5 minutes before serving—the blueberry filling gets very hot!


Tips for Success

  • Don’t Overfill: It’s tempting to pile on the blueberries, but overfilling makes them much harder to seal.

  • Egg Wash Alternative: For that extra shiny, professional look seen in your image, you can brush the tops with a beaten egg instead of melted butter before baking.

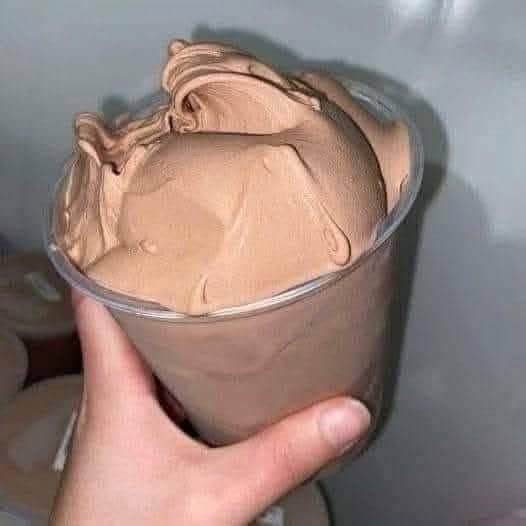
Chocolate Silk Mousse (Creamy Cottage Cheese Dessert)

Chocolate Silk Mousse (Creamy Cottage Cheese Dessert)

Prep Time: 5 minutes
Chill Time (optional): 30 minutes
Servings: 1–2

A smooth, rich chocolate mousse made by blending cottage cheese with cocoa and vanilla until silky and glossy.


🛒 Ingredients

  • 1 cup cottage cheese
    (low-fat or full-fat both work; full-fat gives a creamier texture)

  • 2 to 3 tablespoons unsweetened cocoa powder

  • 2 to 3 tablespoons granulated sweetener or sugar
    (use according to taste)

  • 1 teaspoon vanilla extract

  • 1 small pinch sea salt

Optional toppings:

  • chopped nuts

  • chocolate chips

  • shaved dark chocolate

  • fresh berries


👩‍🍳 Step-by-Step Instructions

1. Add Ingredients to Blender

Place the following into a high-speed blender or food processor:

  • cottage cheese

  • cocoa powder

  • sweetener

  • vanilla extract

  • salt

Make sure the cocoa powder is evenly spread so it blends smoothly.


2. Blend Until Smooth

Blend on high speed for 1–2 minutes.

Stop and scrape down the sides if needed.

Continue blending until:

  • no cottage cheese curds remain

  • texture becomes completely smooth

  • mixture looks glossy and thick

This step is essential for achieving a mousse-like texture.


3. Adjust Texture (If Needed)

If the mixture is too thick:

  • add 1 tablespoon water or milk

  • blend again for 10–15 seconds

Repeat only if necessary until smooth and spoonable.


4. Taste and Adjust

Taste the mousse:

  • For deeper chocolate flavor → add more cocoa powder

  • For sweeter flavor → add more sweetener

Blend briefly after any adjustment.


5. Chill (Optional but Recommended)

Transfer the mousse to a serving bowl or jar.

Refrigerate for at least 30 minutes to allow:

  • flavor to deepen

  • texture to firm slightly


6. Garnish and Serve

Just before serving, top with:

  • chopped walnuts

  • chocolate chips

  • fresh berries

  • coconut flakes

Serve cold or slightly chilled.


💡 Helpful Tips

  • Use a powerful blender for the smoothest result.

  • Sift cocoa powder first to prevent clumps.

  • For a richer taste, add 1 teaspoon melted butter or cream.

  • Store covered in the refrigerator for up to 2 days.


🍮 Texture & Flavor

✔ Thick and creamy
✔ Deep chocolate taste
✔ Smooth pudding-like finish