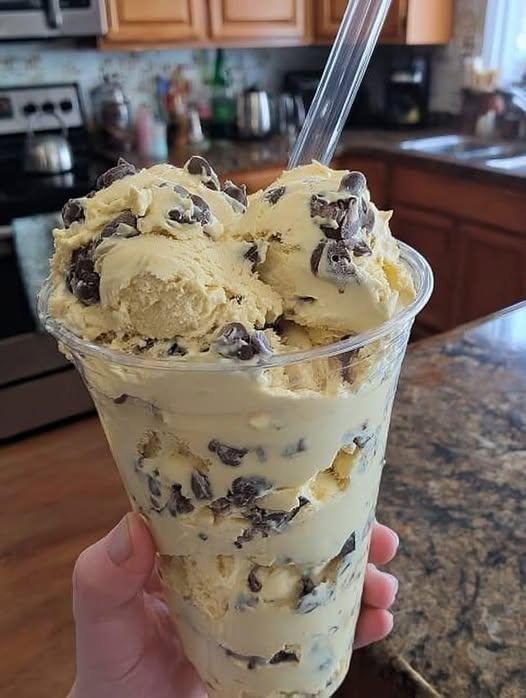
Chocolate Chip Fat Bomb Fluff

Chocolate Chip Fat Bomb Fluff

This recipe creates a light, airy, and creamy dessert that is high in healthy fats and low in sugar.

Ingredients

  • 8 oz (225g) Cream Cheese: Softened to room temperature for easy blending.

  • 1/2 cup Butter: Softened to room temperature.

  • 1/2 cup Creamy Peanut Butter: Or almond butter if you prefer.

  • 1/2 cup Powdered Sweetener: Such as Erythritol or Monk Fruit (adjust to your preferred sweetness).

  • 1 tsp Vanilla Extract: For a rich, aromatic flavor.

  • 1/2 cup Sugar-Free Chocolate Chips: Dark or milk chocolate style.

  • Optional: A pinch of sea salt to enhance the chocolate flavor.


Instructions

  1. Cream the Base:

    • In a large mixing bowl, combine the softened cream cheese, butter, and peanut butter.

    • Using a hand mixer or stand mixer, beat on medium-high speed until the mixture is completely smooth and no lumps remain.

  2. Sweeten and Flavor:

    • Add the powdered sweetener, vanilla extract, and optional pinch of salt.

    • Continue to beat the mixture for another 1–2 minutes. This incorporates air into the base, giving it that signature “fluff” texture.

  3. Add the Chocolate:

    • Switch to a spatula or wooden spoon.

    • Gently fold in the sugar-free chocolate chips until they are evenly distributed throughout the fluff.

  4. Portion and Chill:

    • Spoon the mixture into individual jars, ramekins, or a large container.

    • While you can eat it immediately, chilling it in the refrigerator for at least 30 minutes allows the flavors to meld and the texture to firm up slightly into a decadent mousse.


Tips for Success

  • Smoothness: Ensure your cream cheese and butter are truly at room temperature. If they are cold, the fluff will be lumpy rather than velvety.

  • Storage: This keeps beautifully in an airtight container in the refrigerator for up to 5 days. You can even freeze small “scoops” on a parchment-lined tray for a frozen treat later.
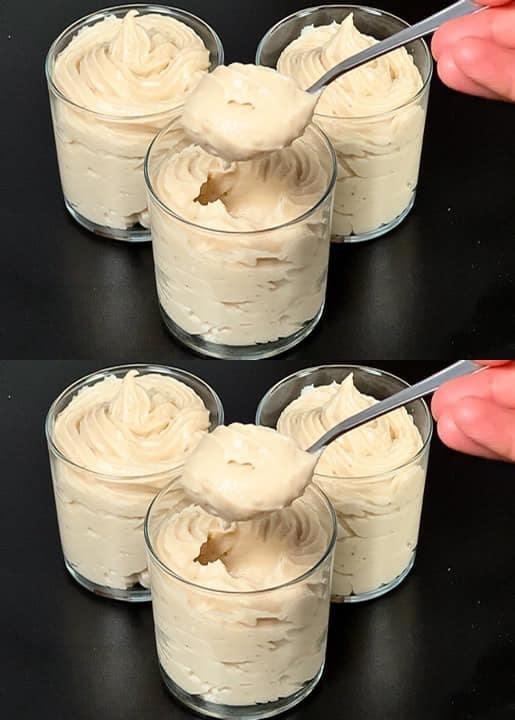
5-Minute Banana Mousse

5-Minute Banana Mousse

This recipe creates a light, airy, and naturally sweet treat that tastes like a professional pastry shop dessert.

Ingredients

  • 2 large ripe bananas: Using overripe bananas (with some brown spots) provides the best natural sweetness and flavor.

  • 1 ½ cups heavy whipping cream: Ensure it is very cold for the best volume.

  • ¼ cup powdered sugar: Adjust based on the ripeness of your bananas.

  • 1 tsp lemon juice: This helps prevent the bananas from browning and adds a tiny bright note.

  • Optional: 1 tsp vanilla extract or a pinch of cinnamon.


Instructions

  1. Prepare the Bananas:

    • Peel the bananas and place them in a bowl.

    • Add the lemon juice and mash them thoroughly with a fork until they form a smooth paste. For an even silkier texture, you can use a blender or food processor.

  2. Whip the Cream:

    • In a separate chilled large bowl, pour in the cold heavy whipping cream.

    • Using a hand mixer or stand mixer, beat the cream on medium-high speed.

    • As it begins to thicken, gradually add the powdered sugar (and vanilla if using).

    • Continue beating until stiff peaks form (the cream should hold its shape firmly when you lift the beaters).

  3. Combine:

    • Gently fold the banana puree into the whipped cream using a spatula.

    • Note: Use a folding motion (cutting through the center and lifting over) rather than stirring to keep the air in the mousse and maintain that fluffy texture.

  4. Serve:

    • Spoon or pipe the mousse into serving glasses.

    • You can serve it immediately for a soft texture, or chill in the refrigerator for 30 minutes to let it set further.


Serving Suggestions

  • Garnish: Top with a few fresh banana slices, a drizzle of caramel, or some crushed vanilla wafers.

  • Chocolate Twist: Fold in a handful of mini chocolate chips or shave dark chocolate over the top before serving.

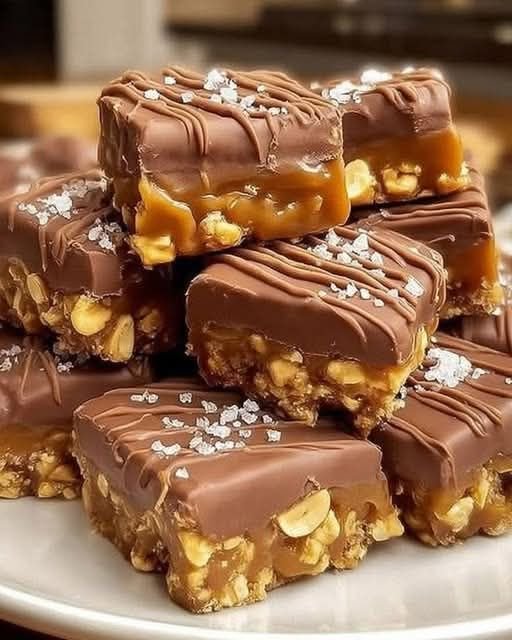
Chocolate Caramel Peanut Bars


Chocolate Caramel Peanut Bars

Ingredients

Peanut Base

  • 2 cups roasted peanuts (unsalted or lightly salted)

  • ½ cup crushed digestive biscuits or graham crackers

  • ¼ cup melted butter

Caramel Layer

  • 1 cup granulated sugar

  • 6 tbsp butter, room temperature

  • ½ cup heavy cream, room temperature

  • ½ tsp salt

  • 1 tsp vanilla extract

Chocolate Topping

  • 1 ½ cups milk chocolate or semi-sweet chocolate chips

  • 2 tbsp creamy peanut butter (optional, for a softer chocolate layer)

  • Flaky sea salt for sprinkling


Instructions

1. Prepare the Base

  • Line an 8×8 inch square baking pan with parchment paper, leaving a slight overhang on the sides for easy removal.

  • In a medium bowl, combine the roasted peanuts, crushed biscuits, and melted butter.

  • Stir until the crumbs are moistened and the peanuts are evenly coated.

  • Press the mixture firmly into the bottom of your prepared pan. Place it in the freezer to set while you make the caramel.

2. Make the Caramel

  • Place the granulated sugar in a heavy-bottomed saucepan over medium heat.

  • Whisk constantly as the sugar melts. It will clump first, then turn into a thick, amber-colored liquid. Watch closely so it doesn’t burn.

  • Once the sugar is completely melted, carefully add the butter. The mixture will bubble rapidly; keep whisking until the butter is fully incorporated.

  • Slowly pour in the heavy cream. Let the mixture boil for about 1 minute.

  • Remove from heat and stir in the salt and vanilla extract.

  • Let the caramel cool for about 5–10 minutes, then pour it evenly over the peanut base. Return the pan to the refrigerator for at least 30 minutes.

3. Add the Chocolate Layer

  • In a microwave-safe bowl, melt the chocolate chips (and peanut butter, if using) in 30-second intervals, stirring in between until smooth.

  • Pour the melted chocolate over the set caramel layer. Spread it to the edges with a spatula.

  • Optional: Drizzle a little extra melted chocolate on top in a zig-zag pattern for that professional look seen in your photo.

  • Immediately sprinkle with flaky sea salt.

4. Set and Serve

  • Refrigerate for at least 2 hours, or until the chocolate and caramel are completely firm.

  • Lift the bars out of the pan using the parchment paper overhang.

  • Using a sharp knife dipped in hot water (and wiped dry), slice into squares.

Mediterranean Spinach & Cheese Crustless Bake

A light, savory oven bake inspired by Greek flavors

This Mediterranean Spinach & Cheese Crustless Bake is a beautifully simple dish that sits somewhere between a crustless quiche and a spanakopita-style casserole. Made with eggs, creamy yogurt, tender spinach, and a blend of melty and tangy cheeses, it bakes up fluffy on the inside with a lightly golden top. Naturally gluten-free and low in carbs, it’s a wonderful option for breakfast, brunch, or a quick dinner served with a fresh salad.

The absence of a crust keeps this dish light while allowing the Mediterranean flavors to shine. Greek yogurt adds moisture and a gentle tang, while feta brings saltiness and depth. It’s an easy recipe to customize and holds up well for meal prep, making it a practical yet satisfying addition to your weekly menu.

Ingredients

  • 6 large eggs
  • 1 cup Greek yogurt (or plain yogurt)
  • 3 tbsp extra-virgin olive oil, divided
  • 1½ cups fresh spinach, chopped (or frozen spinach, well-drained)
  • 1 cup shredded mozzarella or kasseri cheese
  • ½ cup crumbled feta cheese
  • 1 small onion, finely chopped
  • ½ cup chopped green onions or leeks
  • 1 clove garlic, minced
  • ½ tsp dried oregano
  • ½ tsp black pepper
  • ¾ tsp salt (adjust to taste)

Optional Add-Ins

  • ¼ cup diced cooked turkey, chicken, or ham
  • ¼ cup chopped zucchini or bell pepper

Instructions

  1. Preheat the oven
    Preheat your oven to 375°F (190°C). Lightly grease a round or square baking dish with olive oil and set aside.
  2. Prepare the vegetables
    Heat 1 tablespoon of olive oil in a skillet over medium heat. Add the chopped onion and sauté for 3–4 minutes until soft and translucent. Stir in the garlic and cook for another 30 seconds until fragrant. Add the spinach and cook just until wilted. Remove from heat and let cool slightly.
  3. Mix the egg base
    In a large bowl, whisk together the eggs, Greek yogurt, remaining olive oil, salt, black pepper, and dried oregano until smooth and well combined.
  4. Combine everything
    Fold the cooled spinach mixture into the egg base. Gently stir in the shredded mozzarella, crumbled feta, and green onions. If using any optional add-ins like cooked meat or extra vegetables, fold them in at this stage.
  5. Bake
    Pour the mixture into the prepared baking dish and smooth the top. Bake uncovered for 35–40 minutes, or until the center is set and the top is lightly golden.
  6. Rest and serve
    Remove from the oven and allow the bake to rest for about 10 minutes before slicing. This helps it firm up and makes cleaner slices.
See also  Mediterranean Pepperoni Pizza Grilled Cheese

Serving Suggestions

  • Serve warm or at room temperature with a Greek cucumber-tomato salad
  • Add olives and extra feta on the side
  • Enjoy leftovers for breakfast or lunch throughout the week

Storage & Tips

This bake keeps well in the refrigerator for 3–4 days and reheats beautifully. It can also be sliced and frozen for up to 2 months. Simply thaw overnight and warm gently before serving.

Light, fluffy, and full of Mediterranean comfort, this crustless bake proves that simple ingredients can create something truly satisfying 🌿✨

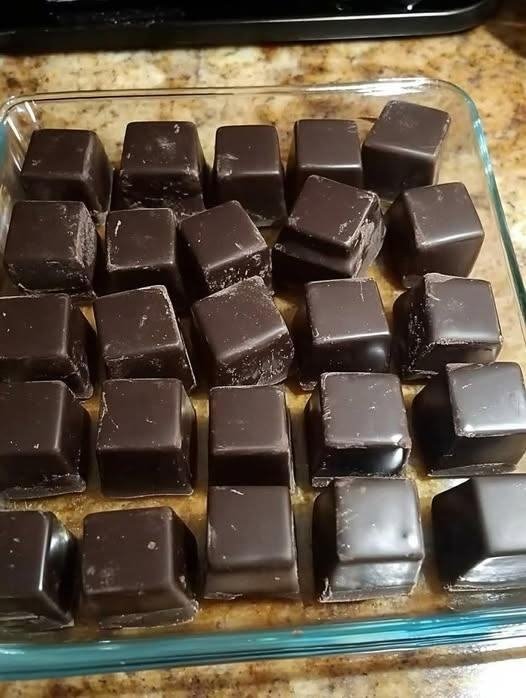
Homemade Dark Chocolate Bites

Homemade Dark Chocolate Bites

Prep Time: 10 minutes
Chill Time: 1–2 hours
Yield: About 24 small bites

These simple chocolate bites are made with cocoa powder and coconut oil for a firm, rich texture and deep chocolate flavor.


Ingredients

  • 1 cup unsweetened cocoa powder (Dutch-processed gives a smoother taste)

  • 1 cup coconut oil, melted

  • 1 tablespoon ground coffee or instant coffee powder (optional, for flavor depth)

  • 2 to 4 tablespoons powdered sweetener (stevia, erythritol, or preferred sweetener)

  • Pinch of sea salt (optional)

Optional mix-ins:

  • Chopped nuts

  • Unsweetened coconut flakes

  • Orange zest

  • Peppermint extract

  • Vanilla extract


Equipment

  • Silicone chocolate molds or

  • Parchment-lined square dish

  • Mixing bowl

  • Whisk

  • Spoon or small spatula


Instructions

1. Prepare the Molds

Place silicone molds on a tray or line a small glass dish with parchment paper. Set aside.


2. Melt the Coconut Oil

If not already melted, gently melt the coconut oil using a double boiler or microwave in short intervals. Let it cool slightly but remain liquid.


3. Mix the Liquid Ingredients

In a medium bowl, whisk together:

  • Melted coconut oil

  • Sweetener

  • Coffee powder (if using)

  • Salt

Stir until the sweetener is mostly dissolved.


4. Add Cocoa Powder

Sift the cocoa powder into the bowl to avoid lumps.
Whisk slowly until the mixture becomes smooth and glossy with no dry spots.


5. Adjust Flavor

Taste a small amount.
Add more sweetener if needed, 1 teaspoon at a time.
If desired, mix in vanilla, citrus zest, or other flavorings.


6. Pour into Molds

Carefully pour or spoon the chocolate mixture into molds or the lined dish.
Tap gently on the counter to remove air bubbles.


7. Chill

Place in refrigerator for 1–2 hours, or freezer for 30 minutes, until fully firm.


8. Unmold and Store

Remove chocolate from molds or cut into bite-size pieces.
Store in an airtight container in the refrigerator.


Storage

  • Keep refrigerated due to coconut oil’s low melting point

  • Best used within 7 days

  • Will soften at room temperature


Texture & Flavor Notes

  • Firm when chilled

  • Smooth and rich

  • Slight coffee note if used

  • Sweetness can be fully customized

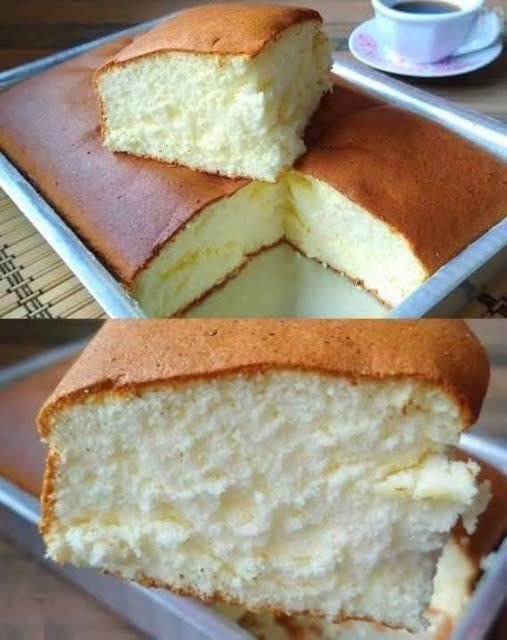
Cloud Milk Cake (3 Ingredients)

Cloud Milk Cake (3 Ingredients)

Prep Time: 15 minutes
Bake Time: 30–35 minutes
Serves: 6–8 slices

A light, airy cake made with eggs, milk, and sweetener, with a soft texture similar to a soufflé-style sponge.


Ingredients

  • 5 large eggs, separated

  • 1 cup (240 ml) milk

  • ½ cup granulated sweetener (such as monk fruit or erythritol, adjust to taste)

Optional:

  • 1 teaspoon vanilla extract

  • Pinch of cream of tartar (for stabilizing egg whites)


Instructions

1. Prepare the Pan and Oven

Preheat your oven to 325°F (160°C).
Line the bottom of an 8-inch round or square baking pan with parchment paper.
Do not grease the sides of the pan so the batter can rise evenly.


2. Mix the Yolk Batter

Place the egg yolks in a medium bowl.
Add the milk and ¼ cup of the sweetener.
Whisk until smooth and slightly pale in color.
Stir in vanilla extract if using.


3. Whip the Egg Whites

In a clean, dry bowl, beat the egg whites with a mixer on medium-high speed.
Once foamy, gradually add the remaining ¼ cup sweetener.
Beat until stiff peaks form.
If using cream of tartar, add it at the foamy stage.


4. Combine the Mixtures

Add a small portion of the whipped egg whites to the yolk mixture and stir gently to loosen it.
Then gently fold the remaining egg whites into the batter using a spatula.
Fold slowly and carefully to keep the mixture airy.


5. Bake in a Water Bath

Pour the batter into the prepared pan.
Place the pan inside a larger baking dish and pour hot water into the outer dish until it reaches about 1 inch up the sides of the cake pan.

Bake for 30–35 minutes, or until:

  • The top is lightly golden

  • The cake feels springy when gently touched


6. Cool Gradually

Turn off the oven and crack the door open.
Let the cake sit inside for 10 minutes.
Remove and allow to cool completely in the pan before slicing.


Helpful Tips

  • Clean bowl: Any grease or water can prevent egg whites from whipping properly.

  • Gentle folding: Use a light hand to keep the batter fluffy.

  • Flavor ideas: Add lemon zest or almond extract for variation.

  • Serving: Serve plain or with fruit, cream, or a light glaze.

  • Storage: Keep covered in the refrigerator for up to 2 days.