5-Minute Homemade Chocolate Crunch Bites

5-Minute Homemade Chocolate Crunch Bites

This recipe creates a rich, fudge-like binder for a crunchy center, finished with a crisp chocolate shell.

Ingredients

For the Crunchy Center:

  • 1 Large Egg

  • 3 tbsp Sugar (approx. 50g)

  • 2 tbsp All-Purpose Flour (approx. 35g)

  • 1 tbsp Unsweetened Cocoa Powder

  • A pinch of salt

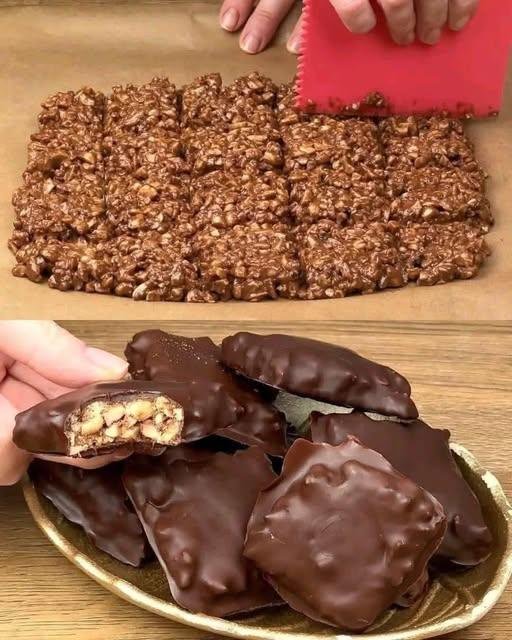
  • 1 cup Roasted Peanuts or Puffed Rice cereal (Note: While not in your text list, these are the “crunch” visible in your photo).

For the Chocolate Coating:

  • 85g Dark Chocolate (chopped)

  • 10g Vegetable Oil (approx. 2 tsp)


Instructions

1. Prepare the Base

In a small saucepan (off the heat), whisk together the egg, sugar, flour, cocoa, and salt until perfectly smooth with no lumps.

2. Thicken

Place the saucepan over low heat. Stir constantly for about 2–3 minutes. The mixture will thicken into a heavy, paste-like consistency. Once it thickens and looks glossy, remove it from the heat immediately so the egg doesn’t scramble.

3. Add the Crunch

Fold in your roasted peanuts or puffed rice until every piece is thoroughly coated in the chocolate paste.

4. Shape and Chill

  • Place a sheet of parchment paper on a flat surface.

  • Transfer the mixture to the paper. Use a spatula (or the red scraper tool seen in your photo) to flatten it into a rectangle about 1/2 inch thick.

  • Place it in the freezer for 10–15 minutes to firm up.

  • Once firm, use a sharp knife to cut into squares or bars.

5. The Chocolate Dip

  • Melt the dark chocolate and oil together in the microwave in 30-second bursts, stirring until silky.

  • Using a fork, dip each chilled square into the melted chocolate, letting the excess drip off.

  • Place back on the parchment paper and chill in the refrigerator until the outer shell is hard.


Why this works

  • The Egg & Flour: These act as the binder in place of gelatin or starch, creating a fudge-like texture that holds the nuts together.

  • The Oil: Adding a little oil to the dipping chocolate gives it that professional shine and prevents it from cracking when you bite into it.
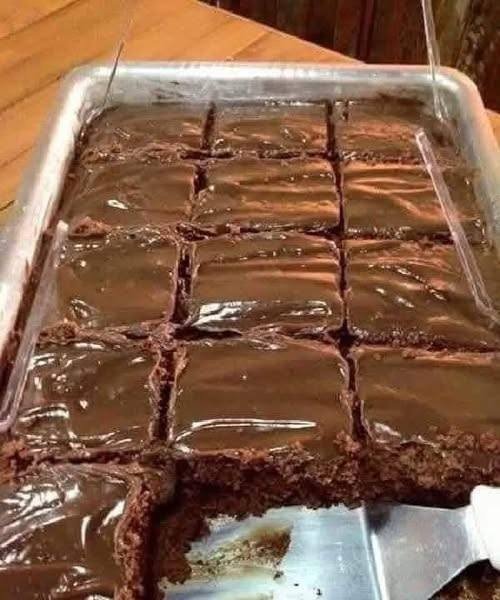
Chocolate Sheet Cake with Warm Chocolate Glaze

Chocolate Sheet Cake with Warm Chocolate Glaze

This is a soft, moist chocolate cake baked in a single pan and topped with a smooth chocolate glaze. The batter is mixed in one bowl after heating the cocoa mixture on the stove.


🧾 Ingredients

For the Cake

  • 2 cups all-purpose flour

  • 2 cups granulated sugar

  • ½ cup unsalted butter

  • ½ cup vegetable oil

  • 1 cup water

  • ¼ cup unsweetened cocoa powder

  • 2 large eggs

  • ½ cup buttermilk
    (or ½ cup milk mixed with 1 teaspoon vinegar)

  • 1 teaspoon baking soda

  • 1 teaspoon vanilla extract


For the Chocolate Glaze

  • ½ cup unsalted butter

  • ¼ cup unsweetened cocoa powder

  • ⅓ cup milk

  • 3 cups powdered sugar

  • 1 teaspoon vanilla extract


🔪 Equipment

  • 13 × 9 inch (33 × 23 cm) baking pan

  • Medium saucepan

  • Large mixing bowl

  • Whisk

  • Spatula

  • Measuring cups and spoons


👩‍🍳 Instructions

1️⃣ Prepare the Oven and Pan

  • Preheat oven to 350°F (175°C).

  • Grease the baking pan or line with parchment paper.


2️⃣ Heat the Cocoa Mixture

In a medium saucepan, combine:

  • Butter

  • Vegetable oil

  • Water

  • Cocoa powder

Bring to a gentle boil, stirring occasionally.
Remove from heat immediately once it reaches a boil.


3️⃣ Mix Dry Ingredients

In a large bowl, whisk together:

  • Flour

  • Granulated sugar


4️⃣ Combine Hot and Dry Mixtures

  • Slowly pour the hot cocoa mixture into the flour and sugar.

  • Whisk until smooth and lump-free.


5️⃣ Finish the Batter

Add:

  • Eggs

  • Buttermilk

  • Baking soda

  • Vanilla extract

Whisk until fully combined.
The batter will be thin; this is expected.


6️⃣ Bake

  • Pour batter into prepared pan.

  • Bake for 20–25 minutes, or until a toothpick inserted in the center comes out clean.


🍫 Make the Glaze

7️⃣ Prepare the Glaze

About 5 minutes before the cake is done:

  1. In a saucepan, combine:

    • Butter

    • Cocoa powder

    • Milk

  2. Bring to a gentle boil, then remove from heat.

  3. Whisk in:

    • Powdered sugar

    • Vanilla extract

  4. Mix until smooth and pourable.


8️⃣ Glaze the Cake

  • Pour the warm glaze evenly over the hot cake immediately after removing it from the oven.

  • Spread gently if needed.


9️⃣ Cool and Serve

  • Let cake cool in the pan until the glaze sets.

  • Slice and serve.


🧊 Storage

  • Store covered at room temperature for 2 days, or refrigerate for 4 days.

  • Bring to room temperature before serving for best texture.


🍽 Serving Suggestions

  • Serve plain

  • Add fresh berries

  • Serve with whipped cream or vanilla ice cream

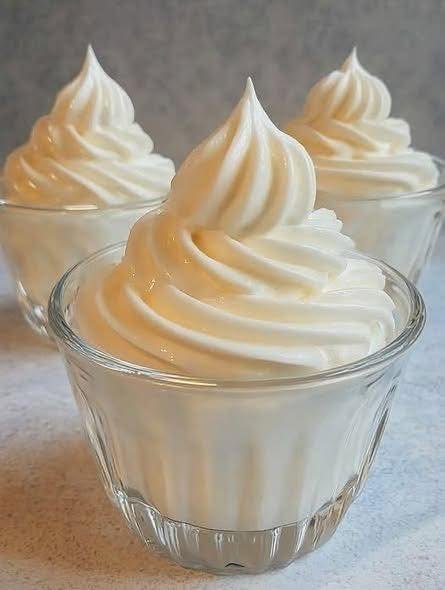
Cheesecake Fluff (3 Ingredients)

Cheesecake Fluff (3 Ingredients)

This creamy dessert has a smooth cheesecake flavor and a light, mousse-like texture. It comes together quickly and can be served on its own or with fresh fruit such as raspberries or strawberries.


🧾 Ingredients

  • 1 cup cream cheese, softened

  • 1 cup whipped topping

  • 2–3 tablespoons powdered sugar (or sweetener of choice, to taste)

Optional Add-Ins

  • ½ teaspoon vanilla extract

  • Fresh raspberries or strawberries for serving


🔪 Equipment

  • Mixing bowl

  • Hand mixer or whisk

  • Spatula

  • Serving cups or dessert glasses


👩‍🍳 Instructions

1️⃣ Soften the Cream Cheese

Remove cream cheese from the refrigerator and allow it to sit at room temperature for about 20–30 minutes until soft. This prevents lumps and ensures a smooth texture.


2️⃣ Mix the Base

In a medium bowl:

  • Add the cream cheese and powdered sugar.

  • Beat with a mixer or whisk until smooth and creamy.


3️⃣ Fold in Whipped Topping

  • Gently fold in the whipped topping using a spatula.

  • Mix until fully combined and fluffy.

  • Do not overmix, or the texture may deflate.


4️⃣ Chill

  • Spoon into serving cups.

  • Refrigerate for 30–60 minutes for best texture.


5️⃣ Serve

Top with:

  • Fresh raspberries

  • Strawberries

  • Blueberries

  • Or a small sprinkle of crushed cookies or nuts

Serve chilled.


🧊 Storage

  • Keep covered in the refrigerator.

  • Best used within 2–3 days.

3-Ingredient Lemon Soda Cake

3-Ingredient Lemon Soda Cake

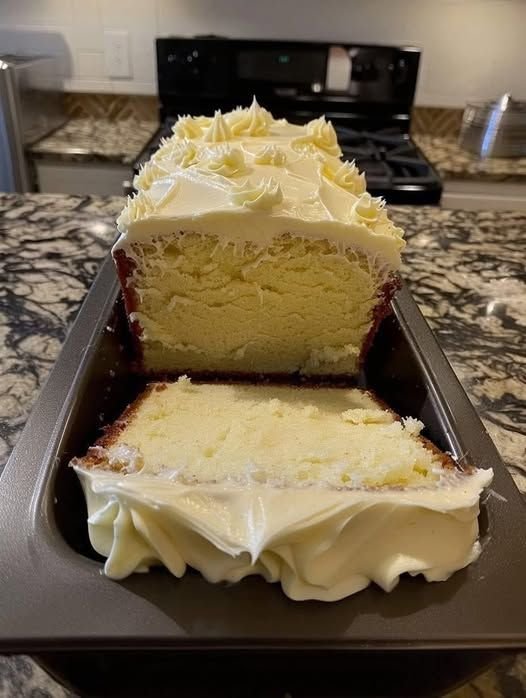
This cake uses sparkling soda to help the batter rise and stay light, while yogurt keeps the crumb moist and tender. The result is a soft lemon loaf with a smooth, custard-like interior that works well on its own or with a light topping.


🧾 Ingredients

For the Cake

  • 1 box (about 15.25 oz / 430 g) lemon cake mix

  • 12 oz (355 ml) lemon-lime sparkling soda (Sprite, 7-Up, or similar)

  • 1 cup plain Greek yogurt

Optional Add-In

  • Zest of 1 fresh lemon


🔪 Equipment

  • 9 × 5 inch (23 × 13 cm) loaf pan

  • Mixing bowl

  • Whisk or electric mixer

  • Spatula

  • Wire rack


👩‍🍳 Instructions

1️⃣ Prepare the Oven and Pan

  • Preheat oven to 350°F (175°C).

  • Lightly grease a loaf pan or line it with parchment paper, leaving extra paper over the sides for easy removal.


2️⃣ Mix the Batter

  1. Add the dry cake mix to a large bowl.

  2. Add the Greek yogurt and stir until thick and mostly smooth.

  3. Slowly pour in the sparkling soda, stirring gently.

⚠️ The batter will foam at first because of the carbonation. This is normal.
Stir gently until the bubbles settle and the batter becomes smooth and creamy.

  1. If using, fold in the lemon zest evenly.


3️⃣ Bake

  • Pour batter into the prepared pan.

  • Smooth the top with a spatula.

  • Bake for 35 to 45 minutes.


4️⃣ Check for Doneness

Because this cake holds more moisture than a standard cake:

  • Insert a toothpick into the center at 35 minutes.

  • It should come out clean or with a few dry crumbs.

  • If wet batter appears, bake another 5–10 minutes and test again.


5️⃣ Cool Properly

  • Let the cake cool in the pan for 15 minutes.

  • Carefully lift out and place on a wire rack.

  • Allow to cool completely before frosting or slicing.

This cooling time helps the structure set correctly.


🍦 Optional Lemon Topping

Ingredients

  • 1 cup whipped topping

  • 2 tablespoons instant lemon pudding mix (dry powder)

  • 1–2 teaspoons milk (only if needed for consistency)

Method

  1. In a bowl, combine whipped topping and pudding powder.

  2. Stir until smooth and thick.

  3. Add milk only if mixture is too firm.

  4. Spread or pipe over cooled cake.


🧊 Storage

  • Store covered in the refrigerator for up to 4 days.

  • Best served chilled or at room temperature.


🍽 Serving Ideas

  • Dust with powdered sugar

  • Top with fresh berries

  • Serve with vanilla yogurt or whipped cream

Glazed Brown Butter Honey Cakes

Glazed Brown Butter Honey Cakes

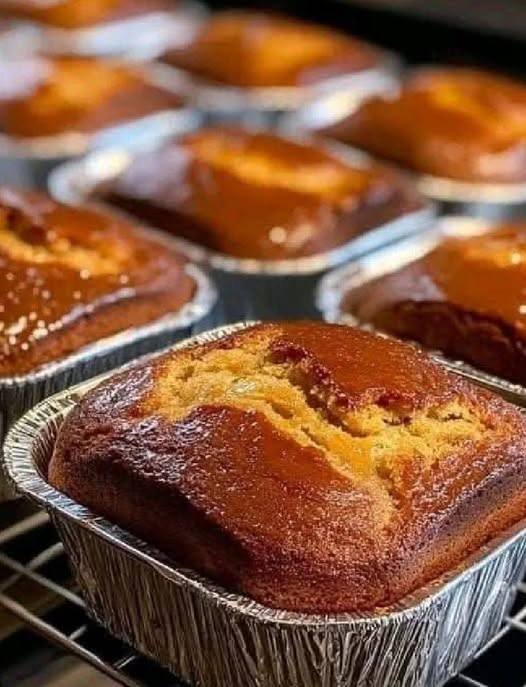
These cakes rely on the deep, nutty flavor of browned butter to create a dessert that tastes far more complex than the 10-minute prep time suggests.

Ingredients

For the Cake:

  • 1 cup (225g) Unsalted Butter: To be browned.

  • ¾ cup Granulated Sugar: Provides structure and sweetness.

  • ¼ cup Honey: Adds moisture and a distinct floral depth.

  • 2 Large Eggs: At room temperature for better emulsification.

  • 1 tsp Vanilla Extract: Enhances all the other flavors.

  • 1 ½ cups All-Purpose Flour: The base of the cake.

  • 1 tsp Baking Powder: For a perfect, airy rise.

  • ½ tsp Salt: Balances the sweetness of the honey.

  • ½ cup Whole Milk: Keeps the crumb tender.

For the Honey Glaze:

  • ¼ cup Honey: The star of the glaze.

  • 2 tbsp Water: To thin the glaze to a pourable consistency.

  • A pinch of Salt: To cut through the sugar.


Instructions

1. Brown the Butter

  • In a medium saucepan, melt the butter over medium heat.

  • Continue cooking, whisking occasionally. The butter will foam, then clear, and finally begin to turn golden brown with small dark specks at the bottom.

  • Once it smells nutty and looks like toasted hazelnuts, remove it from the heat immediately and pour into a heat-proof bowl to stop the cooking. Let it cool for 5 minutes.

2. Mix the Batter

  • Preheat your oven to 350°F (175°C). Grease individual foil baking tins or a standard muffin tin.

  • In a large bowl, whisk the browned butter with the sugar and honey until well combined.

  • Add the eggs one at a time, whisking well after each, then stir in the vanilla extract.

  • In a separate bowl, sift together the flour, baking powder, and salt.

  • Gradually add the dry ingredients to the butter mixture, alternating with the milk. Stir until just combined—do not overmix, or the cakes will be tough.

3. Bake

  • Divide the batter evenly among the prepared tins, filling them about two-thirds full.

  • Bake for 18–22 minutes, or until a toothpick inserted into the center comes out clean and the tops are a deep golden brown.

4. Glaze and Finish

  • While the cakes are baking, whisk the honey, water, and salt in a small bowl.

  • As soon as the cakes come out of the oven, brush the warm glaze generously over the tops. The warmth allows the glaze to soak into the top layer, creating a sticky, delicious crust.

  • Let the cakes cool in the tins for at least 10 minutes before serving.


Pro-Tip

For a dinner party presentation, serve these warm with a dollop of unsweetened whipped cream or a small scoop of vanilla bean ice cream to balance the richness of the honey.

4-Ingredient Decadent Chocolate Truffle Cake

4-Ingredient Decadent Chocolate Truffle Cake

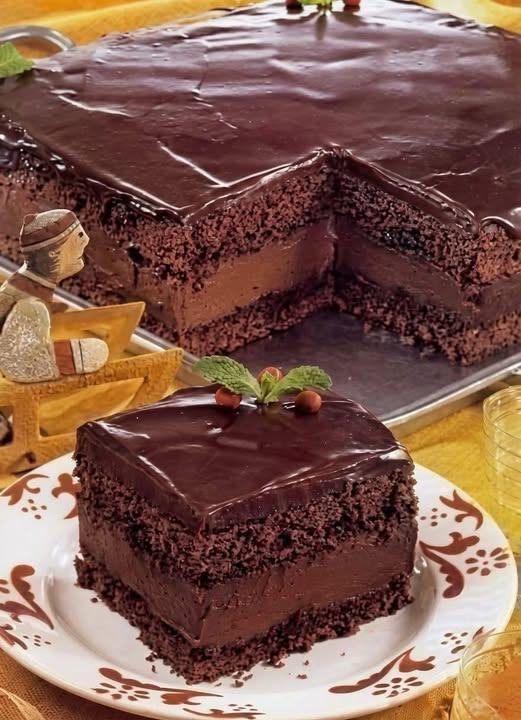
This recipe relies on using high-quality basics to create a dessert that tastes like it took hours.

Ingredients

  • 1 box (approx. 15-18 oz) Chocolate Cake Mix: (Plus the water/oil/eggs called for on the box—standard “hack” recipes count the box as one ingredient).

  • 2 cans (14 oz each) Sweetened Condensed Milk: This forms the base of the fudgy filling.

  • 1 cup Unsweetened Cocoa Powder: Use a high-quality dark cocoa for the best flavor.

  • 1 cup Heavy Cream: To smooth out the filling into a silkier texture.


Instructions

1. Bake the Base

  • Prepare the chocolate cake mix according to the package instructions in a square or rectangular baking pan.

  • Once baked, let the cake cool completely.

  • The Secret Step: Carefully slice the cake in half horizontally to create two layers, or use a spoon to hollow out the center of the cake (leaving a 1-inch border) to create a “trench” for the filling.

2. Create the Truffle Filling (Brigadeiro Style)

  • In a medium saucepan, combine the sweetened condensed milk, cocoa powder, and heavy cream.

  • Cook over medium-low heat, stirring constantly with a silicone spatula.

  • Continue stirring for about 8–10 minutes until the mixture thickens. You’ll know it’s ready when you can run your spatula through the middle and the “path” stays open for a second before closing.

  • Remove from heat and let it cool for about 15 minutes (it will thicken further as it cools).

3. Assemble

  • Spread the thickened chocolate mixture generously over the bottom layer of the cake (or fill the hollowed-out center).

  • Place the top layer of cake back on.

  • If you have leftover filling, thin it out with a tablespoon of milk or cream to create the shiny glaze for the very top.

4. Chill and Serve

  • For the best “melt-in-your-mouth” texture, cover the cake and refrigerate for at least 4 hours or overnight. This allows the filling to set and the moisture to move into the cake layers.


Pro-Tip

For an even more intense flavor, you can brush the cake layers with a little bit of cold coffee or milk before adding the filling to keep it extra moist.