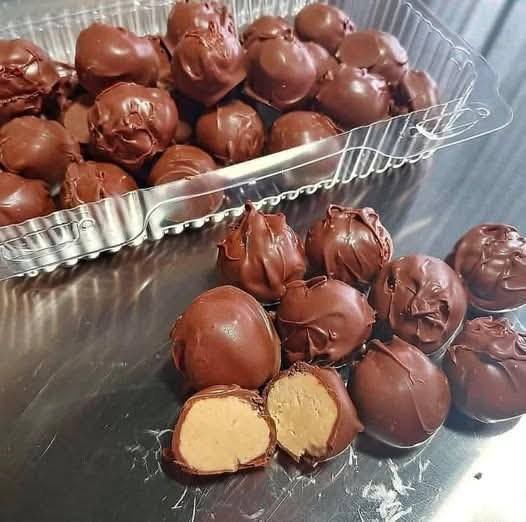
Chocolate Peanut Butter Balls (No-Bake)

Chocolate Peanut Butter Balls (No-Bake)

These bite-size treats have a creamy peanut butter center and a smooth dark chocolate coating. They are easy to prepare and perfect for chilling and serving as a snack or dessert.


Ingredients

For the filling:

  • 1 cup natural peanut butter

  • ½ cup powdered sweetener or powdered sugar

  • ¼ cup protein powder (optional, plain or vanilla)

  • 1 teaspoon vanilla extract

  • Pinch of salt (if peanut butter is unsalted)

For coating:

  • 1½ cups dark chocolate chips or chopped dark chocolate

  • 1 tablespoon coconut oil or butter (for smooth melting)


Instructions

1. Make the Peanut Butter Mixture

In a mixing bowl, combine:

  • Peanut butter

  • Sweetener

  • Protein powder (if using)

  • Vanilla

  • Salt

Stir until thick, smooth, and fully combined. The mixture should be firm enough to roll.
If too soft, refrigerate for 10–15 minutes.

2. Shape the Balls

Scoop about 1 tablespoon of mixture and roll into a ball using your palms.
Place on a tray lined with baking paper.

Repeat with all the mixture.

3. Chill

Place the tray in the freezer for 15–20 minutes so the balls become firm for dipping.

4. Melt the Chocolate

In a microwave-safe bowl, melt the chocolate with coconut oil in 20–30 second bursts, stirring between each, until smooth.

5. Coat the Balls

Dip each chilled peanut butter ball into melted chocolate using a fork or toothpick.
Let excess chocolate drip off, then place back on the lined tray.

6. Set

Refrigerate for 20–30 minutes until the chocolate is fully set.


Storage

  • Store in an airtight container in the refrigerator for up to 5 days

  • Can be frozen for up to 1 month


Optional Variations

  • Add crushed nuts to the peanut butter mixture

  • Use milk or white chocolate instead of dark

  • Add a pinch of cinnamon or espresso powder

  • Drizzle with melted white chocolate on top
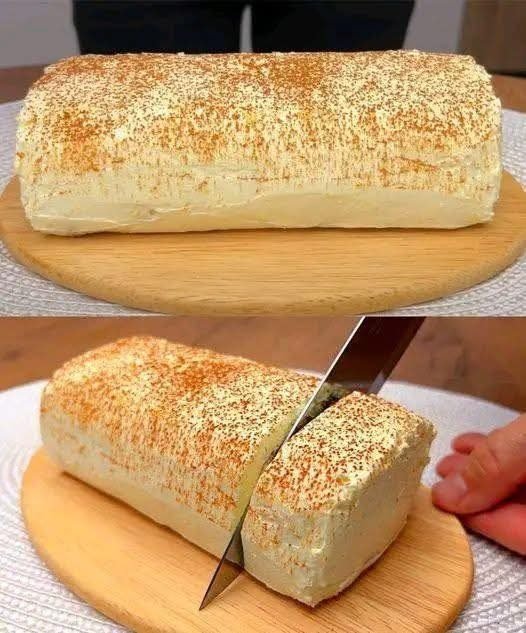
Creamy No-Bake Cheese Log (5-Minute Prep Dessert)

Creamy No-Bake Cheese Log (5-Minute Prep Dessert)

This simple no-bake dessert is smooth, lightly sweet, and easy to shape into a sliceable log. It’s perfect for quick entertaining or a make-ahead chilled treat.


Ingredients

  • 2 cups (500 g) ricotta or quark cheese, well drained

  • ½ cup (120 g) cream cheese, softened

  • ¼ cup sweetener of choice (honey, agave syrup, or powdered monk fruit)

  • 1 teaspoon vanilla extract

For coating (optional):

  • Unsweetened cocoa powder

  • Ground cinnamon

  • Finely chopped nuts (almonds, walnuts, pistachios)


Step-by-Step Instructions

1. Prepare the Cheese

If using ricotta, place it in a sieve or cheesecloth and let it drain for 10–15 minutes. This prevents excess moisture and helps the log hold its shape.

2. Blend Until Smooth

In a medium mixing bowl, add:

  • Ricotta (or quark)

  • Cream cheese

Beat using a hand mixer or whisk until completely smooth and creamy. Scrape the sides of the bowl so no lumps remain.

3. Sweeten and Flavor

Add:

  • Sweetener

  • Vanilla extract

Mix again for about 30 seconds until fully combined and evenly flavored.

4. Shape the Log

Lay a large sheet of plastic wrap on your counter.
Spoon the mixture onto the center and shape it into a thick line (log shape).

5. Roll and Seal

Lift the plastic wrap and roll the mixture tightly into a cylinder.
Twist the ends like a candy wrapper to compress and smooth the log.

6. Chill to Set

Place in:

  • Freezer: 20–30 minutes
    OR

  • Refrigerator: 2 hours

This firms it up so it slices neatly.

7. Coat the Outside

Unwrap the chilled log.
Roll it gently in:

  • Cocoa powder

  • Cinnamon
    or

  • Chopped nuts

until fully coated.

8. Slice and Serve

Cut into thick slices using a sharp knife.
Serve cold.


Optional Mix-Ins (Add Before Rolling)

  • Mini chocolate chips

  • Finely chopped dates or raisins

  • Lemon or orange zest

  • Shredded coconut


Storage

  • Store wrapped in the refrigerator for up to 3 days

  • Can be frozen for up to 2 weeks

  • Slice while cold for best shape

3-Ingredient Lemon Soufflé Cakes

3-Ingredient Lemon Soufflé Cakes

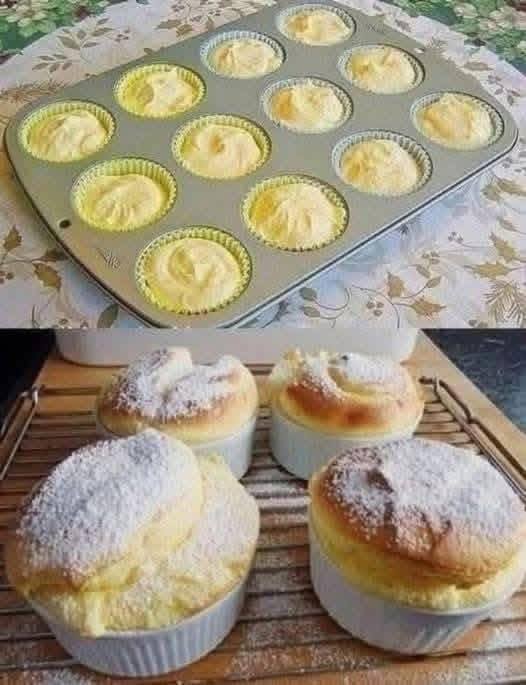
These cakes use the natural lift of whipped eggs to create a tall, “magic” rise that looks incredible right out of the oven.

Ingredients

  • 3 Large Eggs, separated (whites in one bowl, yolks in another)

  • 1/2 cup Condensed Milk (or a sugar-free alternative for sweetness and creamy texture)

  • 1/4 cup Fresh Lemon Juice (about 1 large lemon)

  • Optional: Powdered sugar for dusting the tops


Instructions

  1. Prep Your Tools: Preheat your oven to 325°F (165°C). Lightly grease 4–6 ramekins or a muffin tin.

    • Tip: For an extra-clean rise, you can lightly dust the greased ramekins with a little granulated sugar substitute.

  2. Mix the Base: In a medium bowl, whisk together the egg yolks, condensed milk, and lemon juice until the mixture is smooth and pale yellow.

  3. Whip the Whites: In a separate, very clean glass or metal bowl, beat the egg whites on high speed until they form stiff peaks. The whites should stand straight up and not slide when you tilt the bowl.

  4. Fold with Care: Using a spatula, gently fold about a third of the whipped whites into the yolk mixture to lighten it. Then, very carefully fold in the remaining whites until just combined. Do not over-mix, as those air bubbles are what make the cakes rise.

  5. Bake: Divide the batter evenly among your prepared ramekins or muffin cups. Bake for 15–20 minutes until the tops are puffed up and lightly golden brown.

  6. Finishing Touch: Remove from the oven and let them sit for 2 minutes. Dust the tops with a light coating of powdered sugar before serving.


Why this works:

  • The Rise: By whipping the whites separately, you are trapping air that expands in the heat of the oven, creating that “treasure-like” height.

  • The Flavor: The lemon juice provides a sharp, refreshing contrast to the sweetness of the milk, making it feel light rather than heavy.

Silky Cottage Cheese Chocolate Mousse

Silky Cottage Cheese Chocolate Mousse

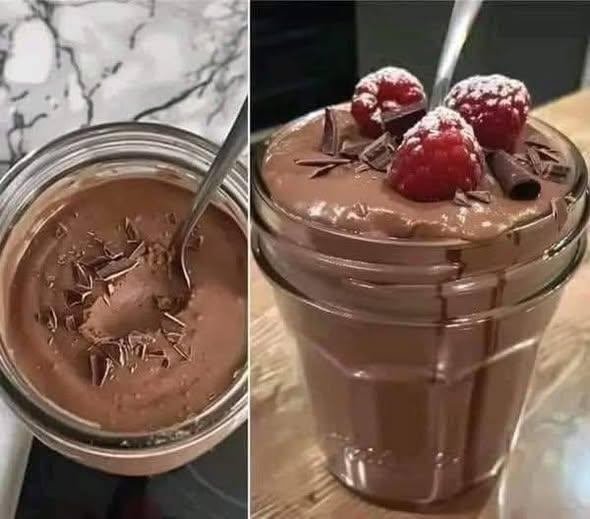
This recipe creates a smooth, whipped texture that feels like a classic gourmet mousse.

Ingredients

  • 1 cup cottage cheese

  • 2-3 tablespoons unsweetened cocoa powder

  • 2-3 tablespoons sweetener of choice (such as maple syrup, honey, or a sugar-free alternative)

  • 1 teaspoon vanilla extract

  • A pinch of salt

  • Optional Toppings: Fresh raspberries, shaved chocolate, or crushed nuts


Instructions

  1. Blend: Place the cottage cheese, cocoa powder, sweetener, vanilla extract, and salt into a high-speed blender or food processor.

    • Pro Tip: Ensure you blend long enough (about 1–2 minutes) until the “curd” texture of the cheese completely disappears and the mixture looks like liquid velvet.

  2. Taste and Adjust: Taste a small spoonful of the mousse. If you prefer a deeper chocolate flavor, add an extra tablespoon of cocoa powder. If you’d like it sweeter, add a bit more of your chosen sweetener and pulse again to combine.

  3. Portion: Spoon the mixture into small jars or ramekins.

  4. Set: For the best experience, place the jars in the refrigerator for at least 30 minutes. This allows the mousse to firm up and the flavors to deepen.

  5. Garnish and Enjoy: Just before serving, top with your favorite garnishes. Fresh raspberries provide a beautiful tart contrast to the rich chocolate, while chocolate shavings add a nice bit of crunch.


Why this works:

  • The Texture: When blended, cottage cheese loses its grainy texture and becomes incredibly thick and creamy, much like a traditional mousse base.

  • The Protein: Unlike traditional mousse which relies on heavy cream, this version is naturally satiating.

3-Ingredient Lemon Cloud Mousse

3-Ingredient Lemon Cloud Mousse

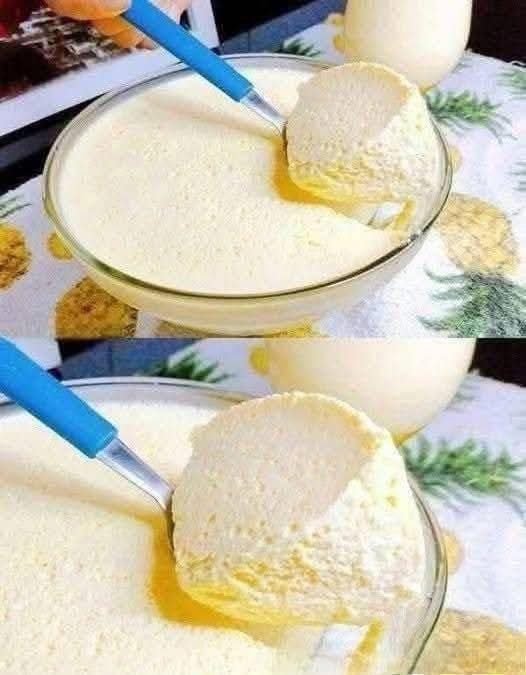
This dessert is incredibly simple to whip up and relies on the chemical reaction between lemon juice and milk proteins to create its unique, velvety structure.

Ingredients

  • 1 ½ cups Evaporated Milk, chilled (It must be very cold to whip properly)

  • ½ cup Fresh Lemon Juice (approx. 2–3 lemons)

  • ½ cup Granulated Sugar Substitute (or regular sugar, depending on your preference)

  • Optional: Fresh lemon zest for garnish.


Instructions

  1. Chill the Milk: For the best results, place your can of evaporated milk in the refrigerator for at least 4 hours (or 30 minutes in the freezer) before starting. The colder the milk, the fluffier your mousse will be.

  2. Whip to Soft Peaks: Pour the chilled evaporated milk into a large, cold mixing bowl. Using a hand mixer or stand mixer, beat the milk on high speed for about 3–5 minutes until it doubles in volume and looks thick and foamy.

  3. Add Sweetness: While continuing to beat the milk, gradually add your sugar or sweetener. Continue whipping until the mixture begins to look like whipped cream.

  4. The “Magic” Step: Slowly pour in the lemon juice while keeping the mixer running. You will notice the mixture instantly begins to thicken and stiffen. This is the lemon juice “setting” the milk proteins. Continue beating for another minute until it is very thick and holds its shape.

  5. Set and Serve: Spoon the mousse into a large glass serving bowl or individual ramekins. Smooth the top with the back of a spoon.

  6. Final Chill: Place the dessert in the refrigerator for at least 1 hour to allow it to set completely. This gives it that “treasure-like” airy texture seen in your photo.


Pro Tips for Success

  • Don’t skip the chill: If the milk is room temperature, it will not whip; it will just stay liquid.

  • The Zest: Folding in a teaspoon of fresh lemon zest at the very end adds a beautiful pop of color and an extra hit of citrus aroma.

  • Serving: This is delicious on its own, but it also makes a great topping for fresh berries or a crust made of crushed biscuits.

Creamy Lemon Cheesecake Parfaits

Creamy Lemon Cheesecake Parfaits

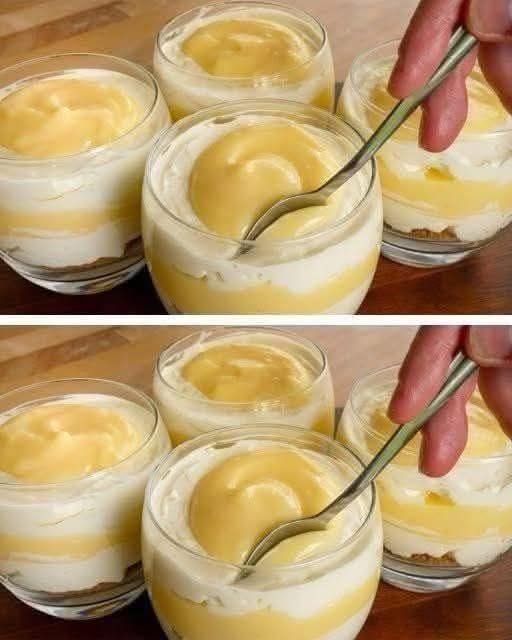
This dessert features a buttery biscuit base, a silky cream cheese layer, and a zesty homemade lemon curd.

Ingredients

For the Base:

  • 1 cup graham crackers or digestive biscuits, crushed into fine crumbs

  • 3 tbsp unsalted butter, melted

For the Cheesecake Layer:

  • 1 cup (8 oz) cream cheese, softened

  • 1/2 cup powdered sugar

  • 1 tsp vanilla extract

  • 1 cup heavy whipping cream, chilled

For the Lemon Topping:

  • 1/2 cup lemon curd (store-bought or homemade)

  • Optional: Fresh mint leaves or lemon zest for garnish


Instructions

  1. Prepare the Base: In a small bowl, mix the crushed biscuits with the melted butter until the mixture feels like wet sand. Spoon about 2 tablespoons into the bottom of each glass. Press down lightly with the back of a spoon to create an even layer.

  2. Make the Cream Layer: In a large bowl, beat the softened cream cheese, powdered sugar, and vanilla until smooth and creamy. In a separate bowl, whip the heavy cream until stiff peaks form. Gently fold the whipped cream into the cream cheese mixture until combined and fluffy.

  3. Layer the Parfaits: Pipe or spoon a thick layer of the cheesecake mixture over the biscuit base in each glass. Smooth the top with a spoon.

  4. Add the Lemon Zest: Gently stir your lemon curd to loosen it up. Pour a generous layer of curd over the cheesecake filling. For the look in the photo, you can add a small “dollop” of the white cream back on top and swirl it, or simply leave the lemon as a bright top layer.

  5. Chill and Serve: Place the glasses in the refrigerator for at least 30 minutes to allow the layers to set and the flavors to meld. Top with a bit of fresh zest or a mint leaf just before serving.


Why this works:

  • Texture: The crunch of the buttered crumbs balances the velvet-smooth cream.

  • Flavor: The tartness of the lemon cuts through the richness of the cream cheese, making it refreshing rather than heavy.