2-Ingredient Orange Fluff

🍊 2-Ingredient Orange Fluff

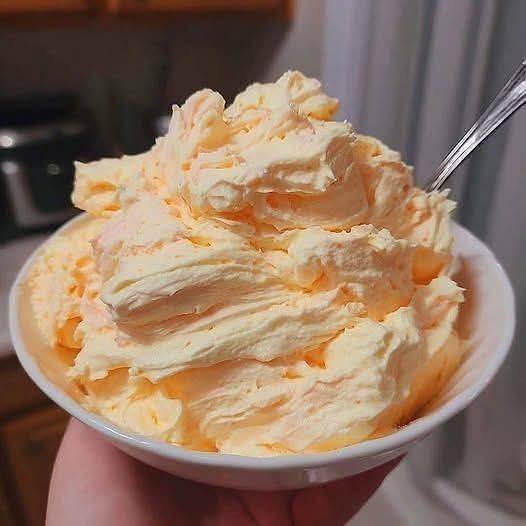
This recipe is prized for being quick, airy, and a clever way to incorporate more protein into a dessert.

Ingredients

  • Greek Yogurt: 2 cups of plain, non-fat or low-fat Greek yogurt.

  • Orange Gelatin Mix: 1 small package (about 0.3 oz or 9g) of sugar-free orange gelatin powder.

Instructions

  1. Combine: In a medium mixing bowl, add the Greek yogurt.

  2. Mix: Sprinkle the dry orange gelatin powder directly over the yogurt.

  3. Whip: Using a whisk or an electric hand mixer, beat the mixture for 2–3 minutes. This incorporates air, making it “fluffy” rather than just a thick yogurt.

  4. Chill: For the best texture, let it sit in the refrigerator for at least 30 minutes. This allows the gelatin to set slightly and the flavors to meld.

  5. Serve: Enjoy it on its own, or use it as a dip for fresh fruit slices.


✨ Pro-Tips for the “Genius” Result

  • Consistency: If you want it even lighter, you can fold in $1/2$ cup of fat-free whipped topping after mixing.

  • The “Dough” Connection: Since you mentioned being a “professional 2-ingredient dough maker,” you can actually use the same Greek yogurt mixed with self-rising flour to make quick bagels or pizza crusts to pair with your meals!


⚠️ A Quick Refresh on Your Previous Recipes

To keep your wellness routine balanced, here is a quick recap of the safety tips for the other recipes you’ve shared:

  • Clove Tea: Continue to avoid this blend if you are pregnant or taking blood-thinning medication.

  • Papaya Seeds: Keep your intake to a maximum of 1 teaspoon per day to avoid digestive sensitivity.

  • Moderation: Always consult a healthcare professional before making these remedies a permanent part of your daily routine if you have underlying medical conditions.

Muffin Tin Lasagna Cups

Muffin Tin Lasagna Cups

These are quick to assemble and easy to customize. Using wonton wrappers instead of traditional pasta makes them light and gives them a satisfying “crunch.”

Ingredients

  • Wonton Wrappers: 24 wrappers (found in the produce or refrigerated section of most stores).

  • Marinara Sauce: 1.5 cups of your favorite low-sodium tomato sauce.

  • Cheese Blend: 1 cup reduced-fat Mexican cheese blend (as you preferred!) or shredded mozzarella.

  • Ricotta Mixture: 1 cup part-skim ricotta cheese mixed with $1/4$ cup grated Parmesan and a pinch of dried oregano.

  • Protein (Optional): $1/2$ lb of cooked lean ground turkey or crumbled plant-based meat.

Instructions

  1. Prep the Tin: Preheat your oven to 375°F (190°C). Lightly spray a 12-cup muffin tin with non-stick cooking spray.

  2. The First Layer: Press one wonton wrapper into the bottom of each muffin cup. Make sure it flat against the bottom and sides.

  3. The Base Filling: Add a small dollop of the ricotta mixture, a spoonful of sauce, and a sprinkle of your Mexican cheese blend.

  4. The Second Layer: Place a second wonton wrapper on top of the first layer (rotate it slightly so the corners point in a different direction for better coverage).

  5. Top It Off: Repeat the filling layers—ricotta, sauce, and finally, a generous pinch of the reduced-fat Mexican cheese on top.

  6. Bake: Place in the oven for 12–15 minutes. Watch for the edges of the wontons to turn golden brown and the cheese to bubble.

  7. Rest & Serve: Let them cool in the pan for 5 minutes. This helps the cheese set so they pop out easily with a spoon or butter knife.


💡 Why This Recipe Works

  • Effortless Portion Control: Since they are pre-sized in a muffin tin, it’s easy to track exactly how much you’re eating.

  • Meal Prep Friendly: These store perfectly in an airtight container for 3–4 days. Reheat them in a toaster oven to keep the “wonton” edges crispy.

  • Balanced Swap: Using reduced-fat cheese and wonton wrappers significantly lowers the calorie density compared to a traditional deep-dish lasagna.

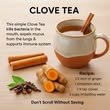
Soothing Clove and Ginger Tea

Soothing Clove and Ginger Tea

This recipe combines warming spices to create a fragrant drink that is easy to prepare at home.

Ingredients

  • Fresh Ginger: $1/2$ inch piece, sliced or crushed.

  • Cinnamon: 1 whole cinnamon stick.

  • Cloves: $1/4$ teaspoon of whole cloves.

  • Water: 3 cups of water.

  • Optional: 1 teaspoon of raw honey (add only when the tea has cooled slightly to preserve its natural properties).

Instructions

  1. Boil: Place the water, sliced ginger, cinnamon stick, and cloves in a small pot.

  2. Simmer: Bring the mixture to a boil and let it simmer for 7 to 8 minutes. This allows the spices to fully infuse the water.

  3. Strain: Pour the tea through a fine-mesh strainer into your favorite mug to remove the solids.

  4. Cool and Sweeten: Let the tea sit for a minute or two. If you prefer it sweet, stir in the honey once the tea is warm rather than boiling hot.

  5. Enjoy: Sip slowly while warm.


🌟 Benefits of the Ingredients

  • Clove: Traditionally used for its antimicrobial properties to help maintain mouth hygiene.

  • Ginger & Cinnamon: Known for their warming effects and support for the immune system.

  • Respiratory Support: The steam and warmth of the tea can help clear mucus and soothe the throat.

⚠️ Important Safety Notes

  • Pregnancy: It is recommended to avoid this tea if you are pregnant.

  • Medication: Those on blood-thinning medications should avoid this blend due to the natural properties of cloves and ginger.

  • Moderation: While these ingredients are natural, they are potent. Stick to the suggested measurements for the best experience.

Easy Creamy Layered Parfait

Easy Creamy Layered Parfait

This recipe is quick, tasty, and perfect for sharing at home.

Ingredients

  • The Base: 1 pack of plain biscuits (like Maria cookies, Graham crackers, or Digestive biscuits).

  • The Cream: * 2 cups whole milk.

    • 1/2 cup sugar.

    • 2 egg yolks.

    • 2 tablespoons cornstarch.

    • 1 teaspoon vanilla extract.

    • 1/2 cup heavy cream (optional, for extra richness).

Instructions

  1. Prepare the Biscuits: Crush the biscuits into small chunks or a coarse sandy texture. Set aside.

  2. Make the Custard: * In a saucepan, whisk together the milk, sugar, egg yolks, and cornstarch until smooth.

    • Place over medium heat, stirring constantly to avoid lumps.

    • Once the mixture thickens into a pudding-like consistency, remove from heat and stir in the vanilla extract.

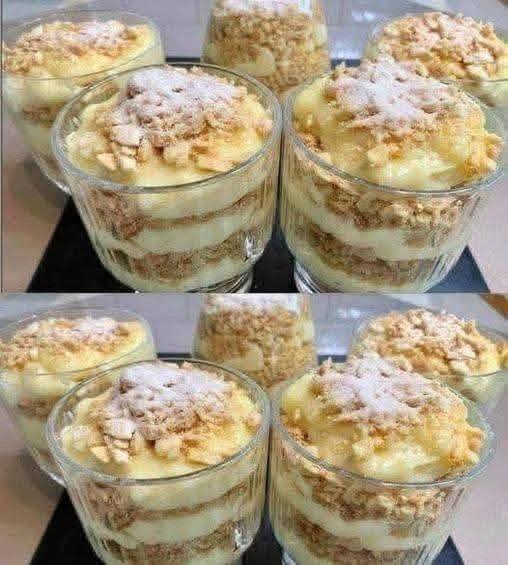
  3. Layering: * Place a spoonful of crushed biscuits at the bottom of each glass.

    • Add a layer of the warm vanilla cream.

    • Repeat the layers until the glass is nearly full.

  4. Finish: Top with a final sprinkle of biscuit crumbs or a dusting of powdered sugar as seen in your photo.

  5. Chill: Let the glasses sit in the refrigerator for at least 2 hours to set and allow the biscuits to soften slightly.


⚠️ Safety Reminder Regarding Papaya Seeds

If you choose to incorporate the papaya seeds we discussed earlier into your diet, remember these safety guidelines from your reference:

  • Dosage: Do not exceed 1 teaspoon of seeds per day.

  • Avoid if: You are pregnant, have stomach ulcers, sensitive digestion, or a papaya allergy.

  • Consultation: Always speak with a healthcare professional before using natural remedies if you have medical conditions or take medication.

No-Bake Creamy Cocoa Dessert (5-Minute Prep)

No-Bake Creamy Cocoa Dessert (5-Minute Prep)

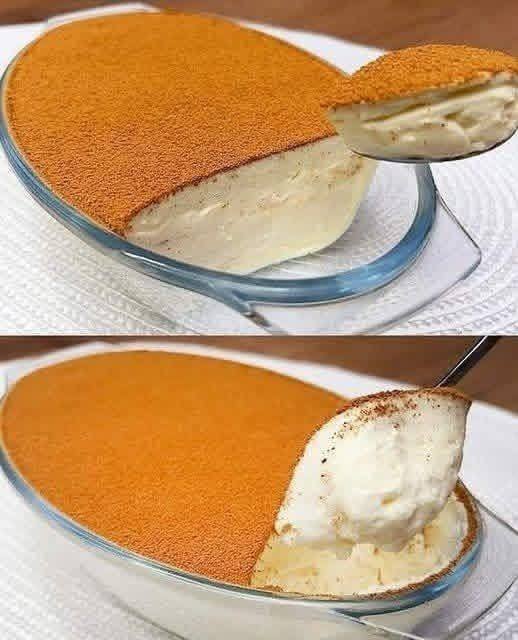
A smooth, creamy chilled dessert with a cocoa-dusted top. No oven needed.


Ingredients

  • 2 cups (500 ml) heavy whipping cream

  • ½ cup (100 g) sugar or sweetener of choice

  • 1 teaspoon vanilla extract

  • 1 cup (250 g) cream cheese or mascarpone, softened

  • 2 tablespoons cornstarch (or instant vanilla pudding powder)

  • ½ cup (120 ml) milk

  • Unsweetened cocoa powder, for topping


Step-by-Step Instructions

1. Make the Cream Base

In a mixing bowl, beat:

  • Heavy cream

  • Sugar

  • Vanilla

Whip until thick and fluffy (soft peaks form).

2. Add the Cheese

Add the softened cream cheese (or mascarpone) to the whipped cream.
Beat again until completely smooth and creamy with no lumps.

3. Thicken the Mixture

In a small bowl, whisk:

  • Milk

  • Cornstarch

Pour this into the cream mixture and mix well until fully combined.

4. Chill

Pour the mixture into a serving dish or glass container.
Smooth the top with a spatula.

Refrigerate for 2–3 hours until firm.

5. Finish

Before serving, dust the top generously with unsweetened cocoa powder.


How to Serve

  • Serve cold

  • Scoop or slice with a spoon

  • Optional: add grated chocolate or coffee powder on top


Storage

  • Keep covered in the refrigerator for up to 3 days

  • Do not leave at room temperature for long


Optional Variations

  • Add instant coffee to the cream for coffee flavor

  • Layer with crushed biscuits for a tiramisu-style dessert

  • Add lemon zest for citrus flavor

  • Use chocolate pudding instead of vanilla


Tips

✔ Use cold cream for better whipping
✔ Sift cocoa powder for a smooth top
✔ Chill fully for clean slices
✔ Beat cream cheese well to avoid lumps

The 2-Ingredient Silk Pudding

The 2-Ingredient Silk Pudding

Creamy, sweet, and perfectly smooth.

Ingredients

  • 1 can (approx. 400g) Sweetened Condensed Milk

  • 1 ½ cups (approx. 350g) Plain Greek Yogurt (or Natural Unsweetened Yogurt)

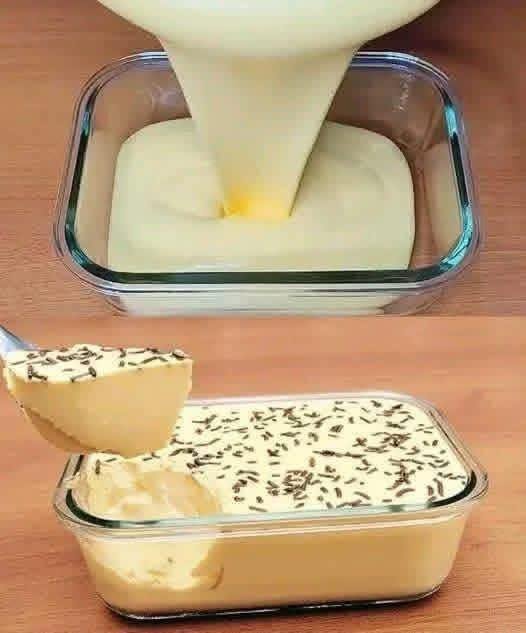
  • Optional: Chocolate sprinkles or a dusting of cocoa powder for the top.


Instructions

  1. Combine: In a medium mixing bowl, pour in the entire can of sweetened condensed milk. Add the Greek yogurt.

  2. Blend until Smooth: Use a whisk or a hand mixer to blend the two ingredients together. Mix for about 1–2 minutes until the texture is completely uniform and has a beautiful glossy sheen.

  3. The “Cook” (Microwave or Oven): * Microwave Method: Pour the mixture into a microwave-safe glass dish. Heat on high for 2 minutes, stir gently, and heat for another 2 minutes. The mixture should thicken significantly.

    • Oven Method: Pour into a baking dish and bake at 160°C (320°F) in a water bath (place the dish inside a larger pan filled with hot water) for about 30 minutes until set.

  4. Add Toppings: While the mixture is still warm but not hot, smooth the top with a spatula and add your chocolate sprinkles or garnish.

  5. Chill to Set: This is the most important part! Let the dish cool to room temperature, then cover and refrigerate for at least 3–4 hours (overnight is even better). This allows the proteins to bond and creates that firm, spoonable texture.

  6. Serve: Scoop directly from the dish or slice if you used the oven method for a firmer set.


Why This Works

The acidity in the yogurt reacts with the proteins in the condensed milk, and the application of gentle heat helps it “set” into a custard without the need for eggs or gelatin. It’s a wonderful kitchen hack for a last-minute dessert!