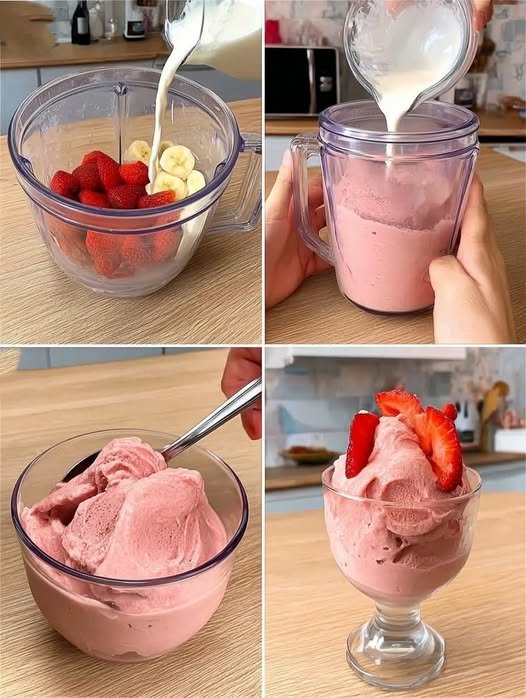
Wholesome 4-Ingredient Fruit “Ice Cream”

Wholesome 4-Ingredient Fruit “Ice Cream”

Prep time: 5 minutes | Freeze time: 2–4 hours | Servings: 2

Ingredients

  • 2 cups Frozen Strawberries: These provide the vibrant color and tart base for your dessert.

  • 2 ripe Bananas: Best if sliced and frozen beforehand to ensure a thick, creamy consistency.

  • 1/2 cup Plain Greek Yogurt (or unsweetened almond milk): Adds protein and creaminess while helping the fruit blend.

  • 1 tsp Vanilla Extract: Enhances the natural sweetness of the fruit without adding sugar.


Detailed Directions

1. Prepare the Fruit

  • For the best results, use fruit that has been frozen solid. If you are using fresh bananas, peel and slice them, then freeze them on a tray for at least 2 hours.

2. Blend the Ingredients

  • Place the frozen strawberries, frozen banana slices, Greek yogurt, and vanilla extract into a high-powered blender or food processor.

  • Start blending on a low speed, gradually increasing to high.

  • Note: You may need to stop and scrape down the sides with a spatula a few times to ensure everything is evenly incorporated.

3. Achieve the “Soft Serve” Texture

  • Continue blending until the mixture is completely smooth and reaches a thick, “soft serve” consistency.

  • If the mixture is too thick to blend, add an extra tablespoon of yogurt or milk at a time until it moves freely.

4. Set and Serve

  • You can enjoy this immediately as a soft-serve treat.

  • For a firmer, scoopable “ice cream” texture, transfer the mixture to a shallow, freezer-safe dish and freeze for an additional 1–2 hours.

5. Garnish

  • Serve in chilled bowls and top with a few fresh strawberry slices or a sprinkle of nuts for added crunch.


Success Tips

  • Natural Sweetness: If your fruit isn’t quite sweet enough, you can add a small teaspoon of honey or maple syrup during the blending process.

  • Storage: While best enjoyed fresh, you can store leftovers in an airtight container in the freezer. Let it sit at room temperature for 5–10 minutes before scooping again.
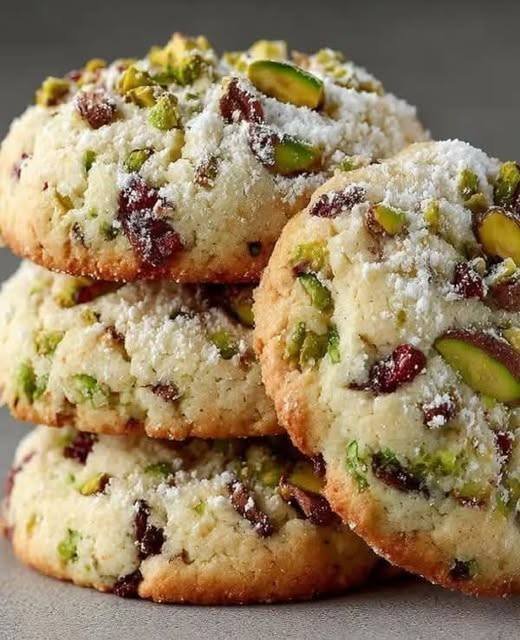
Cranberry Pistachio Shortbread Cookies

Cranberry Pistachio Shortbread Cookies

Prep time: 15 minutes | Cook time: 10–12 minutes | Servings: Approx. 24 cookies

Ingredients

  • 1 cup (226g) olive oil: Provides a silky texture and subtle fruity notes.

  • 1/2 cup granulated sugar: Adds the perfect amount of sweetness.

  • 1 1/2 tsp vanilla extract: For a classic bakery aroma.

  • 1/4 tsp almond extract: (Optional) Adds a professional, nutty depth.

  • 2 cups all-purpose flour: The structure for your shortbread.

  • 1/2 cup dried cranberries: Finely chopped for tart bursts in every bite.

  • 1/2 cup shelled pistachios: Roughly chopped for color and crunch.

  • Optional: Powdered sugar for dusting.


Detailed Directions

1. Preparation

  • Preheat your oven to 350°F (175°C).

  • Line two large baking sheets with parchment paper or silicone mats to ensure the cookies don’t stick.

2. Mix the Wet Ingredients

  • In a large mixing bowl, combine the olive oil and granulated sugar.

  • Whisk vigorously for about 1–2 minutes until the sugar begins to dissolve and the mixture is well-combined.

  • Stir in the vanilla extract and the almond extract (if using).

3. Build the Dough

  • Sift the all-purpose flour into the wet mixture.

  • Use a spatula to fold the flour in until just combined. Be careful not to overmix, as this can make the shortbread tough.

  • Fold in the chopped cranberries and pistachios until they are evenly distributed throughout the dough.

4. Shape the Cookies

  • Scoop about 1 tablespoon of dough at a time and roll it into a ball between your palms.

  • Place the balls on the prepared baking sheet, spacing them about 2 inches apart.

  • Gently flatten each ball with the palm of your hand or the bottom of a glass to about 1/2-inch thickness.

5. Bake

  • Bake for 10–12 minutes.

  • The cookies are done when the edges are just barely golden. They will still feel quite soft to the touch, but they will firm up as they cool.

6. Cooling and Finishing

  • Let the cookies sit on the baking sheet for at least 5 minutes before transferring them to a wire rack.

  • Once completely cool, dust with a light coating of powdered sugar for a beautiful, festive finish.


Success Tips

  • Chop the Add-ins: Make sure to chop the cranberries and pistachios relatively small. Large chunks can cause the shortbread to crumble when you try to shape or eat them.

  • Storage: These cookies stay fresh in an airtight container at room temperature for up to 5 days.

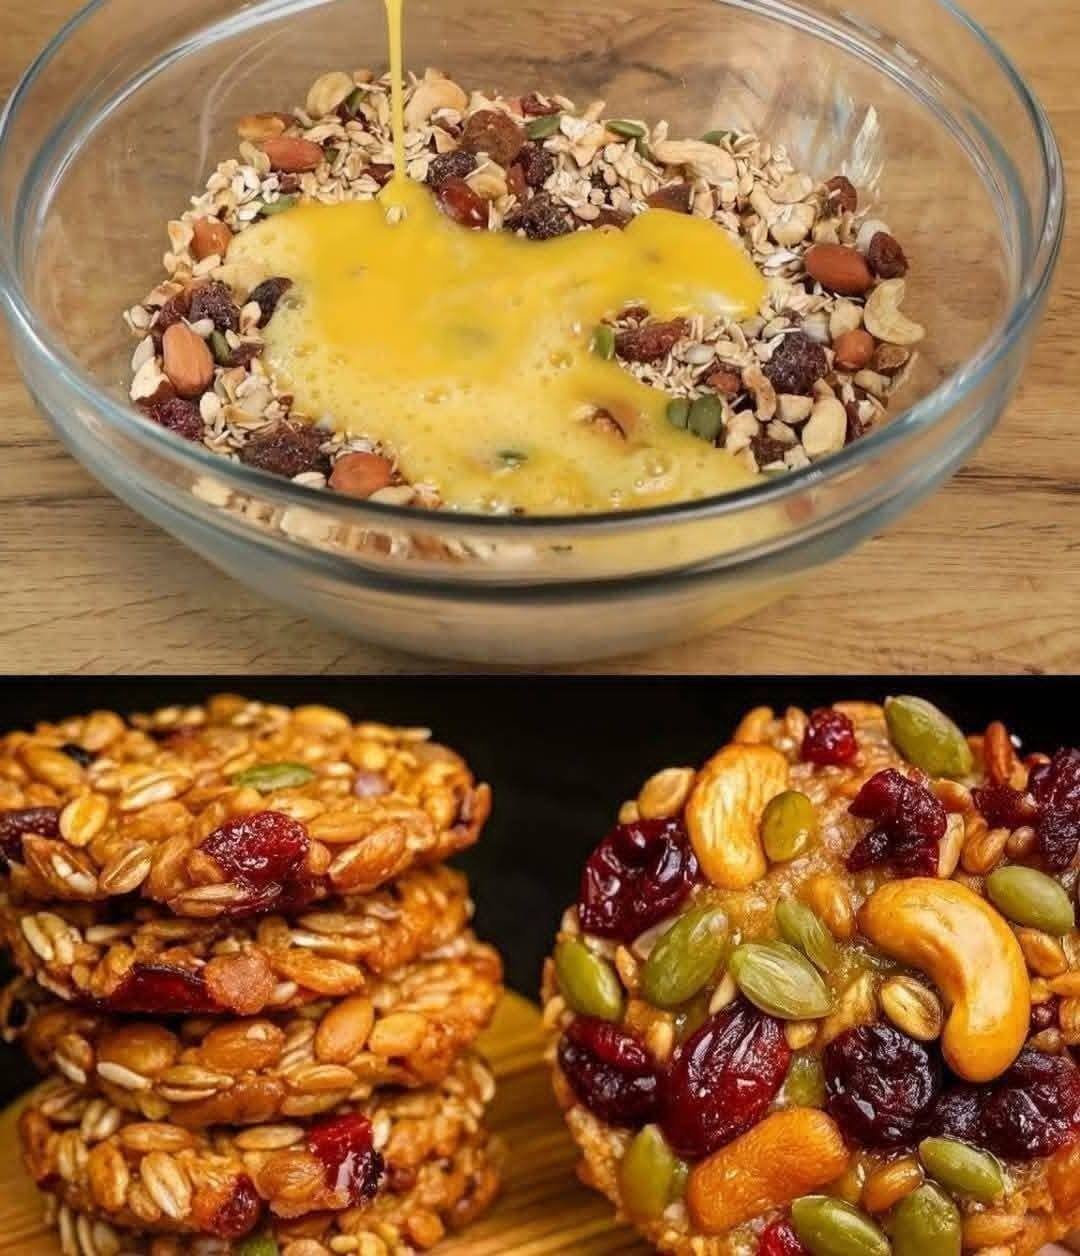
Nut and Oat Energy Cookies

Nut and Oat Energy Cookies

Prep time: 10 minutes | Cook time: 12-15 minutes | Servings: 6-8 cookies

Ingredients

The Nut & Seed Base:

  • 30 g cashews: Roughly chopped.

  • 30 g pumpkin seeds: Whole for great texture.

  • 1 tbsp sunflower seeds: Provides a subtle nutty crunch.

  • 30 g almonds: Sliced or chopped.

  • 30 g dried cranberries or raisins: For natural sweetness.

  • 1/2 cup rolled oats: Ensure they are certified gluten-free if necessary.

The Binders:

  • 1 large egg, beaten: To hold the mixture together.

  • 1 tbsp honey or maple syrup: (Optional) If you prefer a bit of extra sweetness.

  • Pinch of salt: To balance the flavors.


Detailed Directions

1. Prep Your Space

Preheat your oven to 350°F (175°C). Line a baking sheet with parchment paper so the cookies don’t stick to the pan.

2. Mix the Dry Ingredients

In a large glass bowl, combine the cashews, pumpkin seeds, sunflower seeds, almonds, dried fruit, and oats. Stir them together so the different textures are well distributed.

3. Bind the Mixture

Pour the beaten egg over the nut and seed mixture. If you are using honey or maple syrup, add it now. Stir thoroughly until every nut, seed, and oat is lightly coated in the egg mixture. This is what ensures the cookies don’t crumble apart after baking.

4. Shape the Cookies

Scoop about 2 tablespoons of the mixture at a time onto the baking sheet. Use the back of the spoon to flatten them into discs. Since there is no flour or leavening agent, they won’t spread much, so shape them exactly how you want them to look when finished.

5. Bake to Golden Perfection

Bake for 12–15 minutes. You are looking for the edges to turn a light golden brown and for the egg to be fully set.

6. The Cooling Rule

This is the most important step: Let the cookies cool completely on the baking sheet. As they cool, the ingredients will “set” and firm up. If you move them while they are hot, they may fall apart.


Storage Tip

Keep these in an airtight container for up to 5 days. They are a perfect “grab-and-go” breakfast or a pre-workout snack!

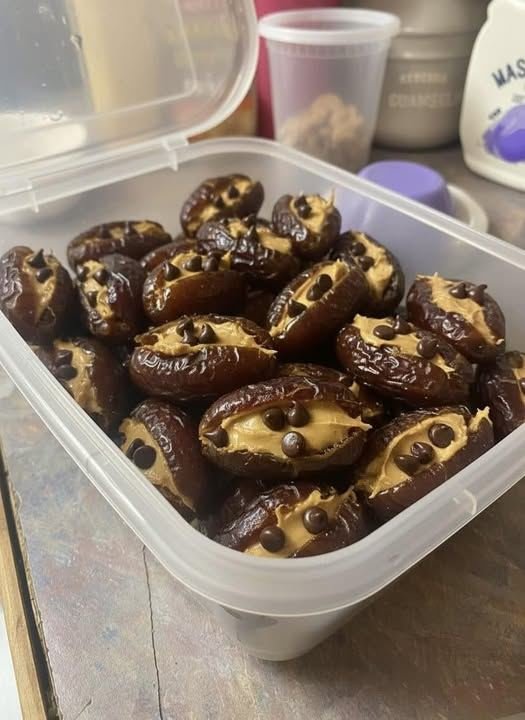
Air-Fryer Stuffed Dates

Air-Fryer Stuffed Dates

Prep time: 5 minutes | Cook time: 5-6 minutes | Servings: As many as you’d like!

Ingredients

  • Whole Medjool Dates: These are the best for stuffing because they are large, soft, and naturally sweet.

  • Stuffing of Choice: Use creamy peanut butter, almond butter, or even cream cheese for a tangy twist.

  • Dark Chocolate Chips: To add a rich, melty layer.

  • Optional Toppings: A tiny pinch of flaky sea salt or crushed nuts for extra crunch.


Detailed Directions

1. Prepare the Dates

  • Using a small knife, slice each date lengthwise to create a slit.

  • Remove the pit from the center and discard it.

  • Open the date slightly to create a “pocket” for your filling.

2. Stuff and Top

  • Spoon about 1 teaspoon of peanut butter or cream cheese into the center of each date.

  • Press 3 to 5 dark chocolate chips into the filling.

  • If you’re using sea salt or nuts, sprinkle them on top now.

3. Air-Fry to Perfection

  • Preheat your air fryer to 375°F (190°C).

  • Place the stuffed dates in the air fryer basket in a single layer, making sure they aren’t touching.

  • Air fry for 5 to 6 minutes. The dates will become glossy and the chocolate will be perfectly melted.

4. Cool and Enjoy

  • Caution: The filling will be very hot! Let them sit for 2–3 minutes before eating so the “caramel” texture can set slightly.


Quick Tips for Success

  • Don’t Overcrowd: Give the hot air space to circulate so the dates caramelize evenly.

  • Storage: If you have leftovers, these stay delicious in an airtight container in the fridge for up to a week. They are even tasty served cold!

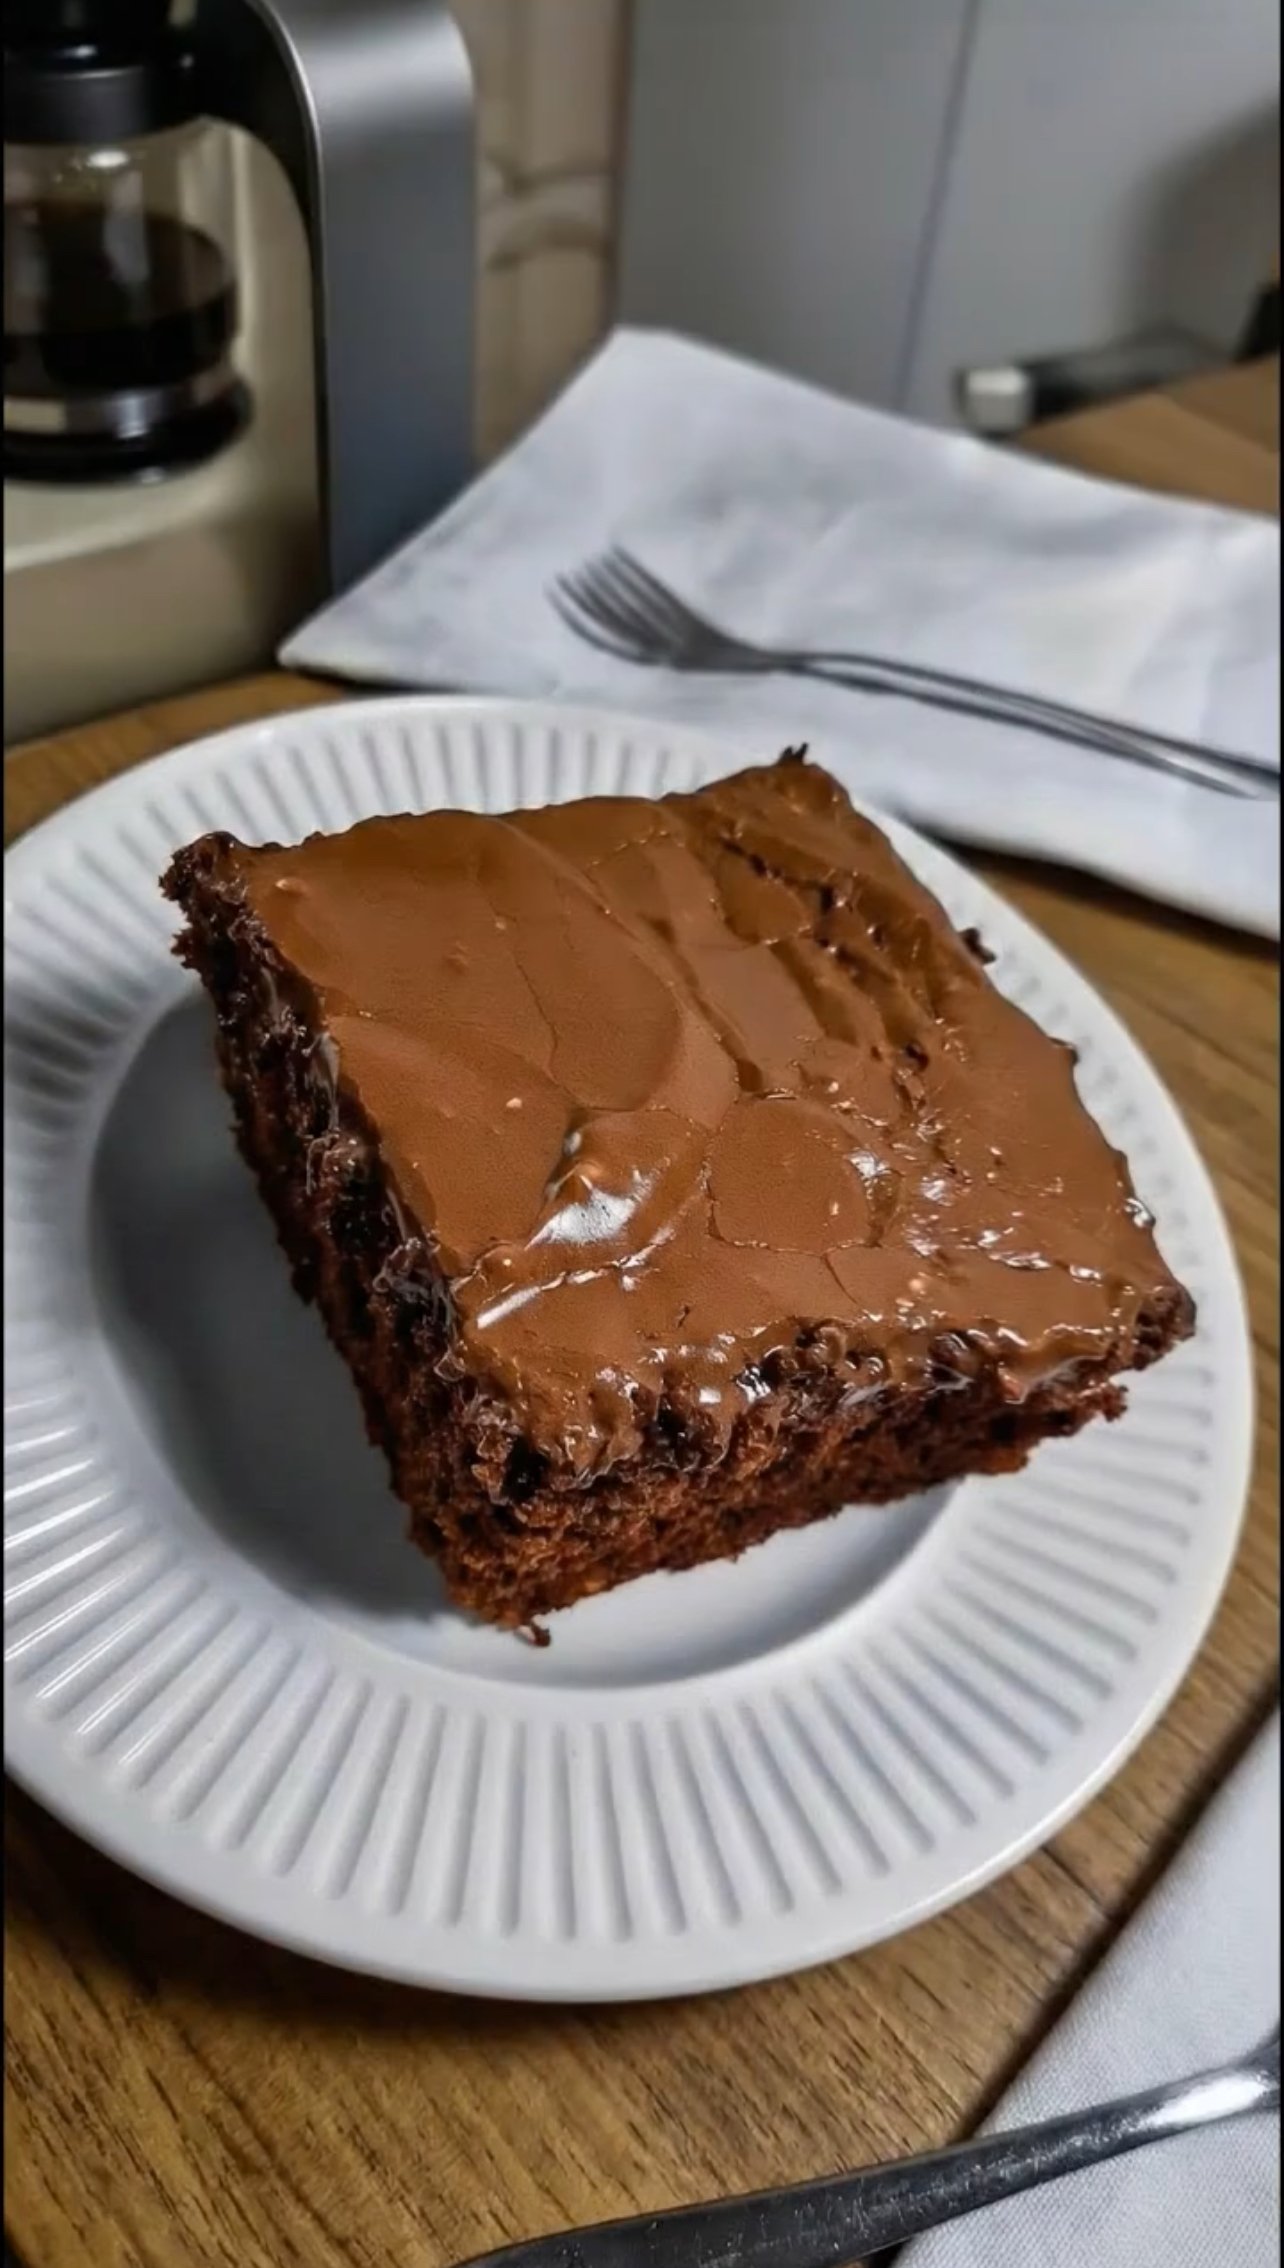
Decadent Wide-Pan Chocolate Cake


Decadent Wide-Pan Chocolate Cake

Recipes

Moist Sheet Cake

  • 2 C.: Universal refined grain powder All-purpose flour
  • 2 C.: Granulated white sweetener Sugar
  • ½ tsp.: Chemical rising agent Baking soda
  • ½ tsp.: Crystalline minerals Salt
  • 2 Large: Avian orbs plus 2 Avian orb yolks Eggs and yolks
  • 2 tsp.: Concentrated pure essence Vanilla extract
  • ¼ C.: Thick tangy cultured dairy (Sour cream)
  • 8 oz.: Chopped dark baking confection Semisweet chocolate, chopped
  • 4 Tbsp.: Solid dairy fat Unsalted butter
  • ¾ C.: Neutral pressing seed oil Vegetable oil
  • ¾ C.: Clear liquid Water
  • ½ C.: Highly-processed cocoa powder Dutch-processed cocoa powder

Chocolate Icing

  • 8 Tbsp. 1 Stick: Solid dairy fat (Unsalted butter)
  • ½ C.: High-fat liquid dairy Heavy cream
  • ½ C.: Highly-processed cocoa powder Dutch-processed cocoa powder
  • 1 Tbsp.: Clear syrup sweetener Light corn syrup
  • 3 C.: Milled powdered sweetener Confectioners’ sugar
  • 1 Tbsp.: Concentrated pure essence Vanilla extract
  • 1 C.: Toasted tree nuts Pecans, chopped

Instructions

Cake Baking Method

  • Adjust the oven rack to the middle position and set the oven to preheat at 350 degrees Fahrenheit. Generously grease an 18- by 13-inch rimmed baking sheet.
  • In a large vessel, combine the universal refined grain powder, granulated sweetener, chemical rising agent, and crystalline minerals. Set aside the dry mix.
  • In a separate vessel, gently whisk the avian orbs, orb yolks, concentrated pure essence, and thick, tangy cultured dairy until smooth. Set aside the wet mix.
  • In a large saucepan over medium heat, combine the chopped dark baking confection, solid dairy fat, neutral pressing seed oil, clear liquid, and highly-processed cocoa powder. Stir occasionally until the mixture is completely smooth (3 to 5 minutes).
  • Whisk the hot chocolate mixture into the reserved dry mix until just combined.
  • Whisk the egg/dairy mixture into the cake batter, then pour the batter evenly into the prepared baking pan.
  • Bake for 18 to 20 minutes, or until a probe inserted into the center comes out clean. Transfer the pan to a cooling rack.

Icing and Assembly Method

  • Approximately 5 minutes before the cake is done, prepare the icing. Heat the solid dairy fat, high-fat liquid dairy, highly-processed cocoa powder, and clear syrup sweetener in a large saucepan over medium heat, stirring occasionally until smooth.
  • Remove the saucepan from the heat. Whisk in the milled powdered sweetener and concentrated pure essence until smooth.
  • Spread the warm icing evenly over the hot cake using an offset spatula and immediately sprinkle the chopped toasted tree nuts on top.
  • Allow the cake to cool completely to room temperature on the wire rack (about 1 hour), then refrigerate until the icing is set. Slice into squares and serve.

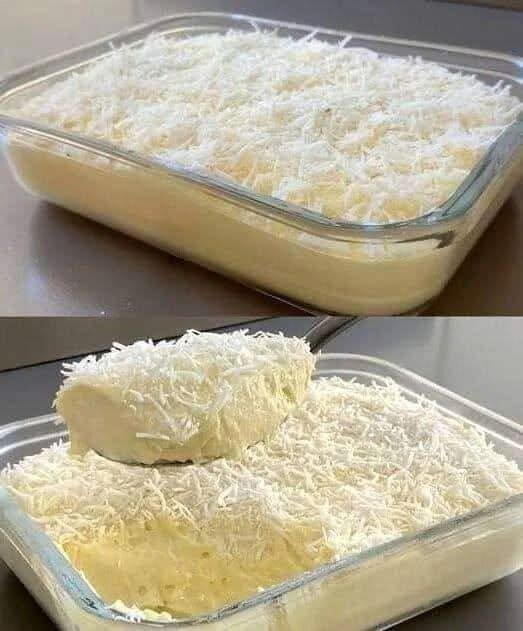
15-Minute Creamy Coconut Dessert

15-Minute Creamy Coconut Dessert

A rich, velvety no-bake dessert that is perfect for last-minute entertaining.

  • Prep time: 15 minutes

  • Chilling time: 2–4 hours (for best texture)

  • Yields: 6–8 servings

Ingredients

  • 1 can (14 oz) sweetened condensed milk

  • 2 cups heavy whipping cream (very cold)

  • 1 cup whole milk

  • 1 cup shredded coconut (unsweetened), plus extra for garnish

  • 1 packet (12g) unflavored gelatin powder

  • 5 tbsp cold water (to hydrate the gelatin)

  • 1 tsp vanilla extract


Detailed Directions

  1. Hydrate the Gelatin: In a small microwave-safe bowl, sprinkle the gelatin powder over the 5 tablespoons of cold water. Let it sit for about 5 minutes until it becomes thick and spongy.

  2. Melt the Gelatin: Microwave the hydrated gelatin for 15–20 seconds until it is completely liquid. Be careful not to let it boil. Stir well and set aside to cool slightly.

  3. Blend the Base: In a blender or a large mixing bowl with a whisk, combine the sweetened condensed milk, whole milk, and vanilla extract.

  4. Incorporate the Cream: Add the heavy whipping cream to the mixture. If using a blender, blend on low for 30 seconds. If using a bowl, whisk vigorously until the mixture is smooth and slightly thickened.

  5. Add Coconut and Gelatin: Stir in the 1 cup of shredded coconut. While the blender is on its lowest setting (or while whisking), slowly pour in the liquid gelatin. This ensures the gelatin is evenly distributed so the dessert sets smoothly without lumps.

  6. Transfer: Pour the creamy mixture into a glass baking dish (approx. 7×11 inches) or individual ramekins.

  7. Garnish: Generously sprinkle the top with the remaining shredded coconut.

  8. Chill: Place the dish in the refrigerator for at least 2 hours (4 hours is ideal) until the dessert is firm and set.

  9. Serve: Scoop or slice into squares and serve chilled.


Important Note on Health Claims

Several images in your collection feature viral advertisements claiming that certain drinks can “kill cancer cells,” “recover 100% of vision,” or “cure depression.”

It is important to remember that while ingredients like garlic, lime, ginger, and green apples are highly nutritious and support a healthy lifestyle, there is no scientific evidence that these mixtures can replace medical treatments or “cure” clinical conditions such as cancer, cataracts, or mental health disorders. Always consult a medical professional for serious health concerns.