Creamy Sweet Banana Pudding

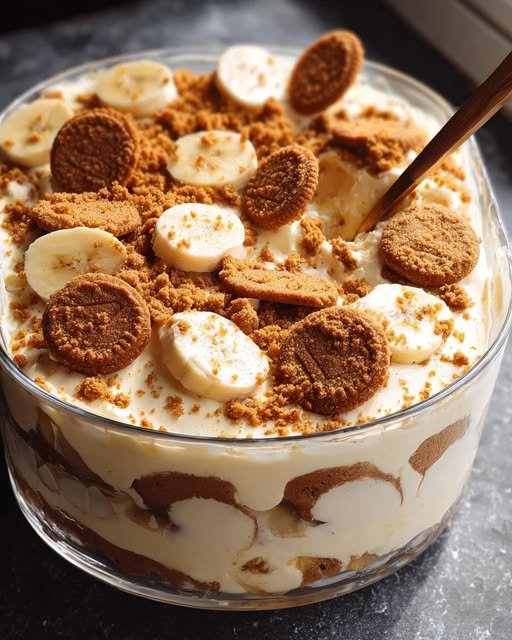
Creamy Sweet Banana Pudding

This recipe sounds like a dream—the combination of cream cheese and sweetened condensed milk gives it that “mousse-like” texture that sets it apart from traditional puddings.

Since you asked for full recipes, I have organized your notes into a clean, easy-to-follow format for your collection.


Creamy Sweet Banana Pudding

This recipe is exceptionally rich and creamy. Using instant pudding and room-temperature cream cheese ensures a smooth, thick consistency without any cooking required.

  • Prep time: 20 minutes

  • Chill time: 3–4 hours

  • Servings: 10–12

  • Shelf Life: Best eaten within 48 hours.

Ingredients

  • 1 (8-oz) block cream cheese, room temperature

  • 1 (14-oz) can sweetened condensed milk

  • 1 (5-oz) package instant vanilla pudding mix

  • 2 1/2 cups cold milk

  • 2 tsp vanilla extract

  • 8 oz heavy cream, whipped (or one 8-oz tub of Cool Whip)

  • 4 ripe bananas, sliced

  • 10 oz shortbread cookies (like Chessmen or Lorna Doone)

Instructions

  1. Cream the Base: In the bowl of a stand mixer fitted with the whisk attachment, beat the softened cream cheese and sweetened condensed milk until completely smooth. Scrape the sides of the bowl to ensure there are no lumps (about 2–3 minutes).

  2. Thicken the Pudding: Add the dry pudding mix, cold milk, and vanilla. Start on low speed for 30 seconds to avoid a mess, then increase to high. Beat for 4–5 minutes until the mixture is thick and smooth.

  3. Lighten the Texture: Gently fold half (4 oz) of your whipped cream into the pudding mixture until just combined. Set the other half aside for the topping.

  4. Layer the Dish: * Line the bottom of a 9×13 baking dish (or a trifle bowl) with a single layer of shortbread cookies.

    • Place the sliced bananas evenly over the cookie layer.

  5. Assemble: Spread the pudding mixture evenly over the bananas. Top the pudding with the remaining whipped cream, smoothing it to the edges.

  6. Garnish: Crumble any remaining cookies over the top or tuck whole cookies around the edges for decoration.

  7. Chill: Cover with plastic wrap and refrigerate for at least 3–4 hours before serving to allow the cookies to soften slightly and the flavors to meld.


Pro-Tips

  • Banana Ripeness: Use bananas that are yellow with just a few brown spots. If they are too green, they won’t be sweet enough; if they are too dark, they will become mushy too quickly.

  • Smoothness Hack: If your cream cheese is still a bit cold, microwave the unwrapped block for 15 seconds before mixing to prevent lumps.
Lemon Crinkle Biscuits

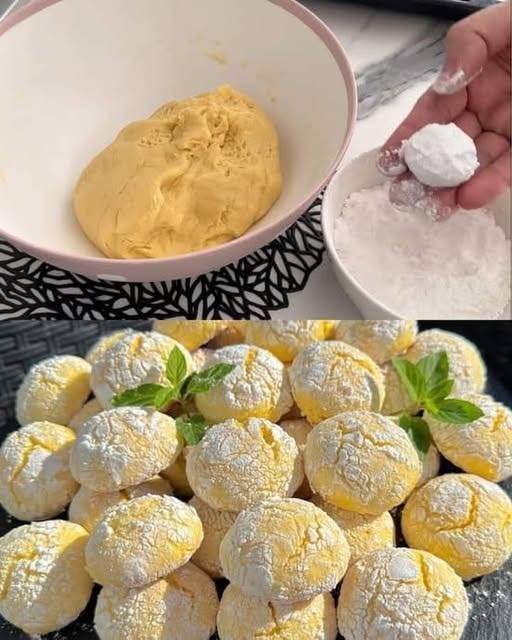
Lemon Crinkle Biscuits

These lemon-flavored biscuits have a soft interior and a lightly crisp exterior. They are coated in powdered sugar before baking, which creates a cracked surface as they expand in the oven.

Preparation Time

15 minutes

Chilling Time (Optional)

30 minutes

Baking Time

12–15 minutes

Yield

Approximately 20–24 biscuits


Ingredients

Biscuit Dough

  • 2 large eggs, at room temperature

  • 100 g granulated sugar

  • 80 ml neutral vegetable oil (such as sunflower oil)

  • Zest of 1 lemon, finely grated

  • 50 ml freshly squeezed lemon juice

  • 380 g all-purpose flour, sifted

  • 12 g baking powder

  • A small pinch of salt

Coating

  • 80 g powdered sugar, for rolling


Instructions

1. Mix the Wet Ingredients

Place the eggs and granulated sugar in a large mixing bowl. Whisk until the mixture becomes pale and slightly thickened.
Add the oil, lemon juice, and lemon zest. Whisk again until fully combined.


2. Combine the Dry Ingredients

In a separate bowl, mix the flour, baking powder, and salt until evenly distributed.


3. Form the Dough

Gradually add the dry ingredients to the wet mixture. Stir with a spatula or wooden spoon until a soft, slightly sticky dough forms.

If the dough is difficult to handle, cover the bowl and refrigerate for 30 minutes to firm it slightly.


4. Shape and Coat

Preheat the oven to 180°C (350°F). Line a baking tray with parchment paper.

Scoop approximately 1 tablespoon of dough and roll it gently into a ball.
Roll each ball in powdered sugar until fully coated.

Arrange the coated dough balls on the prepared baking tray, leaving space between them.


5. Bake

Bake for 12–15 minutes, or until the biscuits have spread and developed a cracked surface.
The tops should remain light in color, while the bottoms may show slight browning.

Remove from the oven and allow the biscuits to cool on the tray for 5 minutes before transferring to a wire rack.


Storage Notes

  • Store cooled biscuits in an airtight container at room temperature for up to 5 days.

  • The texture remains soft as long as the container is well sealed.

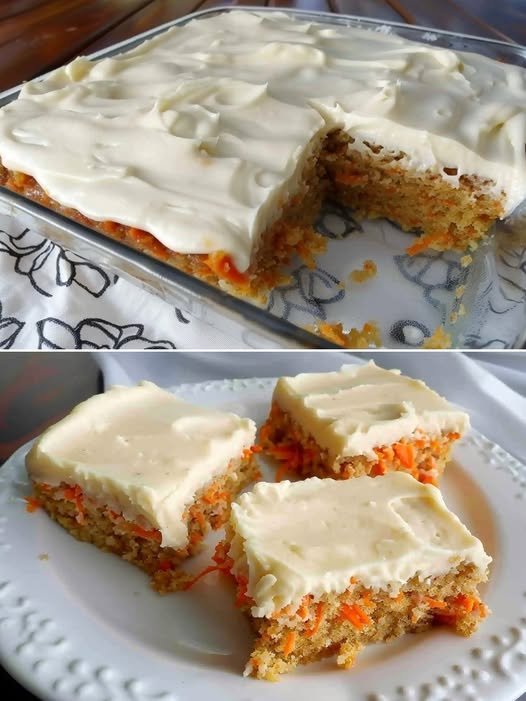
Keto Carrot Cake Bars with Cream Cheese Frosting

Keto Carrot Cake Bars with Cream Cheese Frosting

A rich, spiced dessert that is low-carb, gluten-free, and perfectly “mix-and-bake” simple.

  • Prep time: 15 minutes

  • Cook time: 25 minutes

  • Yields: 12 bars

  • Net Carbs: 7g per bar

Ingredients

The Spiced Cake Base:

  • 1 ½ cups Almond flour

  • ½ cup Coconut flour

  • ¾ cup Erythritol (granulated)

  • 1 tsp Ground cinnamon

  • ¼ tsp Ground nutmeg

  • ¼ tsp Ground ginger

  • 1 tsp Baking powder

  • ¼ tsp Salt

  • 3 Large eggs

  • ½ cup Almond milk (unsweetened)

  • ½ cup Liquid coconut oil

  • 1 tsp Vanilla extract

  • 1 ½ cups Grated carrot (finely grated is best)

  • ½ cup Walnuts or pecans, chopped

The Tangy Frosting:

  • 8 oz Cream cheese, softened

  • ¼ cup Unsalted butter, softened

  • ⅓ cup Erythritol (powdered works best for smooth frosting)

  • 1 tsp Vanilla extract

  • A pinch of Salt


Instructions

  1. Prep Work: Preheat your oven to 350°F (175°C). Line an 8×8 or 9×9 inch baking pan with parchment paper, leaving a slight overhang for easy removal.

  2. Mix Dry Ingredients: In a large bowl, whisk together the almond flour, coconut flour, erythritol, cinnamon, nutmeg, ginger, baking powder, and salt.

  3. Mix Wet Ingredients: In a separate bowl, whisk the eggs, almond milk, liquid coconut oil, and vanilla extract until smooth.

  4. Combine: Pour the wet ingredients into the dry ingredients. Mix until a smooth batter forms. Fold in the finely grated carrots and chopped nuts.

  5. Bake: Spread the batter evenly into your prepared pan. Bake for 22–25 minutes. Tip: Do not overbake! The bars should be set but still moist. 6. Cool: Allow the cake to cool completely in the pan. If the cake is even slightly warm, the frosting will melt.

  6. Make the Frosting: In a medium bowl, use a hand beater to cream together the softened cream cheese and butter. Add the powdered Erythritol, vanilla, and salt. Beat until fluffy and smooth.

  7. Frost and Chill: Spread the icing over the cooled cake. For the best texture and clean slices, place the pan in the fridge for at least 30 minutes before cutting into 12 bars.


💡 Pro-Tips for Success

  • Fine Texture: Finely grate your carrots. Large shreds can release too much moisture and make the bars “soggy”.

  • Clean Slices: Use a sharp knife dipped in warm water (and wiped dry) to get those perfect, bakery-style squares.

  • Storage: These stay delicious in the fridge for up to 5 days or can be frozen for up to 2 months.


Nutritional Profile (Per Bar)

  • Calories: 215 kcal

  • Fat: 19g

  • Net Carbs: 7g

  • Protein: 5g

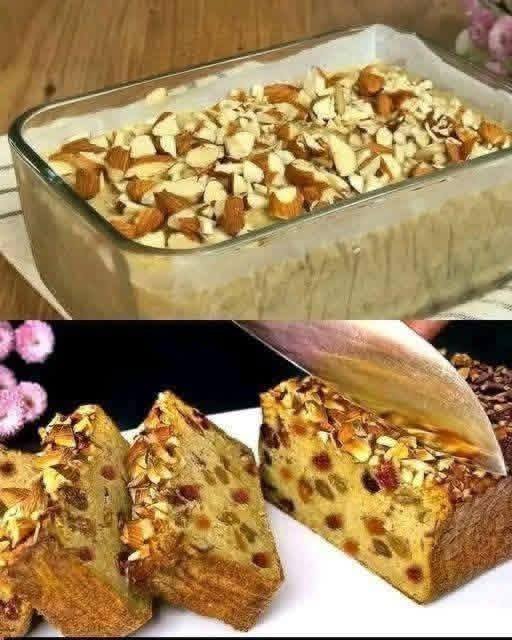
Healthy Apple & Oatmeal Breakfast Loaf

Healthy Apple & Oatmeal Breakfast Loaf

A simple, nutrient-dense bake that is naturally sweetened and gluten-friendly (when using certified GF oats).

  • Prep time: 10 minutes

  • Bake time: 40–45 minutes

  • Yields: 1 loaf (approx. 8 slices)

Ingredients

  • 2 large sweet apples (such as Honeycrisp or Fuji)

  • 1 cup rolled oats (old-fashioned oats work best for texture)

  • 2 large eggs

  • 1/2 cup unsweetened applesauce or mashed banana (for moisture)

  • 1 teaspoon ground cinnamon

  • 1 teaspoon vanilla extract

  • 1/2 teaspoon baking powder

  • 1/4 cup chopped almonds or walnuts (for the topping)

  • Optional: 1/4 cup raisins or dried cranberries for extra sweetness


Detailed Directions

  1. Preparation: Preheat your oven to 350°F (175°C). Line a standard loaf pan with parchment paper or lightly grease it with a small amount of coconut oil.

  2. Process the Oats: For a smoother “flour-like” texture, pulse the 1 cup of oats in a blender or food processor for 30 seconds. If you prefer a rustic, chewy texture, you can leave them whole.

  3. Prep the Apples: Core the apples. Grate one apple into a large mixing bowl. Dice the second apple into small, bite-sized cubes to provide texture throughout the loaf.

  4. Mix Wet Ingredients: Add the eggs, applesauce (or banana), and vanilla extract to the bowl with the grated apple. Whisk until well combined.

  5. Combine: Stir in the oats, cinnamon, and baking powder. Fold in the diced apple pieces and any optional dried fruit.

  6. Transfer and Top: Pour the batter into your prepared loaf pan and smooth the top with a spatula. Sprinkle the chopped almonds evenly over the surface.

  7. Bake: Place in the center of the oven and bake for 40–45 minutes. The loaf is done when a toothpick inserted into the center comes out clean and the almond topping is golden brown.

  8. Cool: Allow the loaf to cool in the pan for 10 minutes, then transfer it to a wire rack to cool completely before slicing.


A Note on Wellness Claims

Regarding the “colon cleanse” juice and morning tonics mentioned in your collection: while ingredients like apple, ginger, and lemon are excellent for daily hydration and antioxidant support, there is no medical evidence that they can “flush pounds of toxins” or cure clinical conditions like depression or rheumatism. These drinks should be enjoyed as part of a balanced diet rather than as a replacement for professional medical advice.

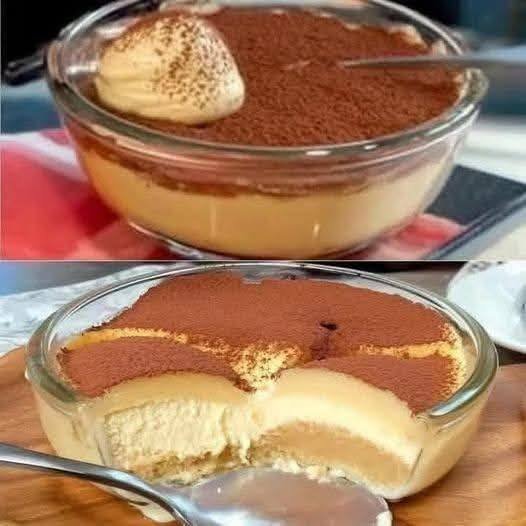
3-Ingredient Blender Coffee Mousse

3-Ingredient Blender Coffee Mousse

A light, airy, and inexpensive dessert that whips up in seconds.

  • Prep time: 5 minutes

  • Chilling time: 1 hour

  • Servings: 4

Ingredients

  • 2 cups heavy whipping cream (ensure it is very cold)

  • 1/2 cup sweetened condensed milk (adjust slightly more or less for your preferred sweetness)

  • 2 tablespoons instant coffee granules (decaf granules work perfectly as well)

  • Optional: Unsweetened cocoa powder or extra coffee granules for garnish.


Detailed Directions

  1. Chill Your Tools: For the best results, place your blender jar in the fridge for 10–15 minutes before starting. Cold equipment helps the cream thicken faster and stay stable.

  2. Combine Ingredients: Pour the cold heavy whipping cream, sweetened condensed milk, and instant coffee granules into the blender base.

  3. The “Slow Start” Blend: Secure the lid and start the blender on the lowest speed. This allows the coffee granules to begin dissolving into the liquid without splashing.

  4. Whip to Perfection: Slowly increase the speed to medium. Watch the mixture very closely through the lid. * In about 30–60 seconds, you will see the blades leave “tracks” in the cream and the sound of the motor may change slightly as the mixture thickens.

    • Stop immediately once it reaches a stiff, fluffy mousse consistency.

    • Caution: If you blend too long, the fat will separate and turn into coffee-flavored butter.

  5. Portion and Set: Gently spoon or pipe the mousse into small glass bowls, ramekins, or even coffee cups.

  6. Chill: Place the containers in the refrigerator for at least 1 hour. This chilling period is essential for the mousse to “set” and develop a velvety, cloud-like texture.

  7. Serve: Right before serving, dust the tops with cocoa powder or a few crushed coffee granules for a professional look.


Success Tips

  • Instant Coffee Only: Do not use regular ground coffee beans; they won’t dissolve and will leave the dessert gritty. If you have large crystals, you can crush them into a fine powder before adding to the blender.

  • Flavor Twists: Add a teaspoon of vanilla extract or a pinch of sea salt to the blender to add more depth to the coffee flavor.

  • Blender vs. Mixer: While this recipe is designed for a blender, you can also use a hand mixer or stand mixer. The blender method is simply faster and creates a denser, more “mousse-like” structure.

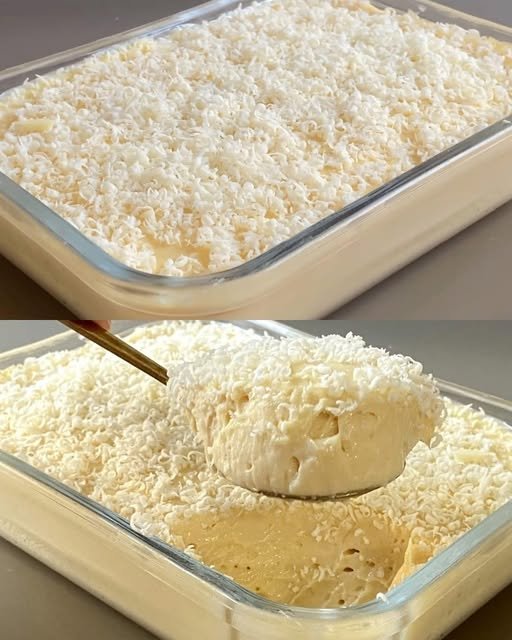
Creamy Dessert with 5 Ingredients: Simple Recipe with a Wonderful Texture

Hello, everyone! Welcome back to our cooking blog, where we share delicious recipes every week. Today, we’re preparing a dessert with 5 ingredients. So, grab your pen and paper to jot down the ingredients, and let’s dive into this easy, step-by-step recipe that’s perfect for breakfast, appetizers, or even to accompany fresh salads!


How to Make Creamy Dessert with 5 Ingredients

Discover more
milk
Cake
Cookies

If you love creamy and easy desserts, try this delicious recipe! With a smooth flavor and light texture, it’s perfect for special moments. You don’t need cooking classes or costly meal delivery services to prepare something delicious at home. With a bit of planning and our detailed meal prep guide, you can create amazing dishes with confidence and ease.

Recipe Ingredients:

  • 2 cartons of table cream or  heavy cream (7 oz each / 200g each)
  • 1 can  sweetened condensed milk (14 oz / 395g)
  • 2 tablespoons powdered milk (about 0.5 oz / 15g)
  • About 1 cup pineapple juice (or another juice of your choice) (8 fl oz / 240 ml)
  • White chocolate shavings (or any topping of your choice: milk chocolate, dark chocolate, shredded coconut, etc.)

Instructions:

First, add the heavy cream, sweetened condensed milk, pineapple juice, and powdered milk to a blender.

Then, blend everything for about 2 minutes, or until the mixture is smooth, creamy, and well combined.

Next, pour the mixture into a glass baking dish (I used a 1-liter one). Scrape down the sides of the blender to make sure you use all of the mousse.

After that, decorate with white chocolate shavings or any topping of your choice.

Right after, place the glass dish in the refrigerator and chill for at least 30 minutes, until the mousse is cold and firm.

Lastly, serve it chilled and enjoy this quick and delicious dessert.

Tips:

– Using pineapple juice is optional. You can also try other flavors like passion fruit, strawberry, or lemon.

– Feel free to customize the topping with milk chocolate, dark chocolate, shredded coconut, fresh fruit, or anything else you like. Get creative!