Golden Cloud Bread Rounds

Golden Cloud Bread Rounds

Prep time: 10 mins | Cook time: 15–20 mins | Yields: 6–8 rounds

Ingredients

  • 3 large Eggs (separated into whites and yolks)

  • 3 tbsp Cream cheese (softened to room temperature)

  • 1/4 tsp Cream of tartar (essential for holding the “cloud” shape)

  • 1/2 tsp Garlic powder or onion powder

  • 1 pinch Sea salt

  • Optional: 1 tbsp melted butter and fresh parsley for brushing on top


Detailed Instructions

  1. Preparation: Preheat your oven to 300°F (150°C). Line a large baking sheet with parchment paper. This is a very delicate batter, so the parchment paper is a must to prevent sticking!

  2. The Egg Yolks: In a medium bowl, whisk together the 3 egg yolks, the softened cream cheese, the garlic powder, and the salt until the mixture is completely smooth and creamy.

  3. The Egg Whites: In a separate, very clean glass or metal bowl, whip the 3 egg whites and the cream of tartar using a hand mixer or stand mixer. Whip on high speed until stiff peaks form (this means when you lift the beaters, the points of the foam stand straight up).

  4. The Folding Process: This is the most important step! Gently fold the yolk mixture into the whipped whites using a spatula. Do not stir. Use a slow “under-and-over” motion so you don’t deflate the air bubbles you just created.

  5. Form the Rounds: Spoon the mixture onto the prepared baking sheet into 6 to 8 even circles. Use the back of the spoon to lightly flatten them into a pancake shape.

  6. Bake: Place in the oven for 15–20 minutes. They are done when the edges are golden brown and the tops feel firm to the touch.

  7. The Finishing Touch: Brush the warm rounds with a tiny bit of melted butter and a sprinkle of fresh herbs. Let them cool for at least 5 minutes to allow the texture to firm up.


Why this recipe is a keeper:

  • Light & Airy: It has a unique, melt-in-your-mouth texture that is totally different from traditional bread.

  • Perfect for Sandwiches: You can use two rounds to make a gluten-free breakfast sandwich or a mini-burger.

  • Protein-Focused: Since it’s made primarily of eggs and cheese, it’s a satisfying way to fuel your body.
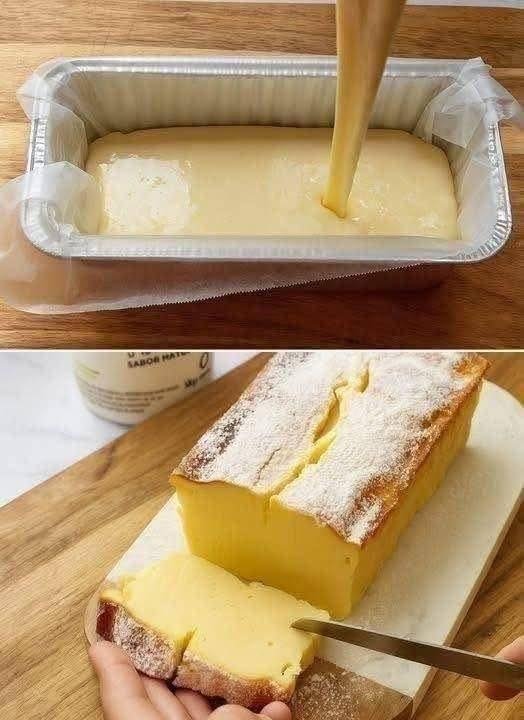
The 90-Calorie Creamy Yogurt Cake

The 90-Calorie Creamy Yogurt Cake

Prep time: 5 mins | Bake time: 35–45 mins | Serves: 6–8

Ingredients

  • 2 cups (500g) Greek yogurt (plain or vanilla)

  • 4 large Eggs

  • 4 tbsp (40g) Cornstarch (this provides the structure)

  • Optional Sweetener: 3–4 tbsp of honey, maple syrup, or your preferred granulated sweetener (if using plain unsweetened yogurt).

  • Optional Flavor: 1 tsp vanilla extract or a squeeze of lemon juice.


Instructions

  1. Preparation: Preheat your oven to 340°F (170°C). Line a 6-inch or 7-inch round cake pan with parchment paper. To make the paper fit better, scrunch it into a ball first, then flatten it out—it will mold to the pan much easier!

  2. Mix the Base: In a large mixing bowl, whisk the Greek yogurt and eggs together until the mixture is completely smooth and there are no streaks of yellow.

  3. Incorporate the Starch: Sift in the cornstarch. Add your sweetener and vanilla extract if you are using them. Whisk gently until the batter is silky and lump-free.

  4. Bake: Pour the batter into your prepared pan. Bake for 35 to 45 minutes. The cake should be set on the edges but still have a slight “jiggle” in the very center.

  5. The Secret Step (Chilling): Once baked, let the cake cool to room temperature in the pan. Do not skip this: Place the cake in the refrigerator for at least 2 hours (or overnight). This allows the proteins to set, transforming the texture into a creamy, cheesecake-like consistency.

  6. Serve: Gently lift the cake out using the parchment paper. Slice and enjoy as is, or top with fresh berries.


Why this works for a nightly treat:

  • High Protein: Using Greek yogurt makes this much more satisfying than a traditional flour-based cake.

  • Simplicity: With only a few minutes of active work, it fits easily into a busy evening routine.

  • Customizable: You can experiment by adding cocoa powder for a chocolate version or folding in blueberries before baking.

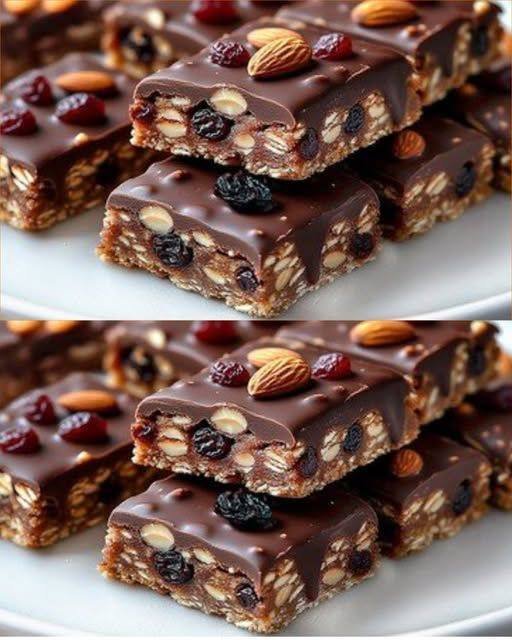
No-Bake Fruit, Nut & Chocolate Oat Bars

No-Bake Fruit, Nut & Chocolate Oat Bars

A dense, chewy energy-style bar topped with a smooth chocolate layer.

Ingredients

For the Chewy Oat Base:

  • 2 cups Rolled Oats (Old-Fashioned): Provide heart-healthy fiber.

  • ½ cup Creamy Almond Butter or Peanut Butter: Adds healthy fats and protein.

  • ⅓ cup Sugar-Free Maple Syrup: A mindful alternative to traditional sweeteners.

  • ½ cup Slivered or Chopped Almonds: For essential crunch.

  • ½ cup Dried Fruit Mix (Raisins and Dried Cranberries): Natural sweetness.

  • 1 tsp Vanilla Extract and a pinch of Salt: For flavor depth.

For the Chocolate Layer:

  • 1 ½ cups Dark Chocolate Chips (at least 70% cacao): Lower in sugar than semi-sweet.

  • 1 tbsp Coconut Oil (or Butter): Ensures the chocolate stays soft enough to slice.

For the Topping (Garnish):

  • Whole Raw Almonds

  • Dried Cranberries

  • Large Raisins or Dried Cherries


Detailed Instructions

1. Prepare the Base

  • Line an 8×8 inch square baking pan with parchment paper, leaving some overhang on the sides for easy removal.

  • In a large microwave-safe bowl, combine the nut butter and sugar-free syrup. Heat for 30 seconds and stir until smooth.

  • Stir in the vanilla extract and salt.

  • Fold in the oats, slivered almonds, and the dried fruit mix. Stir until everything is thoroughly coated and sticky.

2. Press and Set

  • Transfer the oat mixture into your prepared pan.

  • Use a spatula (or the bottom of a flat measuring cup) to press the mixture down firmly into an even layer. This ensures the bars don’t crumble when cut.

  • Place the pan in the freezer for 10–15 minutes to firm up while you make the topping.

3. The Chocolate Layer

  • In a small bowl, combine the dark chocolate chips and coconut oil.

  • Melt in the microwave in 20-second intervals, stirring in between, until completely smooth.

  • Pour the melted chocolate over the chilled oat base and spread it evenly with a spatula.

4. Garnish and Chill

  • While the chocolate is still wet, artistically arrange your whole almonds, cranberries, and raisins on top.

  • Refrigerate for at least 1–2 hours until the chocolate is set.

  • Lift the bars out using the parchment paper edges and slice them into 16 even squares.


Storage Tip

Keep these bars in an airtight container in the refrigerator for up to a week, or freeze them for a quick grab-and-go snack later!

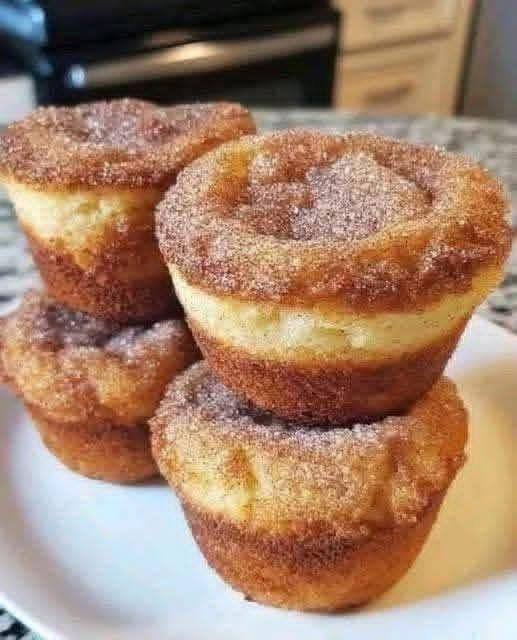
Friendly Cinnamon Muffin Donuts

WW-Friendly Cinnamon Muffin Donuts

These muffins provide that classic “donut” texture using a simple, protein-rich base. By swapping the coating, you can enjoy that signature crunch without the heavy sugar hit.

Ingredients

The Batter Base:

  • 2 cups Self-Rising Flour: Provides the structure and lift.

  • 1 cup Sweetened Condensed Milk: This acts as your sweetener and fat source (look for a fat-free or low-fat version to lower the point count further).

  • 2 Large Eggs: To bind the batter and add a boost of protein.

The Mindful Coating:

  • ½ cup Granulated Stevia or Monk Fruit: A 1:1 sugar substitute to keep the “crunch” without the glycemic spike.

  • 1 teaspoon Ground Cinnamon: For that classic aromatic flavor.

  • 2–3 tablespoons Light Butter (Melted): Used sparingly to help the cinnamon mixture stick.


Detailed Instructions

1. Preparation

  • Preheat: Set your oven to 180°C (350°F). Ensure the rack is in the center position for even browning.

  • Prep the Pan: Lightly spray a standard 12-cup muffin tray with non-stick cooking spray or use silicone liners to ensure the muffins pop out easily.

2. Create the Batter

  • In a large mixing bowl, crack the two eggs and whisk them lightly.

  • Pour in the sweetened condensed milk and whisk until the eggs and milk are fully incorporated.

  • Slowly fold in the self-rising flour.

  • Pro Tip: Use a spatula to mix until just combined. If you overmix, the muffins will become tough rather than fluffy. Stop as soon as you see no more dry flour streaks.

3. Bake to Perfection

  • Spoon the batter into the prepared muffin cups, filling each about ¾ of the way full. This gives them room to rise into a “donut hole” dome.

  • Place in the oven and bake for 18–22 minutes.

  • The Test: Insert a toothpick into the center of a muffin; if it comes out clean or with just a few dry crumbs, they are ready. They should be a light golden brown.

4. The Finishing Touch

  • While the muffins are cooling for a minute, combine the cinnamon and sugar substitute in a small, shallow bowl.

  • Melt your light butter in a separate small bowl.

  • While the muffins are still warm, lightly brush the tops with a thin layer of butter.

  • Immediately roll the buttered top into the cinnamon-sweetener mix.

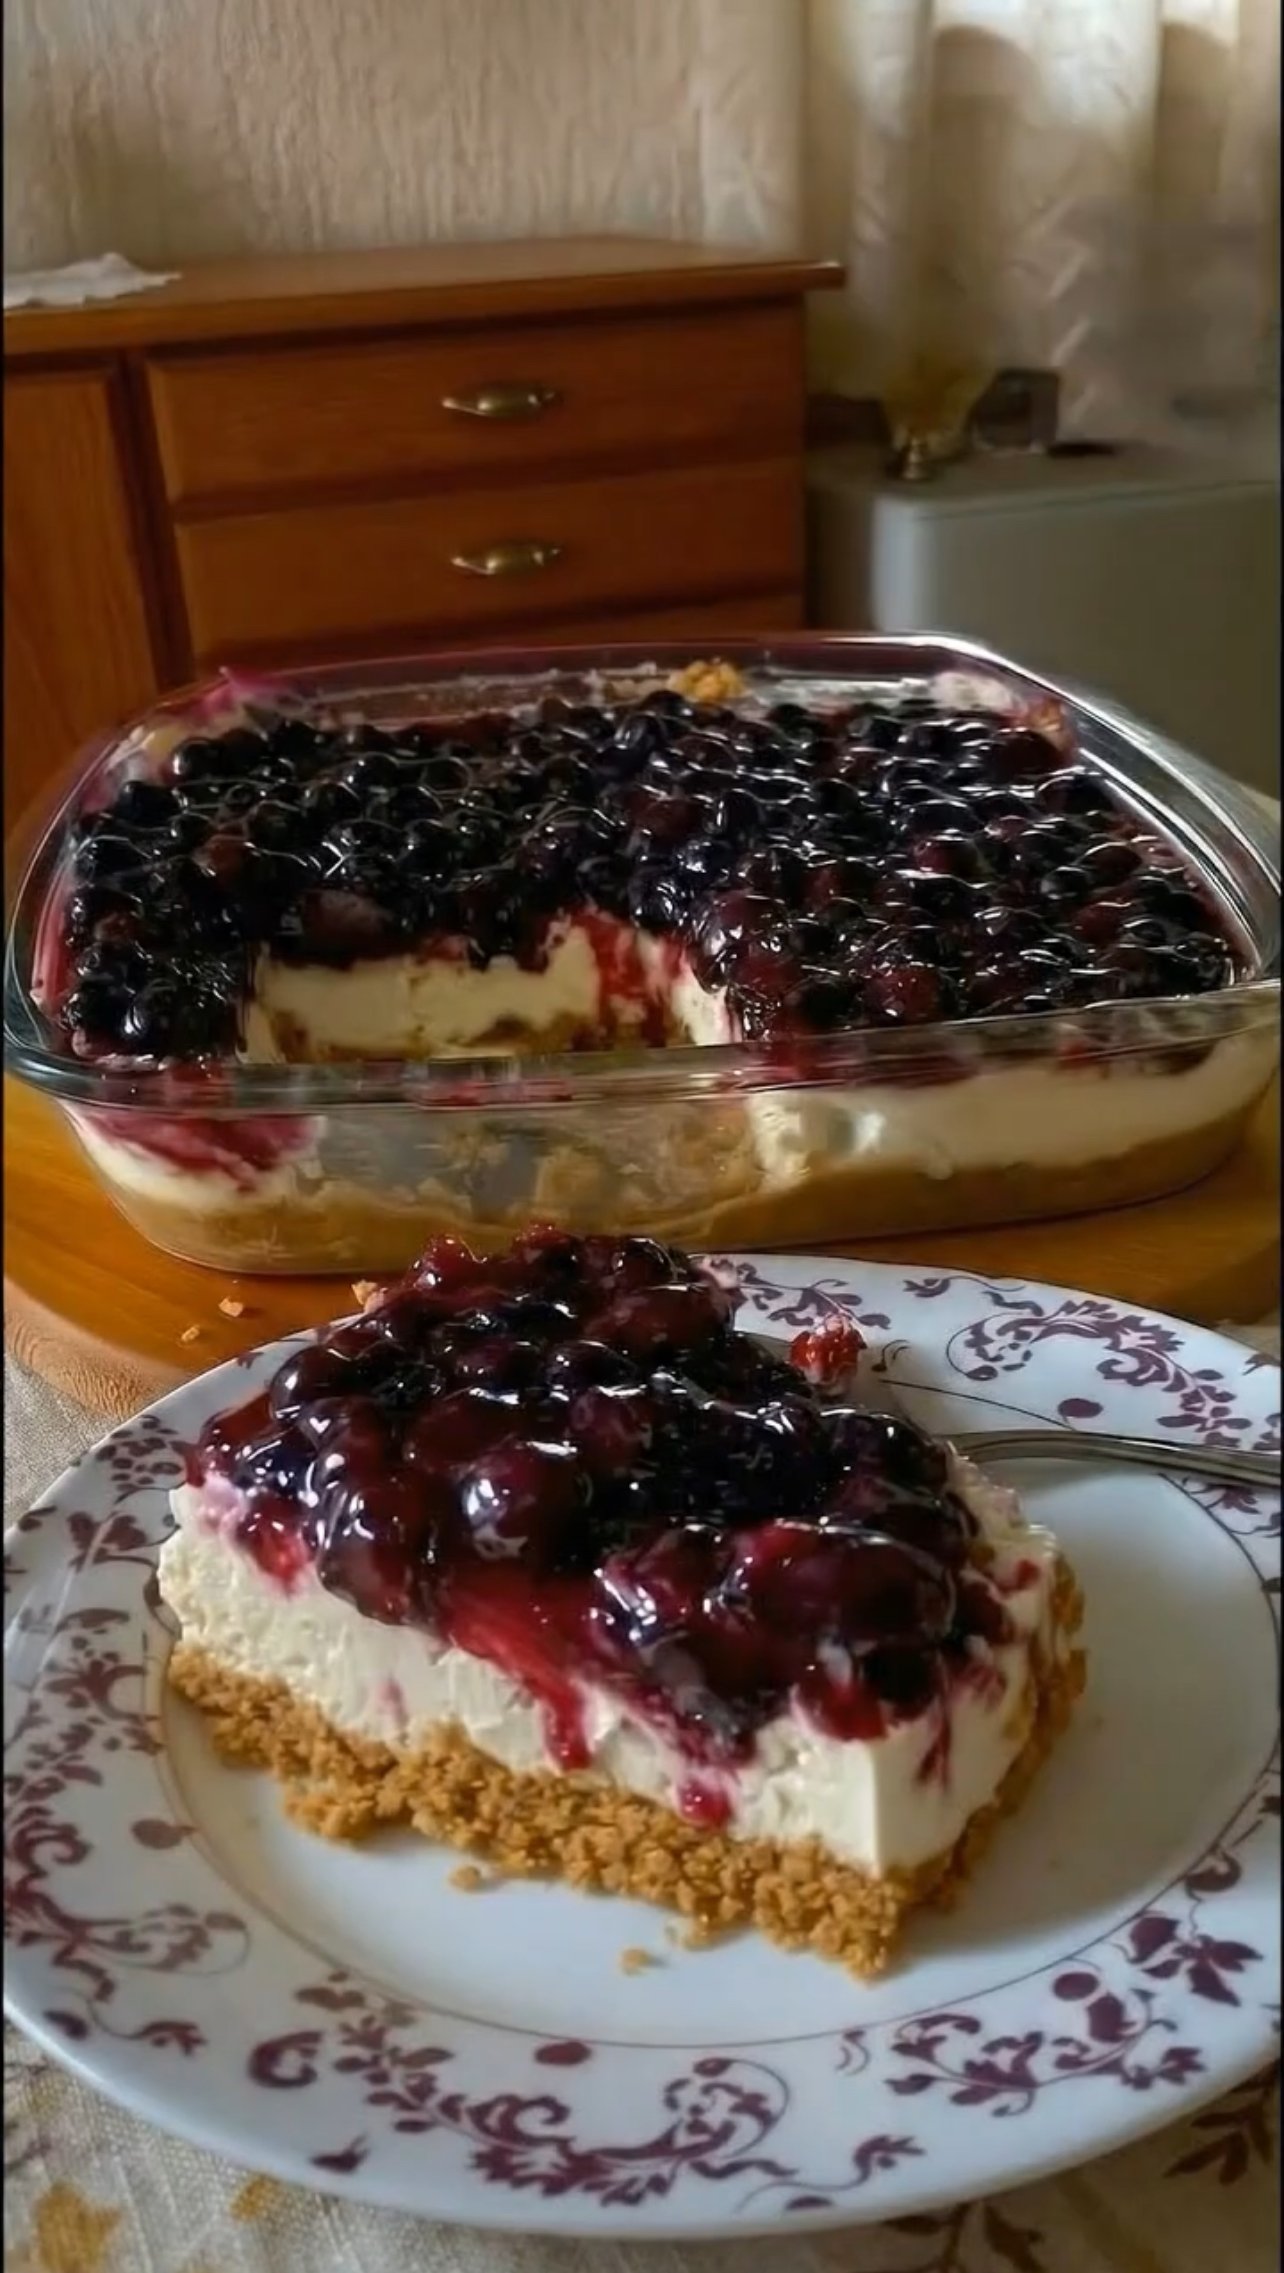
Elegant Baked Blueberry Cheesecake


Elegant Baked Blueberry Cheesecake

Ingredients

For the Crust:

  • 2 cups digestive biscuits or graham crackers (crushed)
  • ½ cup melted butter
  • 2 tbsp sugar (optional)

For the Cheesecake Filling:

  • 2 cups cream cheese (room temperature)
  • ¾ cup sugar
  • 2 large eggs (room temperature)
  • 1 cup heavy cream
  • 1 tsp vanilla essence
  • 1 tbsp cornflour (optional – helps prevent cracks)

For the Blueberry Topping:

  • 2 cups fresh or frozen blueberries
  • ¼ cup sugar
  • 1 tbsp lemon juice
  • 1 tbsp cornflour + 2 tbsp water (mix to make slurry)

👩‍🍳 Step-by-Step Method

Step 1: Prepare the Crust

  1. Crush biscuits into fine crumbs using a blender or rolling pin.
  2. Mix crumbs with melted butter (and sugar if using).
  3. Press mixture firmly into the bottom of a greased 8×8 inch baking dish or springform pan.
  4. Bake at 180°C (350°F) for 10 minutes.
  5. Remove and let it cool.

Step 2: Make the Cheesecake Filling

  1. In a large bowl, beat cream cheese until smooth and creamy.
  2. Add sugar and mix well.
  3. Add eggs one at a time, mixing gently (do not overbeat).
  4. Add heavy cream, vanilla essence, and cornflour.
  5. Mix until smooth and lump-free.

💡 Tip: Overmixing adds air and causes cracks.

Step 3: Bake the Cheesecake

  1. Pour the filling over the cooled crust.
  2. Tap the pan gently to remove air bubbles.
  3. Bake at 160°C (320°F) for 45–55 minutes.
    • Center should be slightly jiggly.
  4. Turn off oven and leave cheesecake inside for 1 hour (door slightly open).
  5. Cool completely at room temperature.
  6. Refrigerate for at least 4 hours or overnight.

Step 4: Prepare the Blueberry Topping

  1. In a saucepan, add blueberries, sugar, and lemon juice.
  2. Cook on medium heat until berries release juice.
  3. Add cornflour slurry and cook until thick and glossy.
  4. Let it cool completely.

Step 5: Assemble

  1. Spread cooled blueberry topping evenly over chilled cheesecake.
  2. Chill for another 30–60 minutes before slicing.
  3. Slice with a warm knife for clean cuts.

✨ Pro Tips for Perfect Cheesecake

✔ Use room temperature ingredients

✔ Don’t overmix

✔ Bake at low temperature

✔ Chill properly for best texture

Diabetic-Friendly Vanilla Cream Rolls (5-Minute No-Bake)

Diabetic-Friendly Vanilla Cream Rolls (5-Minute No-Bake)

 Description

These light, creamy vanilla rolls are made with a low-carb, sugar-free filling and thin, crisp roll shells. The texture is silky and melts in your mouth, while keeping carbohydrates lower than traditional pastry cream rolls. Perfect for a quick dessert, tea snack, or make-ahead treat.

⚠️ “Diabetic-friendly” means lower in sugar and carbs — always monitor blood glucose and consult your healthcare provider for personal guidance.

 Ingredients (Makes 8 Rolls)

For the Cream Filling

  • 1 cup heavy whipping cream (cold)

  • 4 oz (115 g) cream cheese, softened

  • 2–3 tablespoons powdered erythritol or monk fruit sweetener (adjust to taste)

  • 1 teaspoon pure vanilla extract

  • Pinch of salt

For the Roll Shells (Quick Option)

  • 8 low-carb wafer rolls OR

  • 8 thin low-carb crepes (store-bought or homemade)

Optional dusting: powdered erythritol

 Instructions (5–10 Minutes)

  1. Whip Cream
    Beat heavy cream until soft peaks form.

  2. Mix Base
    In another bowl, beat cream cheese, sweetener, vanilla, and salt until smooth.

  3. Combine
    Gently fold whipped cream into cream cheese mixture until light and fluffy.

  4. Fill Rolls
    Transfer filling into a piping bag (or zip bag with tip cut).
    Pipe into wafer rolls or spread onto crepes and roll tightly.

  5. Chill (Optional but Recommended)
    Refrigerate 20–30 minutes for best texture.

  6. Serve
    Dust lightly with powdered sweetener if desired.

Servings

  • 8 rolls

  • 1 roll per serving

Nutritional Info (Approx. Per Roll)

(Using erythritol and low-carb shells)

  • Calories: 120–150

  • Net Carbs: 2–4g

  • Fat: 12g

  • Protein: 2–3g

  • Sugar: <1g

  • Fiber: 1–2g

(Numbers vary depending on shells used.)

 Benefits

✔ Lower sugar than traditional cream rolls
✔ Low net carbs (keto-friendly option)
✔ High satiety from healthy fats
✔ No refined sugar
✔ Quick preparation
✔ Portion-controlled dessert

 Notes & Tips

  • Chill bowl and beaters for faster whipping.

  • Don’t overbeat cream — it can turn grainy.

  • Add lemon zest for brightness.

  • For firmer filling, add 1 tablespoon chia seeds or ½ teaspoon gelatin (bloomed).

  • Store refrigerated up to 3 days.

Variations

  • 🍓 Add sugar-free strawberry puree swirl

  • 🍫 Mix in 1 tbsp unsweetened cocoa powder

  • 🥥 Add 1 tbsp coconut cream for tropical flavor

  • ☕ Add ½ tsp instant espresso for mocha twist

 Q & A

Q: Is this safe for diabetics?
It contains no added sugar and uses low-glycemic sweeteners, but portion control is important.

Q: Can I use stevia?
Yes, but use a baking blend to avoid bitterness.

Q: Can I make it dairy-free?
Use coconut cream and dairy-free cream cheese.

Q: Can I freeze them?
Yes, freeze up to 1 month. Thaw in fridge.

Q: Why is my filling runny?
Cream wasn’t whipped enough or ingredients were too warm.