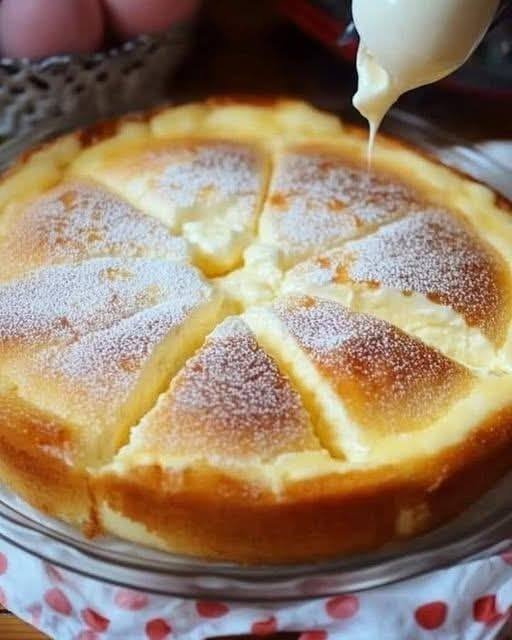
Easy Blender Cream Cheese Cake

Easy Blender Cream Cheese Cake

Ingredients

  • Cream cheese: 500g (about 2 blocks), softened

  • Eggs: 3 large

  • Milk: 1 cup

  • Condensed milk: 1 can (approx. 395g)

  • Cornstarch: 2 tablespoons

  • Vanilla extract: 1 teaspoon

  • Butter: For greasing the pan


Detailed Instructions

  1. Preheat and Prepare: * Preheat your oven to 180°C (350°F).

    • Grease a round cake pan or springform pan with butter to prevent sticking.

  2. Blend the Base: * Place the eggs, milk, condensed milk, and vanilla extract into a blender.

    • Add the softened cream cheese and the cornstarch.

    • Blend on medium speed for about 2 minutes, or until the mixture is completely smooth and free of lumps.

  3. Bake: * Pour the smooth batter into your prepared cake pan.

    • Bake for 40–50 minutes. The cake should be set around the edges but still have a slight “jiggle” in the center.

  4. Cool and Set: * Remove from the oven and let it cool to room temperature.

    • For the best texture and flavor, refrigerate for at least 4 hours (or overnight) before serving.


Serving Suggestion

You can top this cake with a simple fruit jam, fresh berries, or a dusting of powdered stevia for an extra touch of sweetness.
Sugar-Free Oatmeal and Apple Energy Dessert

Sugar-Free Oatmeal and Apple Energy Dessert

Ingredients

  • Rolled Oats: 1 cup

  • Warm Milk: ⅔ cup (150 ml)

  • Apples: 2, grated or finely diced

  • Butter: 2 tablespoons, melted

  • Eggs: 2 large

  • Vanilla Extract: ½ teaspoon

  • Walnuts or Almonds: ½ cup, chopped (optional for added texture)


Detailed Instructions

  1. Hydrate the Oats: In a large mixing bowl, combine the 1 cup of rolled oats with the ⅔ cup of warm milk. Stir well and allow the mixture to sit for 10 minutes so the oats can soften and absorb the liquid.

  2. Prepare the Fruit and Nuts: While the oats are soaking, peel and either grate or finely dice the 2 apples. If using walnuts or almonds, chop them into small pieces to ensure even distribution.

  3. Create the Batter: Add the 2 eggs, 2 tablespoons of melted butter, and ½ teaspoon of vanilla extract to the soaked oats. Mix thoroughly until the eggs are fully incorporated. Fold in the prepared apples and nuts.

  4. Fill the Molds: Lightly grease a silicone mold or muffin tin. Using a spoon, fill each cavity nearly to the top with the batter, as these bites do not rise significantly.

  5. Bake: Preheat your oven to 180°C (350°F). Bake for 25–30 minutes until the tops are golden brown and the centers are firm.

  6. Cool and Serve: Let the dessert cool in the mold for at least 5 minutes before removing. This helps the structure set, making them easy to grab as a portable energy snack.


Why This Works

  • Natural Sweetness: Grated apples provide moisture and sweetness without the need for refined sugar.

  • Satiety: The combination of fiber from the oats and protein from the eggs helps keep you feeling full and energized.

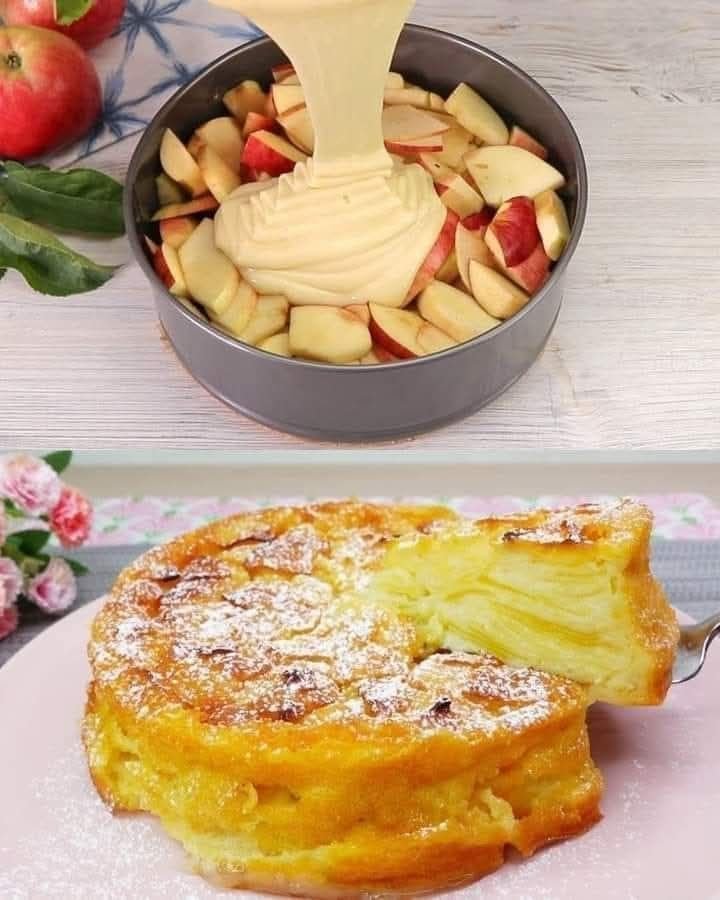
Zesty Lemon Apple Cake

Zesty Lemon Apple Cake

Ingredients

  • Apples: 4-5 medium, peeled and thinly sliced

  • Eggs: 2 large

  • Wheat flour: ⅔ cup (80g)

  • Milk: ⅓ cup (100ml)

  • Unsweetened applesauce: 1 ½ tablespoons

  • Lemon: Zest of 1 lemon and juice of ½ lemon

  • Baking powder: 1 teaspoon

  • Stevia: 1 teaspoon (adjust based on your brand’s sweetness level)

  • Salt: A pinch


Detailed Instructions

  1. Prepare the Apples: Peel and thinly slice your apples. Immediately toss them with the juice of ½ lemon in a bowl. This prevents browning and adds a bright base flavor.

  2. Mix the Wet Base: In a separate large bowl, whisk the 2 eggs with a pinch of salt and the 1 teaspoon of stevia until the mixture is slightly frothy. Stir in the 100ml of milk, 1 ½ tablespoons of applesauce, and the lemon zest.

  3. Incorporate Dry Ingredients: Sift the 80g of wheat flour and 1 teaspoon of baking powder into the wet mixture. Whisk gently until the batter is smooth and there are no large lumps.

  4. Combine: Fold the sliced apples into the batter. Ensure every slice is well-coated; this is what creates the “layered” look in the finished cake.

  5. Prepare for Baking: Preheat your oven to 180°C (350°F). Grease a round cake pan or line it with parchment paper. Pour the apple and batter mixture into the pan, smoothing out the top.

  6. Bake: Bake for 30–35 minutes. The cake should be golden on top and firm to the touch. Because of the high fruit content, it will remain moist and custard-like inside.

  7. Final Touch: Let the cake cool completely before slicing. This allows the fruit layers to set. If you like, you can lightly dust the top with a tiny bit of powdered stevia or cinnamon before serving.

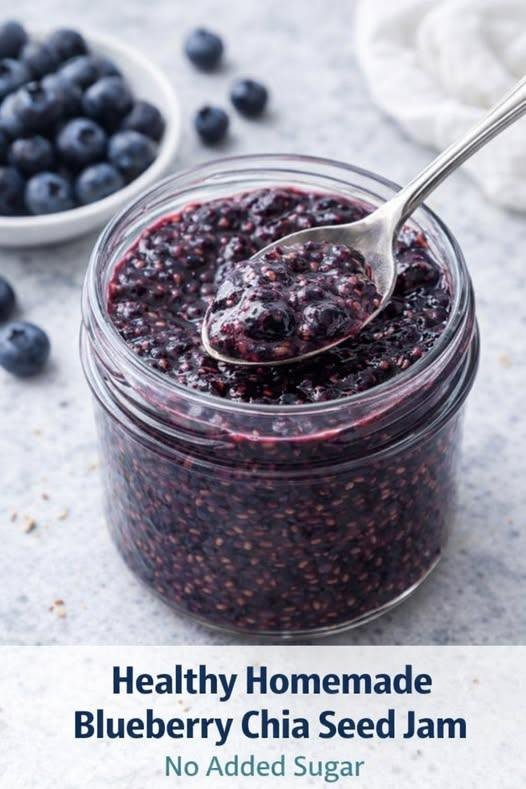
Healthy Homemade Blueberry Chia Seed Jam

Healthy Homemade Blueberry Chia Seed Jam 

📋 Recipe Overview

  • Prep time: 5 minutes

  • Cook time: 10–12 minutes

  • Total time: 17 minutes

  • Servings: Makes about 1.5 cups (approx. 12 servings)

🛒 Ingredients

  • Blueberries: 3 cups (fresh or frozen)

  • Chia Seeds: 2 tablespoons

  • Maple Syrup or Honey: 1–2 tablespoons (adjust to taste)

  • Lemon Juice: 1 tablespoon (brightens flavor and helps preservation)

  • Vanilla Extract: ½ teaspoon (optional, for depth)

🍳 Instructions

  1. Simmer: Place the blueberries in a small saucepan over medium heat. Cook for about 5–8 minutes, stirring occasionally, until the berries burst and release their juices.

  2. Mash: Use a fork or potato masher to crush the berries to your preferred consistency (leave some chunks for texture or mash thoroughly for a smoother jam).

  3. Sweeten & Brighten: Stir in the maple syrup (or honey) and lemon juice. Remove from heat.

  4. Thicken: Stir in the chia seeds and vanilla extract.

  5. Set: Let the mixture sit for at least 10 minutes. The chia seeds will absorb the liquid and thicken the mixture into a jam-like consistency.

  6. Store: Once cooled, transfer to a glass jar. It will continue to thicken as it chills in the fridge.

💡 Notes & Tips

  • The “Gel” Factor: If the jam isn’t thick enough after 10 minutes, stir in an extra teaspoon of chia seeds and wait a bit longer.

  • Sweetness Check: Taste the jam before adding the chia seeds. Depending on how ripe your berries are, you may want more or less sweetener.

  • Frozen vs. Fresh: Both work perfectly! If using frozen, you may just need an extra minute or two of simmering time.

🥗 Nutritional Info (Per 2-tablespoon serving)

Nutrient Amount
Calories 35 kcal
Total Fat 1g
Fiber 2g
Sugars 4g (mostly natural)
Protein 1g

✨ Benefits of This Jam

  • Omega-3s: Chia seeds are one of the best plant-based sources of alpha-linolenic acid (ALA).

  • Antioxidant Powerhouse: Blueberries are loaded with anthocyanins, which support heart health and brain function.

  • Low Glycemic: Unlike traditional jam (which is often 50% sugar), this version won’t cause a massive blood sugar spike.

❓ Q&A

Q: How long does it last?

A: Because it lacks the heavy sugar used as a preservative in traditional jams, this stays fresh in the fridge for 7–10 days.

Q: Can I freeze it?

A: Yes! It freezes beautifully for up to 3 months. Just leave a little headspace in the jar so it can expand.

Q: Can I use other fruit?

A: Absolutely. This method works great with raspberries, blackberries, or strawberries (just chop the strawberries first).

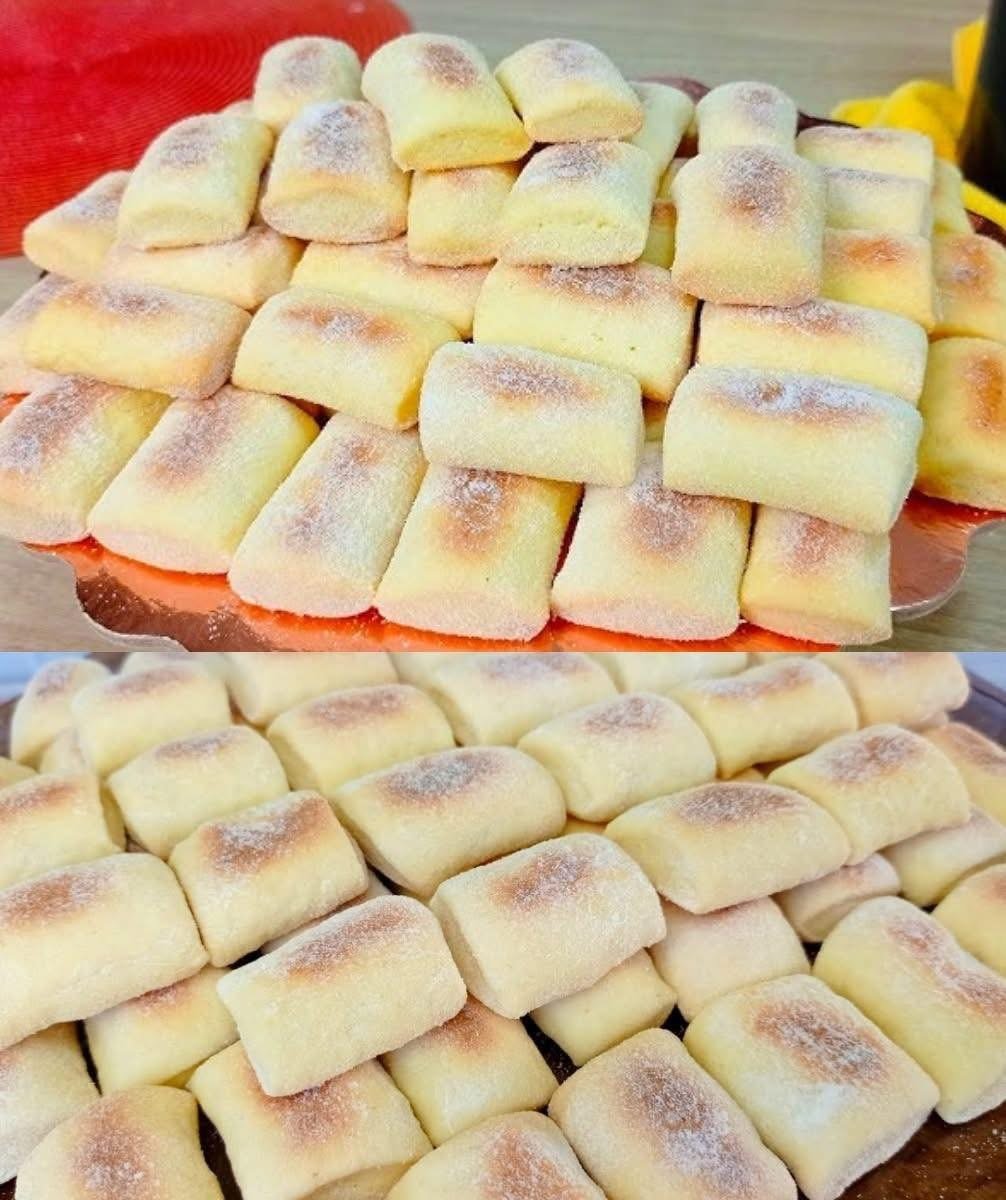
Soft Milk Cookies

Soft Milk Cookies

Ingredients

  • ½ cup butter (room temperature, soft)
  • ½ cup powdered sugar
  • 2 tbsp oil
  • ¼ cup milk
  • 1 tsp vanilla essence
  • 1½ cups all-purpose flour (maida)
  • 2 tbsp cornflour
  • 1 tsp baking powder
  • 2–3 tbsp milk powder (optional, for extra softness)
  • Extra powdered sugar (for coating)

👩‍🍳 Step-by-Step Detailed Recipe

🔹 Step 1: Cream Butter & Sugar

  1. In a bowl, add soft butter and powdered sugar.
  2. Beat for 3–4 minutes until light and creamy.
  3. Add oil and mix well.

🔹 Step 2: Add Liquid Ingredients

  1. Add milk and vanilla essence.
  2. Mix until smooth and combined.

🔹 Step 3: Mix Dry Ingredients

  1. In another bowl, sift:
    • Flour
    • Cornflour
    • Baking powder
    • Milk powder (if using)
  2. Gradually add dry mixture into butter mixture.
  3. Mix gently to form a soft dough.
    • Dough should be soft but not sticky.

💡 If sticky, add 1–2 tbsp more flour.

🔹 Step 4: Shape the Cookies

  1. Take small portions of dough.
  2. Roll into small logs or rectangles (like in picture).
  3. Lightly roll in powdered sugar.
  4. Place on baking tray lined with parchment paper.

🔹 Step 5: Bake

  • Preheat oven to 170°C (340°F).
  • Bake for 12–15 minutes.
  • Bottom should turn light golden.
  • Top should remain pale (do not overbake).

🔹 Step 6: Cool

  1. Let cookies cool completely on tray.
  2. They will firm up as they cool.

✨ Tips for Extra Soft Cookies

✔ Use soft butter (not melted)

✔ Do not overmix dough

✔ Do not overbake

✔ Store in airtight container

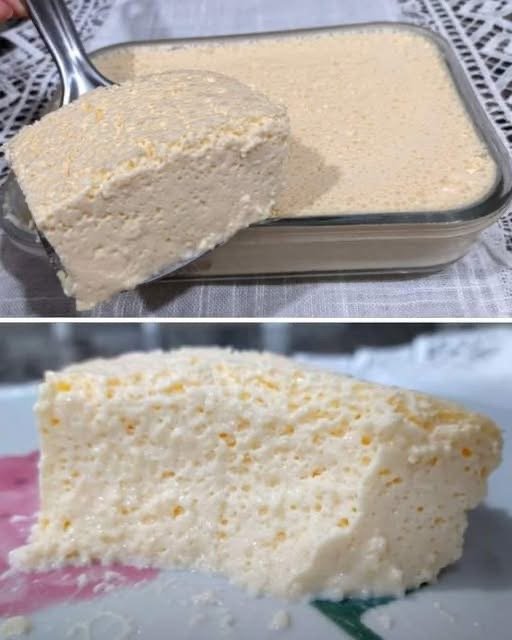
Soft & Fluffy Milk Pudding

Soft & Fluffy Milk Pudding

This looks like a light, airy baked milk pudding — soft, slightly bubbly texture, and melts in the mouth 🤍 Perfect simple dessert with basic ingredients!

🛒 Ingredients

  • 4 eggs (room temperature)
  • ½ cup sugar
  • 2 cups warm milk
  • 1 tsp vanilla essence
  • 1 tbsp melted butter (optional, for richness)
  • 1 tbsp flour or cornflour (optional – for slightly firmer texture)

👩‍🍳 Step-by-Step Detailed Recipe

🔹 Step 1: Prepare the Mixture

  1. In a bowl, crack 4 eggs.
  2. Add sugar and whisk until slightly light and creamy.
    (Do not overbeat, just mix well.)
  3. Add vanilla essence and melted butter.
  4. Slowly pour warm milk while mixing continuously.
  5. If using flour/cornflour, sift and mix until smooth.

💡 Tip: Strain the mixture for extra smooth texture.

🔹 Step 2: Prepare Baking Dish

  1. Lightly grease a glass or baking dish.
  2. Pour the mixture into the dish.

🔹 Step 3: Water Bath Baking (Important!)

  1. Place the filled dish inside a larger baking tray.
  2. Pour hot water into the larger tray (halfway up the sides).
    This prevents cracks and keeps pudding soft.

🔹 Step 4: Bake

  • Preheat oven to 170°C (340°F).
  • Bake for 35–45 minutes.
  • Center should be set but slightly jiggly.

🔹 Step 5: Cool & Chill

  1. Remove from oven.
  2. Let it cool at room temperature.
  3. Refrigerate for at least 2–3 hours before slicing.

🍽️ Serving Tip

  • Slice gently with a sharp knife.
  • Serve plain or drizzle with caramel or fruit sauce.

✨ Texture Tips

✔ Use room temperature eggs

✔ Do not overbake (it becomes rubbery)

✔ Always use water bath

✔ Chill well for clean slices