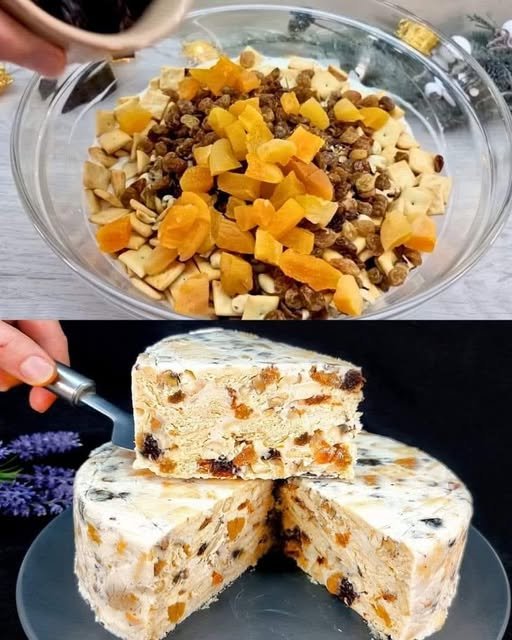
🍰 No-Bake Creamy Dried Fruit & Biscuit Cake

🍰 No-Bake Creamy Dried Fruit & Biscuit Cake

A rich, fudge-like dessert filled with tangy apricots, sweet raisins, and crunchy biscuits.

Prep time: 20 mins | Chill time: 6 hours (or overnight) | Servings: 8-10

πŸ›’ Ingredients

  • Dried Fruit:

    • 100 g (3.5 oz) Prunes, chopped

    • 100 g (3.5 oz) Raisins

    • 100 g (3.5 oz) Dried Apricots, chopped

  • The Crunch: * 300g (approx. 10 oz) Butter biscuits or tea cookies (broken into small pieces)

    • 1/2 cup Walnuts or roasted peanuts (optional, for extra texture)

  • The Cream Base:

    • 400 g (14 oz) Sour Cream (full fat is best for setting)

    • 300 g (10.5 oz) Sweetened Condensed Milk

    • 15 g (1 packet) Gelatin (dissolved in 50 ml warm water) OR 100 gΒ softened butter for a thicker, fudge-like texture.

πŸ₯£ Instructions

  1. Prepare Fruit: Rinse the prunes, raisins, and apricots with warm water. Pat them dry with a paper towel. Chop the prunes and apricots into small, bite-sized pieces.

  2. Break Biscuits: In a large bowl, break the biscuits into small chunks (don’t crush them into powder; you want texture).

  3. Mix the Cream: In a separate bowl, whisk together the sour cream and sweetened condensed milk until smooth. If using gelatin, stir the dissolved gelatin into this mixture now.

  4. Combine: Add the dried fruit and broken biscuits into the cream mixture. Fold gently with a spatula until every piece is well-coated.

  5. Mold: Line a deep bowl or a springform cake tin with plastic wrap (this makes it easy to pop out later). Pour the mixture into the tin and press down firmly to remove air bubbles.

  6. Set: Cover and refrigerate for at least 6 hours, though overnight is best to allow the biscuits to soften slightly into a cake-like texture.

  7. Serve: Invert the cake onto a plate, remove the plastic wrap, and slice into wedges.
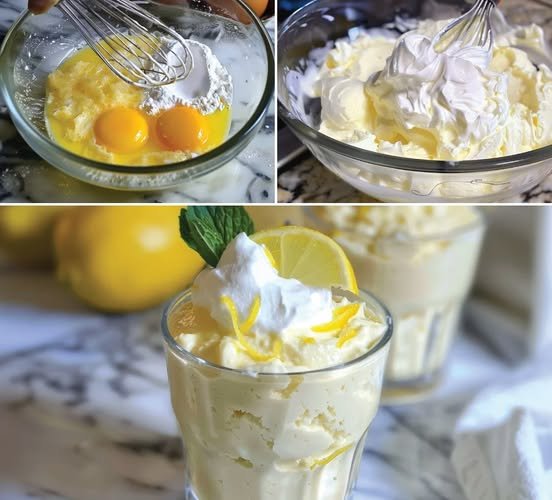
Keto Lemon Mousse

Introduction

Delight in the tangy and refreshing flavors of this keto lemon mousse, a perfect dessert for those on a low-carb diet or anyone who enjoys a burst of citrusy goodness. This creamy and indulgent treat is not only easy to make but also fits into a ketogenic lifestyle without compromising on taste. With just a few simple ingredients, you can create a dessert that’s both satisfying and guilt-free.

Ingredients

  • For the Mousse:
    • 1 cup heavy cream
    • 8 oz cream cheese, softened
    • β…“ cup powdered erythritol (or preferred keto-friendly sweetener)
    • Zest of 2 lemons
    • Juice of 2 lemons (about Β½ cup)
    • 1 teaspoon vanilla extract
    • Pinch of salt

Instructions

  1. Prepare the Lemon Mixture:
    • Start by zesting and juicing the lemons. Set aside the zest and juice for later use.
  2. Make the Mousse:
    • In a mixing bowl, beat the heavy cream until stiff peaks form. Set aside.
    • In another bowl, beat the softened cream cheese until smooth and creamy.
    • Add powdered erythritol, lemon zest, lemon juice, vanilla extract, and a pinch of salt to the cream cheese. Mix until well combined and smooth.
    • Gently fold the whipped cream into the cream cheese mixture until fully incorporated, being careful not to deflate the whipped cream.
  3. Chill and Serve:
    • Spoon the lemon mousse into serving dishes or glasses.
    • Cover and refrigerate for at least 2-3 hours to allow the mousse to set and flavors to meld.
  4. Garnish and Enjoy:
    • Before serving, garnish with additional lemon zest or a slice of lemon for decoration, if desired.
    • Serve chilled and enjoy the refreshing citrusy flavor of your keto lemon mousse!

πŸ“ Vegan Strawberry Banana “Nice Cream”

πŸ“ Vegan Strawberry Banana “Nice Cream”

A guilt-free, 5-ingredient treat that tastes like a dream!

Prep time: 5 mins | Total time: 5 mins | Servings: 4

πŸ›’ Ingredients

  • 3 large ripe bananas, sliced and frozen

  • 1 1/2 cups frozen strawberries

  • 1/4 cup unsweetened almond milk (add more by the tablespoon if needed)

  • 1–2 tsp maple syrup or agave (optional)

  • 1/2 tsp vanilla extract (optional)

πŸ₯£ Instructions

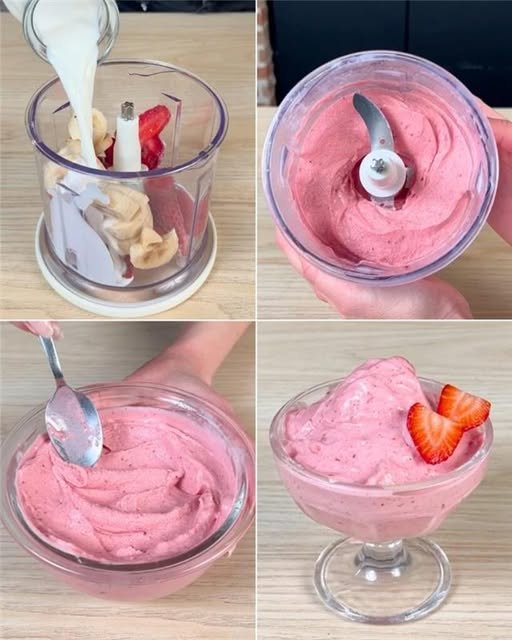
  1. Load the Blender: Place your fully frozen banana slices and strawberries into a high-speed blender or food processor.

    Pro Tip: Freezing banana slices on a baking sheet first prevents them from turning into a giant frozen block!

  2. Add Liquids: Pour in the almond milk, maple syrup, and vanilla.

  3. Blend: Process until smooth and creamy. Stop to scrape down the sides every 30 seconds so everything gets incorporated.

  4. Texture Choice: * Soft Serve: Eat it immediately right out of the blender!

    • Scoopable: Transfer to a container and freeze for 1–2 hours.

  5. Topping Ideas: Top with shredded coconut, extra berries, or crushed walnuts for a little crunch.

πŸ“Š Nutrition (Per Serving)

  • Calories: ~100

  • Net Carbs: 20g

  • Protein: 1g

  • Fat: 0.5g

Soft & Creamy Coconut Delight Cake

πŸ₯₯ Soft & Creamy Coconut Delight Cake

πŸ›’ Ingredients

1️⃣ Base Layer

  • 2 cups crushed digestive biscuits or graham crackers
  • Β½ cup melted butter
  • 2 tbsp sugar

2️⃣ Cream Filling Layer

  • 1 cup heavy whipping cream (cold)
  • 1 packet (200g) cream cheese (room temperature)
  • Β½ cup powdered sugar
  • 1 tsp vanilla essence

3️⃣ Coconut Cream Layer

  • 1 cup milk
  • 1 cup heavy cream
  • 3 tbsp cornflour
  • Β½ cup sugar
  • 1 cup desiccated coconut

4️⃣ Topping

  • 1 to 1Β½ cups coconut flakes (for coating outside)

πŸ‘©β€πŸ³ Step-by-Step Method

πŸ”Ή Step 1: Prepare the Base

  1. Crush biscuits into fine crumbs.
  2. Add melted butter and sugar.
  3. Mix until it looks like wet sand.
  4. Press firmly into a square or rectangular dish.
  5. Refrigerate for 20–30 minutes to set.

πŸ”Ή Step 2: Make Cream Filling

  1. Beat heavy whipping cream until soft peaks form.
  2. In another bowl, beat cream cheese until smooth.
  3. Add powdered sugar and vanilla.
  4. Gently fold whipped cream into cream cheese mixture.
  5. Spread this evenly over the chilled biscuit base.
  6. Refrigerate again for 20 minutes.

πŸ”Ή Step 3: Prepare Coconut Cream Layer

  1. In a saucepan add milk, cream, sugar and cornflour.
  2. Cook on medium heat while stirring continuously.
  3. When it thickens (like custard), add desiccated coconut.
  4. Cook 1–2 more minutes.
  5. Let it cool slightly (not fully cold).
  6. Spread gently over the cream layer.

πŸ”Ή Step 4: Final Coconut Coating

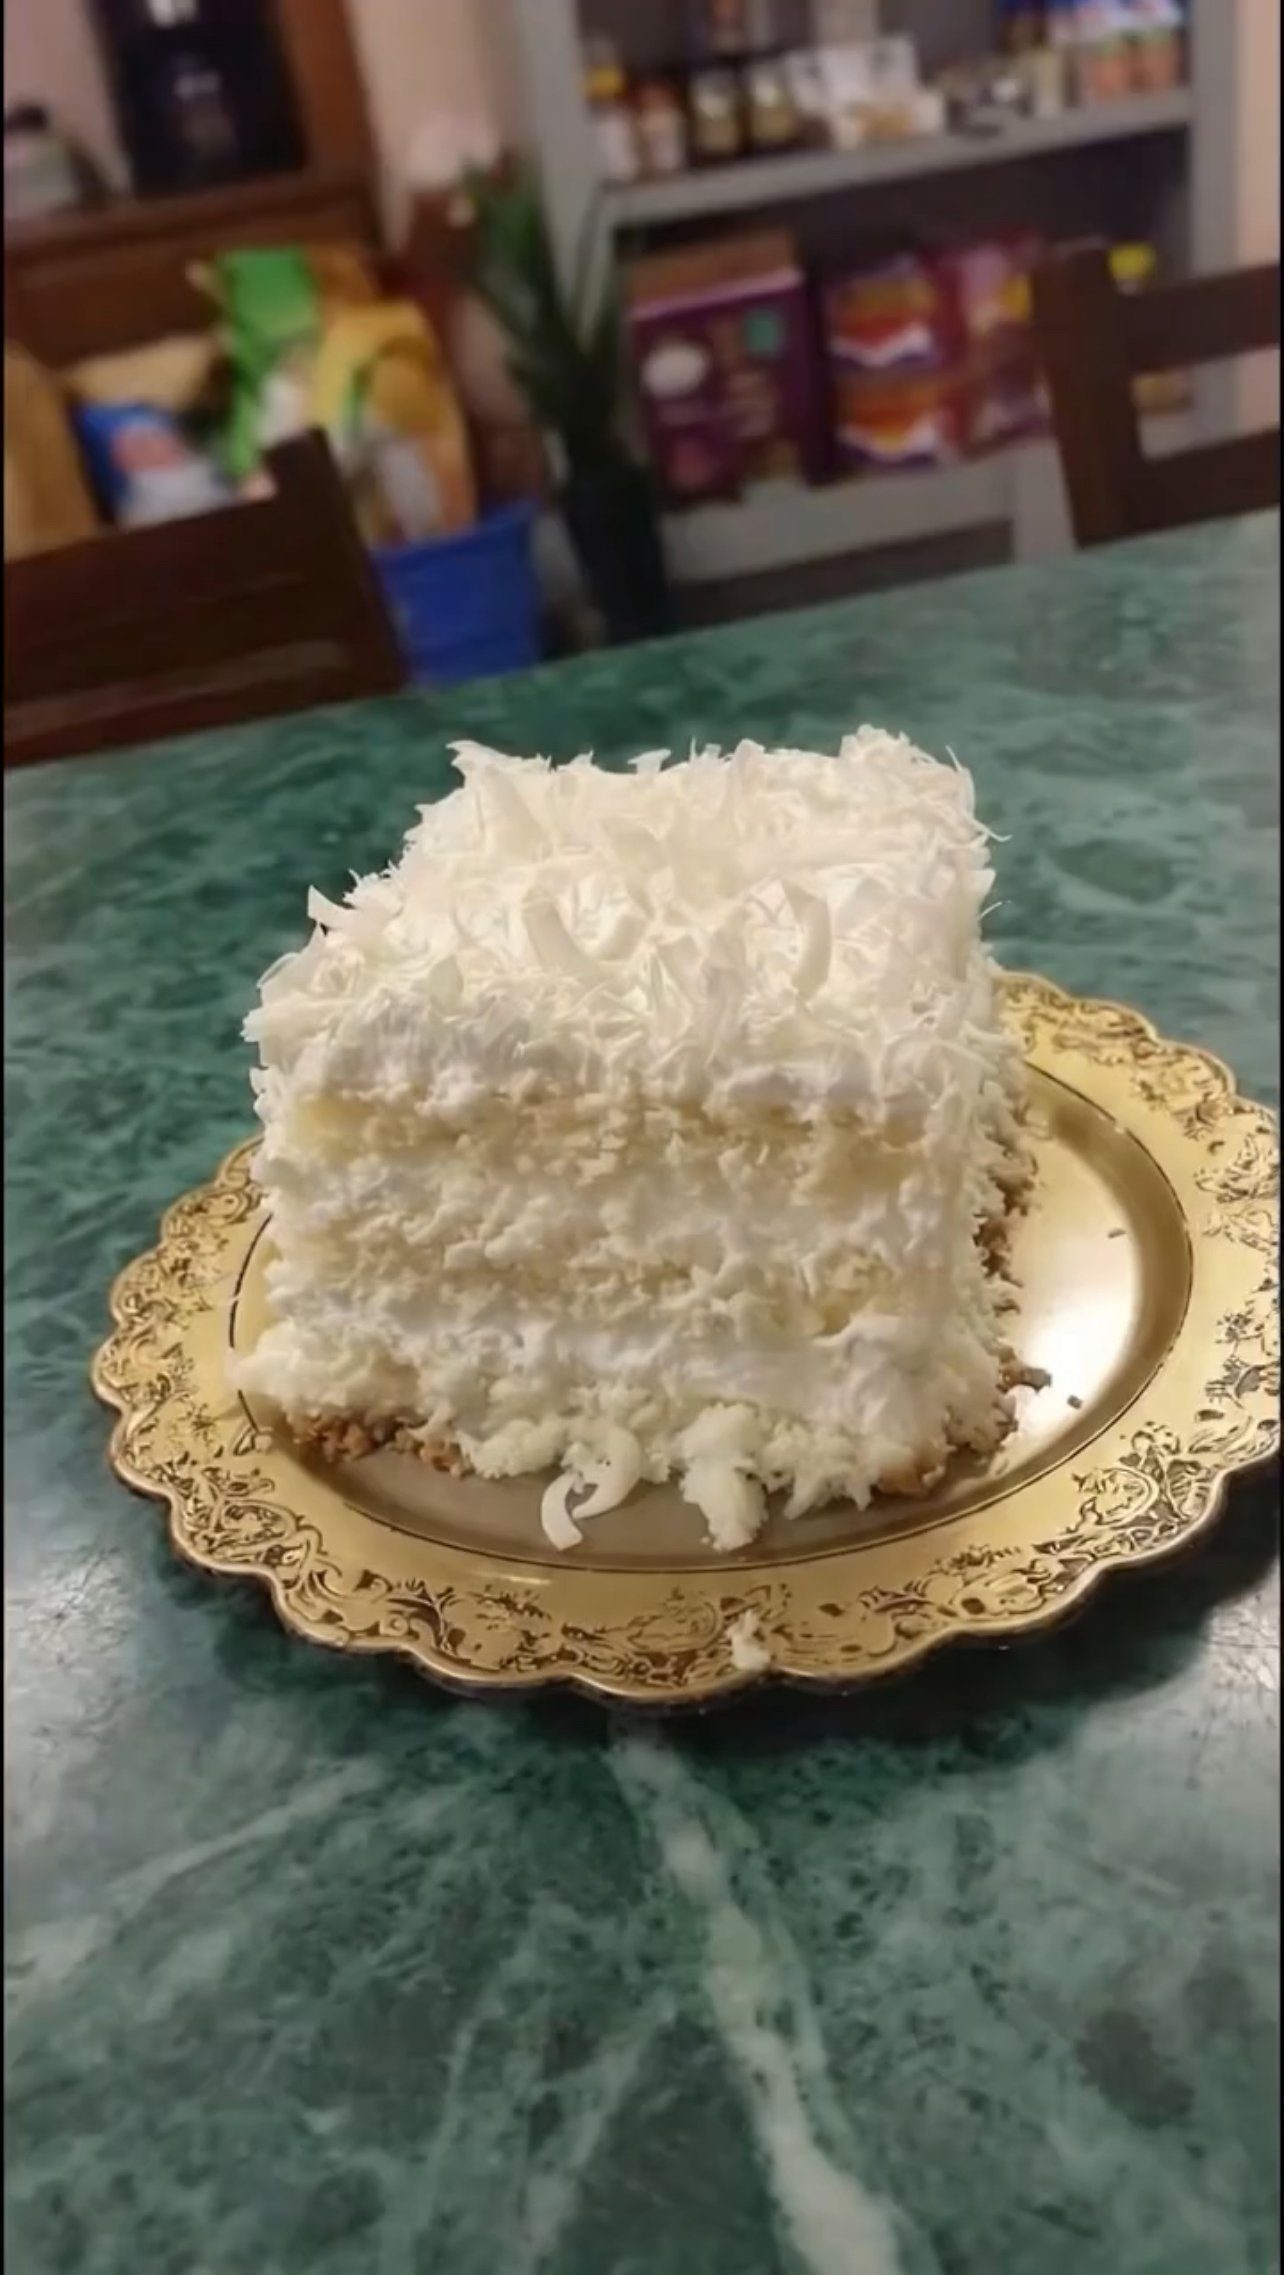
  1. Once slightly set, sprinkle coconut flakes generously on top.
  2. Gently press coconut on the sides as well (like in the picture).

πŸ”Ή Step 5: Chill & Serve

  • Refrigerate at least 4–6 hours (overnight is best).
  • Cut into square pieces.
  • Serve chilled for that soft, melt-in-mouth texture.

πŸ’‘ Tips for Perfect Texture

βœ” Use cold whipping cream

βœ” Chill properly before cutting

βœ” Toast coconut lightly if you want extra flavor

βœ” For extra richness, add condensed milk (2–3 tbsp) in cream layer

Chocolate and Milk Powder Pudding (No-Bake, Creamy Dessert)

Hello, everyone! Welcome back to our cooking blog, where we share delicious recipes every week. Today, we’re preparing a creamyΒ dessert. So, grab your pen and paper to jot down the ingredients, and let’s dive into this easy, step-by-step recipe that’s perfect for breakfast, appetizers, or even to accompany fresh salads!

Chocolate-making kit

How to Make Chocolate and Milk Powder Pudding

This easy no-bake chocolateΒ and milkΒ powder pudding is a rich, creamy dessert with a smooth texture and irresistible flavor. You don’t need cooking classes or costly meal delivery services to prepare something delicious at home. With a bit of planning and our detailed meal prep guide, you can create amazing dishes with confidence and ease.

Recipe Ingredients:

Chocolate Pudding Layer

  • 200 ml whole milk (6.8 fl oz)
  • 1 can sweetened condensed milk – 395 g (13.9 oz)
  • 1 carton heavy cream – 200 g (7.0 oz)
  • 1 cup cocoa powder (50% cacao)β€”approx. 120 g (4.2 oz)
  • 1 packet unflavored gelatin – 12 g (0.42 oz)
  • 5 tablespoons water – 75 ml (2.5 fl oz)

Milk Powder Pudding Layer

  • 200 ml whole milk (6.8 fl oz)
  • 1 can sweetened condensed milk – 395 g (13.9 oz)
  • 1 carton heavy cream – 200 g (7.0 oz)
  • 1 cup milk powder – approx. 100 g (3.5 oz)
  • 1 packet unflavored gelatin – 12 g (0.42 oz)
  • 5 tablespoons water – 75 ml (2.5 fl oz)

Instructions:

Step 1: Prepare the Chocolate Layer

Discover more
sweetened condensed milk
Pudding
cocoa powder

In a small bowl, hydrate the unflavored gelatin with 5 tablespoons (75 ml / 2.5 fl oz) of water and let it sit for 5 minutes. Microwave for 15 seconds until fully dissolved and set aside.

Dessert decorating supplies

In a blender, combine the milk, sweetened condensed milk, heavy cream, cocoa powder, and dissolved gelatin, then blend for 2 minutes until completely smooth and creamy.

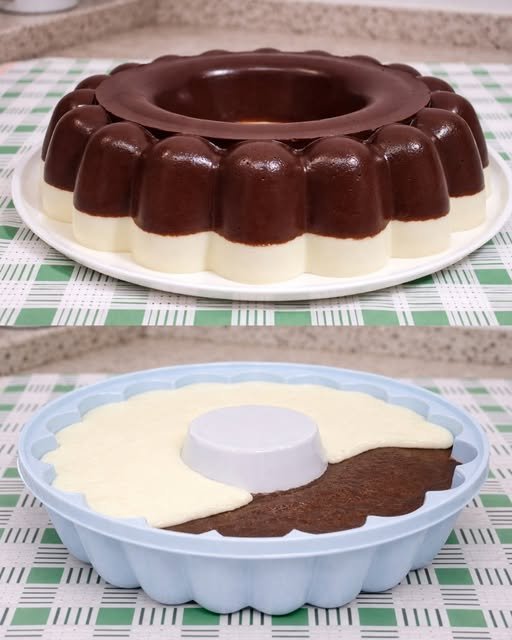
Lightly grease a Bundt pan or glass mold with oil, pour the mixture into the mold, and refrigerate for 30 minutes, or until slightly firm.

Step 2: Prepare the Milk Powder Layer

Hydrate the gelatin again with 5 tablespoons (75 ml / 2.5 fl oz) of water and microwave for 15 seconds until dissolved.

Kitchen gadget reviews

In a blender, combine the milk, sweetened condensed milk, heavy cream, milk powder, and dissolved gelatin, then blend for 2 minutes until smooth and creamy.

Carefully pour this mixture over the chocolate layer and refrigerate for at least 3 hours, or until fully set.

Serving

Once fully chilled, gently unmold and serve. The result is a beautiful layered pudding with a rich chocolate base and a creamy milk powder top.

Pro Tips

  • For clean layers, make sure the first layer is slightly firm before adding the second.
  • Use high-quality cocoa powder for deeper chocolate flavor and premium dessert results.
  • Garnish with chocolate syrup, chocolate shavings, or fresh strawberries for a professional presentation.

High-Protein Cloud Cake

High-Protein Cloud Cake

Ingredients

  • Eggs: 4 large, separated (yolks and whites)

  • Greek Yogurt: 1 Β½ cups (plain, unsweetened)

  • Optional for flavor: 1 teaspoon vanilla extract or a pinch of stevia (if you prefer a sweeter taste)

  • Optional for topping: A dusting of powdered stevia or fresh berries


Detailed Instructions

  1. Preparation: Preheat your oven to 170Β°C (340Β°F). Line the bottom and sides of a 6-inch round cake pan with parchment paper. This is a delicate cake, so the paper helps it release without breaking.

  2. Mix the Base: In a medium bowl, whisk the 4 egg yolks with the 1 Β½ cups of Greek yogurt until the mixture is completely smooth. If you are using vanilla or a sweetener, stir it in now.

  3. Whip the Egg Whites: In a separate, very clean glass or metal bowl, beat the 4 egg whites using an electric mixer until they form stiff peaks. You should be able to lift the beaters and have the foam stand straight up without drooping.

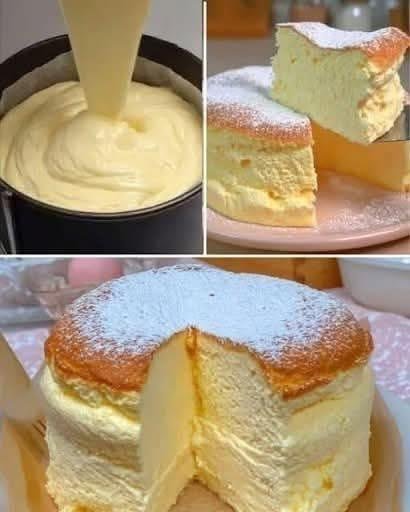
  4. Fold Gently: Gently fold about one-third of the whipped egg whites into the yogurt mixture to lighten it. Then, very carefully fold in the remaining egg whites. Do not overmix, or you will lose the “cloud” airiness.

  5. Bake: Pour the batter into your prepared pan. Place the cake pan inside a larger baking dish and fill the larger dish with about an inch of hot water (a water bath). Bake for 35–40 minutes.

  6. Cool and Set: Turn off the oven and leave the door slightly ajar, letting the cake cool inside for 10 minutes (this prevents it from collapsing too quickly). Remove from the oven and let it cool completely before refrigerating for at least 2 hours.

  7. Serve: Dust with a little powdered sweetener or top with fresh fruit before serving cold.


Why This Recipe Works

  • Protein-Packed: By using Greek yogurt and eggs, this dessert provides a high amount of protein with very little fat or carbohydrates.

  • Texture: The whipped egg whites act as the leavening agent, giving the cake its signature “cloud” lift.