Cabbage Fritters

🥬 Cabbage Fritters

📖 Description

Cabbage fritters are crispy on the outside, soft on the inside, and packed with flavor. Made with finely shredded cabbage, simple spices, and a light batter, these fritters are a budget-friendly, quick snack or side dish. They’re popular across many cuisines and can be shallow-fried, deep-fried, baked, or air-fried.

⏱️ Prep & Cook Time

Prep Time: 15 minutes


Cook Time: 15 minutes


Total Time: 30 minutes


🍽️ Servings

Serves: 4 people


Yield: ~12 fritters


📝 Ingredients

2 cups finely shredded cabbage


½ cup onion, finely chopped


½ cup all-purpose flour (or chickpea flour for gluten-free)


2 tbsp cornstarch (optional, for extra crispiness)


1 egg (optional; skip for vegan version)


1 tsp salt (adjust to taste)


½ tsp black pepper


½ tsp chili powder or paprika


½ tsp cumin powder


1 tsp garlic, minced


2–3 tbsp water (as needed)


Oil for frying

👩‍🍳 Instructions

Prepare the cabbage: Shred cabbage finely and squeeze out excess moisture.


Mix ingredients: In a bowl, combine cabbage, onion, flour, cornstarch, spices, garlic, and egg (if using).


Make batter: Add water gradually to form a thick, scoopable batter.


Heat oil: Heat oil in a pan over medium heat.


Fry fritters: Drop spoonfuls of batter into hot oil and flatten slightly.


Cook evenly: Fry 2–3 minutes per side until golden brown.


Drain & serve: Remove and drain on paper towels. Serve hot.


🧾 Notes

Squeezing moisture from cabbage is key to crispy fritters.


Chickpea flour adds protein and enhances flavor.


Egg helps binding but is optional.

💡 Tips for Best Results

Don’t overcrowd the pan; fry in batches.


Keep oil at medium heat to avoid soggy fritters.


Add chopped herbs (cilantro, parsley) for extra freshness.


For healthier cooking, air-fry at 180°C (350°F) for 12–15 minutes, flipping halfway.


🧮 Nutritional Information (Approx. per serving)

Calories: 180 kcal


Carbohydrates: 22 g


Protein: 4 g


Fat: 8 g


Fiber: 3

g


Sodium: 300 mg

(Values may vary based on oil and ingredients used.)


🌱 Health Benefits

Rich in fiber: Supports digestion and gut health


Low-cost & nutritious: Cabbage is packed with vitamin C and antioxidants


Versatile diet-friendly: Can be made vegan or gluten-free


Good for weight management: Filling and low-calorie when baked or air-fried


❓ Q & A

Q: Can I make cabbage fritters without egg?

A: Yes. Use chickpea flour or add 1 tbsp flaxseed meal mixed with water.


Q: Why are my fritters soggy?

A: Excess moisture in cabbage or oil not hot enough.


Q: Can I store leftovers?

A: Yes. Refrigerate for up to 2 days and reheat in an oven or air fryer.

Q: Can I add other vegetables?

A: Absolutely. Carrots, zucchini, or bell peppers work well.


Q: Are cabbage fritters healthy?

A: Yes, especially when baked or air-fried and made with minimal oil.
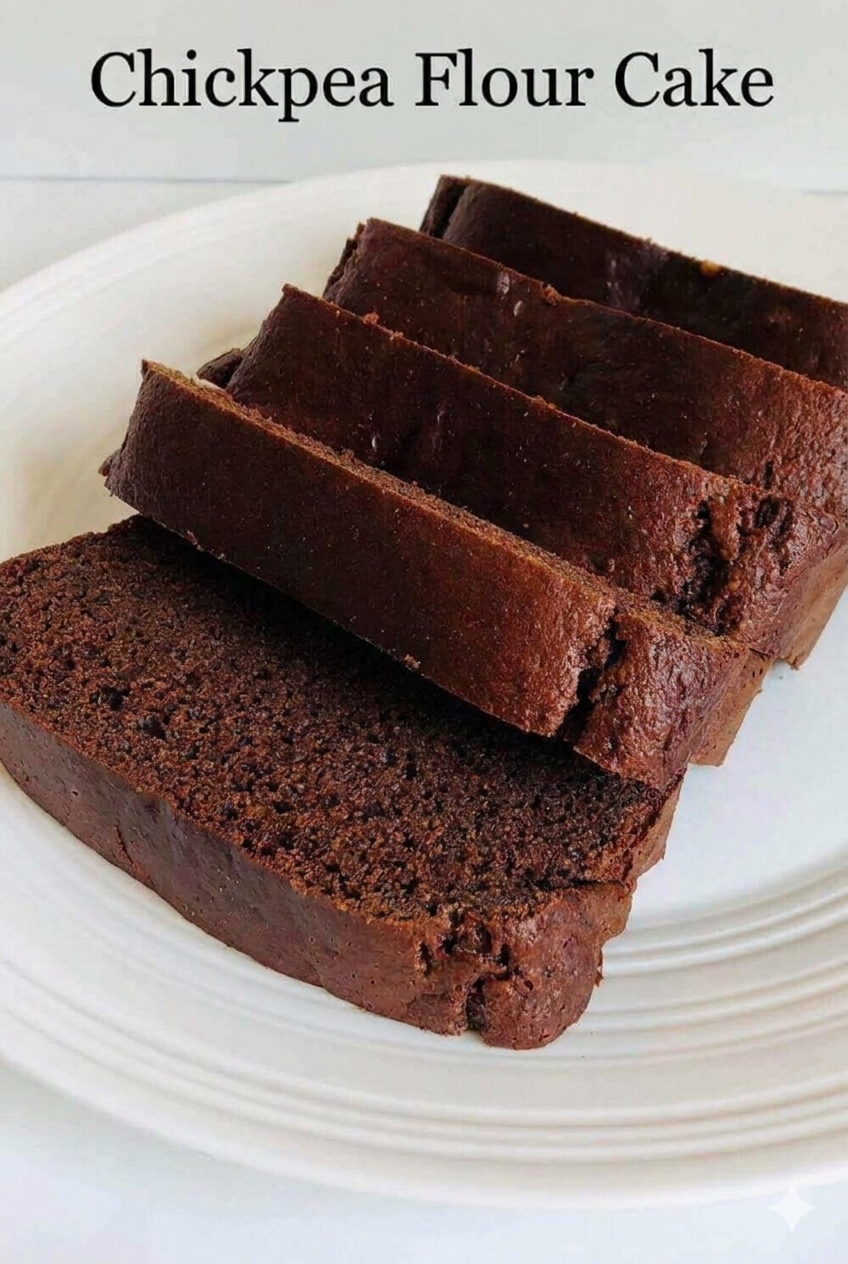
Protein-Packed Chickpea Flour Chocolate Cake

Protein-Packed Chickpea Flour Chocolate Cake

This recipe makes a rich, moist, and delightfully protein-packed chocolate cake that’s surprisingly gluten-free and avoids refined sugars. It’s so wholesome you can enjoy a slice for breakfast!

Detailed Recipe:

  • Prep time: 15 minutes

  • Bake time: 35-45 minutes

  • Yields: One 9×5 loaf pan (about 12 slices)

Ingredients:

  • Dry:

    • 1 1/2 cups chickpea flour (sifted)

    • 1/2 cup unsweetened cocoa powder (sifted)

    • 3/4 cup coconut sugar (or your favorite granulated alternative like monk fruit, maple flakes, or sugar)

    • 1 1/2 tsp baking powder

    • 1/2 tsp baking soda

    • 1/4 tsp sea salt

  • Wet:

    • 1/2 cup unsweetened applesauce (adds moisture and acts as a binder)

    • 1/2 cup water (or plant milk, like oat or almond milk)

    • 1/3 cup melted coconut oil (or any neutral oil)

    • 1 tsp vanilla extract

    • Optional: 1/2 cup vegan chocolate chips (gently fold in)

Instructions:

  1. Prepare: Preheat your oven to 350°F (175°C). Grease a standard 9×5-inch loaf pan with a little oil or line it with parchment paper for easy removal.

  2. Sift and Mix Dry: In a large mixing bowl, sift together the chickpea flour and cocoa powder to remove any lumps. Add the coconut sugar, baking powder, baking soda, and salt. Whisk until well combined.

  3. Combine Wet: In a separate, smaller bowl, whisk together the applesauce, water (or milk), melted coconut oil, and vanilla extract until smooth.

  4. Create Batter: Pour the wet ingredients into the dry ingredients and stir with a spatula or whisk until just combined. The batter will be thick and rich. Avoid overmixing. Gently fold in the optional chocolate chips if using.

  5. Pour and Smooth: Transfer the batter to your prepared loaf pan. Smooth the top with a spatula.

  6. Bake: Place the pan in the preheated oven and bake for 35 to 45 minutes. The cake is done when a toothpick or cake tester inserted into the center comes out clean (or with just a few moist crumbs).

  7. Cool: Allow the cake to cool in the pan for about 10 minutes. Then, carefully turn it out onto a wire rack to cool completely before slicing. This helps set the structure.

  8. Enjoy: Slice and enjoy! It’s delicious on its own, with a dusting of cocoa powder, or a dollop of coconut whipped cream.

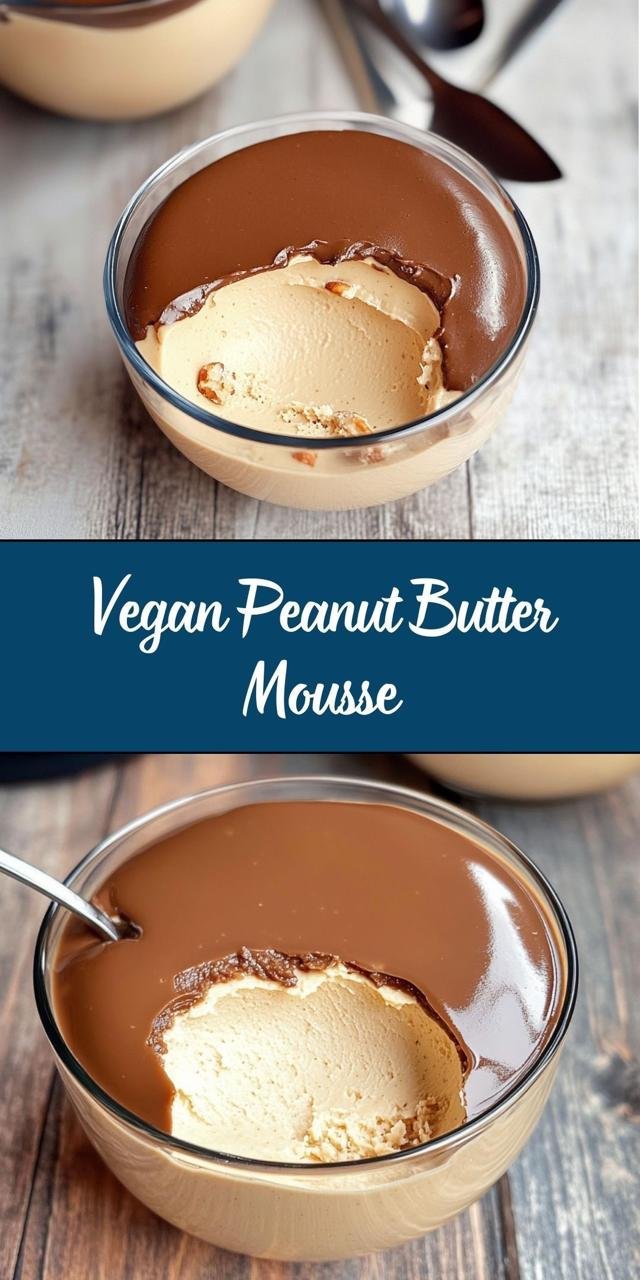
Vegan Peanut Butter Mousse

Vegan Peanut Butter Mousse

This mousse is incredibly creamy, using a base of coconut cream or silken tofu for a light, airy finish.

Ingredients

  • 1 cup Creamy peanut butter (natural is best)

  • 1 can (13.5 oz) Full-fat coconut milk, chilled overnight (use only the solid cream from the top)

  • 1/2 cup Maple syrup or agave nectar

  • 1 tsp Vanilla extract

  • Pinch of sea salt

  • For the Ganache Topping: 1/2 cup vegan chocolate chips melted with 2 tbsp coconut milk.

Instructions

  1. Prepare the Base: Scoop the hardened coconut cream from the top of the chilled can into a large chilled bowl. Whisk with a hand mixer until fluffy.

  2. Blend: Fold in the creamy peanut butter, sweetener, vanilla, and salt. Whisk again until the mixture is completely smooth and light.

  3. Set: Divide the mousse into individual serving bowls. Let them chill in the refrigerator for at least 2 hours to firm up.

  4. Top: Once set, pour a thin layer of the chocolate ganache over each bowl.

  5. Serve: Add a few crushed peanuts on top for a delightful crunch before serving.

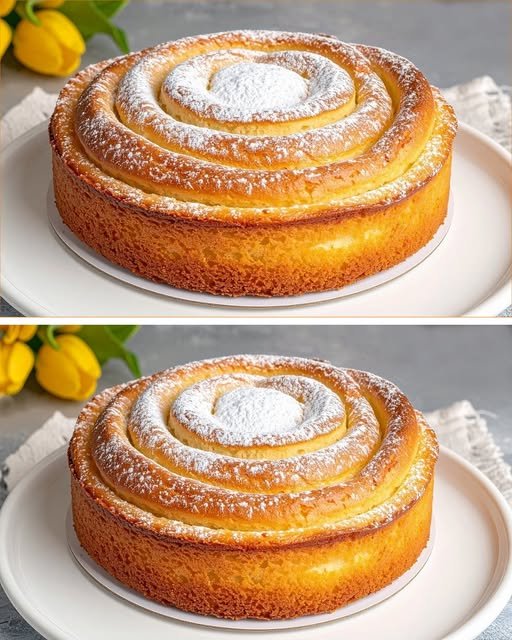
Grandma’s Swiss Apple Pie

Grandma’s Swiss Apple Pie

Easy Homemade Swiss Apple Pie Recipe That Everyone Will Love

If you’re looking for a dessert that’s both comforting and delicious, this easy homemade Swiss apple pie recipe is just what you need. With a moist, fluffy base and layers of sweet, tender apples, it’s a delightful treat that captures the essence of traditional baking. The creamy topping takes it over the top, making it a favorite for family gatherings, special occasions, or simply a cozy night at home. This pie offers the perfect balance of flavors and textures that will make everyone want a second slice!

Recipe Summary

  • Prep Time: 30 minutes
  • Cook Time: 50 minutes
  • Total Time: 1 hour 20 minutes
  • Servings: 8
  • Estimated Calories: 260 per slice

Ingredients

  • 4 large eggs
  • 180 g (3/4 cup) sugar
  • 1 pinch salt
  • 80 ml (1/3 cup) sunflower oil
  • 90 g (1/3 cup) plain yogurt
  • 1 tsp vanilla extract
  • 270 g (2 1/4 cups) all-purpose flour
  • 2 tsp baking powder
  • 3 apples, peeled and sliced
  • 1 egg (for cream)
  • 50 g (1/4 cup) sugar (for cream)
  • 1 tsp vanilla extract (for cream)
  • 30 g (3 tbsp) cornstarch
  • 240 ml (1 cup) milk
  • Powdered sugar for dusting

Instructions

  1. Preheat your oven to 170°C (340°F) and line a 20 cm (8 inch) cake pan with parchment paper.
  2. In a mixing bowl, beat the 4 eggs, 180 g sugar, and pinch of salt until the mixture is light and fluffy.
  3. Add in the sunflower oil, plain yogurt, and vanilla extract, then mix well to combine.
  4. Sift the all-purpose flour and baking powder into the wet mixture. Fold gently until the batter is smooth.
  5. Pour a thin layer of batter into the prepared pan, followed by a layer of the sliced apples. Repeat this layering process until all the apples and batter are used, finishing with a layer of batter.
  6. To prepare the cream, whisk the egg, 50 g sugar, 1 tsp vanilla extract, and cornstarch in a separate bowl until smooth.
  7. Gradually add the milk to the egg mixture, then cook over medium heat, stirring constantly until thickened.
  8. Spread the cream evenly over the cake batter.
  9. Bake in the preheated oven for about 50 minutes, or until the pie is set and golden. If the top browns too quickly, cover it with foil after 35 minutes.
  10. Allow the pie to cool completely, then dust with powdered sugar before serving.

Why This Recipe is Popular

This easy homemade Swiss apple pie recipe is a hit for many reasons. It combines the nostalgic flavors of classic apple pie with a creamy twist, making it a delightful choice for any occasion. It’s perfect for fall gatherings, holiday dinners, or just a sweet treat on an ordinary day. The simplicity of this recipe also appeals to both seasoned bakers and those just starting their culinary adventures.

Serving Suggestions

This delicious pie is perfect for serving at dessert gatherings, family celebrations, or simply enjoyed with a cup of coffee or tea. Pair it with a scoop of vanilla ice cream or a dollop of whipped cream for an extra indulgence.

Tips and Variations

  • Storage: Store leftover pie in an airtight container in the fridge for up to 3 days to maintain freshness.
  • Texture: For a crunchier pie, choose firmer apple varieties like Granny Smith or Honeycrisp.
  • Flavor Ideas: Try adding a sprinkle of cinnamon or nutmeg for an extra layer of warmth.
  • Swaps: You can substitute buttermilk for the yogurt for a richer flavor.
  • Serving Warm: This pie is delicious warm, but be sure to let it cool before adding powdered sugar for the best presentation.

FAQ Section

  • Can I use other fruits instead of apples? Yes! Pears or peaches would make a lovely substitute.
  • How do I know when the pie is done baking? The pie should be golden brown and firm in the center when cooked through.
  • Can I make this pie ahead of time? Absolutely! It can be made a day in advance, just store it in the refrigerator.
  • What can I serve with this pie? It pairs beautifully with whipped cream, vanilla ice cream, or even a drizzle of caramel sauce.

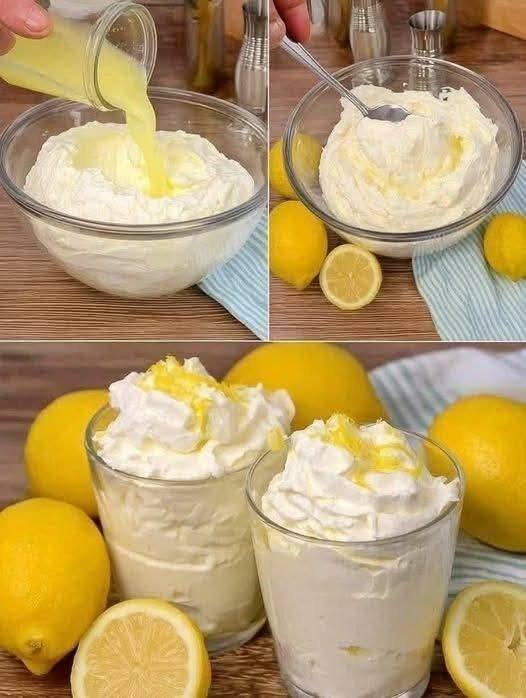
Easy 4-Ingredient Lemon Cheesecake Mousse

Easy 4-Ingredient Lemon Cheesecake Mousse

  • Prep time: 10 minutes

  • Chilling time: 30 minutes (optional, but recommended)

  • Servings: 4

Ingredients

  • 8 oz (225g) Cream Cheese: Softened to room temperature (this is crucial for a smooth texture).

  • 1 cup (240ml) Heavy Whipping Cream: Cold, straight from the fridge.

  • 1/2 cup (60g) Powdered Sugar: Adjust based on your preference for sweetness.

  • 1/4 cup Fresh Lemon Juice: About 1–2 large lemons.

  • Optional: 1 tsp Lemon Zest (for extra zing) and a splash of vanilla extract.


Instructions

  1. Cream the Base: In a large mixing bowl, beat the softened cream cheese and powdered sugar together using a hand mixer or stand mixer until the mixture is smooth and creamy. There should be no lumps.

  2. Add the Citrus: Slowly pour in the lemon juice (and zest, if using). Mix on low speed until combined.

  3. Whip the Cream: In a separate chilled bowl, whip the heavy cream until stiff peaks form.

    • Pro Tip: If you want to save a step, you can slowly pour the liquid heavy cream directly into the cream cheese mixture and whip them together until thick, but whipping them separately usually results in a fluffier mousse.

  4. Fold Together: Gently fold the whipped cream into the lemon-cheese mixture using a spatula. Use a “cut and fold” motion rather than stirring to keep the air in the mousse.

  5. Chill and Serve: Spoon or pipe the mousse into small glasses or ramekins. Let them sit in the fridge for at least 30 minutes to set.

  6. Garnish: Top with extra lemon zest, a mint leaf, or crushed graham crackers for a “cheesecake crust” feel.


A Quick Tip for Success

If your mousse looks a bit too soft, don’t worry—the fat in the cream cheese and the cold temperature of the fridge will help it firm up significantly as it rests.

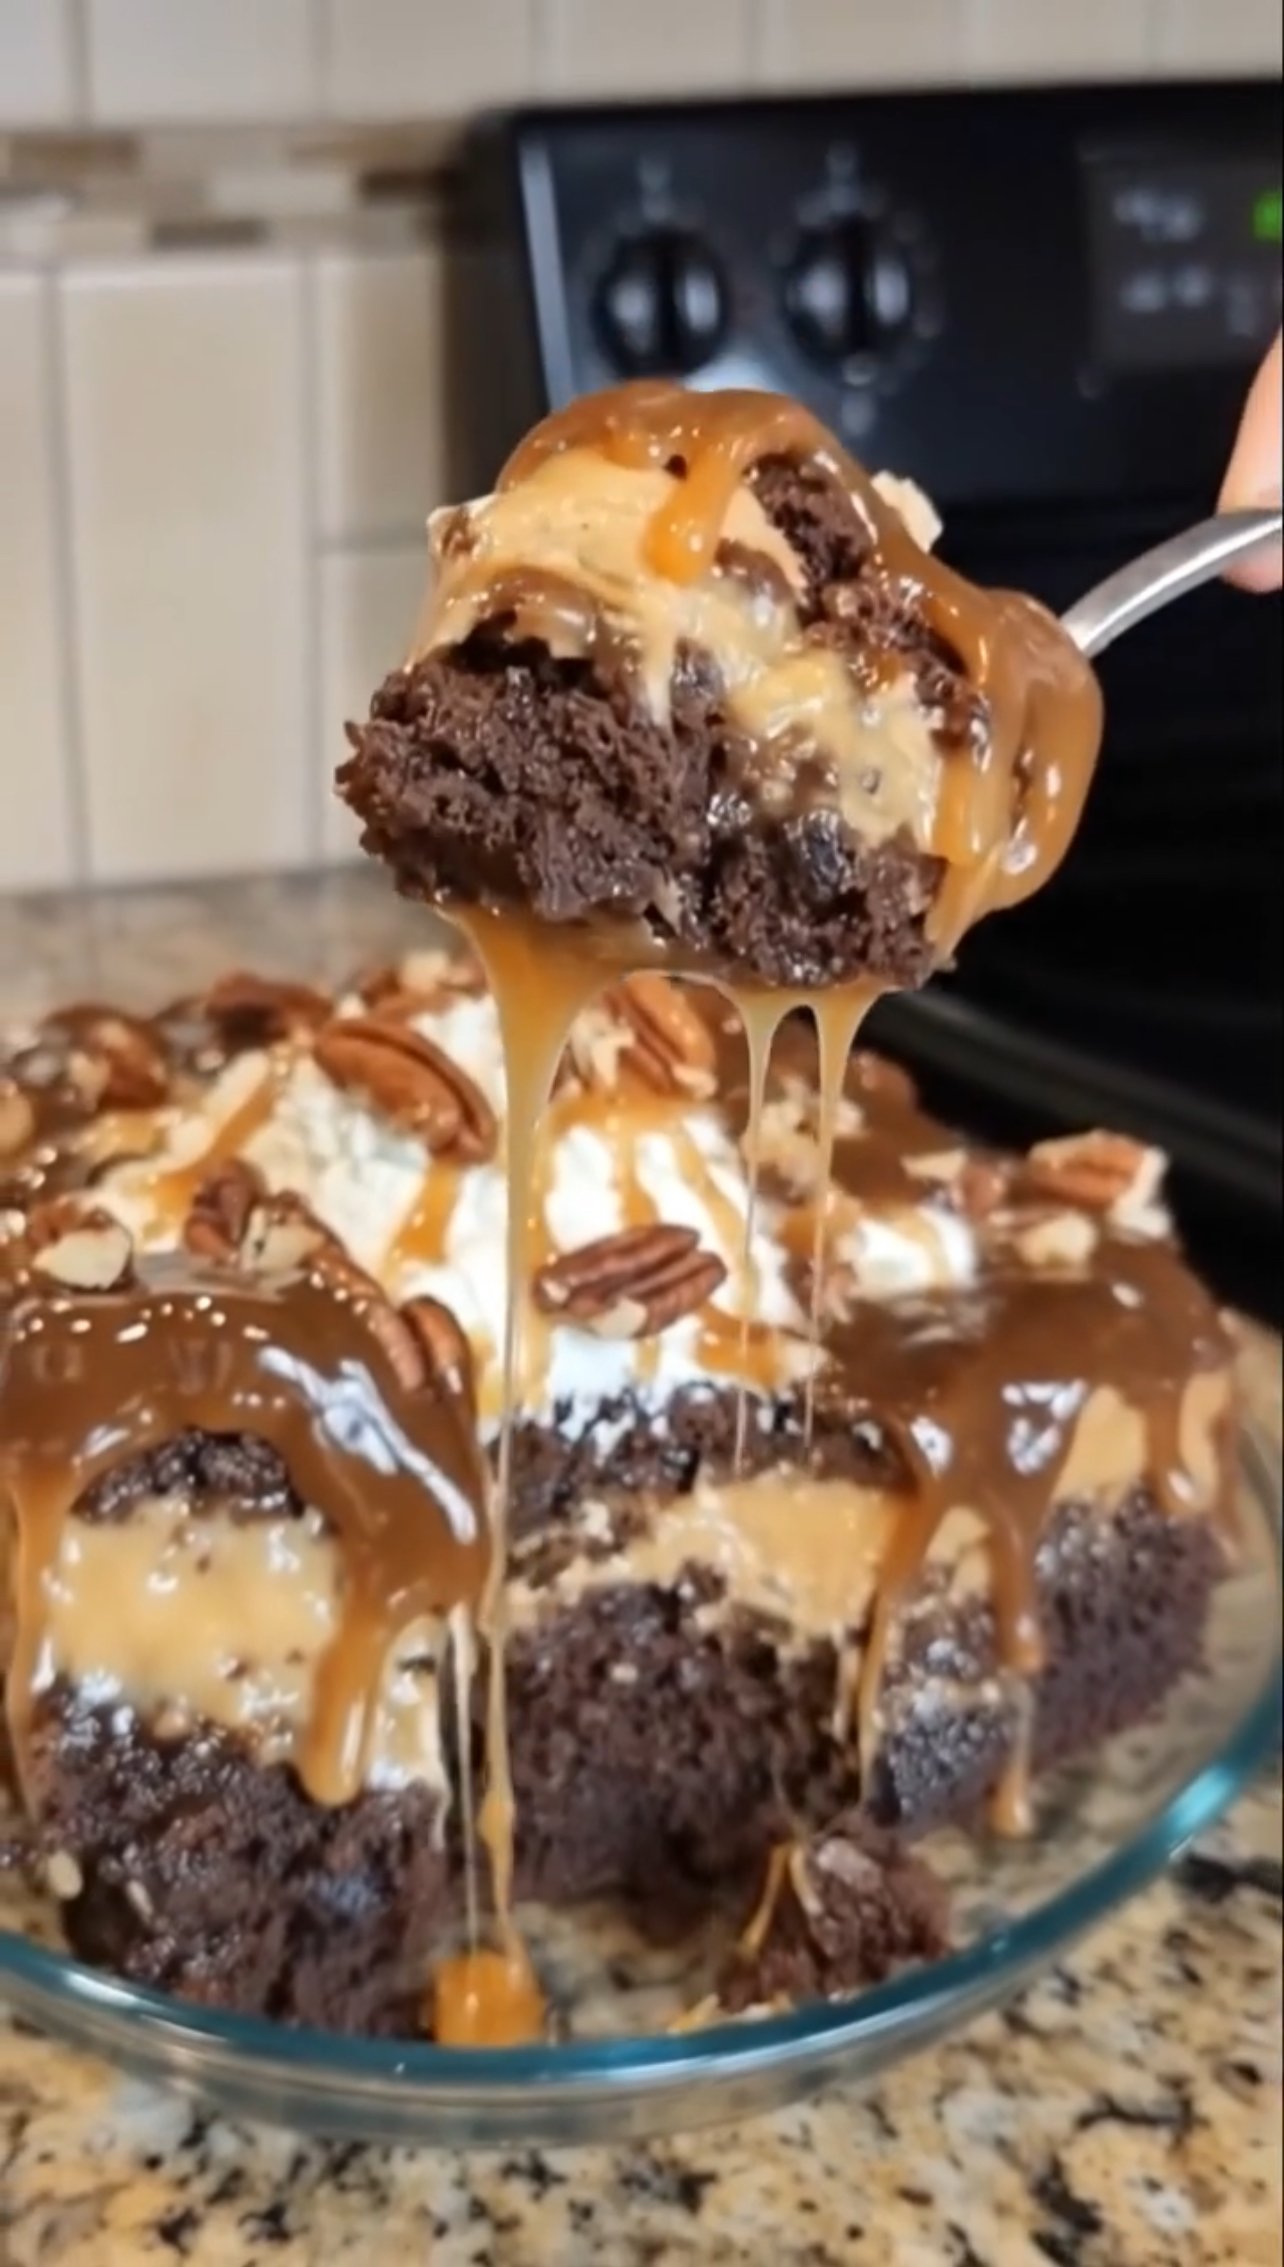
Chocolate Pecan Caramel Poke Cak

Chocolate Pecan Caramel Poke Cake

🛒 Ingredients

For the Chocolate Cake:

  • 1½ cups all-purpose flour
  • 1 cup sugar
  • ½ cup brown sugar
  • ½ cup unsweetened cocoa powder
  • 1½ tsp baking powder
  • ½ tsp baking soda
  • ½ tsp salt
  • 2 eggs
  • ½ cup oil (vegetable oil)
  • 1 cup milk
  • 1 tsp vanilla extract
  • ½ cup hot water or hot coffee (enhances chocolate flavor)

For the Caramel Filling:

  • 1 cup thick caramel sauce (store-bought or homemade)
  • ½ cup sweetened condensed milk

For the Topping:

  • 1 cup whipped cream (freshly whipped or store-bought)
  • ½ cup caramel sauce (for drizzle)
  • ½ cup chopped pecans
  • Extra whole pecans for decoration

👩‍🍳 Step-by-Step Method

Step 1: Prepare the Cake Batter

  1. Preheat oven to 180°C (350°F).
  2. Grease a round or square baking dish.
  3. In a large bowl mix:
    • Flour
    • Cocoa powder
    • Baking powder
    • Baking soda
    • Salt
  4. In another bowl whisk:
    • Eggs
    • Sugar
    • Brown sugar
    • Oil
    • Milk
    • Vanilla
  5. Slowly combine wet and dry ingredients.
  6. Add hot water/coffee and mix until smooth (batter will be slightly thin).

Step 2: Bake the Cake

  1. Pour batter into prepared dish.
  2. Bake for 30–35 minutes.
  3. Check with toothpick — it should come out clean.
  4. Let cake cool for 10 minutes (not fully cold).

Step 3: Make the Poke Filling

  1. In a bowl mix:
    • Caramel sauce
    • Sweetened condensed milk
  2. Stir until smooth and creamy.

Step 4: Poke & Fill

  1. Using the back of a wooden spoon, poke holes all over the warm cake.
  2. Slowly pour caramel mixture over cake.
  3. Spread evenly so it seeps into holes.
  4. Let cake cool completely so filling sets inside.

💡 Tip: For extra gooey texture, warm caramel slightly before pouring.

Step 5: Add Topping

  1. Spread whipped cream evenly over cake.
  2. Drizzle caramel sauce generously.
  3. Sprinkle chopped pecans.
  4. Add whole pecans on top.
  5. Chill in refrigerator for 1–2 hours before serving.

🌟 Optional Extra Rich Version

  • Add a layer of chocolate ganache before whipped cream.
  • Mix crushed toffee bits into topping.
  • Use salted caramel for sweet & salty flavor.

🍰 Serving Tip

Slice and serve chilled.

Every bite will have:

✔ Soft chocolate cake

✔ Creamy caramel inside

✔ Crunchy pecans

✔ Fluffy whipped topping