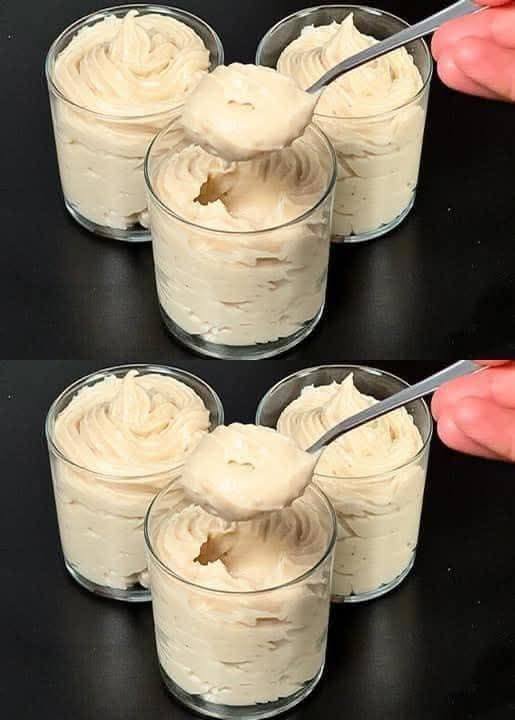
Banana Mousse in 5 Minutes

Banana Mousse in 5 Minutes

Table of Contents

Banana Mousse is one of those desserts that feels elegant yet comes together with surprisingly simple ingredients. Smooth, creamy, and naturally fruity, this quick mousse delivers a light texture with rich banana flavor and a delicate sweetness balanced by milk and butter. It is perfect when you want a chilled dessert that looks impressive but requires minimal cooking skills. The gelatin helps create a soft, airy consistency that sets beautifully in the fridge, making it ideal for serving at gatherings or as a refreshing after-dinner treat. Despite the name “5 minutes,” most of the time is hands-off chilling, while the preparation itself is quick and beginner-friendly. Whether you serve it in small glasses, molds, or layered with biscuits for a fancier presentation, this mousse offers a classic homemade dessert experience that appeals to both kids and adults. Once you make it, you will find it becomes a go-to recipe for easy entertaining and quick sweet cravings.

Prep Time: 5–10 minutes
Cooking Time: 10 minutes
Chilling Time: 3–4 hours
Total Time: About 4 hours
Yield: 6–8 servings

Ingredients

3 ripe bananas

25 g butter

70 g sugar (for the banana mix)

700 ml milk

150 g sugar (for the milk)

30 g gelatin

70 ml water

Instructions

Peel bananas and mash them until smooth using a fork or blender.

In a saucepan, melt butter over low heat and add mashed bananas.

See also  Roasted Carrots in an Air Fryer

Stir in 70 g sugar and cook gently for 2–3 minutes until slightly thick and fragrant.

In a separate bowl, sprinkle gelatin over 70 ml water and let it bloom for 5 minutes.

Heat milk in another pot and add 150 g sugar, stirring until dissolved. Do not boil.

Add the bloomed gelatin into the warm milk mixture and stir until fully melted.

Combine the warm banana mixture with the milk mixture and whisk until smooth.

Strain the mixture if you want an extra silky mousse texture.

Pour into serving glasses or molds and allow to cool at room temperature briefly.

Refrigerate for at least 3–4 hours until fully set, then serve chilled.

Tips

Use ripe bananas with brown spots for stronger flavor and natural sweetness.

Avoid boiling milk after adding gelatin since high heat can weaken its setting ability.

Stir continuously when heating bananas to prevent sticking or burning.

Straining the mixture removes lumps and creates a professional finish.

If you want a lighter mousse, gently fold in whipped cream before chilling.

Pour into small cups for quicker setting and easy portion control.

Chill molds lightly before pouring to help the mousse set evenly.

Taste the mixture before setting to adjust sweetness if needed.

Use clear glasses for a layered or decorated presentation.

Let mousse sit at room temperature for a few minutes before serving for the best texture.

Variations

Add vanilla extract for a warm, bakery-style aroma.

Mix in cocoa powder for a banana chocolate mousse version.

Layer with crushed biscuits or sponge cake for a trifle-style dessert.

Replace part of the milk with coconut milk for a tropical twist.

See also  Air Fryer Salmon

Top with caramel sauce or honey for extra richness.

Fold in chopped nuts for texture contrast.

Add cinnamon or nutmeg for a spiced variation.

Make mini mousse cups topped with whipped cream and banana slices.

Use plant-based milk and vegan gelatin alternatives for a dairy-free version.

Create a two-layer mousse by adding a strawberry or mango puree layer.

Q&A

Can I reduce the sugar?

Yes, adjust according to banana ripeness and taste preference.

What if I do not have gelatin?

Agar-agar can be used, but follow package instructions.

Can I freeze banana mousse?

Freezing changes texture, so refrigeration is best.

How long does it last?

Store in the fridge up to 3 days in an airtight container.

Can I use condensed milk instead of sugar and milk?

Yes, but reduce added sugar accordingly.

Why did my mousse not set?

The milk may have been too hot or gelatin insufficiently dissolved.

Can I make it ahead?

Yes, it is perfect for preparing a day in advance.

Is blending necessary?

Not required, but blending gives a smoother consistency.

Can I add fruit chunks?

Yes, small fruit pieces add flavor and texture.

How do I unmold neatly?

Dip the mold briefly in warm water before turning out.

Nutrition

(approx per serving)

Calories: 210–240
Carbohydrates: 35g
Protein: 5g
Fat: 6g
Fiber: 2g
Sugar: 25g

Conclusion

Banana Mousse in 5 Minutes is a wonderful reminder that delicious desserts do not need complicated steps or fancy ingredients. With its silky texture and comforting banana flavor, it offers a perfect balance between lightness and sweetness while remaining easy enough for everyday preparation. The combination of bananas, milk, and gentle gelatin setting creates a mousse that is creamy without feeling heavy, making it suitable for family meals, festive occasions, or simple weekend treats. Its versatility also means you can easily adapt the recipe with different flavors, toppings, or textures depending on your mood or available ingredients. Whether served plain in elegant glasses or layered with fruits and biscuits for a more decorative look, this mousse delivers consistent results and crowd-pleasing taste. Once chilled and set, each spoonful feels smooth, airy, and satisfying, making it a dessert you will likely return to whenever you want something quick, reliable, and homemade.
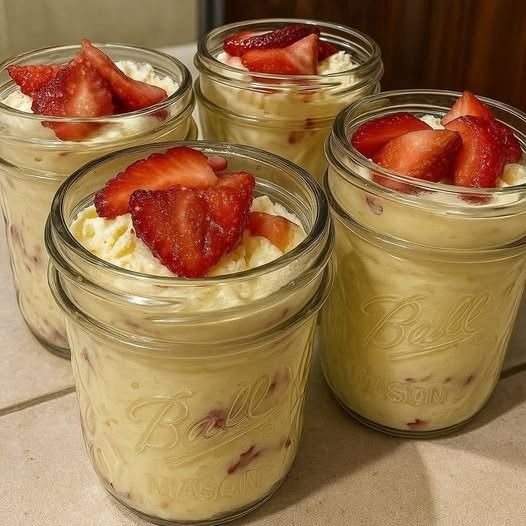
No-Bake Strawberry Cheesecake Jars

No-Bake Strawberry Cheesecake Jars

Table of Contents

These No-Bake Strawberry Cheesecake Jars are the ultimate easy dessert—creamy, fruity, and beautifully layered with zero oven time required. Perfect for warm days, dinner parties, or make-ahead treats, these individual jars deliver all the flavor of classic cheesecake in a lighter, faster format. The buttery graham cracker crust, fluffy vanilla cheesecake filling, and juicy fresh strawberries come together in a dessert that looks elegant but is incredibly simple to prepare.

Serves: 4–6 jars
Prep Time: 15 minutes
Chill Time: 1–2 hours (optional but recommended)

Ingredients

Crust Layer

  • 1 cup graham cracker crumbs
  • 2 tablespoons sugar
  • 4 tablespoons butter, melted

Cheesecake Filling

  • 8 oz (225 g) cream cheese, softened
  • ½ cup powdered sugar
  • 1 teaspoon vanilla extract
  • 1 cup heavy whipping cream, cold

Strawberry Layer

  • 1½ cups fresh strawberries, diced
  • 1–2 tablespoons sugar (optional, depending on sweetness)

Toppings (Optional)

  • Sliced fresh strawberries
  • Whipped cream

Instructions

1. Prepare the Crust
In a small bowl, combine the graham cracker crumbs and sugar. Pour in the melted butter and mix until the crumbs are evenly coated and resemble wet sand. Spoon 2–3 tablespoons of the mixture into the bottom of each jar or glass. Gently press down with the back of a spoon to create a compact base. Set aside.

2. Prepare the Strawberries
Place the diced strawberries in a bowl and toss with sugar if desired. Let them sit for 10–15 minutes to release their natural juices. This step enhances the flavor and creates a light strawberry syrup that pairs beautifully with the cheesecake layer.

See also  HOMEMADE BREAD ROLLS

3. Make the Cheesecake Filling
In a medium mixing bowl, beat the softened cream cheese with powdered sugar and vanilla extract until completely smooth and creamy. In a separate chilled bowl, whip the cold heavy cream until stiff peaks form. Gently fold the whipped cream into the cream cheese mixture using a spatula, working slowly to keep the filling light, airy, and fluffy.

4. Assemble the Jars
Spoon a generous layer of cheesecake filling over the crust. Add a layer of juicy strawberries, including some of their released juices. Repeat the layers until the jars are full, finishing with a cheesecake or strawberry layer depending on your preference.

5. Chill and Serve
Top each jar with sliced strawberries and a swirl of whipped cream if desired. Chill the jars for at least 1 hour to allow the flavors to meld and the texture to set. Serve chilled for the best taste and consistency.

Tips & Variations

  • Substitute strawberries with blueberries, raspberries, or mango for variety
  • Add lemon zest to the cheesecake filling for extra freshness
  • Use digestive biscuits or vanilla wafers instead of graham crackers

These No-Bake Strawberry Cheesecake Jars are creamy, refreshing, and irresistibly indulgent—perfect for any occasion, with minimal effort and maximum flavor 🍓🍰

3-Ingredient Chocolate Cloud Bites

3-Ingredient Chocolate Cloud Bites

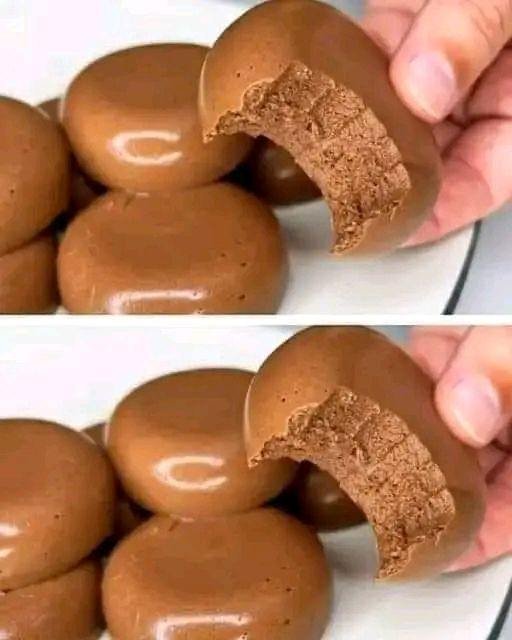
This dessert has a unique, airy texture—somewhere between a marshmallow and a firm mousse.

Ingredients

  • 1 ½ cups Water (or unsweetened almond milk for a creamier texture)

  • 2 tbsp Unsweetened cocoa powder (high quality is best for flavor)

  • 1 ½ tbsp Agar-agar powder (this is a plant-based gelatin substitute that sets firmly)

  • Optional: 2-3 tbsp Stevia or Erythritol (adjust to your preferred sweetness)


Step-by-Step Instructions

  1. Mix the Base: In a small saucepan, whisk together the water, cocoa powder, and your sugar-free sweetener while the water is still cold. Make sure there are no cocoa clumps.

  2. Add the Thickener: Stir in the agar-agar powder. It is important to mix it in thoroughly before turning on the heat.

  3. Simmer: Place the saucepan over medium heat. Bring the mixture to a gentle boil, stirring constantly. Once it starts to bubble, reduce the heat to low and let it simmer for 2 minutes. This “activates” the agar-agar so it sets properly.

  4. The “Cloud” Step (Optional but Recommended): For the extra bubbly, airy texture seen in the photo, remove from heat and use a hand mixer or milk frother to whip the mixture for about 1-2 minutes until it becomes foamy.

  5. Mold the Bites: Pour the mixture into small silicone molds (like a muffin tin or chocolate mold). If you don’t have molds, you can pour it into a flat glass container and cut it into squares later.

  6. Set: Let it sit at room temperature for 15 minutes, then move it to the refrigerator. Agar-agar sets very quickly, usually within 30 to 60 minutes.

  7. Serve: Gently pop them out of the molds. For an extra touch, you can lightly dust them with a tiny bit more cocoa powder.


Tips for Success

  • Agar-Agar vs. Gelatin: Do not swap agar-agar for regular gelatin 1:1. Agar-agar is much stronger and sets at room temperature, which gives these bites their specific “snap.”

  • Flavor Boost: Since the base is water, adding a drop of vanilla extract or a pinch of sea salt can really make the chocolate flavor pop without adding calories.

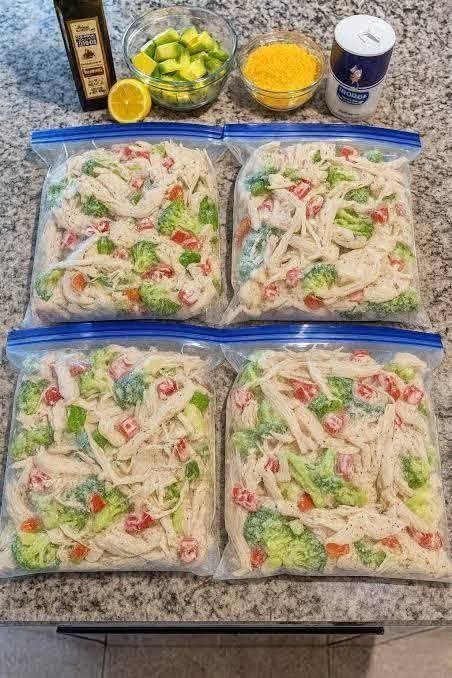
High-Protein Chicken Veggie Skillet A quick, wholesome meal packed with lean protein and fresh veggies

High-Protein Chicken Veggie Skillet A quick, wholesome meal packed with lean protein and fresh veggies

Servings: 4

Total Time: 20 minutes

Difficulty: Very Easy

Calories per Serving: 290 kcal

Macros: Protein: 36g / Carbs: 8g / Fat: 12g / Fiber: 3g

The Ultimate One-Pan Muscle Fuel

Finding the time to cook a balanced meal shouldn’t feel like a second job. This High-Protein Chicken Veggie Skillet is the perfect solution for busy athletes, parents, and health-conscious foodies who need a nutrient-dense dinner on the table in under 20 minutes. By focusing on lean chicken breast and a rainbow of antioxidant-rich vegetables, we’ve created a clean eating masterpiece that hits your macros without any unnecessary fillers or heavy sauces.


This recipe is a staple for high-protein followers because it prioritizes volume and satiety. We use high-heat searing to lock in the juices of the chicken while keeping the vegetables crisp-tender, ensuring every bite is bursting with natural flavor. It’s a “fridge-clear” recipe that works with whatever seasonal greens you have on hand, making it a versatile addition to your weekly rotation.

Whether you’re in a deep cutting phase or just looking for easy meal prep ideas, this skillet delivers. It’s low-carb, gluten-free, and designed to provide a steady stream of energy without the post-dinner slump. It’s professional-grade nutrition made simple.


Look at the Recipe

Sensory Appeal: Vibrant pops of color from fresh peppers and zucchini paired with golden-seared chicken bites.

Flavor Highlight: A savory blend of smoked paprika and garlic with a bright, zesty lemon finish.

Key High-Protein Benefit: Over 35 grams of lean protein per serving to support muscle recovery and metabolic health.

Ingredients Needed

The Protein:


1.5 lbs Boneless, skinless chicken breast, cut into 1-inch cubes

1 tbsp Avocado oil (high smoke point for searing)

1 tsp Smoked paprika

½ tsp Garlic powder

Salt and black pepper to taste

The Veggies:


2 Bell peppers (any color), sliced into strips

1 Medium zucchini, halved and sliced

1 cup Broccoli florets, bite-sized

1 Small red onion, sliced

2 cloves Garlic, minced

Finish: 1 tbsp Fresh lemon juice and chopped parsley

How to Make Our Chicken Veggie Skillet

Sear the Chicken: Heat the avocado oil in a large cast-iron or non-stick skillet over medium-high heat. Season the chicken cubes with paprika, garlic powder, salt, and pepper. Add to the pan in a single layer and sear for 5–6 minutes until golden brown and cooked through. Remove chicken and set aside.


Sauté the Aromatics: In the same pan, add the red onion and bell peppers. Sauté for 3 minutes until they start to soften and develop a slight char.

Flash-Cook the Greens: Add the zucchini and broccoli to the skillet. Stir in the minced garlic. Cook for 4–5 minutes, stirring frequently. You want the vegetables to be vibrant and tender but still have a satisfying “snap.”


Combine and Brighten: Return the cooked chicken to the skillet. Toss everything together for 1 minute to reheat. Turn off the heat and squeeze the fresh lemon juice over the top. This acidity is the secret to a restaurant-quality clean meal.


Serve: Garnish with fresh parsley and serve immediately.

Storage & Serving Suggestions

Storing: This is a meal-prep dream. Store in airtight containers in the fridge for up to 4 days.

Reheating: Quickly toss back into a hot skillet for 2 minutes or microwave for 60–90 seconds.

Freezing: You can freeze this skillet for up to 2 months, though the zucchini may be slightly softer upon thawing.

Serving Pairings: Enjoy as-is for a low-carb dinner, or serve over a bed of quinoa or cauliflower rice to soak up the juices.

Tips & FAQs

Can I use chicken thighs instead of breast? Yes! Chicken thighs will add more moisture and a richer flavor, though the fat and calorie content will be slightly higher. It remains a fantastic high-protein choice.


How do I prevent the vegetables from getting soggy? The key is high heat and not overcrowding the pan. Sauté the vegetables in batches if necessary so they sear rather than steam.

What other vegetables work well in this skillet? Snap peas, asparagus, and halved cherry tomatoes are excellent additions. This recipe is highly adaptable to whatever is fresh in your garden or local market.

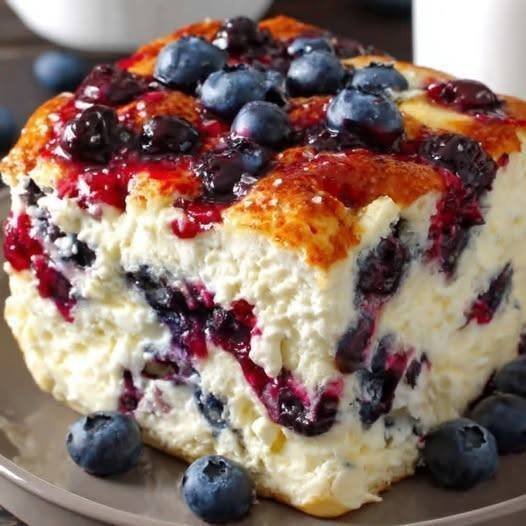
High-Protein Blueberry Breakfast Bake

High-Protein Blueberry Breakfast Bake

Serves 1 | Prep time: 5 mins | Bake time: 25-30 mins

Ingredients

The Base:

  • Bread: 2-3 slices of low-calorie/high-fiber bread or sourdough (cubed).

  • Blueberries: 1/2 cup fresh or frozen blueberries.

The “Protein Bomb” Liquid:

  • Egg Whites: 1/2 cup (liquid carton egg whites work best for volume).

  • Whole Egg: 1 large egg.

  • Protein Powder: 1 scoop (approx. 30g) Vanilla Whey or Casein/Whey blend.

  • Greek Yogurt: 1/4 cup non-fat plain Greek yogurt.

  • Milk: 1/4 cup unsweetened almond milk (or milk of choice).

  • Sweetener: 1-2 tbsp calorie-free sweetener (like Stevia or Monkfruit).

  • Flavorings: 1/2 tsp vanilla extract and a pinch of cinnamon.


Instructions

  1. Prep the Oven: Preheat your oven to 350°F (175°C). Lightly grease a small oven-safe ramekin or individual baking dish with non-stick spray.

  2. Layer the Dish: Place your cubed bread into the dish and sprinkle most of the blueberries over and between the bread pieces.

  3. Mix the Liquid: In a blender or a medium bowl with a whisk, combine the egg whites, whole egg, protein powder, Greek yogurt, milk, sweetener, vanilla, and cinnamon. Pro Tip: Blending ensures the protein powder is completely smooth with no clumps.

  4. Soak: Pour the protein mixture over the bread cubes. Use a spoon to gently press the bread down so every piece is submerged and soaking up the liquid. Let it sit for 2-3 minutes.

  5. Bake: Top with the remaining blueberries. Bake for 25–30 minutes, or until the center is set and the top is golden brown and slightly puffed.

  6. Cool and Serve: Let it cool for a few minutes (it will deflate slightly, which is normal).


Helpful Tips for Success

  • The Bread Matters: Using a slightly “stale” or toasted bread helps it absorb the liquid without becoming too mushy.

  • Casein vs. Whey: If you use a Casein-Whey blend protein powder, the texture will be thicker and more cake-like. Pure Whey tends to be a bit more “custard-like.”

  • The Topping: For an extra treat, drizzle a little sugar-free maple syrup or a “frosting” made of a tablespoon of Greek yogurt mixed with a teaspoon of protein powder.

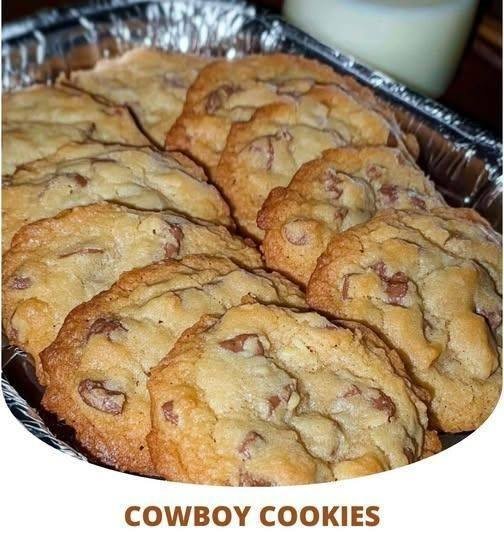
Diabetic-Friendly “Cowboy” Cookies

Diabetic-Friendly “Cowboy” Cookies

A high-fiber, no-sugar-added twist on the classic hearty cookie.

Ingredients

  • 1 cup Almond flour (provides healthy fats and low glycemic index)

  • 1/2 cup Rolled oats (the “heart” of a Cowboy cookie)

  • 1/2 cup Granulated monk fruit sweetener or Erythritol (sugar-free)

  • 1/4 cup Unsweetened shredded coconut

  • 1/4 cup Sugar-free dark chocolate chips

  • 1 Large egg (room temperature)

  • 2 tbsp Melted coconut oil or grass-fed butter

  • 1/2 tsp Baking soda

  • 1/2 tsp Vanilla extract

  • Optional: A pinch of sea salt and 1/4 cup chopped walnuts.


Step-by-Step Instructions

1. Prep Your Station

Preheat your oven to 175°C (350°F). Line a large baking sheet with parchment paper or a silicone mat so the cookies don’t stick.

2. Mix the Dry Ingredients

In a large bowl, whisk together the almond flour, rolled oats, monk fruit sweetener, shredded coconut, and baking soda. Ensure there are no large lumps in the almond flour.

3. Combine the Wet Ingredients

In a smaller bowl, whisk the egg, melted oil/butter, and vanilla extract until well combined.

4. Form the Dough

Pour the wet ingredients into the dry ingredients. Stir with a spatula until a thick, tacky dough forms. Fold in your sugar-free chocolate chips and walnuts (if using).

5. Scoop and Flatten

Scoop about 1.5 tablespoons of dough for each cookie and place them on the tray. Since these don’t spread as much as traditional butter-heavy cookies, use the palm of your hand to gently press them down into thick discs.

6. Bake

Bake for 10–12 minutes until the edges are just starting to turn golden brown.

7. The “Cooling” Rule

Crucial Step: Let these cool on the pan for at least 15 minutes. Sugar-free cookies made with almond flour are very fragile while hot but firm up beautifully as they cool.


Important Nutritional Note

While these are much lower in carbohydrates and contain no refined sugar, they are not “zero calorie.” Almonds, oats, and coconut are nutrient-dense but do contain natural calories and healthy fats. Always check with your healthcare provider or nutritionist regarding portion sizes if you are managing a strict diabetic diet.