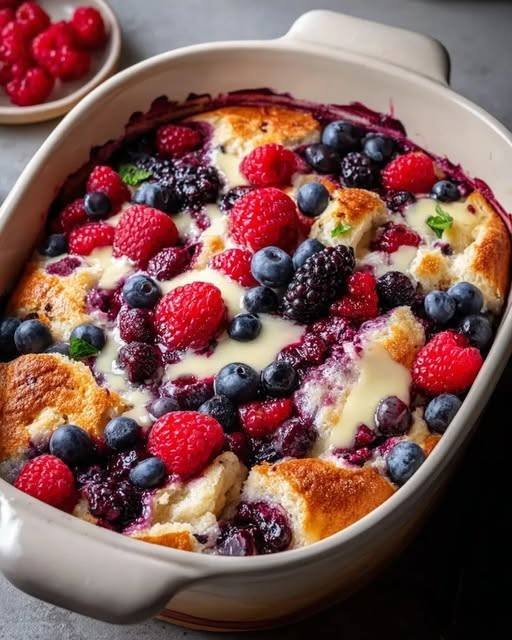
Triple Berry Protein Bake

Triple Berry Protein Bake

Creamy, naturally sweet, and packed with protein, this Triple Berry Protein Bake is the perfect balance between a wholesome breakfast and a light dessert. Made with cottage cheese, almond flour, and vibrant mixed berries, it’s gluten-free, nourishing, and incredibly satisfying. Each slice delivers a soft, cheesecake-like texture with bursts of juicy berries in every bite.

Ingredients

  • 2 cups full-fat cottage cheese
  • 3 large eggs
  • ½ cup almond flour
  • ¼ cup honey, maple syrup, or sugar-free sweetener
  • 1 teaspoon vanilla extract
  • 1 teaspoon lemon zest
  • 1 teaspoon baking powder
  • 2 cups mixed berries (strawberries, blueberries, raspberries — fresh or frozen)

Instructions

1. Prepare the Oven & Dish
Preheat your oven to 175°C (350°F). Lightly grease an 8×8 or 9×9-inch baking dish with butter or cooking spray to prevent sticking.

2. Blend the Base
In a food processor or blender, combine the cottage cheese and eggs. Blend until completely smooth and creamy. This step is key for achieving a soft, custard-like texture without visible curds.

3. Mix the Batter
Transfer the smooth mixture to a mixing bowl. Add almond flour, your chosen sweetener, vanilla extract, lemon zest, and baking powder. Stir gently until everything is fully incorporated. The almond flour gives structure while keeping the bake naturally gluten-free.

4. Fold in the Berries
Gently fold in the mixed berries, being careful not to overmix. This helps keep the berries whole and prevents the batter from turning purple. If using frozen berries, no need to thaw — just fold them in straight from the freezer.

5. Bake
Pour the batter into the prepared baking dish and spread evenly. Bake for 35–40 minutes, or until the top is lightly golden and the center is just set. A slight jiggle is okay; it will firm up as it cools.

6. Cool & Serve
Allow the bake to cool for at least 20–30 minutes before slicing. This helps it fully set and makes cleaner slices.

Serving Suggestions

Serve warm or chilled. Top with Greek yogurt, a drizzle of honey, or extra fresh berries. It stores well in the refrigerator for up to 4 days, making it ideal for meal prep breakfasts.

Enjoy a protein-packed treat that feels indulgent but fuels your day beautifully! 💜

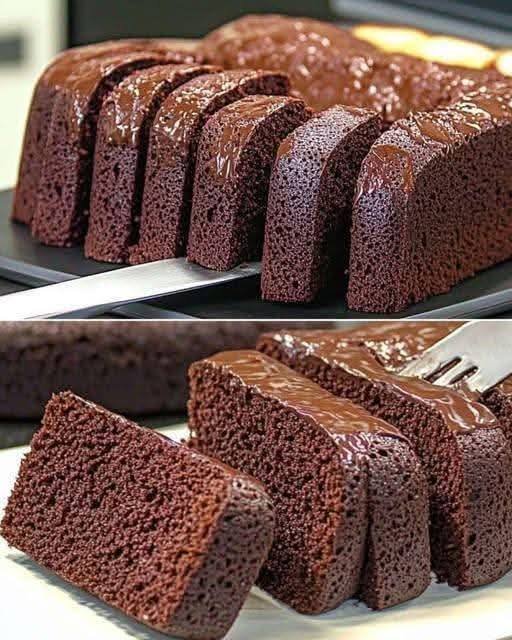
Fluffy Apple & Cocoa Cake (No Added Sugar)

Fluffy Apple & Cocoa Cake (No Added Sugar)

A light, moist, and chocolatey treat powered by fruit.

Ingredients

  • 4 Medium Sweet Apples (Gala, Fuji, or Honeycrisp work best for natural sweetness)

  • 4 Large Eggs

  • 5 Tablespoons Unsweetened Cocoa Powder

  • 1 Teaspoon Baking Powder

  • Olive Oil (specifically for greasing the mold)


Step-by-Step Instructions

1. Prepare the Apples

Wash, peel, and core your four apples. Cut them into small chunks.

  • Pro Tip: To get that incredibly smooth, cake-like texture seen in your photo, you will want to steam or boil the apple chunks for about 10 minutes until they are very soft. Drain any excess water.

2. Blend the Base

Place the softened apples into a blender or food processor. Pulse until you have a completely smooth apple purée.

3. Combine with Eggs

Add the 4 large eggs to the blender with the apple purée. Blend again for about 30 seconds until the mixture is light and well-combined.

4. Sift in Dry Ingredients

Add the 5 tablespoons of cocoa powder and the 1 teaspoon of baking powder to the blender.

  • Important: Use a high-quality unsweetened cocoa powder to ensure a deep chocolate flavor without any hidden sugars.

  • Pulse the blender until the batter is a uniform chocolate color and completely smooth.

5. Prepare the Mold

Lightly grease a silicone mold or a small baking tin with a little olive oil. This ensures the cake releases perfectly without sticking to the sides.

6. Bake or Set

  • Oven Method: Preheat your oven to 350°F (175°C). Pour the batter into the mold and bake for 40–45 minutes, or until a toothpick comes out clean.

  • Alternative: Some versions of this recipe can be “set” in the fridge if using a setting agent, but for the spongy texture in your photo, baking is the best route.

7. Cool and Slice

Allow the cake to cool completely in the mold before flipping it onto a plate. As seen in your image, you can top it with a thin layer of melted sugar-free chocolate or a dusting of extra cocoa powder if you like.


Why It Works for You

By using apples as the base, you are getting natural fiber and sweetness without the need for refined flours or sugars. It keeps the calorie count low while providing a dense, satisfying texture.

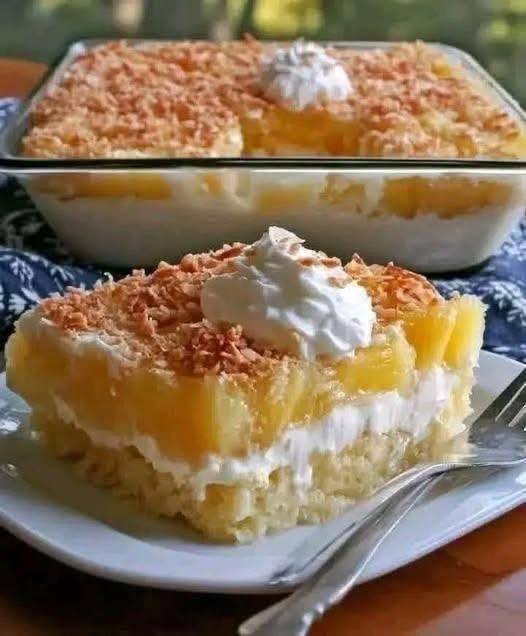
Pineapple Sunshine Cake

Pineapple Sunshine Cake

Prep time: 10 minutes | Bake time: 30 minutes

Ingredients

For the Cake:

  • 1 box (15.25 oz) Yellow Cake Mix

  • 4 Large eggs

  • 1/2 cup Vegetable oil

  • 1 can (8 oz) Crushed pineapple with juice (do not drain)

For the Whipped Topping:

  • 1 can (20 oz) Crushed pineapple with juice (do not drain)

  • 1 box (3.4 oz) Vanilla instant pudding mix

  • 1 container (8 oz) Whipped topping (like Cool Whip), thawed

  • Optional: 1/2 cup toasted shredded coconut (as seen in your photo) or maraschino cherries for garnish.


Step-by-Step Instructions

1. Prepare the Batter

Preheat your oven to 350°F (175°C). In a large mixing bowl, combine the yellow cake mix, eggs, vegetable oil, and the small (8 oz) can of crushed pineapple. Mix by hand or with an electric mixer for about 2 minutes until well combined.

2. Bake the Base

Grease a 9×13-inch baking dish. Pour the batter in and spread it evenly. Bake for 30–35 minutes, or until a toothpick inserted into the center comes out clean.

Crucial Step: Allow the cake to cool completely before adding the topping, otherwise the whipped cream will melt.

3. Make the Tropical Frosting

In a medium bowl, stir together the large (20 oz) can of crushed pineapple and the dry vanilla pudding mix. Once the pudding mix has dissolved into the pineapple juice and thickened slightly, gently fold in the thawed whipped topping until the mixture is light and fluffy.

4. Assemble

Spread the pineapple-pudding mixture evenly over the cooled cake.

5. Garnish and Chill

If you want to match the photo exactly, sprinkle the top generously with toasted coconut. For the best flavor and texture, refrigerate the cake for at least 2 hours before serving. This allows the flavors to meld and the cake to become extra moist.


Why this recipe works

  • The Juice: Using the pineapple juice directly in the batter replaces the water usually called for in box mixes, creating a much deeper flavor.

  • The Pudding: Mixing the pudding directly with fruit juice creates a stable, flavorful “mousse” that stays fluffy in the fridge.

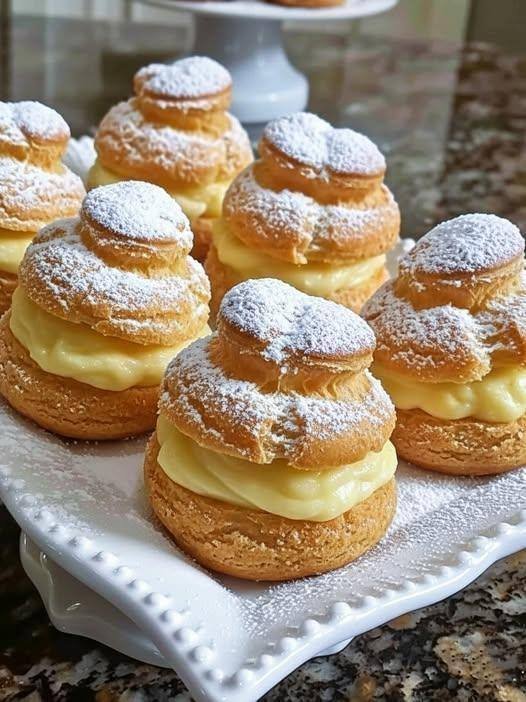
Classic Vanilla Cream Puffs

Classic Vanilla Cream Puffs

This recipe consists of two main parts: the Crème Pâtissière (Pastry Cream) and the Pâte à Choux (Pastry Shells).

1. The Vanilla Pastry Cream

Make this first so it has time to chill.

Ingredients:

  • 2 cups whole milk

  • 1/2 cup granulated sugar

  • 1/4 cup cornstarch

  • 4 large egg yolks

  • 2 tbsp unsalted butter

  • 1 tsp vanilla extract (or vanilla bean paste)

  • A pinch of salt

Instructions:

  1. Heat Milk: In a medium saucepan, bring the milk to a light simmer over medium heat. Do not let it boil over.

  2. Whisk Base: In a separate bowl, whisk together the sugar, cornstarch, salt, and egg yolks until the mixture is pale and thick.

  3. Temper: Slowly pour about half of the hot milk into the egg mixture, whisking constantly to ensure the eggs warm up without scrambling.

  4. Thicken: Pour the egg mixture back into the saucepan with the remaining milk. Cook over medium heat, whisking vigorously, until the custard thickens and begins to bubble.

  5. Finish: Remove from heat. Stir in the butter and vanilla.

  6. Chill: Transfer to a bowl and cover with plastic wrap (press the wrap directly onto the surface of the cream to prevent a skin from forming). Refrigerate for at least 2 hours.


2. The Choux Pastry Shells

Ingredients:

  • 1/2 cup water

  • 1/2 cup whole milk

  • 8 tbsp (1 stick) unsalted butter, cubed

  • 1 tsp sugar

  • 1/4 tsp salt

  • 1 cup all-purpose flour

  • 4 large eggs (at room temperature)

Instructions:

  1. Prep: Preheat your oven to 400°F (200°C) and line a baking sheet with parchment paper.

  2. Boil: In a medium saucepan, combine water, milk, butter, sugar, and salt. Bring to a rolling boil.

  3. Add Flour: Remove from heat and dump in the flour all at once. Stir vigorously with a wooden spoon until a ball of dough forms and pulls away from the sides.

  4. Cook Out: Return to low heat for 1–2 minutes, stirring constantly to “dry out” the dough. You should see a thin film on the bottom of the pan.

  5. Incorporate Eggs: Transfer dough to a stand mixer or bowl. Let it cool for 2 minutes. Add eggs one at a time, beating thoroughly after each addition. The dough is ready when it is glossy and forms a “V” shape when you lift the beater.

  6. Pipe: Pipe rounds (about 2 inches wide) onto the baking sheet. Use a damp finger to smooth down any “points” on top.

  7. Bake: Bake for 20 minutes, then reduce heat to 350°F (175°C) and bake for another 10–15 minutes until deep golden brown.

    • Pro Tip: Poke a tiny hole in the side of each puff with a toothpick right after they come out of the oven to let steam escape.


3. Assembly

  1. Cut: Once the shells are completely cool, slice off the top third of each puff using a serrated knife.

  2. Fill: Whisk your chilled pastry cream to loosen it up. Use a piping bag with a star tip to swirl a generous amount of cream into the bottom half of the shell.

  3. Topper: Place the “hat” back on top of the cream.

  4. Garnish: Dust heavily with powdered sugar (confectioners’ sugar) right before serving to get that beautiful snowy look from your photo.

20-Minute Easy Coconut Cookies

20-Minute Easy Coconut Cookies

Description

These coconut cookies are soft on the inside, lightly crisp on the outside, and packed with coconut flavor. No mixer, no chilling, and just a handful of pantry ingredients. Perfect for last-minute cravings or surprise guests.

 Time

  • Prep: 5 minutes

  • Bake: 12–15 minutes

  • Total: ~20 minutes

Ingredients (Simple & Budget-Friendly)

  • 1 cup desiccated coconut

  • ½ cup all-purpose flour

  • ½ cup powdered sugar

  • ¼ cup melted butter or oil

  • 1 egg

  • ½ tsp baking powder

  • ½ tsp vanilla essence (optional)

  • Pinch of salt

Instructions

  1. Preheat oven to 180°C (350°F). Line a baking tray with parchment paper.

  2. In a bowl, mix egg, sugar, butter, and vanilla until smooth.

  3. Add flour, baking powder, salt, and coconut. Mix into a soft dough.

  4. Scoop small portions, roll into balls, and slightly flatten.

  5. Place on tray, leaving space between cookies.

  6. Bake 12–15 minutes until edges are lightly golden.

  7. Cool for 5 minutes before serving (they firm up as they cool).

 Servings

  • Makes 10–12 cookies

 Notes

  • Cookies will feel soft when hot—don’t overbake.

  • For extra crunch, toast the coconut lightly before mixing.

  • Dough should be soft, not sticky. Add 1 tbsp flour if needed.

 Tips for Best Results

  • Use fine desiccated coconut for smoother texture

  • Don’t flatten too much—slight thickness keeps them soft

  • For extra flavor, add a pinch of cardamom or cinnamon

Nutritional Info (Per Cookie – Approx.)

  • Calories: 120 kcal

  • Carbohydrates: 12 g

  • Fat: 7 g

  • Protein: 2 g

  • Fiber: 1.5 g

(Values are approximate and depend on ingredients used)

 Health Benefits

  • Coconut provides healthy fats for energy

  • Quick homemade snack with no preservatives

  • Can be made egg-free, dairy-free, or gluten-free with swaps

  • Better than store-bought cookies for portion control


Q & A

Q: Can I make this without eggs?
A: Yes! Replace egg with ¼ cup milk or yogurt.

Q: Can I use jaggery or brown sugar?
A: Absolutely—powder it finely for best texture.

Q: How do I store them?
A: Store in an airtight container for up to 5 days.

Q: Can I freeze the dough?
A: Yes, freeze up to 1 month, bake straight from frozen (+2 mins).

Q: Can I air-fry them?
A: Yes! Air-fry at 160°C for 8–10 minutes.

Spinach and Feta Rolls

Spinach and Feta Rolls

Crispy on the outside and soft, savory on the inside, these spinach and feta rolls are perfect as a snack, appetizer, or light meal.
Time
Prep: 15 minutes
Bake: 25 minutes
Serves
10–12 rolls
Ingredients
For the filling
* 2 cups fresh spinach, finely chopped
* 1 cup crumbled feta cheese
* 1 small onion, finely chopped
* 1 garlic clove, minced
* 1 tablespoon olive oil
* Salt and black pepper, to taste
* Pinch of nutmeg (optional)
For the rolls
* 10–12 sheets phyllo pastry
* 4 tablespoons melted butter or olive oil
Optional additions
* 1 tablespoon fresh dill or parsley, chopped
* 1 tablespoon sesame seeds or black seeds for topping
Directions
1. Prepare the filling
Heat olive oil in a skillet over medium heat. Add onion and sauté for 2–3 minutes until soft.
Add garlic and cook for 30 seconds. Stir in spinach and cook until wilted.
Remove from heat, allow to cool slightly, then mix in feta, salt, pepper, nutmeg, and herbs if using.
2. Prepare the phyllo
Preheat oven to 180°C (350°F). Line a baking tray with parchment paper.
Lay one sheet of phyllo on a clean surface and brush lightly with melted butter or olive oil. Place another sheet on top and brush again.
3. Assemble the rolls
Spoon a line of filling along one edge of the phyllo. Fold in the sides and roll tightly into a log shape.
Repeat with remaining phyllo and filling.
4. Bake
Place rolls seam-side down on the prepared tray. Brush the tops lightly with butter or oil and sprinkle with seeds if desired.
Bake for 22–25 minutes until golden and crisp.
5. Serve
Allow to cool slightly before serving. Enjoy warm or at room temperature.
Nutritional information (approximate, per roll)
Calories: 150
Protein: 5 g
Carbohydrates: 12 g
Fat: 9 g
Fiber: 1 g
These rolls are great served with yogurt dip, tzatziki, or a simple green salad.