🍍 2-Ingredient Creamy Pineapple Mousse

🍍 2-Ingredient Creamy Pineapple Mousse

Prep time: 5 minutes | Chilling time: 2 hours | Yields: 4–6 servings

🛒 Ingredients

  • Heavy Cream (Chilled): 2 boxes or cans 

    Tip: Using “Table Cream” or heavy whipping cream that has been in the fridge for a few hours helps it thicken faster.

  • Pineapple Powdered Drink Mix: 1 packet ($25\text{ g}$ | $0.88\text{ oz}$), such as Tang or similar.

  • Optional Toppings: Fresh pineapple chunks, shredded coconut, or white chocolate shavings.


🥣 Step-by-Step Instructions

  1. The Base: Pour both containers of chilled heavy cream into your blender.

  2. The Flavor: Add the entire packet of pineapple drink mix.

  3. The Blend: Blend on high speed for approximately 1 to 2 minutes.

    • Watch closely: You will see the mixture transform from a liquid to a thick, velvety cream. The sound of the blender will change as the mixture becomes dense.

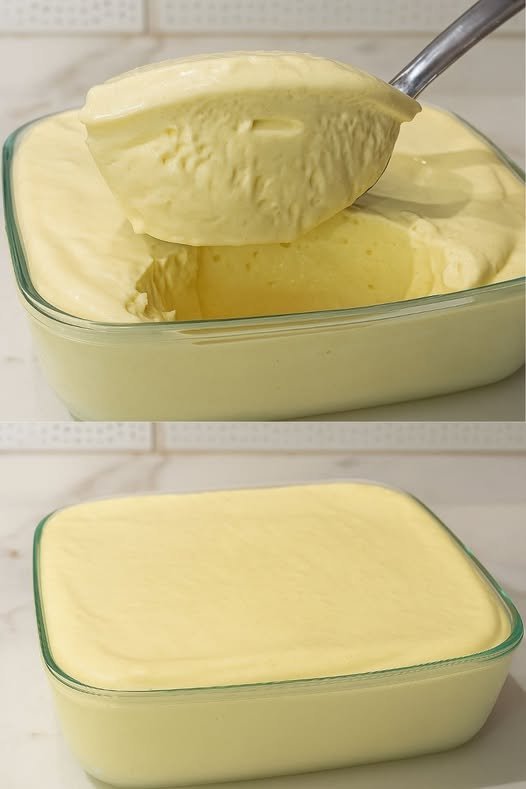
  4. The Set: Pour the mixture into a large glass serving dish (like the one in your photo) or divide it into individual dessert ramekins.

  5. The Chill: Smooth the top with a spatula and refrigerate for at least 2 hours. This allows the mousse to “set” so it holds its shape when scooped.

  6. The Finish: Just before serving, add your chosen toppings.


💡 Why This Works (The “Science”)

You don’t need gelatin or eggs because the citric acid in the powdered drink mix reacts with the fats and proteins in the heavy cream. This causes the cream to “denature” and thicken instantly, creating a stable mousse that won’t deflate.

🌟 Flavor Variations

If you want to try something different using the exact same method:

  • Passion Fruit: Use a passion fruit drink mix (very popular in Brazil!).

  • Strawberry: Use a strawberry mix and top with fresh berries.

  • Grape: Use a grape mix for a nostalgic, vibrant purple dessert.

Diabetic-Friendly 5-Minute Biscuit Cake

Diabetic-Friendly 5-Minute Biscuit Cake

Description:
This diabetic-friendly biscuit cake is a no-bake dessert that’s quick and easy to make. With a creamy, rich texture and a crunch from the biscuits, this cake offers a satisfying treat for those managing their sugar intake. The layers of biscuits and sweet, sugar-free cream make it a delicious, guilt-free indulgence. It’s a perfect dessert for gatherings or when you want to satisfy your sweet tooth without compromising on your health.

Ingredients:

  • 1 pack of sugar-free digestive biscuits (or any low-sugar biscuits)

  • 2 cups of heavy cream (unsweetened)

  • 1 cup sugar-free vanilla pudding mix or sugar-free custard powder

  • 1/2 cup roasted nuts (optional, for topping)

  • 1 tablespoon cocoa powder (optional, for garnish)

Instructions:

  1. Prepare the Cream Layer: In a large mixing bowl, whisk the heavy cream until it thickens and forms soft peaks. Gradually add the sugar-free vanilla pudding mix or custard powder, and continue whisking until smooth and fully combined.

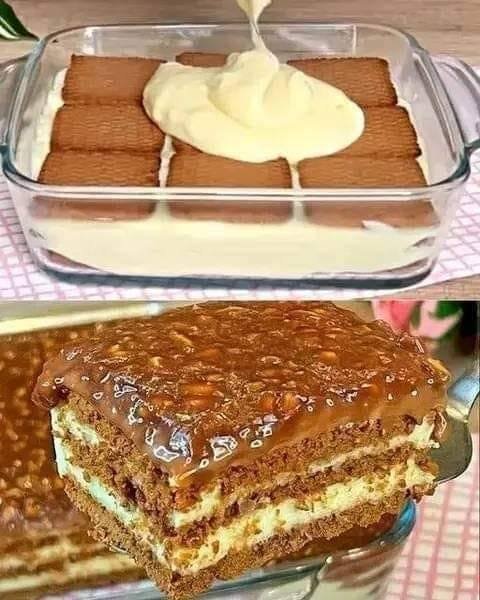
  2. Layer the Biscuits: Arrange a layer of sugar-free digestive biscuits at the bottom of a rectangular or square dish, placing them flat.

  3. Add the Cream: Pour a portion of the prepared cream mixture over the biscuit layer, spreading it evenly across the surface.

  4. Repeat the Process: Add another layer of biscuits, followed by more cream, ensuring the biscuits are well covered. Repeat until you have several layers, finishing with a layer of cream on top.

  5. Chill: Once all layers are assembled, cover the dish and refrigerate for at least 2-3 hours or overnight to allow the flavors to meld together and the cake to set.

  6. Optional Topping: Before serving, sprinkle with roasted nuts or a light dusting of cocoa powder for added flavor and crunch.

  7. Serve: Slice the cake into squares or rectangles and enjoy your diabetic-friendly dessert.

Notes:

  • Sugar-Free Ingredients: Ensure that you are using sugar-free or low-sugar versions of biscuits, pudding mix, and cream. If you can’t find a sugar-free pudding mix, you can substitute with a homemade sugar-free custard.

  • Consistency: The longer the cake sits in the fridge, the better it will taste as the biscuits soften and absorb the cream.

  • Flavor Variations: For extra flavor, you can add vanilla or almond extract to the cream mixture, or incorporate a bit of cinnamon or nutmeg.

Tips:

  • For a richer flavor, use full-fat cream. For a lighter version, you can substitute with whipped cream made from unsweetened plant-based cream.

  • If you like your dessert sweeter, you can add a little bit of stevia or another sugar substitute.

  • The cake works best when left to chill overnight, allowing the flavors to blend and the texture to firm up.

Servings:

  • This recipe serves about 6-8 people, depending on the size of the portions.

Nutritional Information (per serving, based on 8 servings):

  • Calories: 150 kcal

  • Carbs: 10g

  • Protein: 3g

  • Fat: 12g

  • Fiber: 2g

  • Sugar: 2g (depending on the sugar-free ingredients used)

  • Sodium: 60mg

Benefits:

  • Low-Sugar: The use of sugar-free ingredients ensures that this dessert has minimal sugar, making it safe for those managing diabetes.

  • Good for Blood Sugar Control: This cake is designed to have a low glycemic impact, helping to manage blood sugar levels.

  • Rich in Healthy Fats: The heavy cream provides healthy fats that help you feel full and satisfied with a small serving.

  • No-Bake: This recipe is quick and easy to make, perfect for busy days when you want a tasty dessert without spending too much time in the kitchen.

Q&A for Recipe:

  • Q: Can I use a different type of biscuit? A: Yes, any sugar-free or low-sugar biscuits will work well in this recipe. You can also use gluten-free biscuits if you have dietary restrictions.

  • Q: Can I use a plant-based cream? A: Yes, you can substitute the heavy cream with unsweetened plant-based creams, such as coconut cream, almond cream, or soy cream. Just ensure it is unsweetened.

  • Q: How long should I refrigerate the cake? A: For the best flavor and texture, refrigerate the cake for at least 2-3 hours, though overnight is recommended.

  • Q: Can I make this cake in advance? A: Yes, this cake is ideal for making ahead of time. You can prepare it the day before serving, allowing it to set properly in the refrigerator.

Tastes Like a Fudge Brownie, Eats Like a Cookie

Tastes Like a Fudge Brownie, Eats Like a Cookie

Table of Contents

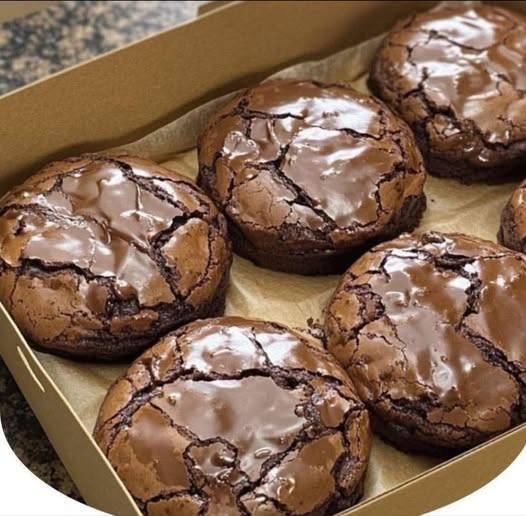
If you love the rich, fudgy decadence of a brownie but crave the handheld convenience of a cookie, this recipe is your dream come true. These cookies are deeply chocolatey, soft in the center, slightly crisp on the edges, and studded with melty dark chocolate chunks. The secret ingredient? Sourdough discard, which adds subtle tang, moisture, and depth—making these cookies irresistibly chewy and complex in flavor.

Perfect for bake sales, holiday trays, or late-night chocolate cravings, these brownie-style cookies deliver bold cocoa flavor with that crackly, shiny top you love in a classic brownie.

Prep Time: 15 minutes
Chill Time: 30 minutes (recommended)
Bake Time: 10–12 minutes
Total Time: About 1 hour
Servings: 18–20 cookies

Ingredients

1 cup (120g) all-purpose flour

1/3 cup (35g) unsweetened cocoa powder

1/2 tsp baking soda

1/2 tsp fine salt

1/2 cup (115g) unsalted butter, softened

3/4 cup (150g) brown sugar

1/4 cup (50g) white sugar

1 large egg

1 tsp vanilla extract

1/2 cup (120g) sourdough discard (unfed)

1 cup (170g) dark chocolate chips or chunks

2 tbsp milk

Instructions

Preheat Oven: Preheat oven to 350°F (175°C). Line baking sheets with parchment paper.

Mix Dry Ingredients: In a bowl, whisk flour, cocoa powder, baking soda, and salt until evenly combined.

Cream Butter & Sugars: In a separate large bowl, beat softened butter, brown sugar, and white sugar until light and fluffy (about 2–3 minutes).

See also  Mediterranean Garlic & Spinach White Pizza on a Cottage Cheese Crust

Add Egg & Vanilla: Beat in the egg and vanilla extract until smooth.

Incorporate Sourdough Discard: Mix in sourdough discard until fully combined.

Combine Wet & Dry: Gradually add dry ingredients into the wet mixture. Mix until just combined.

Add Milk: Stir in milk to loosen the dough slightly for fudgier texture.

Fold in Chocolate: Gently fold in dark chocolate chips or chunks.

Chill Dough: Refrigerate dough for at least 30 minutes to enhance flavor and texture.

Bake: Scoop 2-tablespoon portions onto prepared baking sheets. Bake 10–12 minutes until edges are set but centers remain soft. Cool on pan 5 minutes before transferring to wire rack.

Tips

Use Room Temperature Butter: Ensures proper creaming and texture.

Don’t Overmix: Overworking the dough makes cookies tough.

Chill for Thickness: Chilling prevents excess spreading.

Use Good Cocoa Powder: High-quality cocoa deepens flavor.

Underbake Slightly: Centers should look slightly soft for fudgy texture.

Measure Flour Correctly: Spoon and level to avoid dense cookies.

Use Dark Chocolate: Enhances brownie-like richness.

Let Rest After Baking: They firm up as they cool.

Sprinkle Sea Salt: Adds gourmet contrast.

Store Airtight: Keeps them soft and chewy for days.

Variations

Double Chocolate: Add ¼ cup white chocolate chips.

Nutty Crunch: Fold in ½ cup chopped walnuts or pecans.

Espresso Boost: Add 1 tsp instant espresso powder.

Mint Chocolate: Add ½ tsp peppermint extract.

Stuffed Cookies: Add a caramel or peanut butter center.

Gluten-Free Option: Use 1:1 gluten-free flour blend.

Dairy-Free: Substitute plant-based butter and milk.

Extra Fudgy: Reduce flour by 1 tablespoon.

Brown Butter Version: Brown the butter for deeper flavor.

See also  Mediterranean Cheesy Spinach-Artichoke Bagels

Chunky Brownie Style: Use chopped chocolate bars instead of chips.

Q&A

What is sourdough discard?
It’s the unfed portion of sourdough starter removed before feeding.

2. Do they taste sour?
No, just a subtle tang that enhances chocolate flavor.

Can I skip sourdough discard?
You can substitute ¼ cup yogurt + ¼ cup flour, but flavor changes.

Why chill the dough?
It prevents spreading and improves texture.

Can I freeze the dough?
Yes, freeze scooped portions up to 3 months.

How do I get shiny tops?
Cream butter and sugar thoroughly and don’t overbake.

How long do they stay fresh?
3–4 days in an airtight container.

Can I make them thinner?
Flatten dough slightly before baking.

Why are my cookies dry?
Overbaking or too much flour may be the cause.

Can I double the recipe?
Absolutely—just scale ingredients evenly.

Nutrition

(Approximate Per Cookie)

Calories: 180

Carbohydrates: 22g

Protein: 2g

Fat: 9g

Saturated Fat: 5g

Sugar: 14g

Fiber: 2g

(Nutrition values may vary based on chocolate used.)

Conclusion

These brownie-inspired cookies truly offer the best of both worlds—intense chocolate flavor, chewy centers, crisp edges, and melty pockets of dark chocolate. The sourdough discard adds unique depth while keeping the cookies moist and tender. Whether you’re using up extra starter or simply craving something deeply chocolatey, this recipe guarantees bakery-style results with minimal effort.
Fluffy Soufflé Chocolate Chip Pancakes

Fluffy Soufflé Chocolate Chip Pancakes

Yields: 4–6 thick pancakes

Ingredients

The Batter Base:

  • 2 Large egg yolks

  • 1 tbsp Whole milk

  • ½ tsp Vanilla extract

  • ¼ cup All-purpose flour

  • ½ tsp Baking powder

The Meringue:

  • 3 Large egg whites (cold)

  • 2 tbsp Granulated sugar

The Mix-ins & Topping:

  • ¼ cup Mini chocolate chips (standard ones are too heavy and might sink)

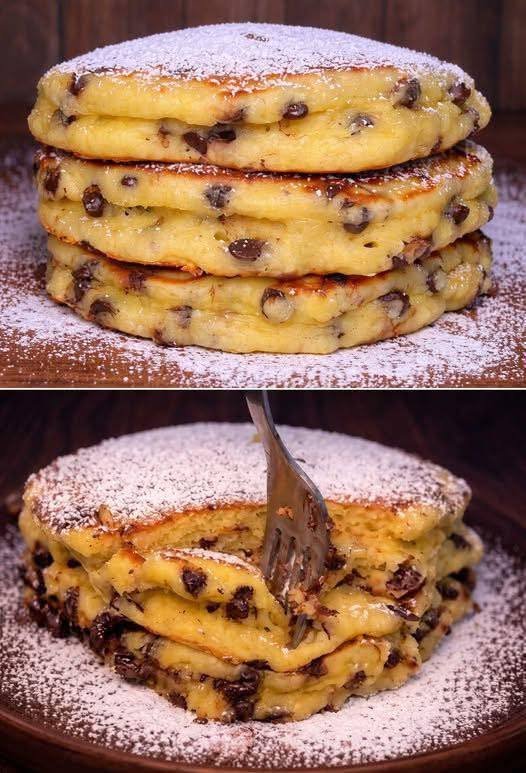
  • Optional: Powdered sugar for dusting (as seen in your picture)


Step-by-Step Instructions

  1. Prepare the Base: In a medium bowl, whisk the egg yolks, milk, and vanilla until smooth. Sift in the flour and baking powder. Whisk until just combined (don’t overmix, or they’ll be tough).

  2. Whip the Whites: In a separate, very clean glass or metal bowl, beat the egg whites on medium speed. Once they become frothy, gradually add the sugar. Continue beating until stiff peaks form (the peaks should stand straight up when you lift the beaters).

  3. Combine Carefully: Gently fold about 1/3 of the egg whites into the yolk mixture to lighten it. Then, add the remaining egg whites and very gently fold them in with a spatula. Do not stir, or you will pop the air bubbles that make them fluffy.

  4. Add Chocolate: Sprinkle the mini chocolate chips over the batter and give it one or two very gentle folds.

  5. Cook Low and Slow: Heat a non-stick pan over very low heat. Lightly grease it with a tiny bit of butter or oil.

  6. The “Scoop” Method: Place 2-3 large scoops of batter onto the pan for each pancake, stacking the batter vertically. Add a teaspoon of water to empty spots in the pan and cover with a lid—the steam helps them cook through without burning the bottom.

  7. Flip: Cook for 4–5 minutes until the bottom is golden. Very carefully flip them over. Cover again and cook for another 3-4 minutes.

  8. Finish: Dust generously with powdered sugar while they are still warm so the chocolate inside stays “melty” as shown in your photo.


A Quick Tip for the “Picture Perfect” Look

If you want them perfectly round and extra tall like the ones in the top photo, you can use silicone pancake rings or greased pastry rings. Just pour the batter into the rings inside the pan and remove the rings after flipping!

Keto Cranberry Quick Bread

Keto Cranberry Quick Bread

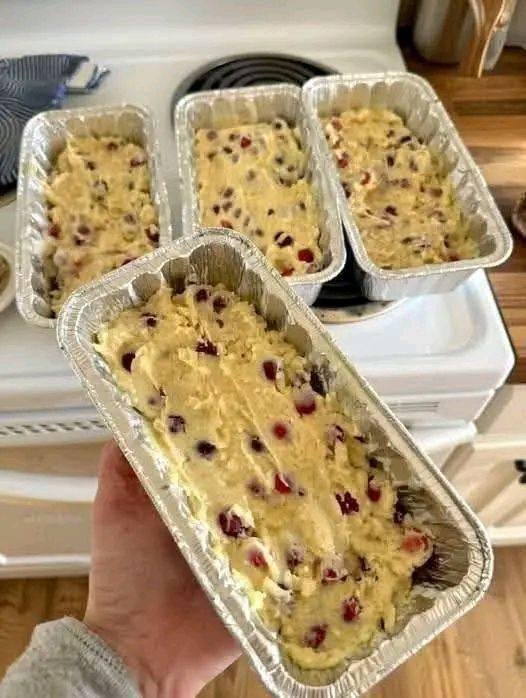
Makes 4 mini loaves (as shown) or 1 standard loaf.

Ingredients

The Base:

  • 3 cups Blanched almond flour (sifted)

  • ½ cup Granulated monk fruit or erythritol sweetener

  • 2 tsp Baking powder

  • ¼ tsp Salt

The Wet Ingredients:

  • 3 Large eggs (room temperature)

  • 1/3 cup Melted butter (or coconut oil)

  • ¼ cup Unsweetened almond milk

  • 1 tsp Vanilla extract

  • 1 tbsp Orange zest (essential for flavor)

The Add-ins:

  • 1 cup Fresh or frozen cranberries (halved)


Step-By-Step Instructions

  1. Prep the Oven: Preheat your oven to 350°F (175°C). Grease four mini foil loaf pans (like the ones in your picture) or one standard 9×5 loaf pan with butter or non-stick spray.

  2. Mix Dry Ingredients: In a large bowl, whisk together the almond flour, sweetener, baking powder, and salt. Make sure there are no large clumps of almond flour.

  3. Mix Wet Ingredients: In a separate medium bowl, whisk the eggs, melted butter, almond milk, vanilla, and orange zest until smooth.

  4. Combine: Pour the wet ingredients into the dry ingredients. Stir with a spatula until just combined. The batter will be thicker than traditional cake batter—almost like a soft paste.

  5. Fold in Berries: Gently fold in the cranberries. If using frozen berries, do not thaw them first, or they will streak the batter pink.

  6. Fill the Pans: Divide the batter evenly among the four mini pans. Smooth the tops with the back of a spoon.

  7. Bake: * Mini Loaves: Bake for 25–30 minutes.

    • Full Loaf: Bake for 45–55 minutes.

    • Note: They are done when the tops are golden brown and a toothpick inserted into the center comes out clean.

  8. Cool: Let them cool in the pans for at least 20 minutes. Low-carb breads are fragile when hot and need time to “set” their structure.


A Quick Tip for Success

Since almond flour doesn’t have gluten, these loaves won’t “spring” up as high as white bread. If you want them extra fluffy, you can add ½ teaspoon of xanthan gum to the dry ingredients.

Jam-Filled Square Sponge Cakes

Jam-Filled Square Sponge Cakes

Yields: 12 cakes | Prep time: 10 mins | Bake time: 20-25 mins

Ingredients

  • 3 Large eggs (room temperature)

  • ¾ cup Granulated sugar

  • 1 ½ cups All-purpose flour

  • 1 tsp Baking powder

  • ½ cup Whole milk

  • 1/3 cup Vegetable oil (or melted butter)

  • 1 tsp Vanilla extract

  • Pinch of Salt

  • ½ cup Strawberry or Raspberry jam (for the center)


Instructions

1. Prepare Your Equipment Preheat your oven to 175°C (350°F). Grease a square muffin tin or a standard cupcake tin thoroughly with butter or non-stick spray.

2. Whip the Eggs and Sugar In a large bowl, beat the eggs and sugar together using a hand mixer or stand mixer. Beat on high speed for about 5 minutes until the mixture is thick, pale, and has doubled in volume. This airiness is what makes them “melt in your mouth.”

3. Add Liquid Ingredients Lower the mixer speed and gently pour in the milk, oil, and vanilla extract. Mix just until combined.

4. Sift in Dry Ingredients Sift the flour, baking powder, and salt into the wet mixture. Gently fold the dry ingredients in using a spatula. Do not overmix, or the cakes will become tough rather than fluffy.

5. Layer the Batter and Jam

  • Fill each mold about 1/3 of the way full with batter.

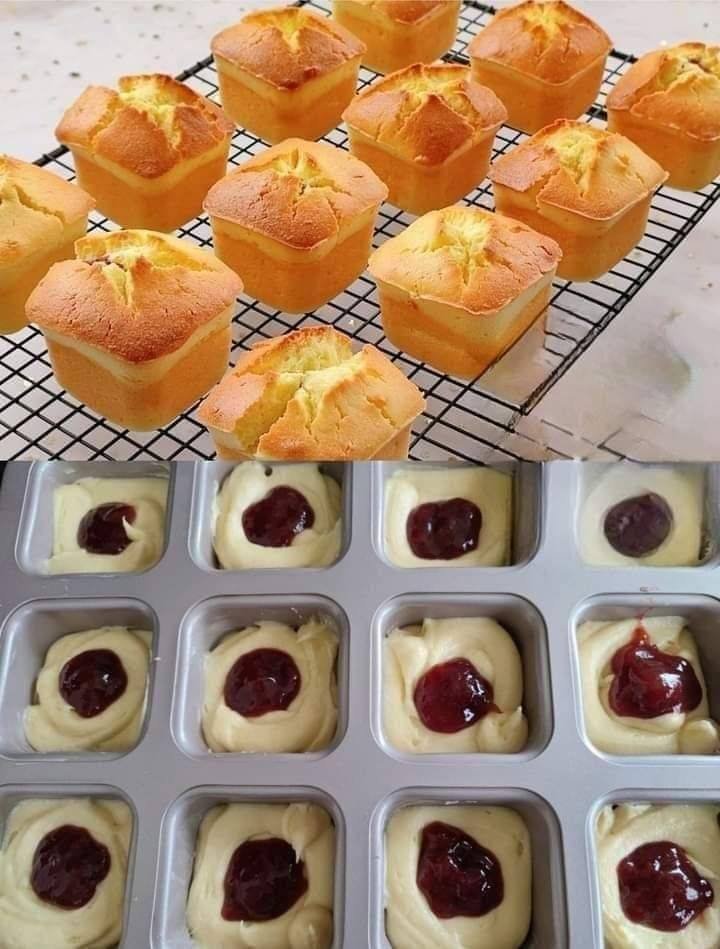
  • Place a small dollop (about 1 teaspoon) of jam directly into the center of the batter in each mold.

  • Cover the jam with more batter until the molds are about 3/4 full.

6. Bake Place in the center rack of the oven and bake for 20–25 minutes. The tops should be golden brown and cracked slightly, as shown in the photo.

7. Cool and Serve Let the cakes cool in the pan for 5 minutes before transferring them to a wire rack. This prevents the jam center from burning you while eating.


Tips for Success

  • Room Temperature: Ensure your eggs and milk are not cold; this helps the batter emulsify better for a smoother crumb.

  • The “5 Minute” Claim: While the baking takes longer, the actual active “work” time for this batter is only about 5 minutes if using an electric mixer.

  • Jam Choice: Use a high-quality, thick jam. If the jam is too watery, it may sink to the bottom of the cake during baking.