๐Ÿ‹ Lemon Cream Sheet Cake Recipe

๐Ÿ‹ Lemon Cream Sheet Cake Recipe

1. Make the Lemon Cream

  1. In a saucepan, whisk together the egg, sugar, and cornstarch until smooth.

  2. Slowly pour in the milk while whisking to avoid lumps.

  3. Cook over medium heat, stirring constantly, until the mixture thickens into a heavy custard.

  4. Remove from heat and stir in the fresh lemon juice and yellow food coloring (optional, for that vibrant pop).

  5. Cover with plastic wrap (touching the surface so no skin forms) and let it cool.

2. Prepare the Cake Base

Note: You will also need about 200g of flour and 10g of baking powder for a standard sponge base.

  1. Beat the 4 eggs, sugar, salt, and vanilla sugar for about 5โ€“8 minutes until very pale and fluffy.

  2. Gradually stream in the vegetable oil while whisking slowly.

  3. Sift in the flour and baking powder, gently folding them in so you don’t lose the air.

3. Assembly & Baking

  1. Pour half of the cake batter into a greased/lined rectangular pan.

  2. Bake at 180ยฐC for about 10โ€“12 minutes until just set.

  3. Spread the cooled Lemon Cream evenly over the par-baked base.

  4. Carefully pour the remaining batter over the cream layer.

  5. The Topping: Sprinkle a generous handful of flaked almonds over the top.

  6. Return to the oven for another 20โ€“25 minutes until the top is golden brown.


Finishing Touches

  • Chill: Once cooled to room temperature, refrigerate for at least 2 hours (as per your notes) to let the lemon cream set perfectly.

  • Garnish: Dust heavily with powdered sugar before slicing into squares.

Pro Tip: To get those clean, professional-looking layers shown in your photo, make sure your lemon cream is completely cold before adding the second layer of batter!
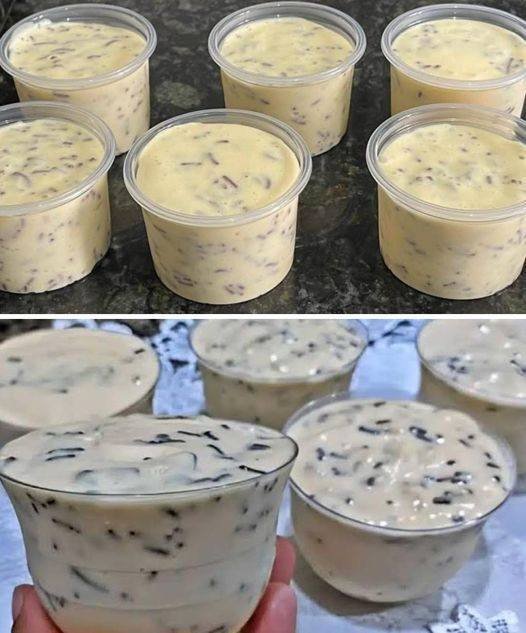
Dessert with 5 ingredients: Simple, easy and yields a lot

.


๐Ÿฎ The Ultimate 5-Ingredient Passion Fruit Mousse

Yields: 6โ€“8 individual servings | Prep time: 10 mins | Chill time: 2โ€“4 hours

๐Ÿ›’ Ingredients

  • 1 can (14 oz / 395g) Sweetened Condensed Milk

  • 1 carton (7 oz / 200g) Heavy Cream (or Media Crema)

  • 1 cup (8 oz / 250ml) Whole Milk

  • 1 packet Passion Fruit Powdered Drink Mix (e.g., Tang)

  • 4 tbsp Chocolate Sprinkles (Granulated chocolate)


๐Ÿฅฃ Complete Preparation Method

  1. The Base Blend: In a blender, combine the condensed milk, heavy cream, and whole milk. Blend on medium speed for about 1 minute until the mixture is completely smooth and integrated.

  2. The Thickening Step: Turn off the blender. Add the passion fruit powder. Pulse or blend for another 30โ€“60 seconds. You will notice the mixture thickening significantly as the acid in the powder reacts with the dairy.

    Tip: Don’t over-blend once it thickens, or you might lose the airy texture!

  3. The “Crunch” Factor: Remove the blender jar from the base. Add the chocolate sprinkles and use a spatula or spoon to fold them in gently by hand. You want them distributed throughout without dissolving the chocolate into the cream.

  4. Portioning: Pour the mixture into individual disposable cups, glass ramekins, or one large serving bowl. If using disposable cups, snap the lids on now to prevent the dessert from absorbing any “fridge smells.”

  5. The Set: Place in the refrigerator for at least 2 to 4 hours. For the absolute best consistency (firm and mousse-like), leaving them overnight is ideal.

  6. Serving: Serve chilled. If you saved a few sprinkles, dash a little extra on top right before serving for a fresh look.


๐Ÿ“Š Nutrition & Storage

  • Storage: Keep refrigerated. These will stay fresh and delicious for up to 5 days.

  • Texture Check: If the mousse seems too thin after blending, don’t worryโ€”the chilling process in the fridge is what truly sets the structure.

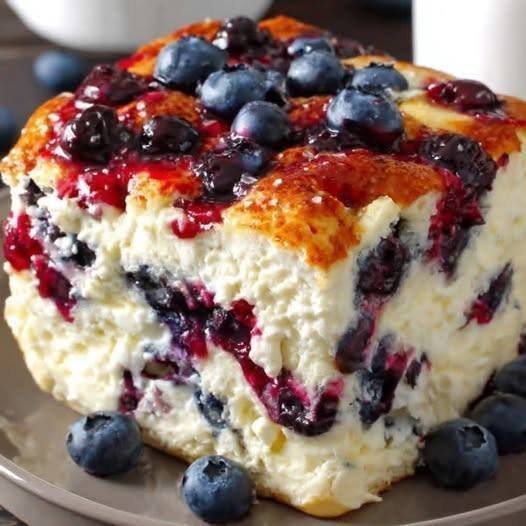
Blueberry Protein Breakfast Bake

Blueberry Protein Breakfast Bake

This high-protein breakfast is incredibly satisfying and keeps you energized throughout the morning. It has a texture similar to a fluffy cheesecake or bread pudding but is packed with nutrients to fuel your day.

Ingredients

  • 2 cups low-fat cottage cheese

  • 4 large eggs

  • 1/2 cup protein powder (vanilla or unflavored)

  • 1/2 cup oat flour or almond flour

  • 1 tsp vanilla extract

  • 1 tsp baking powder

  • 1 cup fresh or frozen blueberries

  • Zest of one lemon (optional for extra brightness)


Preparation Steps

  1. Preheat and Prepare: Preheat your oven to 350ยฐF. Lightly grease an 8×8-inch baking dish with a small amount of oil or cooking spray.

  2. Blend the Base: In a blender or food processor, combine the cottage cheese, eggs, protein powder, flour, vanilla extract, and baking powder. Blend on high until the mixture is completely smooth and creamy.

  3. Incorporate the Berries: Gently fold in half of the blueberries by hand. This ensures they stay whole and create beautiful bursts of flavor.

  4. Assemble: Pour the batter into the prepared baking dish. Scatter the remaining blueberries across the top, pressing them slightly into the surface.

  5. Bake: Place the dish in the oven and bake for 35โ€“40 minutes. The center should be set but still have a slight jiggle, and the edges should be a light golden brown.

  6. Cool and Set: Allow the bake to cool in the pan for at least 10โ€“15 minutes before slicing. This helps the structure set firmly so you can cut perfect squares.

  7. Serve: Enjoy it warm or cold. It can be stored in the refrigerator for up to 4 days, making it perfect for a quick morning meal.

Carnivore Ice Cream (Zero-Carb, Creamy & Sugar-Free)

Carnivore Ice Cream (Zero-Carb, Creamy & Sugar-Free)

This rich and creamy carnivore ice cream is the perfect dessert for anyone following a low-carb or carnivore lifestyle. Itโ€™s made using simple animal-based ingredients like heavy cream, egg yolks, and butter. The result is a smooth, custard-style ice cream with a luxurious texture and natural creamy flavor. There is no sugar, no fruit, and no plant ingredients, making it a great option for strict carnivore eaters. If you prefer a little sweetness, you can add a small amount of powdered erythritol, but it is completely optional.

Ingredients (Serves 4)

  • 2 cups heavy cream
  • 4 large egg yolks
  • 2 tablespoons butter
  • Pinch of salt
  • 1โ€“2 tablespoons powdered erythritol (optional)

Instructions

1. Heat the Cream

In a medium saucepan over medium-low heat, add the heavy cream, butter, and a pinch of salt. Warm the mixture slowly until the butter melts and the cream becomes hot. Do not allow it to boil.

2. Whisk the Egg Yolks

In a separate bowl, whisk the egg yolks until they become smooth and slightly lighter in color.

3. Temper the Yolks

Slowly pour a small amount of the warm cream mixture into the egg yolks while whisking constantly. This step prevents the eggs from scrambling. Once combined, pour the yolk mixture back into the saucepan.

4. Cook the Custard

Cook the mixture on low heat, stirring continuously with a spoon or spatula. After about 3โ€“5 minutes, the mixture will thicken slightly and coat the back of a spoon. Do not overheat.

5. Chill the Mixture

See alsoย ย The Softest 5-Minute Cake in the World

Remove from heat and pour the custard into a bowl. Cover and refrigerate for at least 2โ€“3 hours or until fully chilled.

6. Freeze

  • With Ice Cream Maker:ย Churn according to the machine instructions (about 15โ€“20 minutes).
  • Without Machine:ย Pour into a freezer container and freeze for 1 hour. Stir well, then repeat every 30 minutes for 2โ€“3 hours until creamy.

Serve cold and enjoy your rich, smooth carnivore ice cream.

Cottage Cheese Chocolate Mousse

Cottage Cheese Chocolate Mousse

Table of Contents

Rich, creamy, and incredibly satisfying, this Cottage Cheese Chocolate Mousse is the perfect healthy dessert when youโ€™re craving something sweet but still want to keep things light and protein-packed. It has all the decadence of classic chocolate mousse, yet itโ€™s made with wholesome, simple ingredients you probably already have in your kitchen. The cottage cheese blends into a silky smooth base, creating a luscious texture without heavy cream, while cocoa powder adds deep chocolate flavor. Naturally sweetened with honey or maple syrup, this treat feels indulgent but comes with zero guilt.

Ingredients

1 cup cottage cheese
ยฝ cup unsweetened cocoa powder
3 tablespoons honey or maple syrup (adjust to taste)
1 teaspoon vanilla extract
Pinch of salt
Optional: whipped cream, chocolate shavings, or berries for topping

Instructions

Start by adding the cottage cheese to a blender or food processor. Blend for 1โ€“2 minutes until completely smooth and creamy. This step is important, as it removes the curds and gives the mousse its classic silky texture.

Next, add the cocoa powder, honey or maple syrup, vanilla extract, and a small pinch of salt. Blend again until everything is fully combined and smooth. Stop to scrape down the sides if needed to ensure even mixing. Taste the mousse and adjust sweetness if you prefer it richer or sweeter.

Once blended, spoon the mousse into serving bowls or small jars. For best results, refrigerate for at least 30โ€“60 minutes to allow it to chill and thicken. This helps the flavors develop and gives the mousse a firmer, more traditional consistency.

Before serving, top with a dollop of whipped cream, fresh berries, or a sprinkle of chocolate chips for extra flair.

This mousse is perfect as a quick dessert, post-workout snack, or healthy late-night treat. Itโ€™s high in protein, naturally sweetened, and comes together in just minutes โ€” proof that chocolate cravings can be both delicious and nourishing.

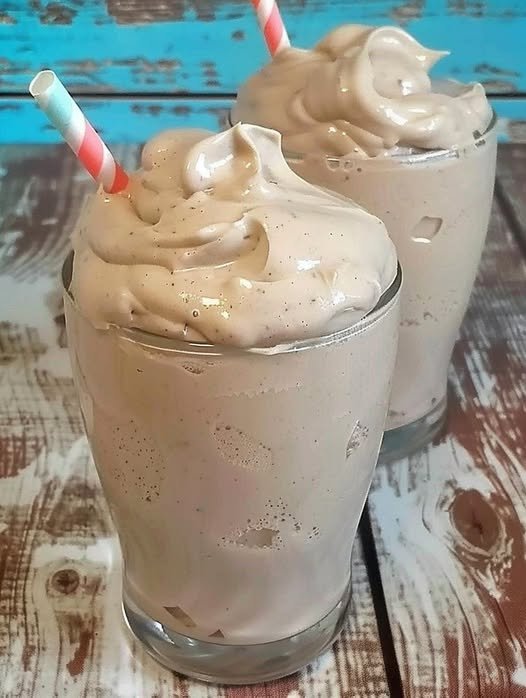
High Protein Chocolate Frosty

If youโ€™ve ever craved a classic chocolate frosty but donโ€™t want the added sugar and empty calories, this healthy, protein-packed version hits the spot. Thick, creamy, and chocolatey, it tastes like a Wendyโ€™s frosty but comes with the bonus of real nutrition from cottage cheese and nut butter.

Why This Frosty Works

  • High in proteinย โ€“ Cottage cheese provides a smooth, creamy texture while packing in protein. Nut butter adds even more.

  • Rich chocolate flavorย โ€“ Cocoa powder or cacao makes it satisfy your chocolate cravings.

  • Quick and simpleโ€”just a few ingredients, a blender, and 30 minutes in the freezer.

  • Customizableโ€”Swap cottage cheese for Greek yogurt or peanut butter for cashew butter depending on your preference.

Ingredients

  • Cottage cheeseโ€”Full-fat gives the creamiest texture; Greek yogurt can be substituted.

  • Cocoa powderย โ€“ Or cacao for a deeper chocolate flavor.

  • Nut or seed butterโ€”Cashew or peanut butter works best; use unsalted to avoid excess saltiness.

  • Sweetenersโ€”Maple syrup combined with a little stevia keeps it naturally sweet.

  • Vanilla extractโ€”enhances the flavor.

  • Milkย โ€“ Any milk you enjoy, dairy or non-dairy, to adjust thickness.

How to Make It

  1. Combine cottage cheese, cocoa, nut butter, maple syrup, vanilla, and milk in a blender.

  2. Blend until smooth and creamy.

  3. Chill in the freezer for about 30 minutes. Stir in any frozen bits to create a thick, frosty texture.

  4. Serve immediately for a rich, indulgent treat.

Tips for the Perfect Frosty

  • For the best texture, use a mix of cottage cheese and Greek yogurt if desired.

  • Stick to unsalted nut or seed butter to prevent the frosting from tasting too salty.

  • If youโ€™re dairy-free, this recipe may not work well; tofu could be experimented with, but results may vary.

Healthy Chocolate Frosty (High Protein)

This chocolate frosty is creamy, chocolatey, and packed with protein thanks to cottage cheese and peanut butter. It tastes indulgent like a fast-food frosty but keeps things healthy and low sugar.

Servings:ย 2
Prep Time:ย 5 minutes
Total Time:ย 5 minutes

Ingredients

  • 1 cup cottage cheese

  • 1 tablespoon cocoa powder

  • 1 tablespoon unsalted nut or seed butter

  • 1 tablespoon maple syrup

  • ยฝ teaspoon vanilla extract

  • 8โ€“10 drops liquid stevia

  • ยผ cup milk of your choice

Instructions

  1. Blend all ingredients until very smooth.

  2. Freeze for 30โ€“60 minutes until slush-like.

  3. Stir and serve immediately.

Notes:

  • If you prefer, replace stevia with an extra tablespoon of maple syrup.

  • Nutrition is based on low-fat cottage cheese, peanut butter, and unsweetened almond milk.

Nutrition (Per Serving)

  • Calories: 189 kcal

  • Carbohydrates: 14.3 g

  • Protein: 18.2 g

  • Fat: 7 g

  • Fiber: 1.4 g

  • Sugar: 7.3 g