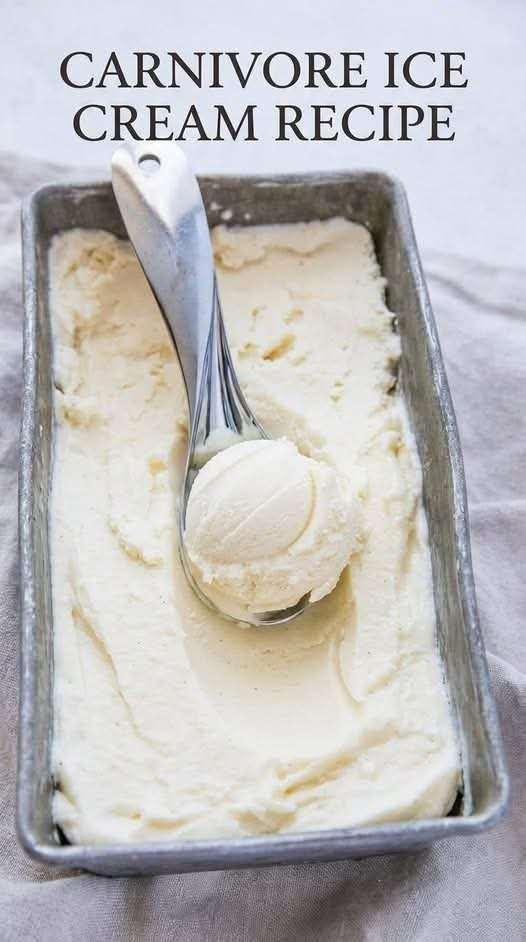
Carnivore Ice Cream (Zero-Carb, Creamy & Sugar-Free)

Carnivore Ice Cream (Zero-Carb, Creamy & Sugar-Free)

This rich and creamy carnivore ice cream is the perfect dessert for anyone following a low-carb or carnivore lifestyle. It’s made using simple animal-based ingredients like heavy cream, egg yolks, and butter. The result is a smooth, custard-style ice cream with a luxurious texture and natural creamy flavor. There is no sugar, no fruit, and no plant ingredients, making it a great option for strict carnivore eaters. If you prefer a little sweetness, you can add a small amount of powdered erythritol, but it is completely optional.


Ingredients (Serves 4)

2 cups heavy cream

4 large egg yolks

2 tablespoons butter

Pinch of salt

1–2 tablespoons powdered erythritol (optional)

Instructions

1. Heat the Cream


In a medium saucepan over medium-low heat, add the heavy cream, butter, and a pinch of salt. Warm the mixture slowly until the butter melts and the cream becomes hot. Do not allow it to boil.


2. Whisk the Egg Yolks


In a separate bowl, whisk the egg yolks until they become smooth and slightly lighter in color.


3. Temper the Yolks


Slowly pour a small amount of the warm cream mixture into the egg yolks while whisking constantly. This step prevents the eggs from scrambling. Once combined, pour the yolk mixture back into the saucepan.


4. Cook the Custard


Cook the mixture on low heat, stirring continuously with a spoon or spatula. After about 3–5 minutes, the mixture will thicken slightly and coat the back of a spoon. Do not overheat.


5. Chill the Mixture

Remove from heat and pour the custard into a bowl. Cover and refrigerate for at least 2–3 hours or until fully chilled.


6. Freeze


With Ice Cream Maker: Churn according to the machine instructions (about 15–20 minutes).

Without Machine: Pour into a freezer container and freeze for 1 hour. Stir well, then repeat every 30 minutes for 2–3 hours until creamy.

Serve cold and enjoy your rich, smooth carnivore ice cream.

Lemon Cloud Bites (Low-Carb & Sugar-Free)

Lemon Cloud Bites (Low-Carb & Sugar-Free)

Ingredients

  • 2 cups Super-fine almond flour

  • 1/2 cup Powdered monk fruit or erythritol (plus extra for rolling)

  • 1 large Egg (room temperature)

  • 2 tbsp Butter or coconut oil, melted

  • 2 tbsp Fresh lemon juice

  • Zest of 2 lemons

  • 1/2 tsp Baking powder

  • 1/4 tsp Salt


Step-by-Step Instructions

1. Preparation

Preheat your oven to 325°F (165°C). Line a baking sheet with parchment paper so the bites don’t stick.

2. Mix the Dry Ingredients

In a medium bowl, whisk together the almond flour, powdered sweetener, baking powder, and salt. Make sure to break up any lumps in the almond flour.

3. Add the Wet Ingredients

In a separate small bowl, whisk the egg, melted butter/oil, lemon juice, and lemon zest. Pour the wet mixture into the dry ingredients and stir until a soft dough forms. It should be slightly tacky but manageable.

4. Roll the Bites

Scoop about one tablespoon of dough at a time and roll it into a small ball (about 1 inch in diameter).

Optional: Roll the balls in a small bowl of extra powdered sweetener for that classic “snowball” look.

5. Bake

Place the balls on the prepared baking sheet, spacing them about an inch apart. Bake for 10–12 minutes. You want the bottoms to be very lightly golden, but the tops should remain pale.

6. Cool

Let them cool on the baking sheet for at least 15 minutes. Almond flour treats are very fragile when warm but firm up perfectly as they cool.


Quick Tip

For an even stronger lemon flavor, you can add 1/4 teaspoon of lemon extract to the wet ingredients. Store these in an airtight container in the fridge to keep them “snappy” and fresh!

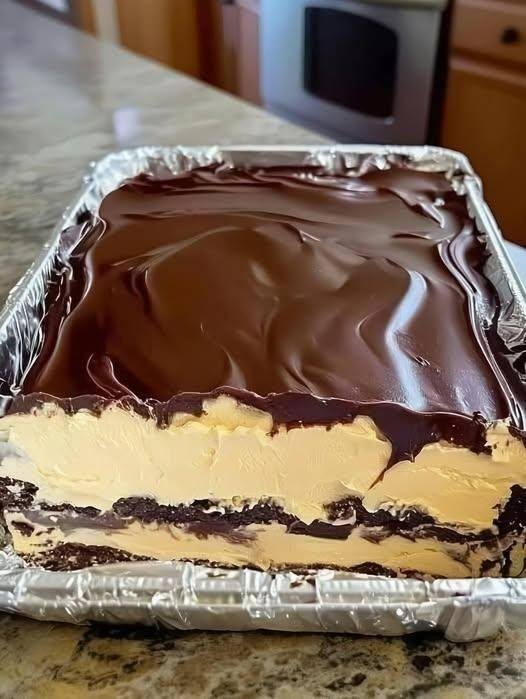
Chocolate Peanut Butter Icebox Dessert

Chocolate Peanut Butter Icebox Dessert

Ingredients

The Base (Crust):

  • 2 cups Chocolate cookie crumbs (such as crushed chocolate sandwich cookies)

  • 5 tbsp Unsalted butter, melted

The Creamy Peanut Butter Layer:

  • 1 cup Peanut butter (smooth works best)

  • 1 cup Cream cheese, softened to room temperature

  • 1 cup Powdered sweetener (or powdered sugar)

  • 1 tsp Vanilla extract

  • 1 ½ cups Whipped topping (or heavy cream whipped to stiff peaks)

The Chocolate Ganache Topping:

  • 1 ½ cups Semi-sweet chocolate chips

  • ½ cup Heavy cream


Step-by-Step Instructions

1. Prepare the Crust

In a medium bowl, combine the chocolate cookie crumbs and melted butter. Stir until the crumbs are evenly moistened. Press the mixture firmly and evenly into the bottom of a 9×13 inch baking dish or a foil pan. Place the pan in the refrigerator for at least 15 minutes to set.

2. Create the Peanut Butter Filling

In a large mixing bowl, beat the softened cream cheese and peanut butter together until completely smooth and creamy. Add the powdered sweetener and vanilla extract, mixing until well combined. Gently fold in the whipped topping using a spatula until the mixture is light and uniform.

3. Assemble the Layers

Remove the crust from the fridge. Spread half of the peanut butter mixture over the chilled crust. If you like extra texture, you can sprinkle a few more crushed cookies over this layer. Spread the remaining peanut butter mixture on top and use a spatula to smooth the surface.

4. Prepare the Chocolate Ganache

Place the chocolate chips in a heat-proof bowl. In a small saucepan or microwave-safe container, heat the heavy cream until it just begins to simmer (do not let it reach a rolling boil). Pour the hot cream over the chocolate chips and let it sit for 2–3 minutes. Stir gently until the chocolate is completely melted and the ganache is glossy and smooth.

5. The Final Touch

Pour the warm chocolate ganache over the peanut butter layer, spreading it to the edges.

6. Chill and Set

Cover the dish and refrigerate for at least 3–4 hours, or ideally overnight. This allows the layers to firm up so you can cut clean, beautiful squares.


Quick Tip

To get those perfect, clean layers when serving, dip your knife in hot water and wipe it dry between every single cut.

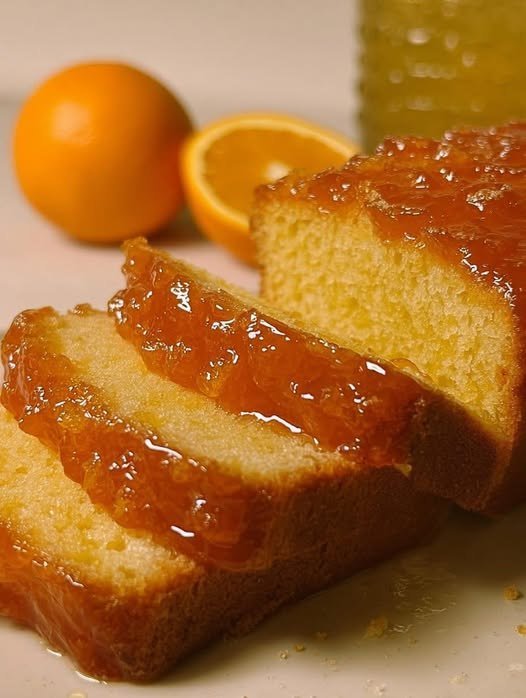
Orange Loaf Cake with Citrus Glaze

Orange Loaf Cake with Citrus Glaze

Ingredients

The Cake:

  • 1 ½ cups All-purpose flour

  • 1 tsp Baking powder

  • ¼ tsp Baking soda

  • ¼ tsp Salt

  • ½ cup Unsalted butter (softened)

  • 1 cup Granulated sweetener (or sugar)

  • 2 large Eggs

  • 1 tsp Vanilla extract

  • ½ cup Orange juice (freshly squeezed)

  • Zest of 1 orange

The Orange Glaze:

  • 1 cup Powdered sweetener (or confectioners’ sugar)

  • 2–3 tbsp Fresh orange juice

  • 1 tsp Orange zest (for extra zing)


Step-by-Step Instructions

1. Prep Your Station

Preheat your oven to 350°F (175°C). Grease a 9×5 inch loaf pan thoroughly, or line it with parchment paper for easy removal.

2. Mix Dry Ingredients

In a medium bowl, whisk together the flour, baking powder, baking soda, and salt. Set this aside.

3. Cream Butter and Sweetener

In a large mixing bowl, beat the softened butter and sweetener together until the mixture is light and fluffy (usually about 2–3 minutes).

4. Incorporate Eggs and Flavor

Add the eggs one at a time, beating well after each addition. Stir in the vanilla extract and the orange zest.

5. Combine Wet and Dry

Alternately add the flour mixture and the orange juice to the butter mixture, starting and ending with the flour. Mix until just combined—be careful not to overmix, or the cake will be dense.

6. Bake

Pour the batter into the prepared loaf pan and smooth the top. Bake for 45–55 minutes. A toothpick inserted into the center should come out clean.

7. Glaze and Finish

While the cake cools on a wire rack, whisk together the powdered sweetener, orange juice, and extra zest in a small bowl until smooth. Once the cake is mostly cool, pour the glaze over the top, letting it drip down the sides.


Pro Tip

If you want the glaze to soak into the cake, poke small holes in the top of the warm cake with a toothpick before pouring the glaze. This creates a “poke cake” effect that keeps it incredibly moist.

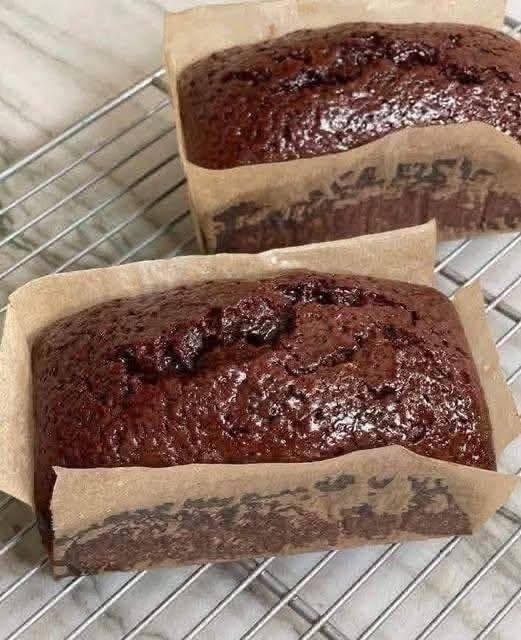
Rich Chocolate Loaf Cake

Rich Chocolate Loaf Cake

Ingredients

For the Cake:

  • 1 ½ cups All-purpose flour (or almond flour for a gluten-free version)

  • 1 cup Granulated sweetener of choice (like monk fruit or erythritol)

  • ½ cup Unsweetened cocoa powder

  • 1 tsp Baking powder

  • ½ tsp Baking soda

  • ½ tsp Salt

  • 2 large Eggs

  • ½ cup Milk of choice (almond, soy, or dairy)

  • ½ cup Melted coconut oil or butter

  • 1 tsp Vanilla extract

  • ½ cup Hot coffee or boiling water (this “blooms” the cocoa for extra flavor)

For the “Unreal” Frosting:

  • 1 cup Confectioners’ sweetener (powdered)

  • ¼ cup Cocoa powder

  • 3 tbsp Melted butter or coconut oil

  • 2–3 tbsp Milk or heavy cream

  • ½ tsp Vanilla extract


Instructions

1. Prepare for Baking

Preheat your oven to 350°F (175°C). Grease a standard 9×5 inch loaf pan or line it with parchment paper, leaving a little overhang on the sides for easy removal.

2. Mix Dry Ingredients

In a large bowl, whisk together the flour, sweetener, cocoa powder, baking powder, baking soda, and salt. Ensure there are no large cocoa clumps.

3. Combine Wet Ingredients

In a separate bowl, beat the eggs, milk, oil, and vanilla extract until smooth.

4. Form the Batter

Pour the wet ingredients into the dry ingredients and stir until just combined. Gently pour in the hot coffee or boiling water and whisk by hand until the batter is smooth. (The batter will be thin—this is normal!)

5. Bake

Pour the batter into the prepared loaf pan. Bake for 45–55 minutes, or until a toothpick inserted into the center comes out clean or with just a few moist crumbs.

6. Cool

Let the cake cool in the pan for 10 minutes, then lift it out using the parchment paper and place it on a wire rack to cool completely before frosting.

7. Make the Frosting

In a medium bowl, whisk the powdered sweetener and cocoa powder. Add the melted butter, vanilla, and 2 tablespoons of milk. Whisk until glossy and smooth. If it’s too thick, add the remaining milk one teaspoon at a time. Spread generously over the cooled cake.


Quick Tip

For the best texture, wait until the cake is entirely cool before adding the frosting, otherwise, it may melt into the cake (though it will still taste delicious!).

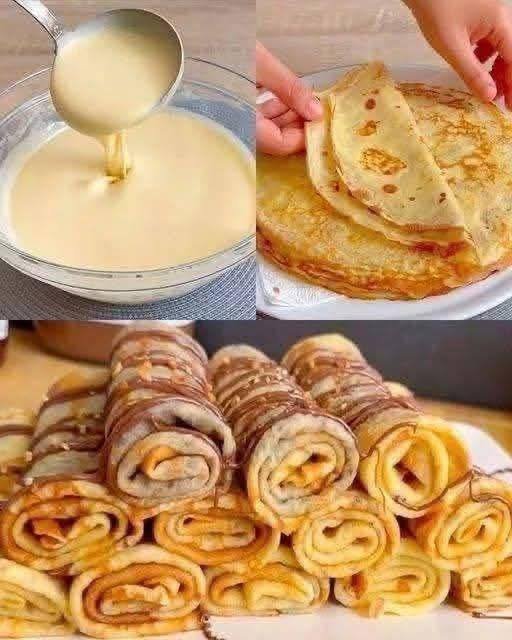
Zero-Carb Breakfast Crepes

Zero-Carb Breakfast Crepes

  • Prep time: 5 minutes

  • Cook time: 10 minutes

  • Yields: 6–8 crepes


Ingredients

  • Eggs: 4 large eggs

  • Cream Cheese: 4 oz (115g), softened at room temperature

  • Natural Sweetener: 1 tsp monk fruit or stevia (optional)

  • Flavor: 1 tsp vanilla extract and a tiny pinch of salt

  • Cooking Fat: A small amount of butter or coconut oil for the pan


Step-by-Step Instructions

  1. Prepare the Batter: Place the eggs, softened cream cheese, vanilla, and sweetener into a blender. Blend on high for 30 seconds until the mixture is completely smooth and bubbly.

  2. Let it Rest: Let the batter sit for 1–2 minutes. This allows the bubbles to settle so your crepes don’t have too many holes.

  3. Heat the Pan: Lightly grease a small non-stick skillet or crepe pan and heat over medium-low.

  4. Pour and Swirl: Pour about 2–3 tablespoons of batter into the center of the hot pan. Quickly tilt and swirl the pan in a circular motion so the batter coats the bottom in a very thin, even layer.

  5. Cook: Cook for about 1–2 minutes. You’ll know it’s ready to flip when the edges start to pull away from the pan and the center looks set.

  6. The Flip: Carefully slide a spatula under the crepe and flip it over. Cook for another 30–45 seconds on the second side.

  7. Roll and Serve: Slide the crepe onto a plate. You can eat them plain or roll them up with a little sugar-free cinnamon “sugar” or a dollop of your Zero-Point Fatbomb Fluff.


Pro-Tips for Your Page

  • HD Photography: To make your photos “pop,” try drizzling a little melted sugar-free chocolate over the rolled crepes, as seen in your last photo.

  • Engagement Booster: Remind your followers that these are “Zero Carbs” and ask them what their favorite sugar-free filling is!