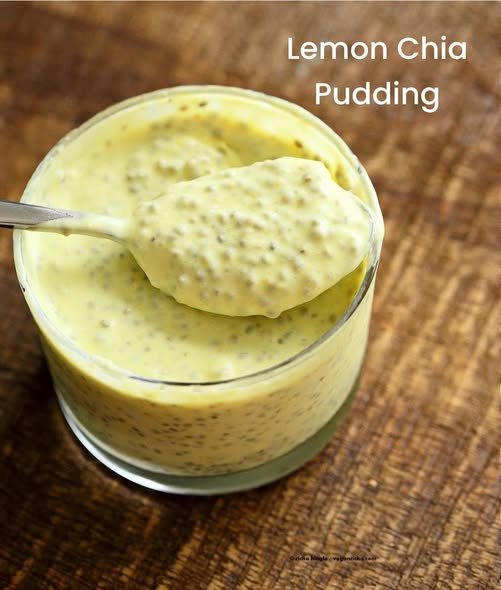
πŸ‹ 5-Ingredient Lemon Curd Chia Pudding

πŸ‹ 5-Ingredient Lemon Curd Chia Pudding

Ingredient Amount
Chia Seeds 1/4 cup
Milk of Choice 1 cup (Coconut or Almond works great)
Lemon Curd 3-4 tbsp (Store-bought or homemade)
Maple Syrup/Honey 1 tbsp (Optional, adjust based on curd sweetness)
Lemon Zest 1 tsp (For that extra “zesty” punch)

Quick Instructions

  1. Mix: In a jar or bowl, whisk together the milk, lemon curd, sweetener, and zest until the curd is well incorporated.

  2. Combine: Stir in the chia seeds thoroughly.

  3. Wait: Let it sit for 5-10 minutes, then give it one more good stir to prevent clumping.

  4. Chill: Cover and refrigerate for at least 2 hours, or ideally overnight.

  5. Serve: Top with an extra dollop of lemon curd or some fresh berries before diving in!

Pro Tip: For that ultra-creamy “curd” look seen in the photo, use a full-fat coconut milk or stir in a spoonful of Greek yogurt before chilling.

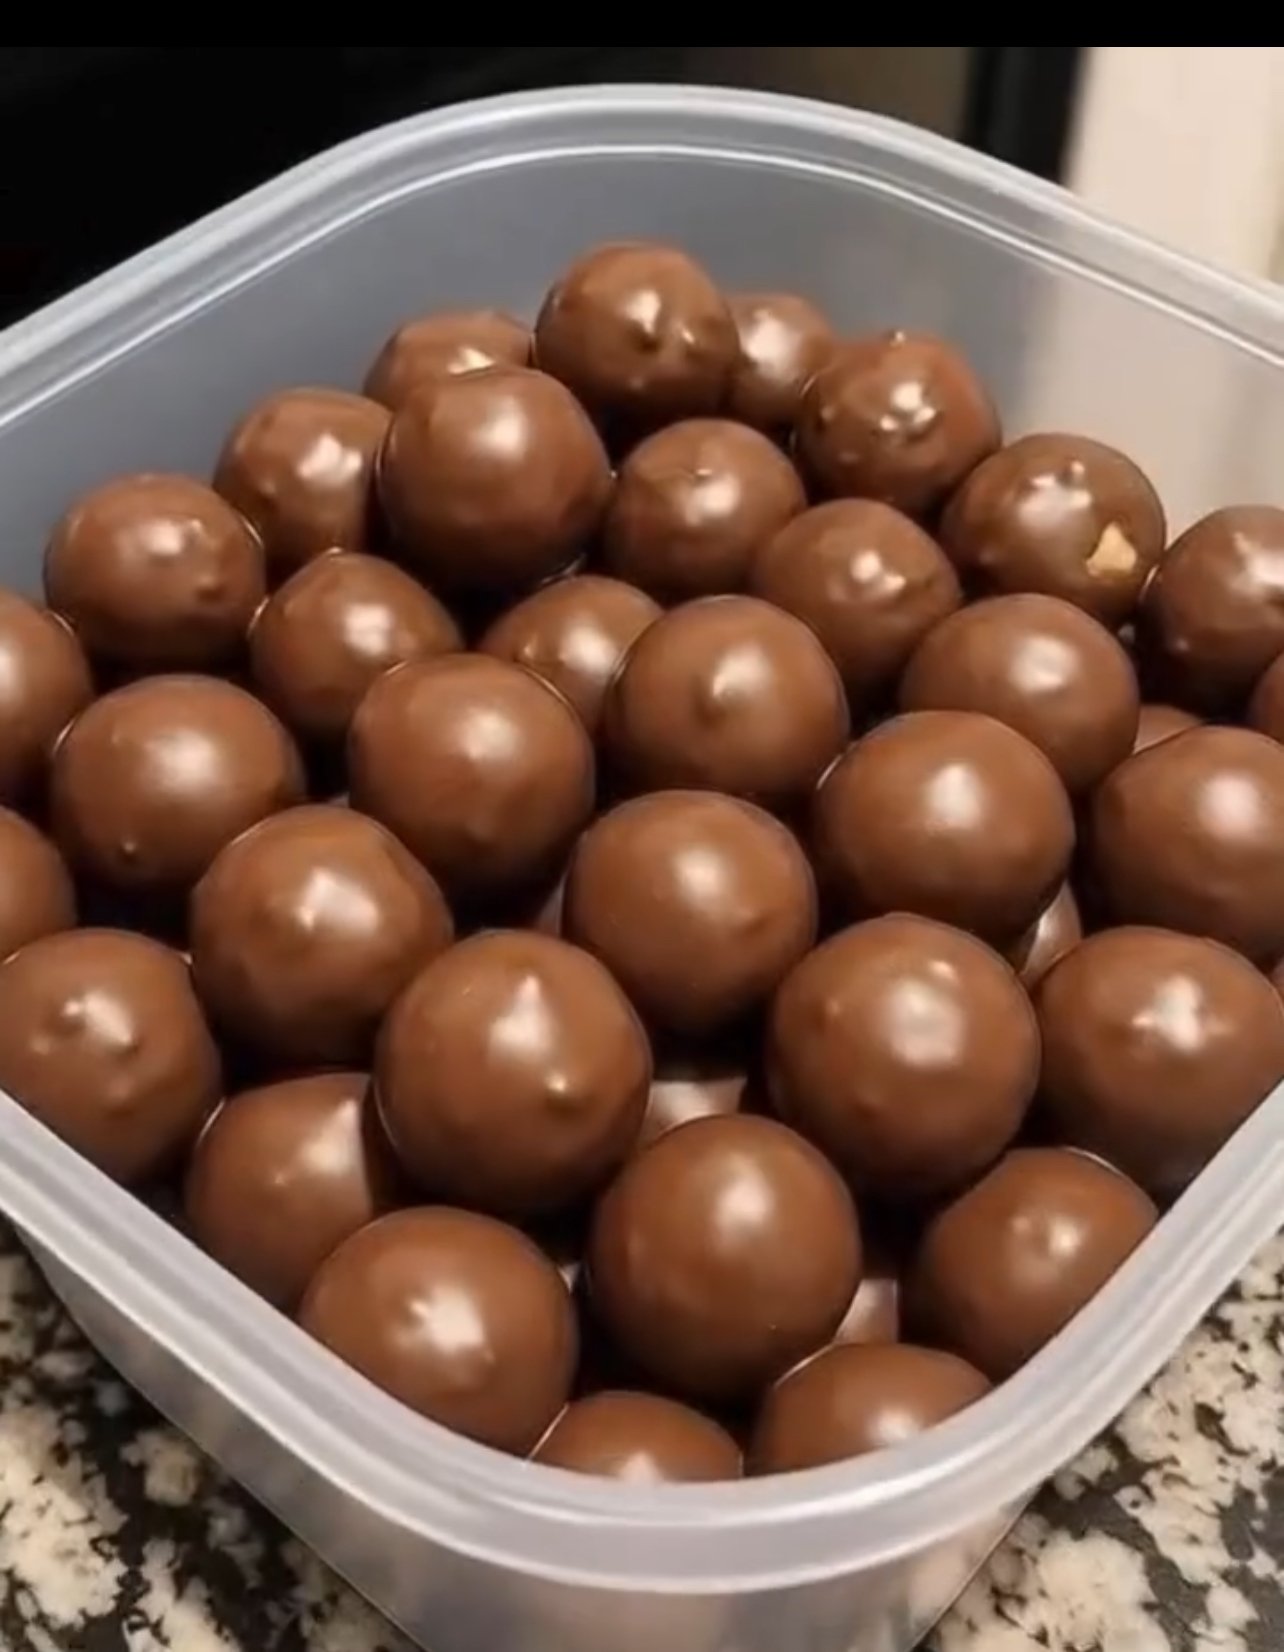
No-Bake Chocolate Peanut Butter Balls

No-Bake Chocolate Peanut Butter Balls

πŸ“Β 

Ingredients (Only 3!)

  • 1 cup peanut butter (smooth works best)
  • 2 cups crushed biscuits (like digestive or graham crackers)
  • 1Β½ cups melted chocolate (milk or dark)

πŸ‘©β€πŸ³Β 

Step-by-Step Method

Step 1: Crush the biscuits

  • Take biscuits and crush them into fine crumbs using a blender or rolling pin.

Step 2: Make the mixture

  • In a bowl, add:
    • Peanut butter
    • Crushed biscuits
  • Mix well until it becomes a soft dough-like texture.

πŸ‘‰ If too dry, add 1–2 tbsp milk.

πŸ‘‰ If too sticky, add a little more biscuit crumbs.

Step 3: Shape the balls

  • Take small portions and roll into bite-sized balls.
  • Place them on a tray lined with butter paper.

Step 4: Chill

  • Put the balls in the fridge for 20–30 minutes to firm up.

Step 5: Coat with chocolate

  • Melt chocolate (microwave or double boiler).
  • Dip each ball into melted chocolate and coat fully.

Step 6: Set

  • Place back on tray and refrigerate for 15–20 minutes until chocolate hardens.

πŸ˜‹Β 

Ready to Enjoy!

Soft inside, chocolaty outside β€” super addictive!

❓ 

Q/A – Common Questions

❓ 1. Can I use any biscuits?

βœ” Yes! Digestive, Marie, or graham crackers all work well.

❓ 2. What if I don’t have peanut butter?

βœ” You can use Nutella or any nut butter (like almond butter).

❓ 3. How long can I store them?

βœ” Store in fridge for 5–7 days in an airtight container.

❓ 4. Can I skip chocolate coating?

βœ” Yes, but coating makes them extra delicious and rich.

❓ 5. Why are my balls breaking?

βœ” Mixture is too dry β€” add a little milk or more peanut butter.

❓ 6. Can I freeze them?

βœ” Yes! Freeze up to 1 month and thaw before eating.Β­

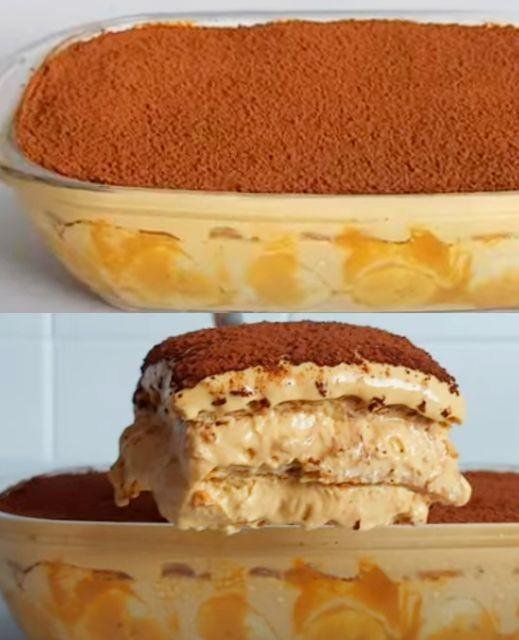
Layered Banoffee Dream

Layered Banoffee Dream

Ingredients

  • For the Base: 250g digestive biscuits (crushed) and 100g unsalted butter (melted).

  • The Caramel: 1 can (397g) Dulce de Leche or condensed milk boiled into toffee.

  • The Fruit: 3–4 large ripe bananas, sliced into rounds.

  • The Topping: 400ml heavy whipping cream, 2 tablespoons powdered sugar, and 1 teaspoon vanilla extract.

  • Garnish: 1 tablespoon cocoa powder (for dusting) or grated dark chocolate.

Step-by-Step Instructions

  1. Prepare the Crust: Mix the crushed biscuits with the melted butter until it resembles wet sand. Press the mixture firmly into the bottom of a rectangular or oval glass dish. Chill in the fridge for 20 minutes to set.

  2. Add the Caramel: Spread the Dulce de Leche evenly over the chilled biscuit base. If the caramel is too thick, warm it slightly to make it spreadable.

  3. Layer the Bananas: Arrange the sliced bananas in a dense layer over the caramel. For the best flavor, ensure the slices cover the entire surface.

  4. Whip the Cream: In a large bowl, whip the heavy cream, powdered sugar, and vanilla extract until stiff peaks form. Be careful not to over-whip.

  5. Assemble: Spread the whipped cream over the banana layer. Use a spatula to create a smooth surface or decorative peaks.

  6. The Finishing Touch: Use a fine-mesh sieve to dust the top generously with cocoa powder, just like in the photo.

  7. Chill: Let the dessert set in the refrigerator for at least 1–2 hours before serving to ensure clean slices.


Recipe Q&A: Banoffee Pie

Q: How do I prevent the bananas from turning brown? A: If you aren’t serving the pie immediately, toss the banana slices in a little lemon or lime juice before layering them. The acidity helps slow down the oxidation process.

Q: Can I use homemade caramel instead of store-bought? A: Absolutely. You can make a traditional toffee by simmering butter and brown sugar with condensed milk until thickened and golden. Just ensure it cools completely before adding it to the dish.

Q: Is there a way to make the whipped cream more stable? A: To keep the cream from sagging if the dish will be out for a while, you can add a tablespoon of instant vanilla pudding mix or a “cream stiffener” powder while whipping.

Q: Can this recipe be made in individual servings? A: Yes! This looks beautiful when layered in small glass jars or verrines for individual portions at a party.

Crispy Parmesan Crusted Chicken with Creamy Garlic Sauce

Crispy Parmesan Crusted Chicken with Creamy Garlic Sauce


Ingredients (Serves 4)


For the Chicken:

β€’ 2 large chicken breasts (cut in half lengthwise to make 4 fillets)

β€’ 1 teaspoon salt

β€’ Β½ teaspoon black pepper

β€’ Β½ teaspoon paprika

β€’ 1 cup all-purpose flour

β€’ 2 eggs (beaten)

β€’ 1 cup breadcrumbs (panko for extra crispiness)

β€’ Β½ cup grated Parmesan cheese

β€’ Β½ teaspoon garlic powder

β€’ Oil for frying (about Β½ cup)


βΈ»


For the Creamy Garlic Herb Sauce:

β€’ 3 tablespoons butter

β€’ 4 cloves garlic (minced)

β€’ 1 cup fresh cream (or heavy cream)

β€’ ΒΌ cup grated Parmesan cheese

β€’ Β½ teaspoon black pepper

β€’ ΒΌ teaspoon salt

β€’ 1 tablespoon chopped fresh parsley

β€’ 1 teaspoon Italian seasoning (optional)

Step-by-Step Instructions


Step 1: Prepare the Chicken

1. Slice chicken breasts into thinner fillets.

2. Cover with plastic wrap and gently pound to even thickness.

3. Season both sides with salt, pepper, and paprika.


βΈ»


Step 2: Prepare Coating Stations


Set up 3 bowls:


1️⃣ Bowl 1: Flour

2️⃣ Bowl 2: Beaten eggs

3️⃣ Bowl 3: Breadcrumbs + Parmesan + garlic powder (mix well)

Step 3: Coat the Chicken

β€’ Dip chicken in flour (shake off excess).

β€’ Dip into egg mixture.

β€’ Press into breadcrumb mixture firmly to coat well.


βΈ»


Step 4: Fry Until Golden

1. Heat oil in a pan over medium heat.

2. Fry chicken for about 4–5 minutes per side.

3. Cook until deep golden brown and fully cooked inside.

4. Remove and place on paper towel.


✨ Tip: Do not overcrowd the pan.


βΈ»


Step 5: Make the Creamy Garlic Sauce

1. In another pan, melt butter.

2. Add minced garlic and sautΓ© 30 seconds.

3. Pour in cream and stir.

4. Add Parmesan, salt, and pepper.

5. Let simmer 3–4 minutes until slightly thick.

6. Add parsley and Italian seasoning.

Step 6: Assemble
β€’ Place crispy chicken on a plate.
β€’ Spoon creamy garlic sauce generously over the top.
β€’ Sprinkle extra parsley.
β€’ Serve hot.

βΈ»

🍽️ Serve With:
β€’ Mashed potatoes
β€’ Steamed vegetables
β€’ Pasta
β€’ Garlic rice

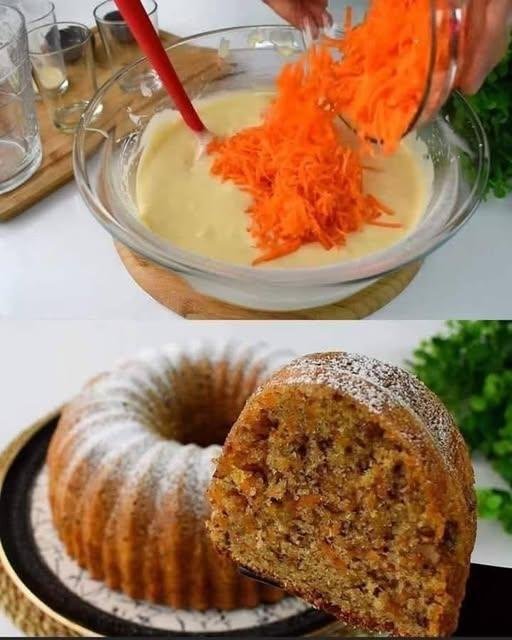
No-Flour Apple & Oat Breakfast Bundt

No-Flour Apple & Oat Breakfast Bundt

Prep time: 10 minutes

Baking time: 35–40 minutes

Servings: 6–8 slices


Ingredients

  • 1 cup Oatmeal (Quick oats work best for a smoother texture, but rolled oats add a nice chew)

  • 2 Apples (Grated or finely chopped)

  • 2 Eggs

  • 150g Plain Yogurt (Greek yogurt works well for extra protein)

  • 1 teaspoon Baking Powder

  • Β½ teaspoon Cinnamon

  • A pinch of Salt

  • Optional: A handful of walnuts or raisins for a bit of crunch and natural sweetness.


Detailed Step-by-Step Instructions

  1. Prep the Oats: For a finer, cake-like crumb, you can pulse your dry oats in a blender for 30 seconds to create “oat flour.” If you prefer a rustic texture, leave them whole.

  2. Mix Wet Ingredients: In a large bowl, whisk the 2 eggs until light. Stir in the plain yogurt until the mixture is smooth and creamy.

  3. Combine Dry Ingredients: Add the oatmeal (or oat flour), baking powder, cinnamon, and salt to the egg mixture. Stir well until combined.

  4. Fold in the Fruit: Gently fold in the grated or chopped apples. If you are using raisins or nuts, add them now. The moisture from the apples is what makes this cake so soft.

  5. Prepare the Pan: Lightly grease a bundt pan or a standard loaf tin with a small amount of coconut oil or butter.

  6. Bake: Pour the batter into the pan and bake at 180Β°C (350Β°F) for 35–40 minutes. You’ll know it’s ready when a toothpick inserted into the center comes out clean and the top is golden brown.

  7. Cool and Serve: Let the cake cool in the pan for 10 minutes before flipping it onto a plate. Dust with a little extra cinnamon or a tiny bit of powdered sweetener if desired.


Common Questions & Answers

Q: Can I make this dairy-free? A: Yes! You can swap the plain yogurt for an equal amount of unsweetened almond yogurt or coconut yogurt.

Q: Does it matter what kind of apples I use? A: Sweeter varieties like Fuji or Gala work best since there is no added sugar in this recipe. They provide all the natural sweetness you need.

Q: How should I store the leftovers? A: Since this cake is very moist due to the apples and yogurt, it’s best to store it in an airtight container in the refrigerator for up to 4 days. You can reheat a slice in the toaster oven for a fresh-baked taste.

Q: Can I use egg substitutes? A: You can use 2 “flax eggs” (2 tablespoons ground flaxseed mixed with 6 tablespoons water), though the cake may be slightly denser and less fluffy.

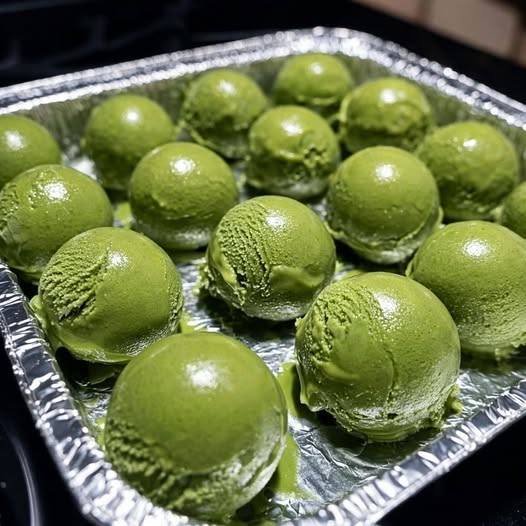
The Perfect Frozen Avocado Scoops

The Perfect Frozen Avocado Scoops

Prep time: 10 minutes

Freezing time: 3–4 hours

Yields: Varies based on quantity of avocados


Ingredients & Tools

  • Ripe Avocados (The ones that yield slightly to a gentle squeeze)

  • Lemon or Lime Juice (Optional, but helps maintain that vibrant green)

  • Small Cookie Scoop (For uniform portions)

  • Baking Sheet & Foil


Detailed Step-by-Step Instructions

  1. Prep the Tray: Line a baking sheet or a foil pan with aluminum foil or parchment paper. This prevents the scoops from sticking to the bottom once they are frozen.

  2. Mash the Avocado: Scoop the flesh out of your ripe avocados into a bowl. Mash them with a fork until you reach your desired consistency. You can keep it slightly chunky or go completely smooth for a velvet-like texture.

  3. The Color Guard (Optional): If you plan on keeping these in the freezer for more than a month, mix in 1 teaspoon of lemon or lime juice per avocado. The citric acid acts as a natural preservative.

  4. Scoop and Portion: Using your cookie scoop, drop uniform mounds of the mashed avocado onto the prepared tray. Ensure they aren’t touching so they freeze as individual units.

  5. Flash Freeze: Place the tray in the freezer for at least 3 to 4 hours, or until the scoops are firm to the touch.

  6. Long-Term Storage: Once firm, quickly transfer the scoops into a gallon-sized freezer bag. Squeeze out as much air as possible before sealing to prevent freezer burn.

  7. How to Use: * For Smoothies: Drop a frozen scoop directly into the blender for a thick, creamy texture.

    • For Toast or Sandwiches: Remove a scoop 15–20 minutes before eating. It will thaw quickly and spread perfectly across your bread.