Homemade Whipped Chocolate Bars

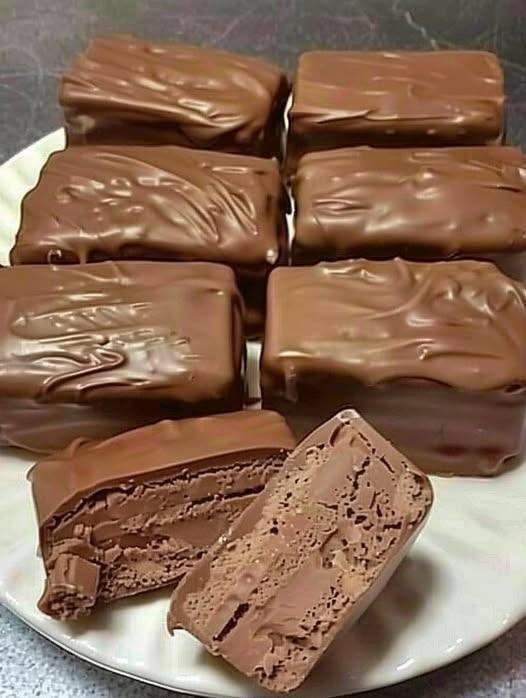
Homemade Whipped Chocolate Bars

A creamy, high-protein snack with a fluffy whipped center and a crisp chocolate shell.


Ingredients

For the Filling:

  • 1 cup Thick Greek yogurt (plain)

  • 1/2 cup Whipped topping (thawed)

  • 2 tablespoons Unsweetened cocoa powder

  • 2 to 3 tablespoons Granulated sweetener (such as monk fruit or stevia)

  • 1/2 teaspoon Vanilla extract

  • Optional: 1 scoop chocolate protein powder for extra body

For the Chocolate Coating:

  • 1/2 cup Chocolate chips (sugar-free or dark)

  • 1 teaspoon Coconut oil


Instructions

Step 1: Prepare the Chocolate Base

  1. In a medium mixing bowl, combine the Greek yogurt, cocoa powder, sweetener, and vanilla extract.

  2. Whisk thoroughly until the mixture is completely smooth and there are no cocoa lumps.

Step 2: Fold for Fluffiness

  1. Gently add the whipped topping to the chocolate yogurt mixture.

  2. Using a spatula, fold it in slowly. If you are using protein powder, fold it in now as well.

  3. Note: Use a light hand here; you want to keep as much air in the mixture as possible to ensure the bars stay “whipped” and light.

Step 3: Shape and Initial Freeze

  1. Line a small loaf pan or rectangular dish with parchment paper, leaving a bit of overhang on the sides.

  2. Spread the mixture evenly into the pan, aiming for about 1 inch of thickness.

  3. Place in the freezer for at least 2 hours until it is completely firm.

Step 4: Slice the Bars

  1. Once frozen solid, use the parchment paper to lift the slab out of the pan.

  2. Place it on a cutting board and slice into 8 equal bars.

  3. Return the bars to the freezer immediately while you prepare the coating so they don’t soften.

Step 5: Melt the Coating

  1. In a microwave-safe bowl, combine the chocolate chips and coconut oil.

  2. Microwave in 30-second intervals, stirring between each, until the chocolate is silky and fully melted.

Step 6: Dip and Set

  1. Work with one bar at a time. Use a fork to dip the frozen bar into the melted chocolate, coating all sides.

  2. Let the excess chocolate drip off, then place the bar back onto parchment paper.

  3. Because the bars are frozen, the chocolate shell should harden almost instantly.


Helpful Tips

  • Serving: For the best “mousse-like” texture, let the bar sit at room temperature for 3–5 minutes before eating.

  • Storage: Keep these stored in an airtight container in the freezer. They make a perfect grab-and-go dessert!

  • Flavor Boost: If you want a richer taste, you can stir a tablespoon of powdered peanut butter into the yogurt base in Step 1.
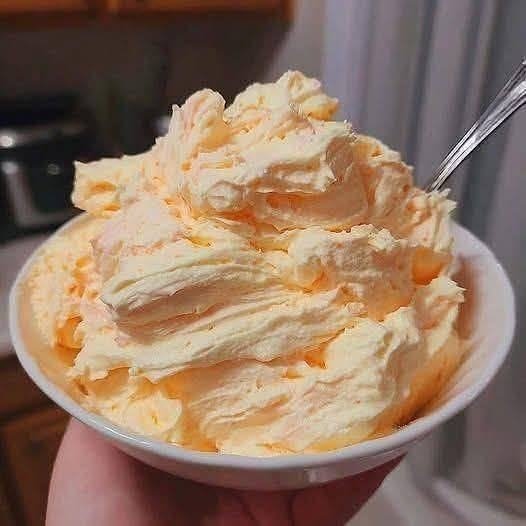
2-Ingredient Orange Protein Fluff

2-Ingredient Orange Protein Fluff


Ingredients

  • 2 cups Non-fat plain Greek yogurt

  • 1 package (0.3 oz) Sugar-free orange gelatin powder (like Jell-O)

  • Optional: 1 cup sugar-free whipped topping (for extra fluffiness) or a splash of vanilla extract.


Instructions

  1. Prep the Yogurt: Scoop the Greek yogurt into a medium-sized mixing bowl. If there is any liquid (whey) on top of the yogurt, drain it off first to keep the fluff thick.

  2. Combine: Sprinkle the dry gelatin powder directly onto the yogurt.

  3. Whip It: Using a hand mixer or a vigorous whisk, blend the yogurt and powder together for about 2 to 3 minutes. Whipping it well incorporates air, which gives it that “fluff” texture.

  4. Optional Fold-in: If you are using whipped topping, gently fold it in now with a spatula so you don’t deflate the air.

  5. Chill: Place the bowl in the refrigerator for at least 30 minutes. This allows the gelatin to set slightly and the flavors to meld.

  6. Serve: Enjoy it on its own, or use it as a dip for fresh fruit like strawberries or apple slices.


Q&A: Tips for Success

Q: Can I use other flavors of gelatin? A: Absolutely! Strawberry, lime, or raspberry all work beautifully. Orange is just a classic because it tastes exactly like a dream bar.

Q: Why is my fluff grainy? A: This usually happens if the powder hasn’t dissolved fully. Make sure to whip it long enough, or let it sit for 10 minutes and then give it one final stir before chilling.

Q: Is this a good replacement for high-calorie desserts? A: Definitely. It’s very high in protein and low in carbs, making it a great late-night snack that won’t spike your blood sugar.

Q: How long does it stay fresh? A: You can store this in an airtight container in the fridge for up to 3 days. If it separates a little, just give it a quick stir before eating.

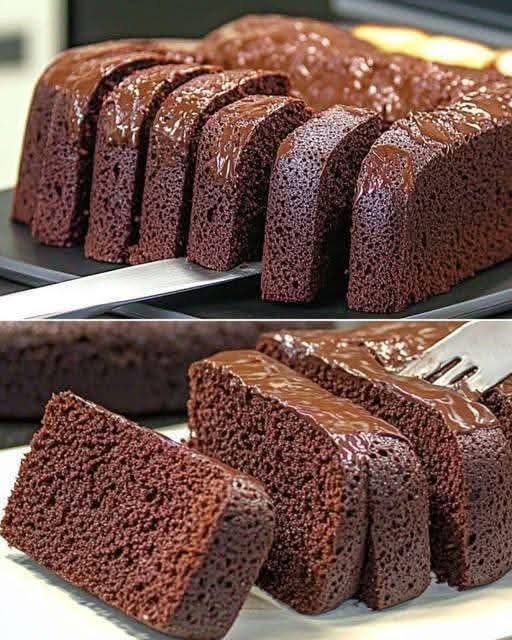
Flourless Apple Chocolate Cake

Flourless Apple Chocolate Cake


Ingredients

  • 4 Medium Sweet apples (Red Delicious or Gala work best)

  • 4 Large Eggs

  • 5 tbsp Unsweetened cocoa powder

  • 1 tsp Baking powder

  • Olive oil (just a small amount for greasing the mold)


Instructions

  1. Prepare the Apples: Peel and core the apples, then cut them into small chunks. Steam or microwave the apple pieces until they are very soft.

  2. Blend the Base: Place the cooked apples into a blender or food processor. Blend until you have a completely smooth apple puree. Let it cool slightly so it doesn’t scramble the eggs.

  3. Mix the Batter: Add the 4 eggs, cocoa powder, and baking powder to the blender with the apple puree. Blend again until the mixture is well-combined and frothy.

  4. Prepare the Mold: Lightly grease a silicone mold or a small baking pan with a little olive oil. Pour the batter into the mold.

  5. Bake: Preheat your oven to 180°C (350°F). Bake for approximately 40 to 45 minutes, or until a toothpick inserted into the center comes out clean.

  6. Cool and Serve: Allow the cake to cool completely in the mold before flipping it onto a plate. This helps the structure set. You can top it with a little melted sugar-free chocolate or a dusting of cocoa powder if desired.


Q&A: Tips for Success

Q: Why did my cake sink in the middle after cooling? A: Because this recipe has no flour, it relies on the eggs for structure. It is normal for it to deflate slightly as it cools, similar to a souffle. Cooling it slowly helps minimize this.

Q: Can I make this in the microwave? A: Yes! You can “bake” it in a microwave-safe dish for about 8 to 10 minutes on high, checking every minute after the 7-minute mark until it is firm.

Q: Which apples are best to use? A: Since there is no added sugar, use the sweetest apples you can find, like Fuji, Gala, or Honeycrisp. Avoid tart apples like Granny Smith for this specific recipe.

Q: How should I store the leftovers? A: Since this cake is very moist due to the fruit, it should be kept in an airtight container in the refrigerator. it stays fresh for up to 3 days.

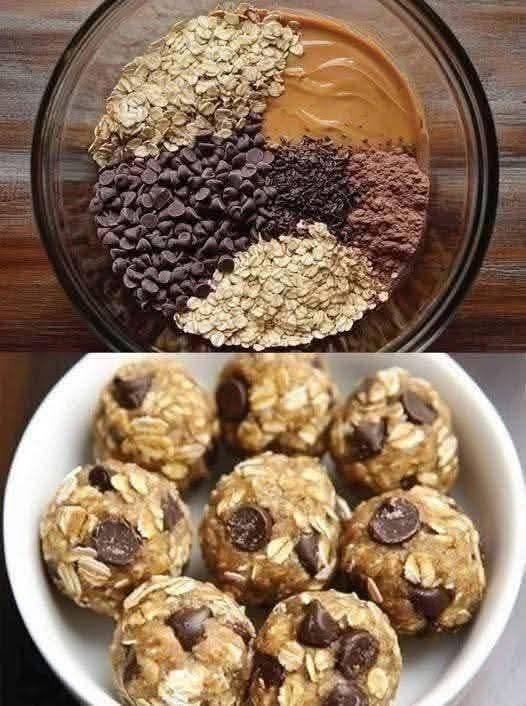
No-Bake Chocolate Chip Protein Balls

No-Bake Chocolate Chip Protein Balls


Ingredients

  • 1 ½ cups Rolled oats (old-fashioned)

  • ½ cup Natural peanut butter (or almond butter)

  • ⅓ cup Honey or maple syrup

  • ½ cup Semi-sweet chocolate chips (mini chips work best)

  • ¼ cup Ground flaxseed or chia seeds (optional for extra fiber)

  • 1 tsp Vanilla extract

  • A pinch of sea salt


Instructions

  1. Combine Base Ingredients: In a large mixing bowl, stir together the rolled oats, peanut butter, honey (or syrup), and vanilla extract.

  2. Add Mix-ins: Fold in the chocolate chips and the flax/chia seeds until everything is evenly distributed.

  3. Chill the Dough: Place the bowl in the refrigerator for about 30 minutes. This allows the oats to soften slightly and makes the mixture much easier to roll.

  4. Form the Balls: Scoop about one tablespoon of the mixture at a time and roll it between your palms to form a ball (approximately 1 inch in diameter).

  5. Store: Place the finished protein balls in an airtight container. They will stay fresh in the refrigerator for up to 1 week or in the freezer for up to 3 months.


Q&A: Tips for Success

Q: My mixture is too dry and won’t stick together. What should I do? A: If the mixture is crumbling, add an extra tablespoon of peanut butter or honey. If it’s too sticky, add a few more tablespoons of oats.

Q: Can I use quick oats instead of rolled oats? A: Yes, you can. Quick oats will result in a softer, less chewy texture, but they work perfectly well for this recipe.

Q: Are these gluten-free? A: To ensure they are gluten-free, make sure your package of oats is certified gluten-free, as cross-contamination can occur during processing.

Q: Can I add protein powder? A: Absolutely. You can add 1 scoop of your favorite protein powder. If you do, you may need to add a splash of milk or extra honey to maintain the right consistency.

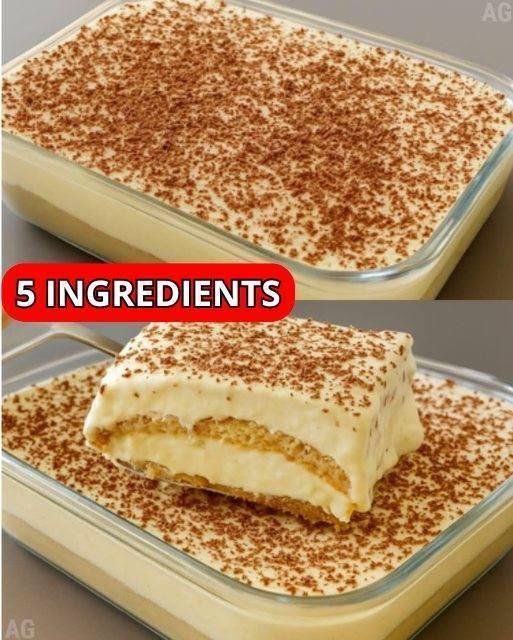
Creamy 5-Ingredient Dessert: Easy to prepare and very tasty, everyone will love it

Creamy 5-Ingredient Dessert: Easy to prepare and very tasty, everyone will love it

Hi, everyone, today we’re going to learn how to make a 5-Ingredient Dessert using simple ingredients. So grab your pen and paper to jot down the ingredients, then follow the complete preparation method.

How to Make Creamy 5-Ingredient Dessert

Discover more
Tea
Cake
juice

With a creamy texture and sweet flavor, this dessert wins everyone over. It’s easy to make with simple ingredients. See below the list of all ingredients and required quantities. And then, a very complete preparation method with details of the recipe.


Recipe Ingredients:

  • 1 container of table cream or heavy cream (7 oz / 200g)
  • 1 can of sweetened condensed milk (14 oz / 395g)
  • Graham crackers or tea  biscuits (bolacha Maizena)
  • Juice of 3 fresh limes (or store-bought lime juice)
  • Milk for soaking the biscuits
  • Chocolate for grating (optional)

Instructions:

Cream Layer Preparation:
First, in a mixing bowl, combine the heavy cream with the sweetened condensed milk. Then, gradually stir in the lemon juice until the mixture becomes thick and creamy.

Milk

Dessert Assembly:
Next, use a 900 ml (about 3.8 cups) glass dish. After that, spread a layer of the cream mixture on the bottom. Then, lightly dip the lady finger cookies (or Maria cookies) in milk and arrange them over the cream layer. Continue alternating layers of cream and cookies until the dish is full.

Finishing Touch:
Finally, if you like, grate some chocolate over the top of the dessert. Lastly, place it in the refrigerator and chill for about 1 hour before serving.

Tips:
You can use powdered drink mix instead of freshly squeezed lemon juice. A blender is not needed for this recipe, as the cream thickens quickly due to the lemon juice. The cookies stay slightly crispy even after being chilled. This dessert is perfect served cold on hot days. You can also make individual servings in small cups or jars.

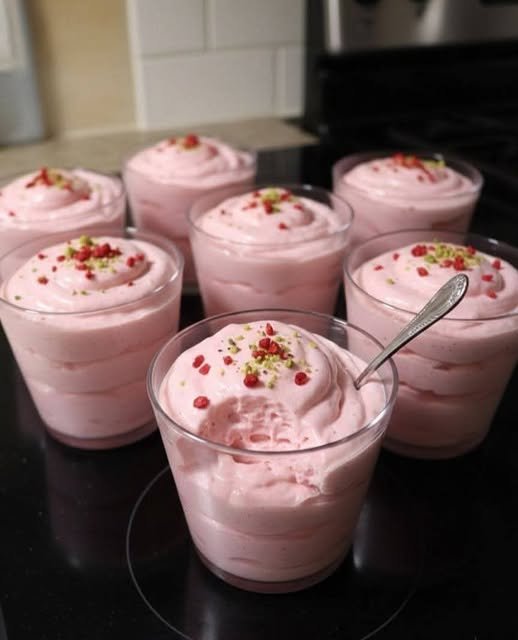
Fluffy Protein Mousse Cups

Fluffy Protein Mousse Cups

A glossy, high-protein dessert with zero blending required.

Ingredients

  • 1 box Sugar-Free Jell-O (Strawberry or Raspberry works great for that pink color)

  • Water (Only half of what the box calls for to keep it concentrated)

  • 1 Protein Shake (or Fairlife milk)

  • 1 spoonful Light Greek Yogurt

  • Garnish: (Optional) Crushed pistachios or freeze-dried berries for that professional finish.

Quick Instructions

  1. Concentrate: Dissolve the gelatin powder in half the amount of boiling water required by the package instructions.

  2. Semi-Chill: Place the mixture in the fridge until it is slightly thickened but still liquid (do not let it fully set).

  3. Whip: Whisk in your protein shake and Greek yogurt. Continue whisking until the mixture becomes fluffy, aerated, and glossy.

  4. Set: Spoon the mixture into individual serving glasses and chill until firm.


Why This Works

  • Texture: The concentrated gelatin provides structure, while the Greek yogurt and protein milk add creaminess and air.

  • Efficiency: Skipping the blender makes cleanup a breeze while still achieving a mousse-like consistency.

  • Customization: You can easily swap the gelatin flavors (like lime or orange) to match different protein shake flavors (like vanilla or coconut).