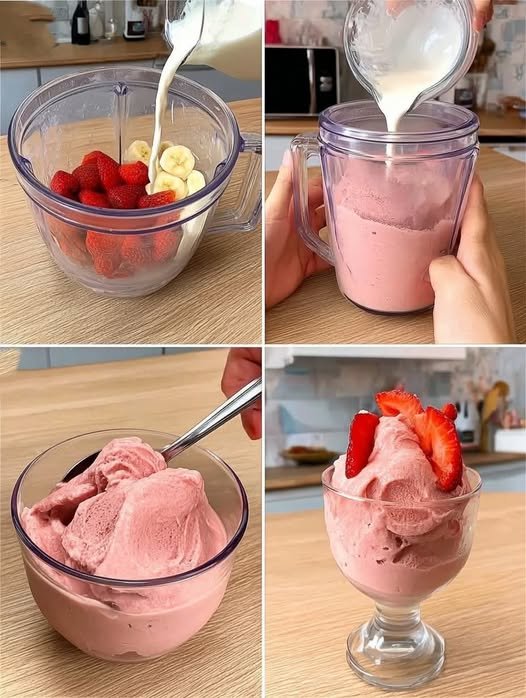
4-Ingredient Stovetop Tapioca Pudding

4-Ingredient Stovetop Tapioca Pudding

  • Prep time: 30 minutes (soaking)

  • Cook time: 20 minutes

  • Servings: 4

Ingredients

Ingredient Amount Notes
Small pearl tapioca ⅓ cup Use traditional pearls (not instant)
Milk 2¾ cups Whole milk provides the creamiest result
Sugar ⅓ cup Adjust slightly based on your preference
Egg 1 large Beaten; used to thicken the custard

Instructions

  1. Soak the Tapioca: In a medium saucepan, combine the small pearl tapioca and the milk. Let the mixture sit for 20–30 minutes at room temperature. This crucial step allows the pearls to hydrate and soften before cooking.

  2. Cook the Base: Place the saucepan over medium-low heat. Stir in the sugar. Cook the mixture, stirring frequently to prevent the milk from scorching or the pearls from sticking to the bottom. Continue until the milk begins to steam and the pearls become mostly translucent (about 10–15 minutes).

  3. Temper the Egg: In a small separate bowl, beat the egg. To prevent the egg from scrambling, slowly whisk in a few spoonfuls of the hot milk mixture into the beaten egg. This gradually raises the temperature of the egg.

  4. Finish the Pudding: Pour the warmed egg mixture back into the saucepan while stirring constantly. Cook for another 3–5 minutes over gentle heat until the pudding thickens enough to coat the back of a metal spoon.

  5. Rest: Remove from heat and let the pudding sit for about 10 minutes. Stir it occasionally during this time to prevent a skin from forming on the surface.

  6. Serve:

    • Warm: Serve immediately for a soft, comforting custard feel.

    • Chilled: Spoon into individual bowls, cover, and refrigerate for 1–2 hours. If the pudding becomes too thick after chilling, stir in a small splash of milk before serving.


Common Questions & Answers

Q: Can I use “Instant” or “Minute” tapioca for this recipe?

A: This recipe is specifically designed for small pearl tapioca. Instant tapioca has a different texture and cooking time; if you use it, you do not need to soak it, and the pudding will thicken much faster. For the classic “beaded” texture shown in traditional puddings, small pearls are the best choice.

Q: Why did my pudding turn out runny?

A: This usually happens if the egg wasn’t cooked long enough after being added back to the pan, or if the heat was too low to activate the thickening properties. Ensure the mixture coats the back of a spoon before removing it from the heat. Keep in mind that the pudding will also thicken significantly as it cools.

Q: Can I make this dairy-free?

A: Yes, you can substitute whole milk with a creamy plant-based alternative like oat milk or full-fat coconut milk. Almond milk is thinner, so the resulting pudding may be less creamy.

Q: How do I prevent a “skin” from forming on top?

A: If you are chilling the pudding, press a piece of plastic wrap directly onto the surface of the pudding while it is still warm. This prevents air from reaching the top and forming a layer.

Q: Does this drink “pull sugar out of the blood” or cause “one-week weight loss”?

A: No. It is important to clarify that no single food or drink can mechanically “pull” sugar from the bloodstream or guarantee weight loss in a specific timeframe like one week. Healthy blood sugar management and weight changes are the result of overall dietary patterns, fiber intake, and physical activity over time.
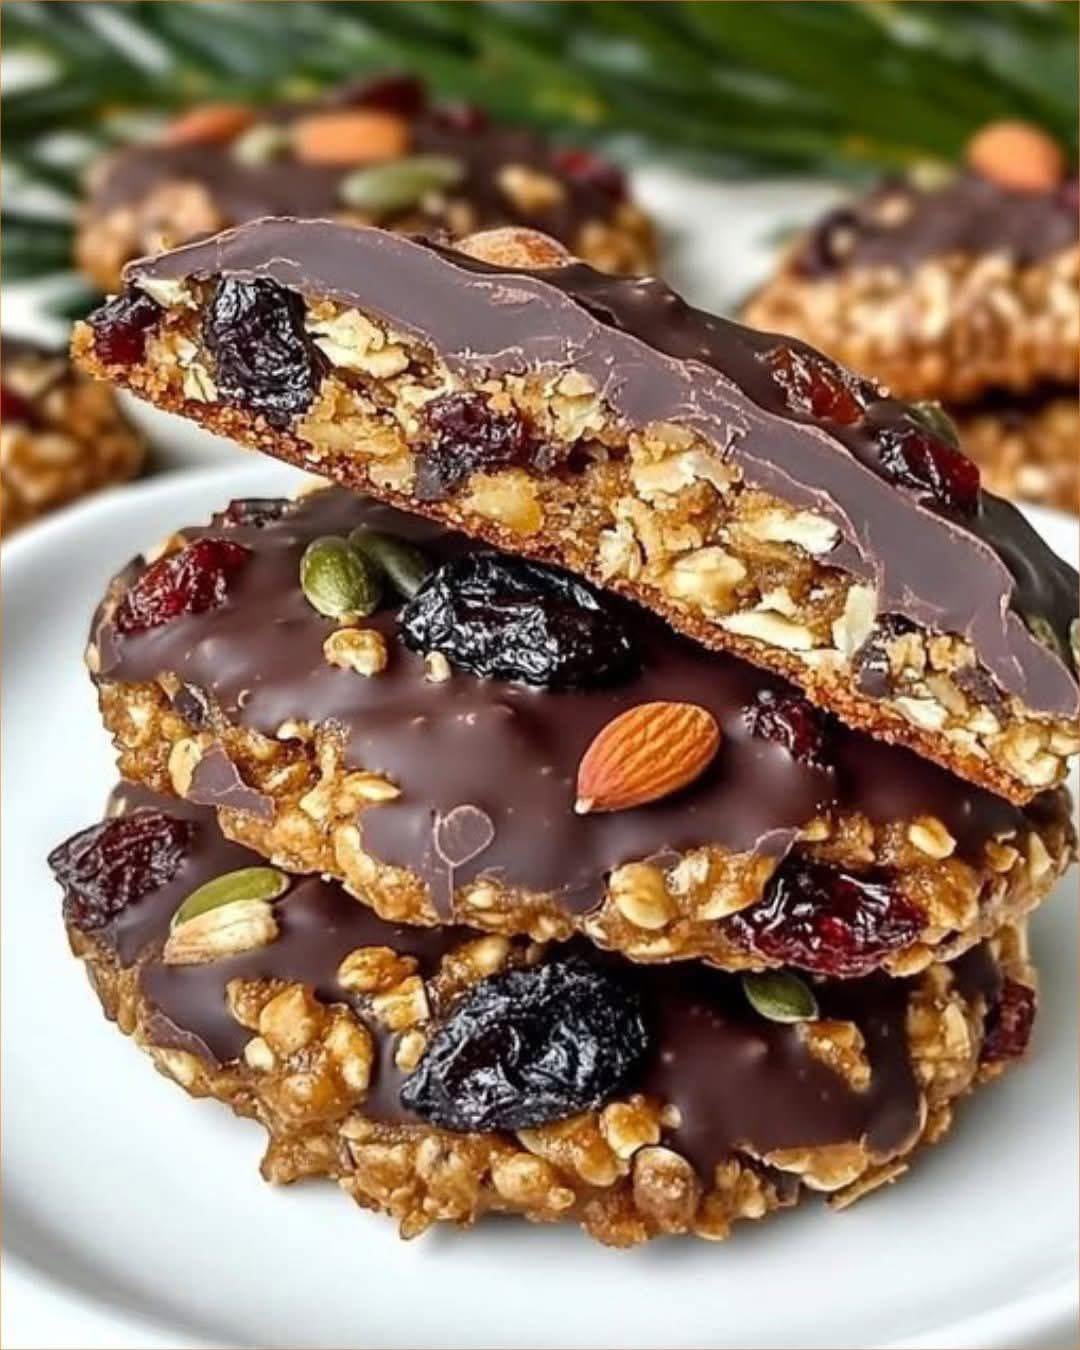

Chocolate-Dipped “Devoured” Granola-Oat Cookies

Chocolate-Dipped “Devoured” Granola-Oat Cookies

These cookies are packed with visual and textural appeal. The center is a chewy/crunchy mix of rolled oats, crispy rice cereal, whole raisins, and dried cranberries. They are finished with a rich dark chocolate coating and topped with a garnish of almonds and pumpkin seeds, mirroring the exact aesthetic of the image.

  • Prep time: 15 minutes

  • Chill time: 30 minutes

  • Servings: Makes 12 large cookies

Ingredients

The Base Cookie:

  • 1 cup Old-fashioned rolled oats

  • 1 cup Puffed brown rice cereal (like Rice Krispies, but brown rice)

  • 1/2 cup All-purpose flour

  • 1/2 cup Brown sugar, packed (dark or light)

  • 1/4 cup Granulated sugar

  • 1/2 cup (1 stick) Unsalted butter, melted and slightly cooled

  • 1 tsp Vanilla extract

  • 1 tsp Cinnamon, ground

  • 1/4 tsp Salt

  • 3/4 cup Dried fruit mix: a generous half should be large dark raisins and the rest dried cranberries (Craisins). Keep some extra fruit for garnish.

The Dipping & Garnish:

  • 1 1/2 cups Semi-sweet or dark chocolate chips

  • 1 tbsp Coconut oil (helps the chocolate set smoothly)

  • 2 tbsp Whole almonds

  • 1 tbsp Pumpkin seeds (pepitas), raw


Instructions

1. Mix the Base: Preheat your oven to 350°F (175°C) and line a large baking sheet with parchment paper. In a large mixing bowl, combine the brown sugar, granulated sugar, melted butter, and vanilla extract. Whisk until smooth. Add the flour, cinnamon, and salt, and mix until just incorporated. Finally, use a rubber spatula to fold in the rolled oats, puffed rice, dark raisins, and dried cranberries. The dough should be thick and slightly sticky.

2. Form and Bake: Scoop about 1/4 cup of dough and press it firmly into a thick disc. Place on the prepared baking sheet. Leave 2 inches of space between cookies as they will spread slightly. Bake for 12–15 minutes, or until the edges are golden brown. Crucial Step: Let the cookies cool completely on the baking sheet (at least 20 minutes) to allow them to “set” up into a firm, granola-like texture. If they are removed when warm, they may crumble.

3. Prepare the Chocolate: While the cookies cool, make your garnishes. Place the raw almonds and pumpkin seeds in a dry, small skillet and toast over medium heat for 3–4 minutes until fragrant. Be sure to keep them moving so they do not burn. Set aside to cool. Melt the chocolate. Place the chocolate chips and coconut oil in a microwave-safe bowl. Microwave in 30-second bursts, stirring well after each interval, until the chocolate is smooth and melted. (Alternatively, use a double boiler on the stovetop).

4. Dip and Garnish (The Visual Finale!): Take a fully cooled cookie. Dip the entire bottom half into the chocolate, ensuring the sides are coated. Place the cookie, chocolate-side up, on a piece of clean parchment paper. Immediately, before the chocolate sets, arrange a few extra dried cranberries, 1–2 large dark raisins, 1 toasted almond, and 2–3 pumpkin seeds on the exposed chocolate. Look at the source photo (image_4.png) as your reference for placement. Repeat for all cookies. Place the baking sheet with the dipped cookies into the refrigerator for 15–20 minutes to allow the chocolate to set completely into a beautiful, solid shell. Store in an airtight container in a cool place.


Q&A Corner

Q: Why do these cookies seem to fall apart if I don’t let them cool completely? A: Because they use less flour than a traditional cookie and are packed with add-ins, they rely on the caramelized sugar and cooling fat to bind together. They are more like a pressed granola bar; the initial cool is when they “cure” into a solid cookie.

Q: Can I use instant oats instead of rolled oats? A: We don’t recommend it. Rolled oats (old-fashioned) provide the distinct chewy texture and visual layer seen in the cross-section of the cookie. Instant oats will break down too much and result in a mushier, less flavorful product.

Q: Can I replace the coconut oil in the chocolate coating? A: The coconut oil is key for making the chocolate shell firm and snappy. Without it, standard dark chocolate may remain soft or tacky even after refrigeration. Avocado oil will work, but coconut oil is preferred for the texture.

Diabetic-Friendly Vanilla Cream Rolls (5-Minute No-Bake)

Discover more

bread

Discover more
Garlic
pan
cheeses

cake

garlic

Diabetic-Friendly Vanilla Cream Rolls

  • Prep time: 5–10 minutes

  • Chilling time: 20 minutes (optional)

  • Servings: 8 rolls

Ingredients

The Cream Filling

  • 1 cup Heavy whipping cream (ensure it is very cold)

  • 4 oz (115g) Cream cheese, softened to room temperature

  • 2–3 tbsp Powdered erythritol or monk fruit sweetener (adjust to your preferred sweetness)

  • 1 tsp Pure vanilla extract

  • 1 pinch Salt

The Roll Shells

  • 8 Low-carb wafer rolls OR 8 thin low-carb crepes

  • Optional: A light dusting of powdered erythritol for garnish

Instructions

  1. Whip the Cream: In a chilled glass or metal bowl, beat the heavy whipping cream until soft peaks form. Set aside in the refrigerator to keep cool.

  2. Prepare the Cream Cheese Base: In a separate bowl, beat the softened cream cheese, powdered sweetener, vanilla extract, and a pinch of salt. Mix until the texture is completely smooth and free of lumps.

  3. Combine: Gently fold the whipped cream into the cream cheese mixture using a spatula. Use a light hand to keep the filling airy and fluffy; do not overmix or it may become grainy.

  4. Fill the Rolls: Transfer the mixture into a piping bag (or a plastic storage bag with a small corner cut off). Carefully pipe the filling into the center of the wafer rolls. If using crepes, spread a thin layer of filling across the surface and roll them up tightly.

  5. Chill and Set: For the best consistency, place the rolls in the refrigerator for 20–30 minutes. This allows the filling to firm up and the flavors to meld.

  6. Serve: If desired, lightly dust the tops with a small amount of powdered sweetener just before serving.


Common Questions & Answers

Q: Why do you recommend powdered sweetener instead of granulated? A: Powdered sweeteners (like powdered erythritol) dissolve instantly into the fats of the cream and cheese. Granulated sweeteners can leave a “gritty” texture in no-bake fillings because there is no heat to melt the crystals.

Q: Is this recipe suitable for a Keto diet? A: Yes. By using heavy cream, cream cheese, and a sugar-free sweetener, the net carb count remains very low (approximately 2–4g per roll), making it an excellent choice for those following a ketogenic or low-carb lifestyle.

Q: How can I prevent the filling from becoming runny? A: Ensure your whipping cream is ice-cold before you start. Also, avoid over-beating the mixture once the cream is added. For an even firmer filling, you can fold in 1/2 teaspoon of bloomed gelatin or 1 tablespoon of chia seeds.

Q: Can these be made in advance? A: Yes, you can store these in the refrigerator for up to 3 days. If you are using wafer rolls, be aware that they may soften slightly over time as they absorb moisture from the cream.

Q: Can I swap the vanilla for other flavors? A: Absolutely. You can stir in 1/2 teaspoon of instant espresso for a mocha flavor, or add a teaspoon of fresh lemon zest to the cream cheese base for a bright, citrusy twist.

Vegan Raspberry Ice Cream

1️⃣ Introduction

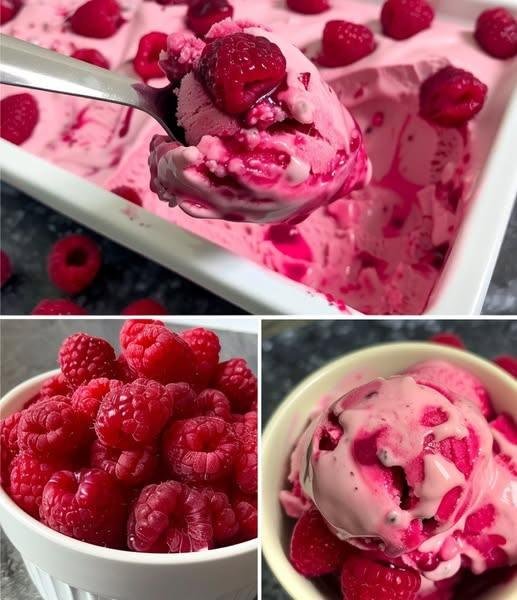
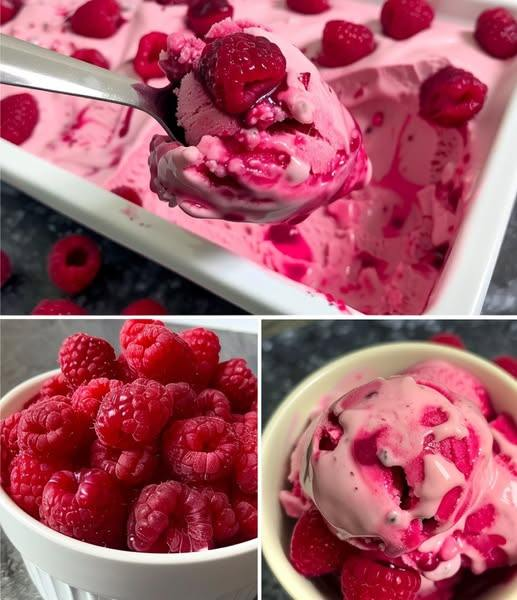
Vegan Raspberry Ice Cream is a refreshing, naturally sweet, and dairy-free dessert that combines the vibrant flavor of raspberries with a creamy plant-based base. It is perfect for those following a vegan, low-calorie, or weight-conscious lifestyle.


2️⃣ Why This Recipe is Special

Unlike traditional ice cream made with heavy cream and sugar, this version uses wholesome ingredients like fruit and plant-based yogurt, making it lighter, healthier, and easier to digest.


3️⃣ Perfect for Modern Diets

This recipe fits into vegan, dairy-free, and even weight-loss meal plans. It is also suitable for those avoiding refined sugar when natural sweeteners are used.


4️⃣ Flavor Profile

The ice cream delivers a balance of tart and sweet flavors. Raspberries bring a natural tang, while the creamy base softens the sharpness, resulting in a refreshing dessert.


5️⃣ Texture Description

Expect a smooth, creamy, and slightly fluffy texture similar to soft-serve ice cream. Freezing longer creates a firmer scoopable consistency.


6️⃣ Ideal Occasions

This dessert is perfect for summer days, after-meal treats, family gatherings, or healthy snacking.


🧾 Ingredients (Serves 4)

🍓 Main Ingredients

  • 2 cups frozen raspberries
  • 2 ripe bananas (sliced and frozen)
  • ½ cup coconut  milk (light) or almond milk
  • 2–3 tbsp maple syrup or low-calorie sweetener
  • 1 tsp vanilla extract

7️⃣ Ingredient Insights

Raspberries are rich in antioxidants and fiber. Bananas provide natural sweetness and creaminess. Plant-based milk ensures a smooth blend without dairy.

Ketosis Guide Subscription

8️⃣ Choosing Raspberries

Frozen raspberries work best for texture. Fresh raspberries can also be used but should be frozen beforehand.


👩‍🍳 Instructions


9️⃣ Prepare Ingredients

Freeze bananas and raspberries for at least 4–6 hours or overnight.

Dairy & Eggs

🔟 Blend Base

Add frozen raspberries, bananas, and plant-based milk into a high-speed blender.


1️⃣1️⃣ Add Sweetener

Add maple syrup or your preferred sweetener along with vanilla extract.


1️⃣2️⃣ Blend Until Smooth

Blend until creamy and smooth. Scrape sides as needed to ensure even blending.


1️⃣3️⃣ Adjust Consistency

Add a little more milk if needed for smoother blending, but keep it thick.


1️⃣4️⃣ Serve Soft or Freeze

Serve immediately for soft-serve texture or freeze for 1–2 hours for a firmer ice cream.


1️⃣5️⃣ Scoop & Enjoy

Scoop into bowls and enjoy as a refreshing dessert.


🍽️ Serving Ideas


1️⃣6️⃣ With Fresh Fruit

Top with fresh raspberries, blueberries, or sliced strawberries.


1️⃣7️⃣ With Crunch

Add crushed nuts, granola, or coconut flakes for texture.


💡 Helpful Tips


1️⃣8️⃣ Keep It Creamy

Do not add too much liquid; this keeps the texture thick and creamy.


1️⃣9️⃣ Natural Sweetness

Use ripe bananas to reduce the need for extra sweetener.


2️⃣0️⃣ Storage Tips

Store in an airtight container for up to 1 week. Let it sit for a few minutes before scooping.


🧬 Nutrition (Per Serving – Approx.)

  • Calories: 130 kcal
  • Protein: 2 g
  • Carbohydrates: 28 g
  • Fat: 2 g
  • Fiber: 4 g

⭐ WW SmartPoints (Approximate)

  • Per Serving: 2–3 SmartPoints

(Using light coconut milk and minimal sweetener.)

Dairy & Eggs

2️⃣1️⃣ Health Benefits

This ice cream is rich in antioxidants, supports digestion due to fiber content, and is naturally low in fat compared to traditional ice cream.


2️⃣2️⃣ Weight Loss Friendly

Low calories and natural ingredients make this dessert suitable for controlled diets and portion-based eating plans.


2️⃣3️⃣ Customization Options

You can add cocoa powder for a  chocolate twist, mix in chia seeds for added fiber, or swirl in peanut butter for richness.

Keto Chocolate Treats

2️⃣4️⃣ Why It’s Perfect for Your Website

This recipe is SEO-optimized, easy to follow, and appeals to a wide audience including vegan, health-conscious, and weight-loss communities.

Creamy No-Bake 3-Ingredient Dessert

Creamy No-Bake 3-Ingredient Dessert

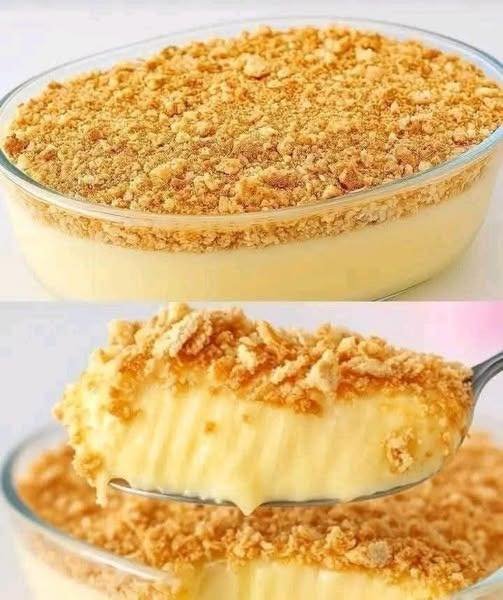
A silky, pudding-like dessert topped with a crunchy biscuit crumble.


Ingredients

  • 2 cups (500 ml) Whole milk

  • 1 can (395 g) Condensed milk

  • 1 packet (approx. 200 g) Marie biscuits (or any plain tea biscuits/graham crackers)

  • Optional Thickener: 3 tablespoons cornstarch (if you prefer a firmer, sliceable texture rather than a soft pudding).


Instructions

Step 1: Prepare the Biscuit Base and Topping

  1. Take about half of the biscuits and crush them into fine crumbs. You can do this by placing them in a zip-top bag and rolling over them with a rolling pin.

  2. If you want a base, press some of the crumbs into the bottom of a glass dish. Reserve the rest of the crumbs for the top.

Step 2: Cook the Creamy Filling

  1. In a medium saucepan, combine the whole milk and the condensed milk.

  2. (Optional) If using cornstarch for a thicker set, whisk it into the cold milk before turning on the heat to ensure there are no lumps.

  3. Place the pan over medium heat and stir constantly.

  4. Bring the mixture to a gentle simmer. Continue stirring for about 5–8 minutes until the mixture thickens and coats the back of a spoon.

Step 3: Assemble

  1. Pour the warm creamy mixture into your prepared glass dish (over the bottom biscuit layer, if you made one).

  2. Smooth the top with a spatula.

  3. Sprinkle the remaining biscuit crumbs evenly over the entire surface.

Step 4: Chill

  1. Let the dessert cool to room temperature for about 20 minutes.

  2. Place in the refrigerator for at least 2–3 hours (or overnight) to set completely.

  3. Serve chilled directly from the dish.


Helpful Tips

  • Texture Variation: For more texture, you can layer whole biscuits between the cream layers instead of just using crumbs on top.

  • Flavor Boost: While not part of the 3 ingredients, a teaspoon of vanilla extract stirred into the cream at the end adds a lovely depth of flavor.

  • Serving: This is best enjoyed within 2 days to keep the biscuit topping from getting too soft from the moisture of the cream.

Tropical Delight: Fruity Tapioca Jelly Drink

Tropical Delight: Fruity Tapioca Jelly Drink

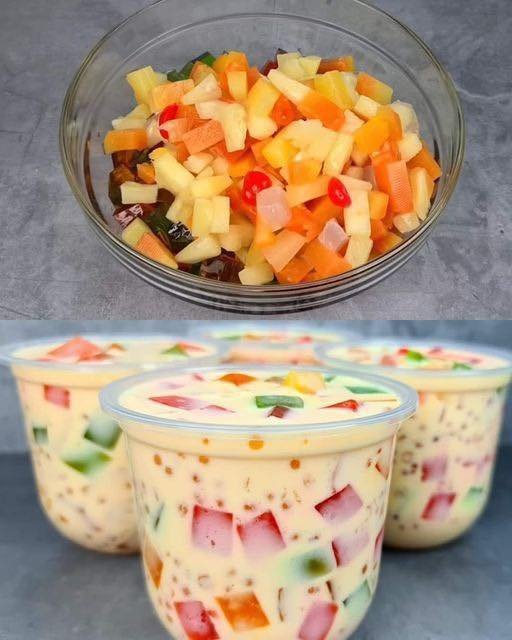
A colorful and refreshing chilled drink featuring creamy milk, soft tapioca pearls, and fruity jelly cubes.


Ingredients

For the Jelly:

  • 4 cups Water

  • 25 grams White unflavored jelly powder

  • 1/4 cup White sugar

  • Food coloring: Red, Yellow, and Green

For the Drink Base:

  • 835 grams Fruit cocktail (well-drained) or fresh chopped mango, pineapple, and strawberries

  • 1 cup Small tapioca pearls (cooked)

  • 250 ml All-purpose cream (or heavy cream)

  • 300 ml Condensed milk

  • 2 cups Evaporated milk (or fresh milk)


Instructions

Step 1: Prepare the Jelly

  1. In a medium pot, bring 4 cups of water to a boil.

  2. Stir in the jelly powder and 1/4 cup sugar, continuing to stir until the powder is fully dissolved and the liquid is clear.

  3. Remove from heat and divide the hot mixture into three separate heat-safe bowls.

  4. Add a few drops of red coloring to the first bowl, yellow to the second, and green to the third. Stir each until the color is even.

  5. Pour each color into a shallow container. Let them cool at room temperature, then refrigerate until firm.

  6. Once set, cut the jelly into small, even cubes and set aside.

Step 2: Create the Creamy Base

  1. In a large mixing bowl, whisk together the all-purpose cream, condensed milk, and evaporated milk.

  2. Stir gently until the mixture is smooth and well-combined.

Step 3: Assemble the Drink

  1. Add the drained fruit cocktail (or your fresh fruit pieces) into the creamy milk base and stir.

  2. Carefully fold in the cooked tapioca pearls and the colored jelly cubes.

  3. Use a gentle folding motion to ensure the jelly cubes stay intact and don’t break apart.

Step 4: Chill and Serve

  1. Transfer the mixture into a large pitcher or individual serving glasses.

  2. Refrigerate for at least 1 hour before serving. This allows the flavors to meld and the drink to become perfectly chilled.

  3. Serve cold, ideally with a wide straw or a long spoon to enjoy the fruit and jelly bits.


Helpful Tips for Success

  • Drain Well: Ensure your canned fruit is thoroughly drained. Excess syrup can thin out the creamy base and make the drink overly sweet.

  • Sweetness Control: You can easily adjust the sweetness by adding more or less condensed milk to suit your preference.

  • Texture: For the best results, make sure your jelly is completely firm before you attempt to slice it into cubes.

  • Storage: This drink is best enjoyed fresh but can be stored in a covered container in the refrigerator for up to 2 days. Give it a very gentle stir before serving again.