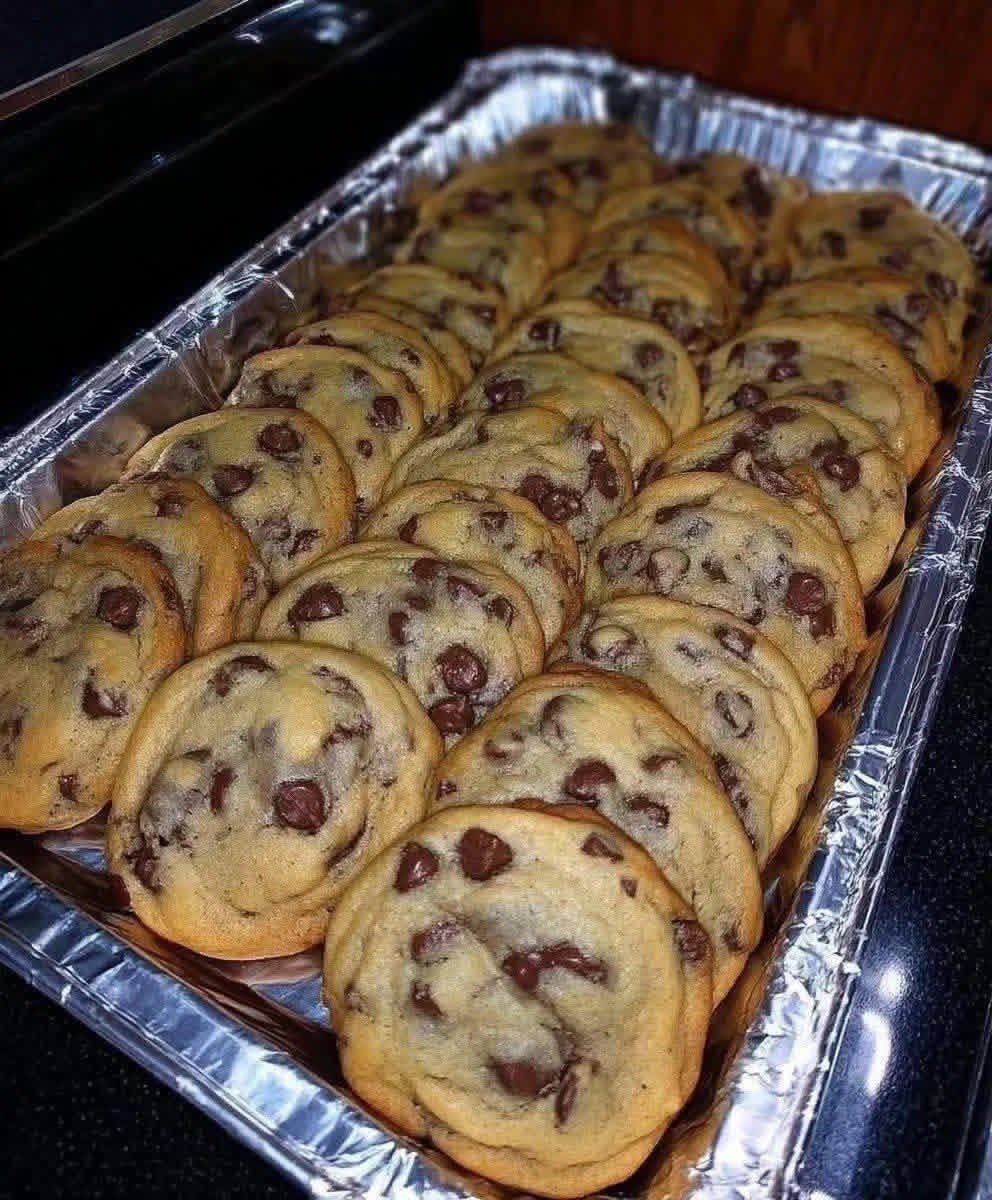
3-Ingredient Flourless Protein Cookies πŸͺ

3-Ingredient Flourless Protein Cookies πŸͺ

Soft, chewy, and naturally richβ€”designed for sustained energy and blood sugar stability.

Ingredients

  • 1 cup Natural creamy peanut butter (Ensure the only ingredients are peanuts and salt) πŸ₯œ

  • 1 large Organic egg (Room temperature works best for binding) πŸ₯š

  • 1/4 cup Sugar-free dark chocolate chips (Sweetened with Stevia or Monk Fruit) 🍫

  • Optional: A tiny pinch of sea salt on top to enhance the chocolate.


Detailed Step-by-Step Instructions πŸ“‹

  1. Preparation ➑️ Preheat your oven to 350°F (175°C). Line a large baking sheet with parchment paper or a silicone baking mat to prevent sticking.

  2. The Batter ➑️ In a medium mixing bowl, combine the peanut butter and the egg. Use a sturdy spatula to mix until the dough becomes thick and pulls away from the sides of the bowl.

  3. The Inclusion ➑️ Fold in the sugar-free chocolate chips gently until they are evenly distributed throughout the dough.

  4. Portioning ➑️ Scoop out approximately 1 tablespoon of dough per cookie. Roll into 12 small balls and place them about 2 inches apart on the prepared baking sheet.

  5. The Press ➑️ Use a fork to gently press down on each ball in a “criss-cross” pattern. Since these cookies have no flour, they will not spread much on their own; this step ensures they bake evenly. 🍴

  6. The Bake ➑️ Bake for 8–10 minutes. The edges should look slightly golden, but the centers will still look very soft. Do not overbake.

  7. The Critical Cooling ➑️ Remove from the oven and let the cookies sit on the hot pan for at least 10 minutes. They are fragile when warm but firm up beautifully as they cool. ❄️


Common Questions & Answers πŸ’‘

Q: Can I use almond butter instead of peanut butter? A: Yes! Any natural nut or seed butter (like sunflower butter) works, provided it is the “drippy” kind with no added oils or sugars. 🍯

Q: My dough is too oily. What happened? A: Natural peanut butter often separates. Make sure to stir your jar thoroughly before measuring to ensure the oil is fully incorporated into the nut solids. ➑️ Stir well!

Q: How should I store these? A: Keep them in an airtight container in the refrigerator for up to 7 days, or freeze them for up to 3 months for a quick grab-and-go snack.

Q: Can I add anything else to the dough? A: A teaspoon of vanilla extract or a dash of cinnamon adds wonderful depth without adding any sugar or significant calories. 🌿


Nutritional Highlights βœ…

  • Low Glycemic Impact: Since there is no flour or refined sugar, these provide a very slow energy release.

  • High Protein: Each cookie provides a solid hit of plant-based protein to keep you satisfied.

  • Heart Healthy: Rich in monounsaturated fats from the peanuts.
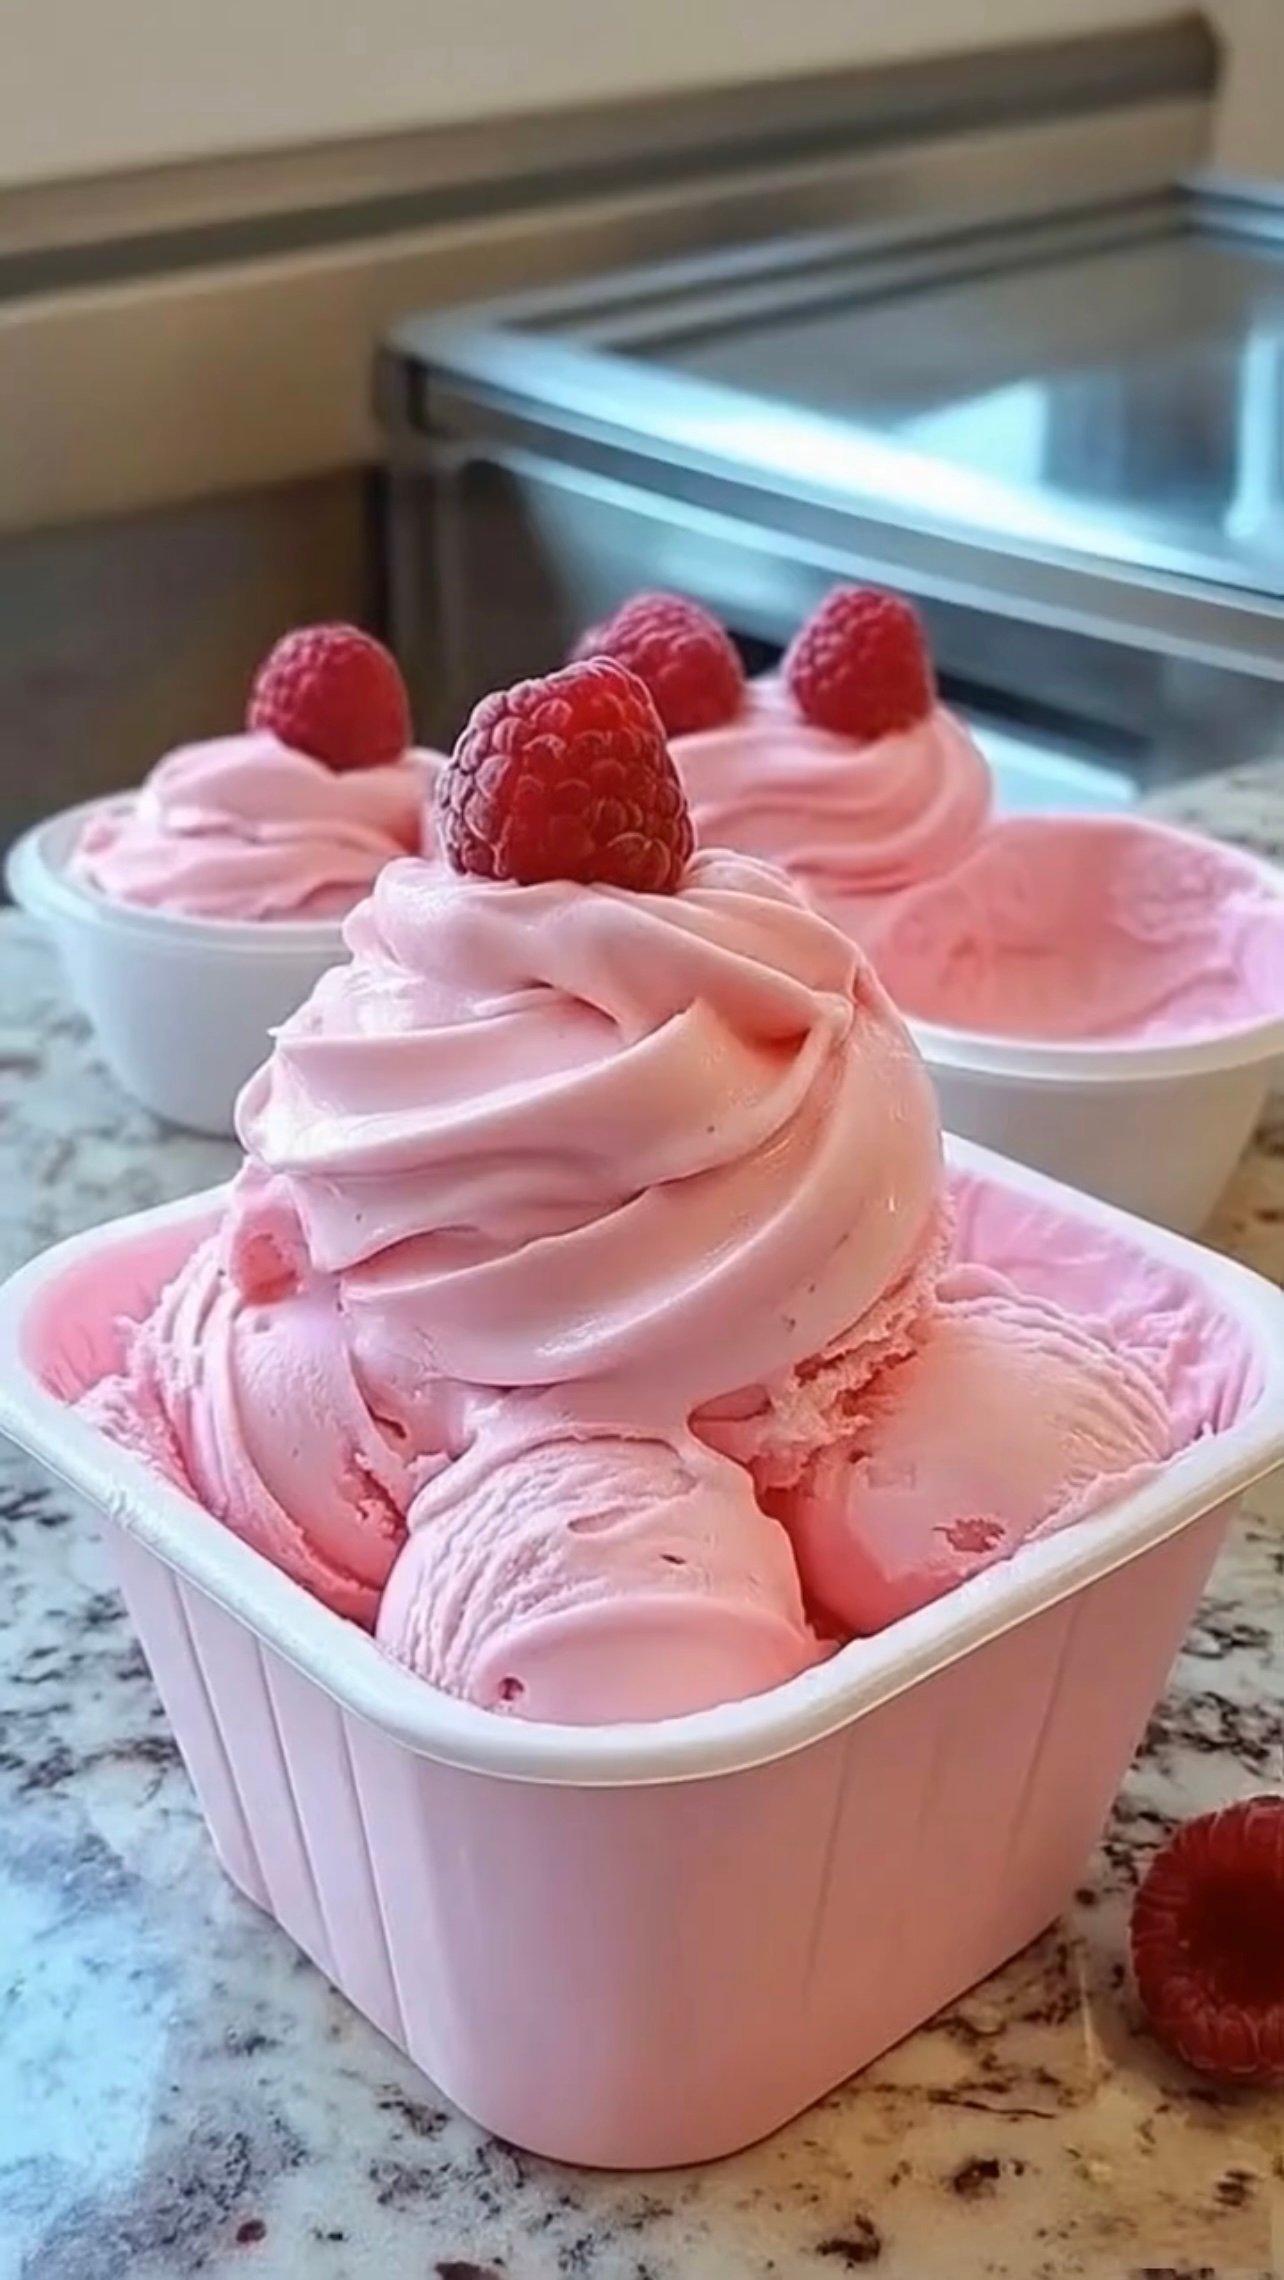
Creamy Raspberry Frozen Yogurt

Creamy Raspberry Frozen Yogurt (Detailed Recipe)

πŸ“ Ingredients:

  • 2 cups frozen raspberries
  • 1 cup Greek yogurt (plain or vanilla)
  • 2–3 tbsp honey or maple syrup (as per taste)
  • 1 tsp lemon juice
  • (Optional) 1–2 tbsp milk or water if needed

πŸ‘©β€πŸ³ Step-by-Step Instructions:

Step 1: Prepare the raspberries

  • If you have fresh raspberries, wash and dry them.
  • Put them in the freezer for at least 4 hours or until fully frozen.
  • Frozen fruit is important for a thick and creamy texture.

Step 2: Add ingredients to blender

  • Take a high-speed blender or food processor.
  • Add:
    • Frozen raspberries
    • Greek yogurt
    • Honey or maple syrup
    • Lemon juice

Step 3: Start blending

  • First, pulse a few times to break the fruit.
  • Then blend on high speed for 30–60 seconds.
  • Stop and scrape the sides if needed.

πŸ‘‰ Tip:

If the mixture is too thick and not blending, add 1 tablespoon milk or water to help it move.

Step 4: Check texture

  • Blend until the mixture becomes smooth, creamy, and thick.
  • Make sure there are no big fruit pieces left.

Step 5: Serve or freeze

  • For soft-serve style:
    Serve immediately. It will be soft, creamy, and ready to eat.
  • For scoop style (like ice cream):
    • Transfer to a container
    • Freeze for 1–2 hours
    • Then scoop and serve

Step 6: Garnish

  • Add some fresh raspberries on top
  • You can also add nuts, granola, or chocolate chips (optional)

πŸ’ͺ Nutritional Benefits:

  • Rich in antioxidants: Raspberries help protect your body
  • Good for digestion: Yogurt contains healthy bacteria
  • High in protein: Keeps you full for longer
  • High fiber: Good for stomach health

❓ Q/A:

Q: Can I make it dairy-free?

A: Yes, use coconut yogurt or almond yogurt instead of Greek yogurt.

Q: Why does it become hard after freezing?

A: Because it has no chemicals or fats like ice cream. Let it sit outside for 5–10 minutes before eating.

Q: Can I use other fruits?

A: Yes! Try strawberries, mangoes, or peaches.T

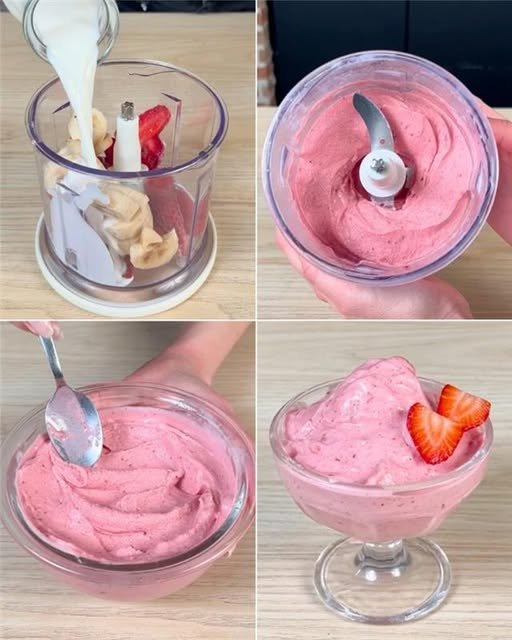
2-Ingredient Strawberry Banana Ice Cream

2-Ingredient Strawberry Banana Ice Cream

Prep time: 5 mins | Freezing time: 2+ hours | Servings: 2

Ingredients

  • Bananas: 2 large (very ripe, peeled, and frozen in chunks)

  • Frozen Strawberries: 1 cup (hulled and frozen)

  • Liquid Base: 2–4 tablespoons of milk (almond, oat, or dairy) only if needed to help blending

  • Optional Flavor: Β½ teaspoon vanilla extract or a squeeze of fresh lemon juice

Instructions

  1. Prep the Fruit: For the best texture, ensure your bananas are “cheetah spotted” (very ripe) before freezing. Peel them and cut them into small coins. Freeze both the banana coins and strawberries for at least 2–4 hours, or overnight, until rock solid.

  2. Initial Pulse: Place the frozen banana chunks and strawberries into a high-speed blender or food processor. Pulse a few times to break the large chunks into smaller, crumbly pieces.

  3. The Creaming Process: Blend on high. At first, the mixture will look like coarse meal or snow. Keep blending!

  4. Adjust Consistency: If your blender is struggling, add your liquid base one tablespoon at a time. Be careful not to add too much, or it will turn into a smoothie rather than ice cream.

  5. Achieve Soft Serve: Stop and scrape down the sides with a spatula as needed. Continue blending until the mixture suddenly transforms into a smooth, thick, and creamy “soft-serve” texture.

  6. Serve or Firm Up: You can enjoy it immediately as soft-serve. For scoopable ice cream, transfer the mixture to a freezer-safe container and freeze for an additional 30–60 minutes.


Nutritional Benefits

  • High Fiber: Both bananas and strawberries are excellent sources of dietary fiber, which supports healthy digestion and keeps you full.

  • Rich in Vitamin C: One serving provides a significant boost to your daily Vitamin C needs, supporting immune health and skin glow.

  • Natural Electrolytes: Bananas are famously high in potassium, which is vital for heart health and muscle function.

  • Antioxidant Power: Strawberries contain anthocyanins, which help protect your body from oxidative stress.


Q&A

Q: Can I make this without a high-speed blender? A: Yes! A standard food processor actually works best for “nice cream” because the wider blades handle the frozen chunks more efficiently than a narrow blender jar.

Q: My ice cream turned out like a liquid smoothie, what happened? A: This usually happens if the fruit wasn’t fully frozen or if too much liquid was added. Next time, try blending the fruit alone for a full minute before adding any milk.

Q: How do I store leftovers? A: Store in an airtight container in the freezer. Because this lacks the fats and stabilizers of store-bought ice cream, it will freeze very hard. Let it sit on the counter for 10–15 minutes to soften before scooping.

Q: Can I add protein to this? A: Absolutely. Adding a scoop of vanilla protein powder or 1/4 cup of Greek yogurt during the blending process makes this an excellent post-workout snack.

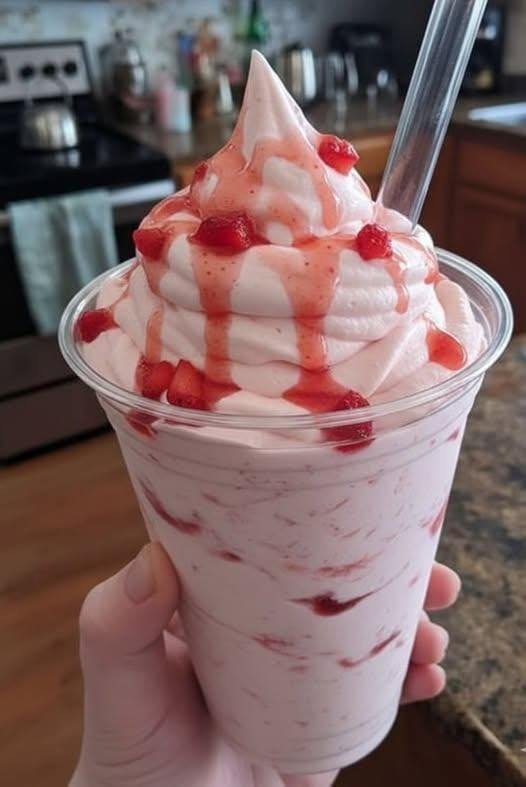
“Strawberry Cheesecake Fluff”

“Strawberry Cheesecake Fluff” or “Yogurt Mousse.” It’s a staple in the WW community because it uses high-protein, zero-point ingredients to create a massive volume of food for almost no points.

Here are the two most likely versions of this 1-point recipe.


Option 1: The “Instant” Cheesecake Fluff

This is the most common version. It’s thick, creamy, and takes about 2 minutes to make.

  • 1 cup Fat-Free Plain Greek Yogurt (0 points)

  • 1 tbsp Sugar-Free Cheesecake Instant Pudding Mix (1 point)

  • 1/2 tsp Vanilla Extract (optional)

  • 1/2 cup Fresh Strawberries, diced (0 points)

  • Splash of water or unsweetened almond milk (to reach desired consistency)

Instructions:

  1. In a small bowl, whisk the yogurt and dry pudding mix together.

  2. Add a tiny splash of water or almond milk if it’s too thick (the pudding mix will firm up the yogurt significantly).

  3. Fold in your strawberries.

  4. The Secret: Let it sit in the fridge for at least 30 minutes. The pudding mix needs time to fully hydrate and lose that “grainy” texture, turning it into a silky mousse.


Option 2: The “Whipped” Strawberry Mousse

If yours looked extra airy and voluminous (like a cloud), it likely uses sugar-free gelatin instead.

  • 2 cups Fat-Free Plain Greek Yogurt (0 points)

  • 1 small box (approx. 11g) Sugar-Free Strawberry Jello/Gelatin (1 point total for the box)

  • 1/2 cup Boiling water

  • 1/2 cup Cold water

Instructions:

  1. Dissolve the gelatin powder in the boiling water, then stir in the cold water. Let it cool for 5 minutes (it shouldn’t be hot).

  2. Put the yogurt in a large bowl. Using a hand mixer or stand mixer, whisk the yogurt for 2 minutes until bubbles form.

  3. While whisking, slowly pour the liquid gelatin into the yogurt.

  4. Continue whisking on high for 5–10 minutes. It will double or triple in size.

  5. Portion into 4-6 cups and chill for 2 hours. Each massive serving is less than 1 point.


Which one was it?

  • If it was very thick and tangy, it was the Pudding Mix version.

  • If it was jiggly and airy, it was the Jello/Gelatin version.

Stuffed Mini Cakes Recipe

Stuffed Mini Cakes Recipe

Ingredients

For the Syrup (Sherbet)

β€’ 2 Β½ cups Granulated sugar

β€’ 3 cups Water

β€’ 1 slice Lemon (or 1 tsp lemon juice)

For the Dough

β€’ 125g (approx. 1 stick) Unsalted butter, softened

β€’ Β½ cup Vegetable oil

β€’ 1 Egg

β€’ Β½ cup Fine semolina

β€’ Β½ cup Powdered sugar

β€’ 1 tsp Baking powder

β€’ 1 tsp Vanilla extract

β€’ 3 to 3 Β½ cups All-purpose flour (added gradually)

For the Stuffing

β€’ 1 cup Walnuts or pistachios, finely crushed

β€’ 1 tsp Ground cinnamon (optional)

Step-by-Step Instructions

1. Prepare the Syrup First

The secret to the perfect texture is pouring cold syrup over hot cakes.

β€’ Combine sugar, water, and lemon in a pot.

β€’ Bring to a boil, then simmer on low for 10–12 minutes.

β€’ Remove from heat and let it cool completely to room temperature.

2. Make the Dough

β€’ In a large bowl, cream together the softened butter, oil, egg, and powdered sugar.

β€’ Stir in the semolina, vanilla, and baking powder.

β€’ Slowly add the flour one cup at a time. Knead until you have a soft, non-sticky dough that holds its shape easily.

3. Shape and Stuff

β€’ Pinch off a piece of dough about the size of a walnut and roll it into a ball.

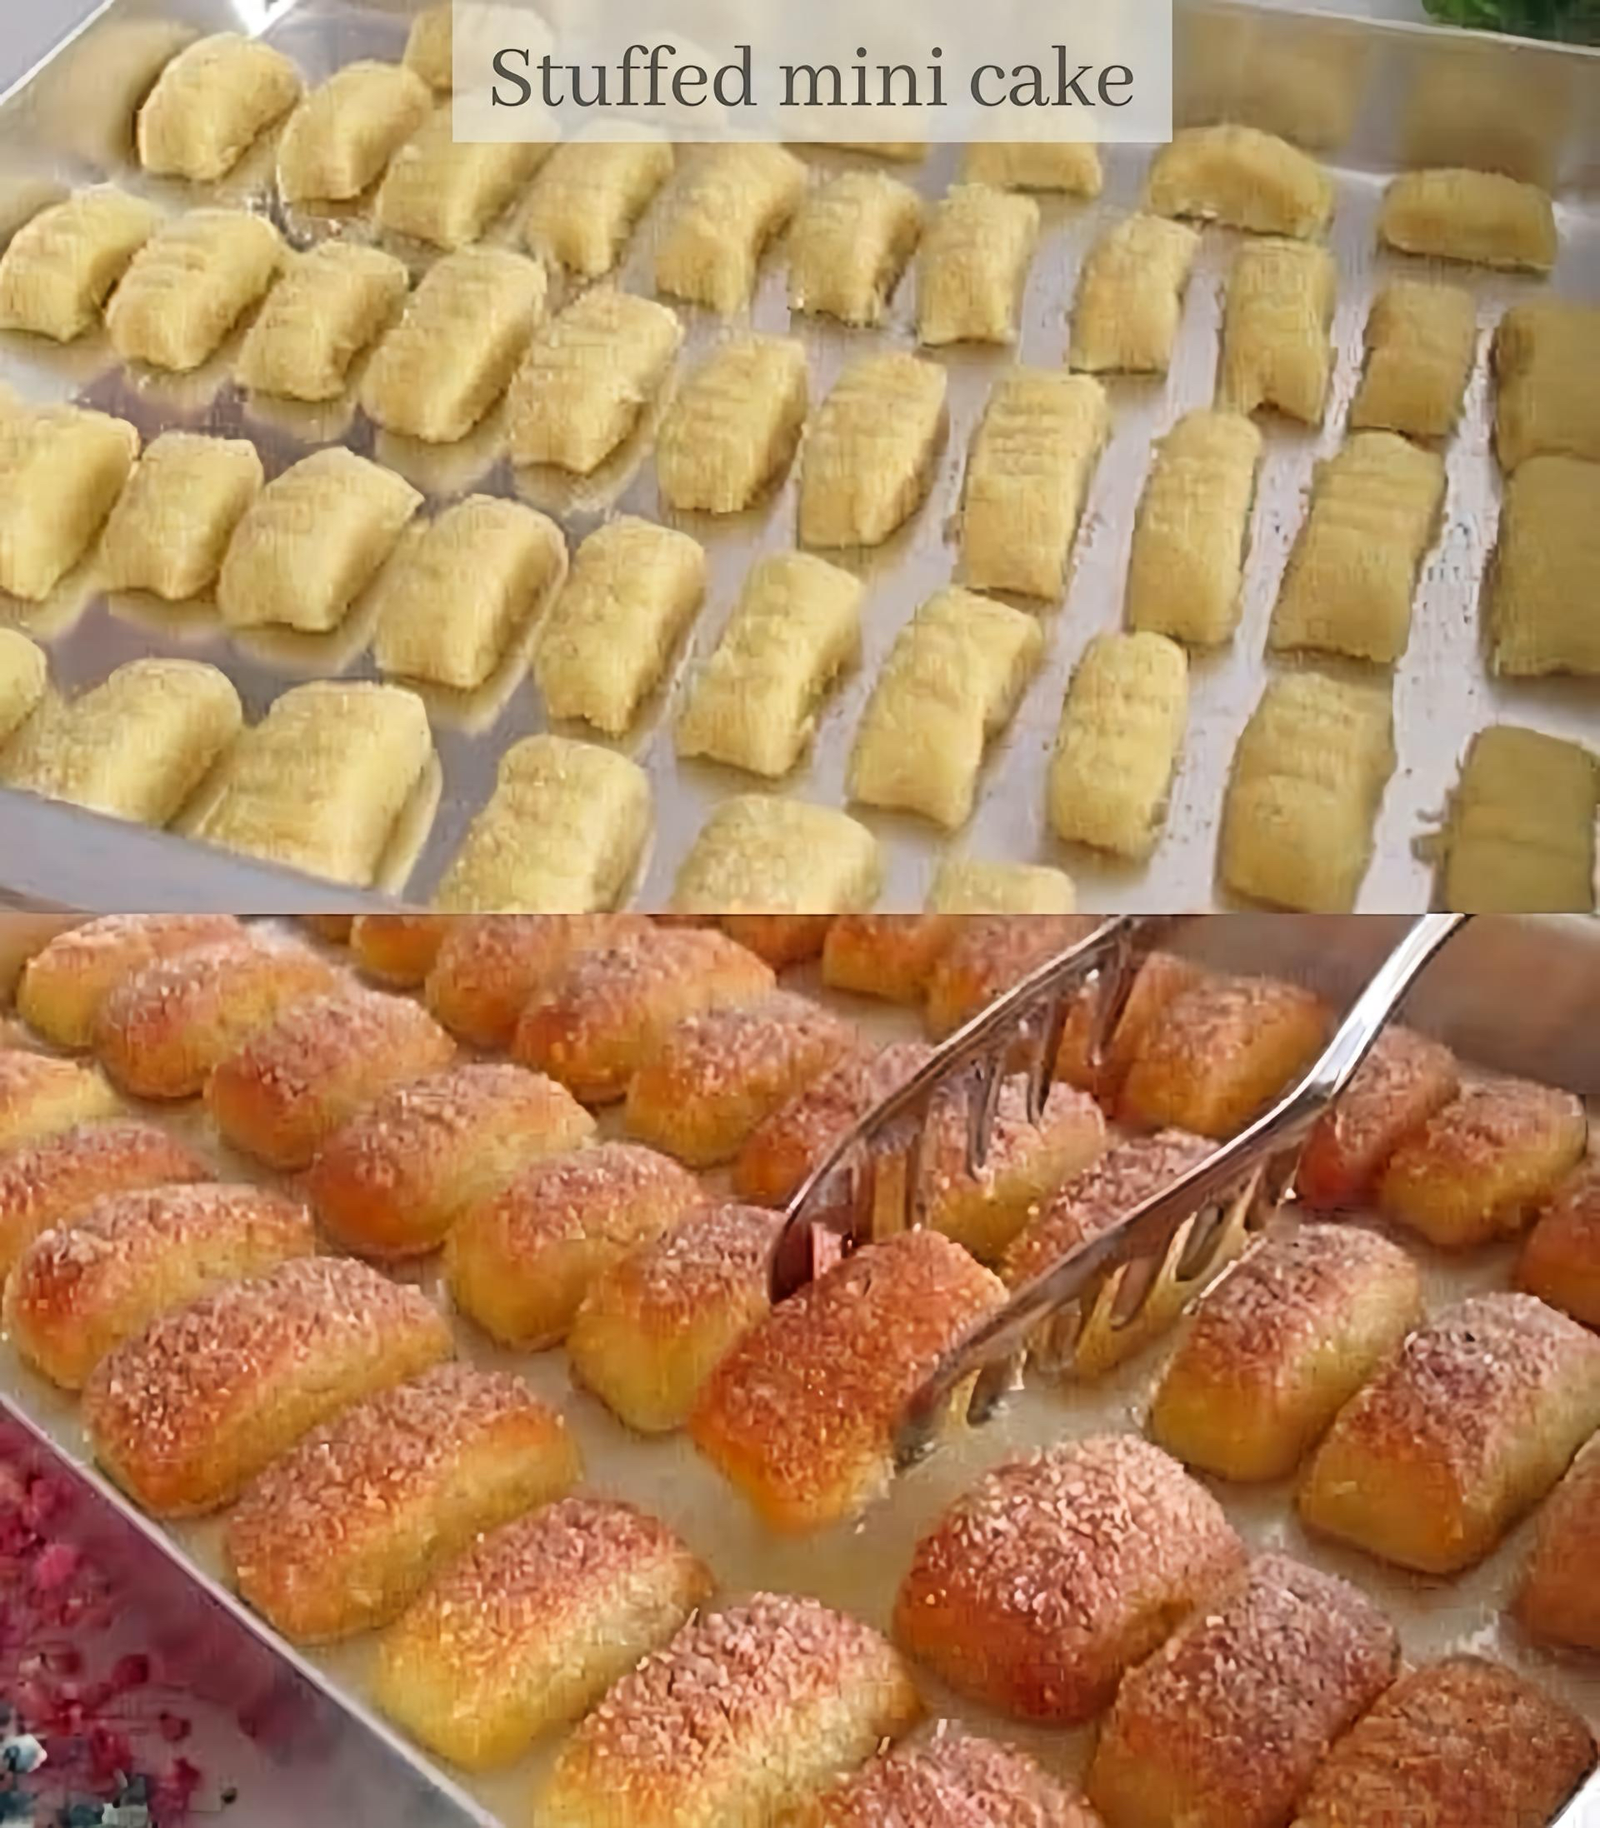
β€’ The Texture: Press the ball onto the fine side of a clean box grater or a specialized texturing mat to flatten it into an oval.

β€’ Place a teaspoon of crushed nuts in the center.

β€’ Carefully roll the dough up into a log shape. The “ribbed” pattern from the grater should be on the outside.

β€’ Place the cakes on a baking tray lined with parchment paper.

4. Bake

β€’ Bake in a preheated oven at 180Β°C (350Β°F) for about 25–30 minutes or until they reach a beautiful golden brown color (as seen in the bottom image).

5. The Soak

β€’ As soon as you take the hot tray out of the oven, pour the completely cooled syrup over the hot cakes.

β€’ Let them sit for at least 2–3 hours (or overnight) to absorb the syrup.

β€’ Garnish with desiccated coconut or ground nuts before serving.

Q&A for Success

β€’ Q: Why did my cakes fall apart?

β€’ A: Usually, this means there wasn’t enough flour or the syrup was poured while it was still too hot.

β€’ Q: Can I make these without semolina?

β€’ A: You can, but they won’t have the signature “cakey” bite. Semolina is what helps them soak up the syrup without turning into mush.

β€’ Q: How do I store them?

β€’ A: Keep them in an airtight container at room temperature for 2 days, or in the fridge for up to a week.

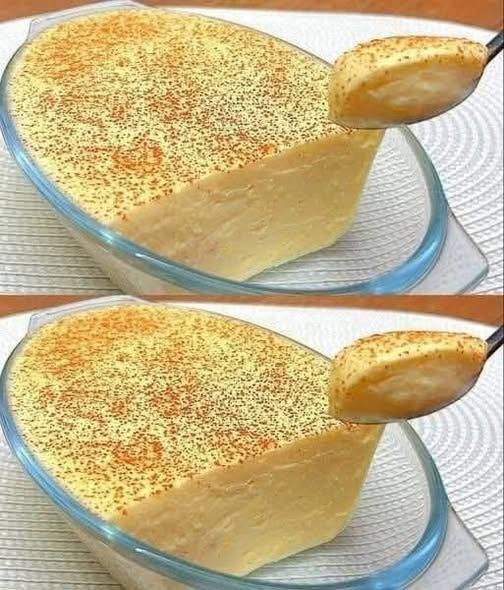
3-Ingredient Whipped Milk Mousse

3-Ingredient Whipped Milk Mousse

Ingredients

  • 2 cups Powdered Milk (Nido or similar full-cream milk powder works best)

  • 1 can (14 oz) Sweetened Condensed Milk (chilled for at least 2 hours)

  • 2 containers (approx. 14-16 oz total) Heavy Whipping Cream or “Media Crema” (must be very cold)

  • Optional: Cinnamon or cocoa powder for dusting the top.

Instructions

  1. Prep the Base: In a large chilled mixing bowl, combine the cold heavy cream and the cold condensed milk.

  2. Whip: Using an electric hand mixer or a stand mixer, beat the mixture on medium-high speed. As it starts to thicken, gradually add the powdered milk one cup at a time.

  3. Build Volume: Continue beating for about 3–5 minutes. You are looking for the mixture to double in volume and become thick enough to hold a soft peak (it should look like a dense, heavy whipped cream).

  4. Set: Pour the mixture into a glass dish. Smooth the top with a spatula.

  5. Chill: While it’s “ready” in 5 minutes, it tastes best if chilled in the freezer for 30 minutes or the fridge for 2 hours to get that “melt-in-your-mouth” consistency.

  6. Finish: Dust with cinnamon or extra powdered milk just before serving.


πŸ’‘ Pro-Tips for Success

  • Temperature is Key: The secret to getting it thick without gelatin is having your cream and condensed milk ice cold.

  • The “Air” Factor: Don’t stop mixing until it looks fluffy. The air bubbles trapped by the milk powder are what give it that structure.

  • Flavor Twist: If you want to cut the sweetness, you can fold in some lime zest or a splash of vanilla extract at the very end.