Mediterranean Swirled Garlic & Herb Cheese Bread

Mediterranean Swirled Garlic & Herb Cheese Bread

This soft pull-apart cheese bread is layered with fragrant garlic, herbs, and melted cheese. Each slice reveals beautiful swirls and delivers a comforting Mediterranean-inspired flavor. It is perfect for sharing with meals, soups, or enjoyed warm on its own.


Ingredients

For the Dough

  • 3 cups all-purpose flour

  • 1 packet (2¼ teaspoons) instant yeast

  • 1 tablespoon sugar

  • 1 teaspoon salt

  • 1 cup warm water (about 110°F / warm to the touch)

  • 2 tablespoons olive oil

For the Filling

  • 4 tablespoons unsalted butter, softened

  • 3 cloves garlic, finely minced

  • 1½ cups shredded cheese (mozzarella and cheddar combination works well)

  • 2 tablespoons fresh parsley, finely chopped

  • 1 teaspoon dried oregano or Italian seasoning

  • ¼ teaspoon red pepper flakes (optional)


Instructions

1. Prepare the Dough
In a large bowl, combine the flour, yeast, sugar, and salt. Add the warm water and olive oil. Mix until a soft dough forms.

2. Knead and Rest
Transfer the dough to a lightly floured surface and work it gently for about 5–7 minutes until smooth and elastic. Place it into a lightly greased bowl, cover, and allow it to rest in a warm area for 1 hour, or until it increases in size.

3. Make the Garlic Herb Butter
In a small bowl, mix together the softened butter, garlic, parsley, and dried herbs until evenly blended.

4. Shape the Dough
Roll the rested dough into a large rectangle, about 12 x 18 inches. Spread the garlic herb butter evenly over the surface, then sprinkle the shredded cheese across the top.

5. Create the Layers
Cut the dough into squares about 3–4 inches wide. Stack several squares together, keeping the layers aligned.

6. Arrange in the Pan
Lightly grease a loaf pan. Place the stacked dough pieces upright inside the pan, arranging them side by side so the layers are visible from the top. Cover and allow to rest for 20–30 minutes.

7. Bake
Preheat the oven to 350°F (175°C). Bake for 30–35 minutes, until the top is golden and the cheese is fully melted.

Tip: If the top colors too quickly, loosely cover with foil during the final minutes.

8. Serve
Let the bread rest in the pan for 10 minutes, then remove and serve warm.


Flavor Ideas

  • Add finely chopped sun-dried tomatoes for extra richness

  • Mix in sliced olives for a Mediterranean touch

  • Sprinkle a little extra parsley on top before serving

Quick 5-Minute Apple Pie (Apple Cake Style)

Quick 5-Minute Apple Pie (Apple Cake Style)

This apple pie–style dessert is simple and comforting, with a soft, moist texture similar to an apple cake or clafoutis. It comes together quickly and highlights the natural sweetness and juiciness of fresh apples. Perfect when you want a homemade dessert with minimal effort and ingredients.


Ingredients

  • 3 large apples, finely chopped (peeled or unpeeled as preferred)

  • 2 large eggs

  • A pinch of salt

  • 4 tablespoons sugar

  • Zest of 1 lemon

  • 50 grams (about 3½ tablespoons) butter, melted and slightly cooled

  • 4 tablespoons all-purpose flour

  • 1 tablespoon baking powder

Optional topping:

  • Powdered sugar for sprinkling


Instructions

1. Prepare the Oven and Pan
Preheat the oven to 350°F (175°C). Lightly grease a loaf pan or small round baking dish, or line it with parchment paper.

2. Prepare the Apples
Wash, core, and finely chop the apples. Set aside.

3. Mix the Base
In a mixing bowl, whisk the eggs with the sugar and salt until the mixture becomes pale and lightly airy.

4. Add Flavor
Stir in the lemon zest, then add the melted butter, mixing until fully combined.

5. Add Dry Ingredients
Sift in the flour and baking powder. Whisk gently until a smooth, thin batter forms.

6. Add the Apples
Fold the chopped apples into the batter, making sure all pieces are evenly coated.

7. Bake
Pour the mixture into the prepared pan and spread evenly.
Bake for 30–35 minutes, or until the top is lightly golden and a toothpick inserted in the center comes out clean.

8. Serve
Let the dessert cool slightly before slicing. Sprinkle with powdered sugar if desired.


Helpful Tips

  • Firm apples like Granny Smith or Honeycrisp work best

  • The dessert will be very moist due to the high apple content

  • Serve warm or at room temperature

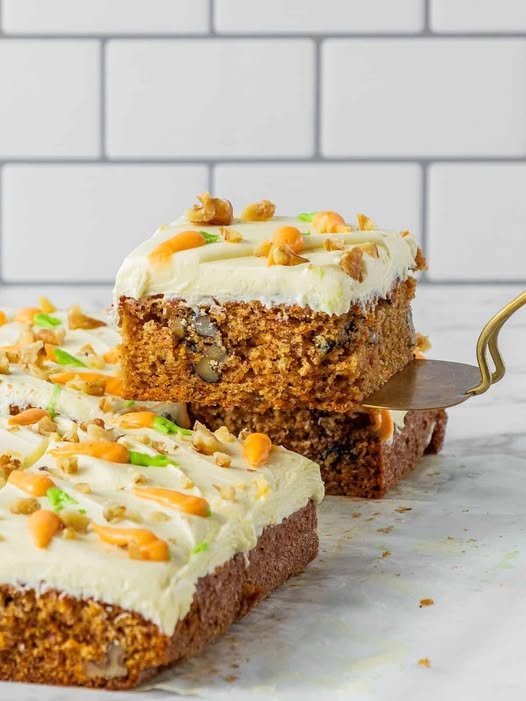
Classic Carrot Cake with Creamy Frosting 🍰🥕

Classic Carrot Cake with Creamy Frosting 🍰🥕

This classic carrot cake is soft, moist, and warmly spiced, with a tender crumb and a smooth, creamy frosting that brings everything together beautifully. Made with freshly grated carrots and simple pantry ingredients, it’s a timeless dessert perfect for gatherings, celebrations, or a comforting homemade treat.


⏱️ Time & Yield

  • Prep Time: 20 minutes

  • Bake Time: 30–40 minutes

  • Cooling & Frosting: 45 minutes

  • Yield: 1 large rectangular cake or 2 round layers (10–12 servings)


🧾 Ingredients

For the Cake

  • 2 cups (250 g) all-purpose flour

  • 1½ teaspoons baking powder

  • 1 teaspoon baking soda

  • ½ teaspoon salt

  • 1 teaspoon ground cinnamon

  • ½ teaspoon ground nutmeg (optional, for warmth)

  • 1 cup (200 g) white granulated sugar

  • ½ cup (100 g) brown sugar

  • 3 large eggs, room temperature

  • ¾ cup vegetable oil or melted coconut oil

  • 2 cups freshly grated carrots (about 3–4 medium carrots)

  • ½ cup chopped walnuts or pecans (optional)


For the Frosting

  • 8 oz (225 g) cream cheese, softened

  • ½ cup (115 g) unsalted butter, softened

  • 2–3 cups powdered sugar (adjust to taste)

  • 1 teaspoon vanilla extract


👩‍🍳 Step-by-Step Instructions

1️⃣ Prepare the Oven and Pan

Preheat your oven to 350°F (175°C).
Grease a 9×13-inch pan or two 8-inch round pans.
Line the bottom with parchment paper for easy removal.


2️⃣ Mix the Dry Ingredients

In a medium bowl, whisk together:

  • Flour

  • Baking powder

  • Baking soda

  • Salt

  • Cinnamon

  • Nutmeg (if using)

Set aside.


3️⃣ Combine the Wet Ingredients

In a large bowl, whisk the eggs with the white sugar and brown sugar until smooth and slightly lighter in color.
Slowly pour in the oil while whisking, until fully blended.


4️⃣ Make the Batter

Add the dry ingredients to the wet mixture in batches.
Stir gently until just combined—avoid overmixing.

Fold in:

  • Grated carrots

  • Chopped nuts (if using)

The batter will be thick and evenly textured.


5️⃣ Bake

Pour the batter evenly into the prepared pan(s).
Bake for 30–40 minutes, depending on pan size.

The cake is ready when:

  • The top springs back lightly

  • A toothpick inserted in the center comes out clean


6️⃣ Cool Completely

Let the cake cool fully in the pan.
Cooling is important so the frosting spreads smoothly.


🍥 Make the Creamy Frosting

In a bowl, beat the softened cream cheese and butter together until smooth and creamy.
Add the vanilla extract.
Gradually mix in the powdered sugar until you reach your desired sweetness and spreadable consistency.


7️⃣ Assemble and Decorate

Spread an even, generous layer of frosting over the cooled cake.
If desired, decorate with:

  • Extra chopped nuts

  • Simple piped designs

  • Light sprinkles of cinnamon


🧊 Storage & Helpful Tips

  • Storage: Keep covered in the refrigerator for up to 4–5 days

  • Flavor tip: This cake tastes even better after resting overnight

  • Carrots: Freshly grated carrots provide the best moisture and texture

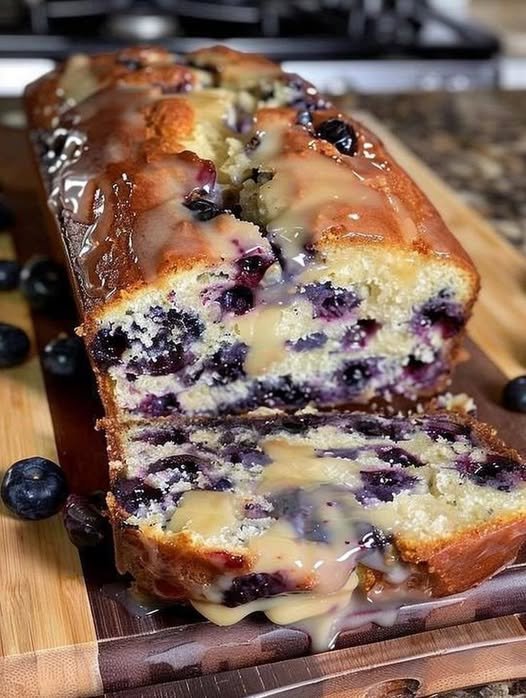
Blueberry Lemon Almond Flour Bread (Detailed & Gentle Recipe) 🫐🍋

Blueberry Lemon Almond Flour Bread (Detailed & Gentle Recipe) 🫐🍋

This blueberry lemon bread is soft, fragrant, and naturally satisfying, with bright citrus notes and bursts of juicy blueberries in every slice. Made with almond flour and simple pantry ingredients, it’s perfect for breakfast, afternoon tea, or a light dessert. The lemon glaze is optional but adds a lovely finishing touch.


⏱️ Time & Yield

  • Prep Time: 15 minutes

  • Bake Time: 45–55 minutes

  • Cooling Time: 30–40 minutes

  • Yield: 1 loaf (8–10 slices)


🧾 Ingredients

For the Bread

  • 2½ cups super-fine almond flour
    Fine texture gives the best crumb.

  • ½ cup granulated erythritol or monk fruit sweetener
    Choose one with a texture similar to sugar.

  • 1½ teaspoons baking powder

  • ¼ teaspoon salt

  • 3 large eggs, room temperature

  • ⅓ cup butter, melted and cooled slightly
    (Coconut oil may also be used.)

  • ¼ cup unsweetened almond milk

  • 2 tablespoons fresh lemon juice

  • 1 tablespoon lemon zest (from about 1 large lemon 🍋)

  • 1 teaspoon vanilla extract

  • 1 cup fresh blueberries
    Toss with 1 teaspoon almond flour to help distribute them evenly.


Optional Lemon Glaze

  • ½ cup powdered sweetener

  • 1–2 tablespoons fresh lemon juice


👩‍🍳 Step-by-Step Instructions

1️⃣ Prepare the Pan and Oven

Preheat your oven to 350°F (175°C).
Grease an 8×4-inch loaf pan or line it with parchment paper, leaving overhang on the sides for easy lifting.


2️⃣ Mix the Dry Ingredients

In a large bowl, whisk together:

  • Almond flour

  • Sweetener

  • Baking powder

  • Salt

Break up any lumps so the mixture is light and even.


3️⃣ Mix the Wet Ingredients

In a separate bowl, whisk together:

  • Eggs

  • Melted butter (make sure it’s warm, not hot)

  • Almond milk

  • Lemon juice

  • Lemon zest

  • Vanilla extract

Whisk until smooth and well combined.


4️⃣ Combine the Batter

Pour the wet mixture into the bowl with the dry ingredients.
Stir gently with a spatula until just combined—do not overmix.

Carefully fold in the blueberries, using a light hand to keep them whole.


5️⃣ Bake

Pour the batter into the prepared loaf pan and smooth the top.
Bake for 45–55 minutes, until:

  • The top is lightly golden

  • A toothpick inserted in the center comes out clean

👉 If the top browns too quickly, loosely cover with foil during the last 15 minutes.


6️⃣ Cool Completely

Let the bread cool in the pan for at least 20 minutes, then gently transfer to a wire rack.
Allow it to cool fully before slicing—this helps the loaf set properly.


7️⃣ Add the Lemon Glaze (Optional)

In a small bowl, whisk powdered sweetener with lemon juice until smooth.
Drizzle over the completely cooled loaf and let it set before slicing.


🍽️ Serving Ideas

  • Enjoy plain or with a little butter

  • Serve with tea or coffee

  • Slice and warm gently before serving for extra aroma


🧊 Storage Tips

  • Store in an airtight container in the refrigerator for up to 5 days

  • For longer keeping, slice and freeze; thaw at room temperature


💡 Helpful Notes

  • If using frozen blueberries, add them directly without thawing

  • Super-fine almond flour gives the best texture

  • Lemon flavor deepens after the bread rests overnight

☁️ The Ultimate Fluffy Blender Cake ☁️

☁️ The Ultimate Fluffy Blender Cake ☁️

This cake is prized for its light texture and simple preparation. It’s the perfect base for an afternoon tea or a morning snack. ☕️

  • Prep time: 10 minutes ⏱️

  • Bake time: 40 minutes ⏳

  • Yields: 1 standard cake 🎂

🛒 Ingredients

  • 3 Large eggs 🥚

  • 1 cup Milk 🥛

  • 1 cup Vegetable oil 🌻

  • 2 cups Sugar 🍬

  • 3 cups All-purpose flour (wheat flour) 🌾

  • 1 tablespoon Baking powder 🥄

  • A pinch of salt 🧂

  • Optional: Butter and flour for greasing the pan 🧈


🥣 Instructions

  1. Prep the Oven: Preheat your oven to 180°C (356°F). Grease and flour a cake pan so your masterpiece doesn’t stick! 🔥

  2. Blend the Base: In a blender, combine the eggs, sugar, oil, and milk. Blend until the mixture is completely smooth and homogeneous. 🌪️

  3. Add Flour: Add the flour and the pinch of salt to the blender. Blend again until the batter is creamy and well-incorporated. 🥣

  4. The Secret Lift: Add the baking powder last. Pulse the blender quickly just a few times—just enough to mix it in without over-working the batter. 🌬️

  5. Bake: Pour the batter into your prepared pan. Bake for approximately 40 minutes, or until the top is golden brown and a toothpick comes out clean. 🥧

  6. Cool & Serve: Let the cake cool for a few minutes before removing it from the pan. Slice it up and enjoy! 🍽️😋


💡 Pro-Tips for Extra Flavor

  • Zesty Twist: Add the zest of one lemon or orange to the batter for a bright, citrusy aroma. 🍋

  • Chocolate Chip: Fold in a half-cup of chocolate chips by hand right before pouring the batter into the pan. 🍫

  • Simple Glaze: While the cake is warm, drizzle a simple mix of powdered sugar and a splash of lemon juice over the top! ❄️

No bake Chocolate Eclair Cake

No-Bake Eclair Cake is the perfect dessert to whip up in a snap and serve for any occasion. Rich vanilla pudding mixed with whipped cream and layered between graham crackers, then topped with sweet chocolate frosting—everyone will enjoy this easy icebox cake!

Chocolate Eclair Cake is a great way to go. It is best served the first or second day, after being refrigerated for a few hours. I sometimes like to freeze it for an hour before serving for an even firmer texture.  I love it!

Ingredients:

  • 2 (3.5 oz) packages of instant vanilla pudding mix
  • 1 (8 oz) container of whipped topping (COOL WHIP), thawed
  • 3 cups milk
  • 2 sleeves graham cracker squares
  • 1 (16 oz) tub chocolate frosting

How To Make No-Bake Chocolate Eclair Cake:

In a medium bowl, mix together the pudding mix, milk, and Cool Whip.
In a 9 x 13 baking dish, arrange a single layer of graham cracker squares on the bottom. You may have to break them up a bit to get enough crackers to cover the bottom of your dish.

Spread half of the pudding mixture on top of the crackers.
Layer another layer of graham crackers over the pudding mixture.
Then layer the other half of the pudding mixture on top of the crackers.
Top with a final layer of graham crackers.
Put plastic wrap over the dish and put it in the fridge for about 30 min to an hour to allow the pudding to set.

When ready, put the tub of chocolate frosting in the microwave for about 15 seconds to soften (remove the lid and aluminum foil top before microwaving).
Take out and stir frosting. It should be easily spreadable now.
Remove plastic wrap from dish and evenly spread chocolate frosting all over the top layer of graham crackers.

Place plastic wrap over the top of the dish and put it back in the fridge and let it chill overnight.
This dessert gets better over time. The graham crackers need plenty of time to soften up.
When ready, slice and serve!