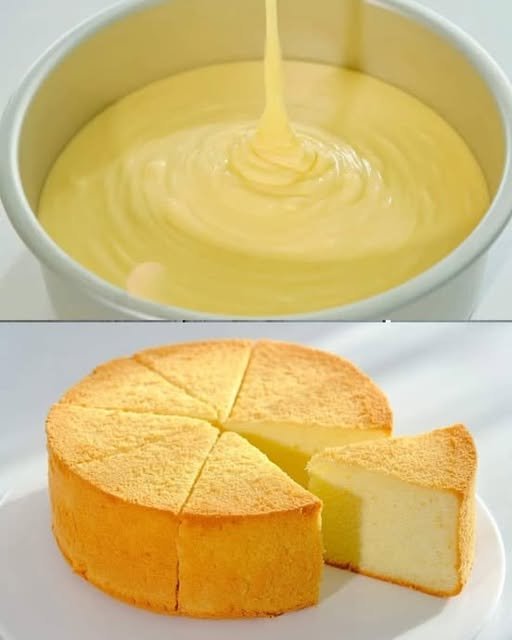
Cloud-Like Basic Chiffon Cake

Cloud-Like Basic Chiffon Cake

Ultra-Soft • Light as Air • Delicate Crumb

Prep Time: 20 minutes
Bake Time: 50–60 minutes
Pan Size: 7-inch (18 cm) chiffon tube pan or round pan
Yield: 6–8 slices


Ingredients

Egg Base

  • 5 large eggs, cold, separated into yolks and whites

  • 50 g milk, at room temperature

  • 50 g vegetable oil (or any neutral-flavored oil)

  • 84 g cake flour, sifted

  • 20 g granulated sugar (for egg yolks)

  • 2 g salt

  • 1 teaspoon vanilla extract

Meringue

  • 5 egg whites

  • 50 g granulated sugar

  • 2 ml lemon juice (or ¼ teaspoon cream of tartar)


Step-by-Step Instructions

1. Prepare the Egg Yolk Batter

Place the egg yolks into a large mixing bowl. Add the 20 g sugar, salt, and vanilla extract.

Whisk until the mixture looks smooth, pale, and well blended.

Slowly pour in the milk and vegetable oil. Whisk steadily until everything combines into a glossy, slightly thick mixture.

Sift the cake flour directly into the bowl. Using a whisk or spatula, gently mix in a zigzag or “Z” motion until the batter is smooth and free of lumps.
Mix only until combined to keep the texture light.


2. Whip the Egg Whites (Meringue)

In a separate clean bowl, add the egg whites and lemon juice.

Using an electric mixer on medium speed, beat until the whites become foamy and bubbly.

Add the sugar gradually in three portions, beating between each addition.

Increase to medium-high speed and continue beating until stiff peaks form.
When you lift the beaters, the peaks should stand upright and look glossy.


3. Combine the Batter Gently

Add about one-third of the whipped egg whites to the yolk batter. Fold gently with a spatula to loosen the mixture.

Pour the lightened yolk batter into the remaining egg whites.

Using a gentle folding motion, combine everything:

  • Cut through the center

  • Scrape the bottom

  • Lift and fold over

Continue until the batter looks evenly blended with no white streaks.


4. Bake the Cake

Pour the batter into an ungreased 7-inch chiffon pan or round pan.

Lightly tap the pan on the counter 2–3 times to release large air bubbles.

Place the pan on the middle rack of a preheated oven.

Bake at 150°C (300°F) for 50–60 minutes, until:

  • The top turns light golden

  • The surface springs back gently when touched


5. Cool the Cake Properly

Once baked, remove the pan from the oven and immediately turn it upside down on a wire rack or bottle neck.

Allow the cake to cool fully in this position for 1–2 hours.
This helps the cake keep its airy structure.

When completely cool, run a thin knife around the edges and gently release the cake.


Helpful Baking Tips

  • Pan Choice: Leave the pan ungreased so the batter can rise evenly.

  • Clean Equipment: Make sure bowls and beaters are completely clean for the best meringue volume.

  • Sugar Control: Adding sugar slowly helps create a smooth, stable foam.

  • Flour Substitute:
    If cake flour is unavailable:

    • Measure 84 g all-purpose flour

    • Remove 1½ tablespoons

    • Replace with 1½ tablespoons cornstarch

    • Sift well before using


Texture & Flavor

This chiffon cake is:

  • Soft and airy

  • Lightly sweet

  • Moist without being heavy

  • Perfect on its own or with fruit, whipped cream, or a light glaze
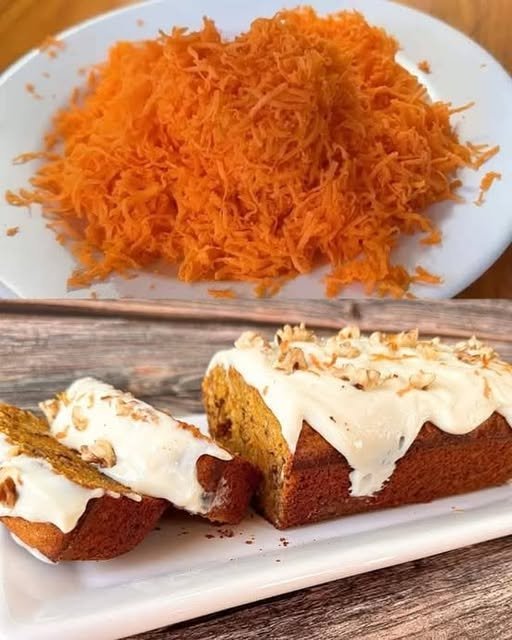
Quick and Delicious Carrot and Walnut Cake

Quick and Delicious Carrot and Walnut Cake

Soft, lightly spiced cake with natural sweetness and a smooth topping

This carrot and walnut cake is moist, fragrant, and easy to prepare. Finely grated carrots keep the crumb soft, while walnuts add a pleasant texture. The gentle citrus aroma from orange zest brightens the flavor, making this cake perfect for tea time, family gatherings, or everyday baking.


Ingredients

For the Cake Batter

  • Large eggs – 3
    Provide structure and help the cake rise evenly.

  • Granulated sugar – 150 g (¾ cup)
    Adds sweetness and keeps the cake tender.

  • Vegetable oil – 80 ml (⅓ cup)
    Ensures a soft texture that stays moist even after cooling.

  • All-purpose flour – 180 g (1½ cups)
    Gives the cake its shape while remaining light.

  • Carrots – 200 g (about 2 medium), finely grated
    Add natural moisture and mild sweetness.

  • Walnuts – 100 g (½ cup), chopped
    Bring gentle crunch and nutty flavor.

  • Orange zest – from 1 orange
    Adds freshness and aroma without extra liquid.

  • Baking powder – 2 teaspoons
    Helps the cake rise smoothly.

  • Cake spice mix – ½ teaspoon
    A blend of cinnamon, cloves, nutmeg, ginger, cardamom, vanilla, and anise.

  • Salt – a small pinch
    Balances flavors and enhances sweetness.


For the Creamy Topping (Optional but Recommended)

  • Cream cheese – 115 g (4 oz), softened
    Creates a smooth and lightly tangy topping.

  • Butter – 30 g (2 tablespoons), softened
    Adds richness and structure.

  • Powdered sugar – 120 g (1 cup)
    Sweetens and smooths the frosting.

  • Vanilla extract – ½ teaspoon
    Rounds out the flavor.


Equipment Needed

  • Loaf pan

  • Mixing bowls

  • Whisk or hand mixer

  • Spatula

  • Wire cooling rack


Step-by-Step Instructions


1. Prepare the Oven and Pan

  • Preheat the oven to 350°F (175°C).

  • Lightly grease a loaf pan with oil or butter.

  • Line the base with parchment paper for easy release.


2. Whisk Eggs and Sugar

  • In a large bowl, add the eggs and sugar.

  • Whisk or beat for 2–3 minutes until the mixture becomes pale, airy, and slightly thickened.


3. Add Oil and Orange Zest

  • Slowly pour in the vegetable oil while whisking gently.

  • Stir in the orange zest until evenly distributed.


4. Combine Dry Ingredients

  • Sift together the flour, baking powder, salt, and spice mix.

  • Add to the wet mixture and fold gently using a spatula.

  • Mix only until the flour disappears to keep the cake soft.


5. Fold in Carrots and Walnuts

  • Add the grated carrots and chopped walnuts.

  • Fold gently until evenly mixed.

  • The batter will be thick but smooth.


6. Bake the Cake

  • Pour the batter into the prepared pan and level the top.

  • Bake for 40–50 minutes, until the cake is set and lightly golden.

  • A toothpick inserted in the center should come out clean.


7. Cool the Cake

  • Let the cake rest in the pan for 10 minutes.

  • Carefully remove and transfer to a wire rack.

  • Allow to cool completely before adding any topping.


Prepare the Creamy Topping

8. Make the Frosting

  • In a bowl, combine the cream cheese and butter.

  • Whisk until smooth and creamy.

  • Add powdered sugar and vanilla extract.

  • Mix until soft, smooth, and spreadable.


9. Finish and Serve

  • Spread the topping evenly over the cooled cake.

  • Garnish with extra chopped walnuts or orange zest if desired.

  • Slice and serve.


Storage Tips

  • Keep covered at room temperature for 1 day

  • Refrigerate for up to 4 days

  • Bring to room temperature before serving for best texture

Super Moist 5-Minute Chocolate Cake

Super Moist 5-Minute Chocolate Cake

A soft, tender chocolate cake with a smooth chocolate topping

This easy chocolate cake comes together quickly using basic pantry ingredients. The batter is mixed in one bowl, bakes evenly, and stays soft and moist for days. It is ideal for everyday baking, family gatherings, or when you want a reliable chocolate dessert without complicated steps.


Ingredients

For the Cake

  • All-purpose flour – 1½ cups (180 g)
    Provides structure while keeping the cake soft.

  • Unsweetened cocoa powder – ½ cup (60 g)
    Use natural or Dutch-processed cocoa for a deep chocolate flavor.

  • Granulated sugar – 1 cup (200 g)
    Adds sweetness and helps retain moisture.

  • Baking powder – 1 teaspoon
    Helps the cake rise evenly.

  • Baking soda – ½ teaspoon
    Works with the cocoa to give the cake a light texture.

  • Salt – ½ teaspoon
    Balances the sweetness and enhances flavor.

  • Large eggs – 2
    Bind the ingredients and give structure
    OR
    Plain yogurt – ½ cup (for extra softness and moisture)

  • Milk – ½ cup (120 ml)
    Adds moisture and helps dissolve dry ingredients.

  • Vegetable or canola oil – ½ cup (120 ml)
    Keeps the cake tender even after cooling.

  • Vanilla extract – 2 teaspoons
    Enhances the chocolate flavor.

  • Boiling water or hot coffee – ½ cup (120 ml)
    Helps fully dissolve the cocoa powder and deepen the chocolate taste
    (Coffee does not make the cake taste like coffee)


For the Chocolate Topping

  • Semi-sweet chocolate chips or chopped chocolate – ½ cup
    Choose good-quality chocolate for smooth results.

  • Heavy cream – ⅓ cup
    Creates a soft, shiny chocolate topping.

  • Optional garnish: Chocolate shavings or cocoa powder


Equipment Needed

  • 8 × 8 inch (20 × 20 cm) square baking pan

  • Large mixing bowl

  • Whisk or hand mixer

  • Small heat-safe bowl

  • Spatula


Step-by-Step Instructions

1. Prepare the Oven and Pan

  • Preheat your oven to 350°F (175°C).

  • Grease the baking pan lightly with oil or butter.

  • For easy removal, line the pan with parchment paper, leaving a little overhang on the sides.


2. Combine Dry Ingredients

  • In a large bowl, add the flour, cocoa powder, sugar, baking powder, baking soda, and salt.

  • Sift if possible to remove lumps.

  • Whisk well until everything is evenly mixed and uniform in color.


3. Add Wet Ingredients

  • Add the eggs or yogurt, milk, oil, and vanilla extract to the bowl.

  • Whisk or beat on medium speed for 1–2 minutes until smooth and well combined.

  • Scrape the sides and bottom of the bowl to ensure no dry pockets remain.


4. Add Hot Liquid

  • Reduce mixing speed or switch to a spatula.

  • Slowly pour in the boiling water or hot coffee.

  • Mix gently until the batter becomes smooth and thin.

Important:
The batter will be runny. This is expected and helps create a soft texture after baking.


5. Bake the Cake

  • Pour the batter into the prepared pan.

  • Tap the pan gently on the counter to release air bubbles.

  • Bake for 30–35 minutes, or until:

    • A toothpick inserted in the center comes out clean or with a few moist crumbs.

  • Remove from the oven and let the cake cool completely in the pan.


Prepare the Chocolate Topping

6. Heat the Cream

  • Place the chocolate in a heat-safe bowl.

  • Heat the cream until very hot but not boiling (microwave or stovetop).


7. Melt the Chocolate

  • Pour the hot cream over the chocolate.

  • Let it sit undisturbed for 5 minutes.

  • Stir slowly from the center outward until smooth and glossy.

If needed, warm gently for a few seconds to fully melt.


Assemble the Cake

8. Finish and Serve

  • Pour the chocolate topping over the cooled cake.

  • Spread evenly using a spatula.

  • Add chocolate shavings or a light dusting of cocoa powder if desired.

  • Let the topping set for 15–20 minutes before slicing.


Storage Tips

  • Store covered at room temperature for 2 days

  • Refrigerate for up to 5 days

  • Bring to room temperature before serving for best texture

🍓 Keto No-Bake Strawberry Cheesecake Jars

This recipe is a brilliant “hack” for keto enthusiasts—using blended cottage cheese is a fantastic way to boost the protein content while maintaining that signature cheesecake creaminess.

Following your preference for full recipes, here is the complete, organized guide for your Cheesecake Jars.


🍓 Keto No-Bake Strawberry Cheesecake Jars

A high-protein, low-carb delight that layers a buttery almond crumble with a silky, citrus-kissed cheesecake filling and fresh macerated strawberries.

  • Servings: 4 jars

  • Prep Time: 15 minutes

  • Chill Time: 1 hour

  • Diet: Keto, Low-Carb, High-Protein, Sugar-Free


📝 Ingredients

For the Low-Carb “Crust” Layer

  • ½ cup almond flour

  • 1 tbsp butter, melted

  • 1 tbsp granular erythritol or allulose

  • ¼ tsp cinnamon (optional)

  • Pinch of salt

For the Cheesecake Filling

  • 1 cup cottage cheese (full fat or low fat)

  • 4 oz cream cheese, softened to room temperature

  • ½ cup Greek yogurt (0% or 2%)

  • 3–4 tbsp powdered erythritol or allulose (adjust to your sweetness preference)

  • 1 tsp vanilla extract

  • 1 tbsp lemon juice

For the Strawberry Layer

  • 1 cup fresh strawberries, diced

  • 1 tbsp powdered sweetener

  • 1 tsp lemon juice


👩‍🍳 Detailed Instructions

  1. Prepare the Crust: In a small bowl, combine the almond flour, melted butter, sweetener, cinnamon, and salt. Stir until it forms a soft, sandy crumble. Set aside.

  2. Blend the Base: Place the cottage cheese in a blender or food processor. Blend on high until it is completely silky with no visible curds.

  3. Finish the Filling: Add the softened cream cheese, Greek yogurt, sweetener, vanilla, and lemon juice to the blender. Process until the mixture is smooth, thick, and creamy.

  4. Prep the Berries: In a separate bowl, toss the diced strawberries with lemon juice and sweetener. Use a fork to gently mash a few of the berries—this creates a natural “syrup” while keeping most of the fruit chunky.

  5. Assemble: * Drop 1–2 tablespoons of the almond crust into the bottom of 4 small glass jars.

    • Spoon or pipe in a thick layer of the cheesecake cream.

    • Top with a generous spoonful of the strawberry mixture.

    • (Optional) Repeat the layers if using tall jars.

  6. Chill: Cover the jars and refrigerate for at least 1 hour. This allows the cheesecake layer to firm up and the flavors to meld.


❄️ Storage & Tips

  • Fridge: These jars are perfect for meal prep! They stay fresh for up to 4–5 days.

  • High Protein Tip: Don’t skip the cottage cheese; blending it is the secret to getting a high-protein count without a “diet” taste.

  • Texture: If the filling is too thick to blend easily, add 1 tablespoon of unsweetened almond milk to help the blades move.


📊 Quick Macros (Estimated per jar)

  • Net Carbs: ~5g

  • Protein: ~12g

  • Sugar: 0g added

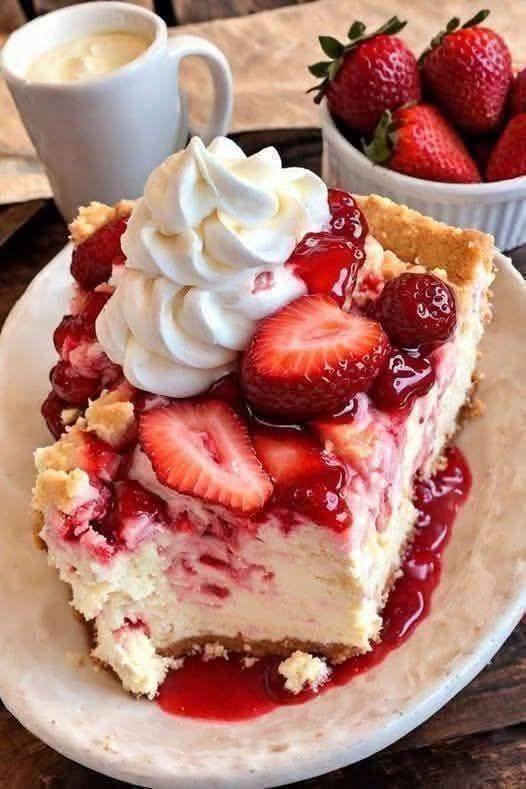
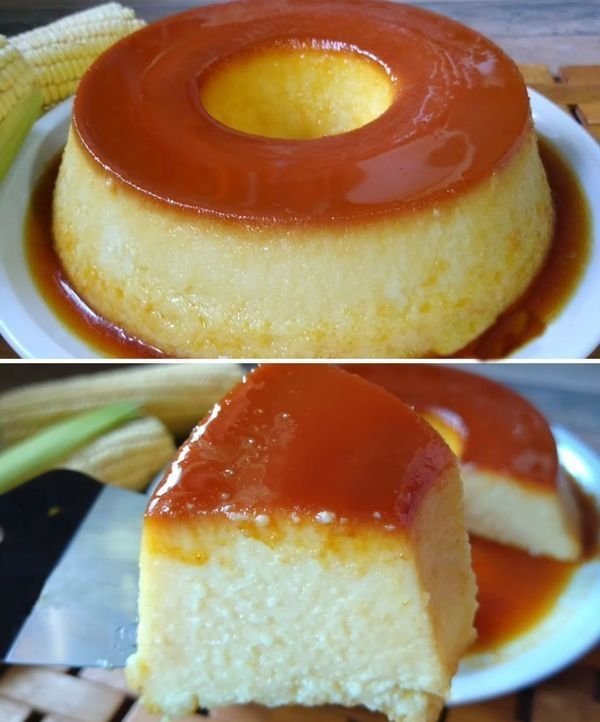
🍮 Creamy Leche Flan Cheesecake

🍮 Creamy Leche Flan Cheesecake

Prep time: 20 mins | Bake time: 2 hours | Chilling time: 4 hours

Yields: One 20cm (8-inch) Cake

Ingredients

The Caramel Base

  • 100 g (½ cup) White sugar

The Leche Flan Layer

  • 10 Egg yolks

  • 375 ml (1 ½ cups) Milk

  • 250 g (1 cup) Condensed milk

  • 1 tsp Vanilla extract (added for flavor)

The Cheesecake Layer

  • 300 g (1 ¼ cups) Cream cheese, softened to room temperature

  • 100 g (½ cup) White sugar

  • 4 Egg whites

  • ½ tsp Salt


Instructions

1. Prepare the Caramel

Place the 100 g sugar in a saucepan over medium heat. Do not stir; swirl the pan occasionally until the sugar melts and turns a dark amber color. Immediately pour the hot caramel into a 20 cm (8-inch) round mold, tilting the mold to coat the bottom evenly. Set aside to harden.

2. Make the Flan Mixture

In a medium bowl, whisk the 10 egg yolks gently (avoid creating too many air bubbles). Stir in the milk, vanilla extract, and condensed milk. Mix slowly until fully incorporated. Set aside.

3. Make the Cheesecake Mixture

In a separate large bowl, beat the cream cheese with a hand mixer until smooth. Gradually add the 100 g sugar, salt, and 4 egg whites. Continue mixing until the batter is creamy and free of lumps.

4. Combine and Sift

Gently fold the flan mixture into the cheesecake mixture until combined. Crucial Step: Sift the entire mixture through a fine-mesh strainer directly into the prepared mold over the hardened caramel. This ensures a perfectly silky texture.

5. The Water Bath (Bain Marie)

Place the mold inside a larger roasting pan. Fill the roasting pan with hot water until it reaches about halfway up the sides of the cheesecake mold.

6. Bake and Chill

  • Bake: Place in the oven at 155°C (311°F) and bake for 2 hours. The center should have a slight jiggle but be set.

  • Cool: Remove from the water bath and let it cool completely at room temperature.

  • Chill: Refrigerate for at least 4 hours (or overnight) to allow the layers to fully set and the caramel to liquefy.

7. Serve

Run a thin knife around the edge of the mold. Invert the cake onto a large rimmed serving plate (to catch the caramel sauce). Slice and enjoy!


💡 Pro-Tips for a Perfect Flan Cake

  • Smoothness is Key: Sifting the mixture isn’t just a suggestion—it removes any bits of egg or undissolved cream cheese, which is the secret to that restaurant-quality “melt-in-your-mouth” feel.

  • Temperature Matters: Make sure your cream cheese is truly at room temperature before mixing; otherwise, you will have tiny white lumps in your cheesecake layer.

  • The “Jiggle” Test: Don’t be alarmed if it looks a little soft when you take it out of the oven. It will firm up significantly during the 4-hour chill time.

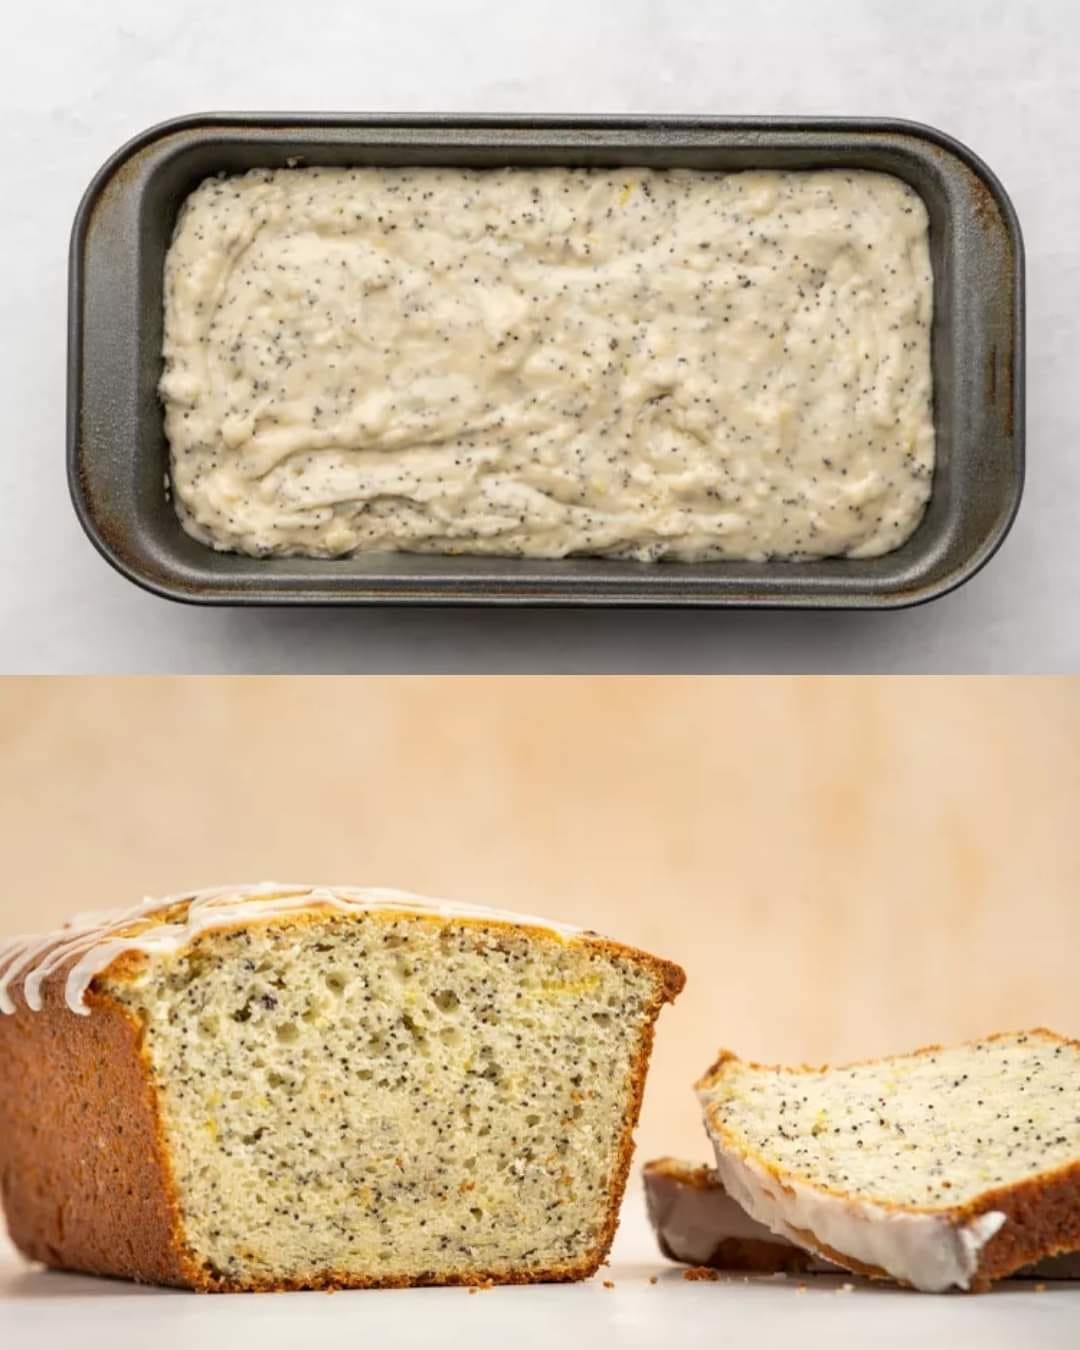
Lemon Poppy Seed Bread

Lemon Poppy Seed Bread

Servings: 8–10 slices | Prep Time: 15 minutes | Cook Time: 50–60 minutes


Ingredients

For the Bread

  • 2 cups all-purpose flour

  • 2 tablespoons poppy seeds

  • 1 teaspoon baking soda

  • ½ teaspoon baking powder

  • ½ teaspoon salt

  • 1 cup granulated sugar

  • ½ cup (1 stick) unsalted butter, softened

  • 2 large eggs

  • ⅓ cup fresh lemon juice (about 2 large lemons)

  • 1 tablespoon lemon zest

  • ¾ cup Greek yogurt or sour cream (for moisture)

  • 1 teaspoon vanilla extract

For the Lemon Glaze

  • 1 cup powdered sugar

  • 2 tablespoons fresh lemon juice


Instructions

1. Prepare the Oven and Pan

  1. Preheat your oven to 350°F (175°C).

  2. Grease a standard 9×5 inch loaf pan thoroughly, or line it with parchment paper for easy removal.


2. Combine the Dry Ingredients

  1. In a medium bowl, whisk together:

    • 2 cups flour

    • 2 tablespoons poppy seeds

    • 1 teaspoon baking soda

    • ½ teaspoon baking powder

    • ½ teaspoon salt

  2. Set aside.


3. Cream Butter and Sugar

  1. In a large mixing bowl, beat the softened butter and granulated sugar together until light, creamy, and fluffy (about 2–3 minutes).


4. Add Wet Ingredients

  1. Add the eggs one at a time, beating well after each.

  2. Stir in:

    • ⅓ cup fresh lemon juice

    • 1 tablespoon lemon zest

    • 1 teaspoon vanilla extract

    • ¾ cup Greek yogurt or sour cream

  3. Mix until smooth and fully combined.

Tip: For extra lemon flavor, rub the lemon zest into the sugar before creaming it with butter—this releases the natural oils.


5. Combine Wet and Dry Ingredients

  1. Gradually fold the dry ingredient mixture into the wet ingredients using a spatula.

  2. Mix just until combined—avoid over-mixing to keep the bread light and tender.

  3. The batter should be thick with a slightly textured consistency.


6. Bake the Bread

  1. Pour the batter into the prepared loaf pan and smooth the top with a spatula.

  2. Bake in the preheated oven for 50–60 minutes, or until:

    • The top is golden brown

    • A toothpick inserted in the center comes out clean


7. Cool and Glaze

  1. Allow the bread to cool in the pan for 10 minutes, then transfer it to a wire rack to cool completely.

  2. Prepare the glaze: whisk together 1 cup powdered sugar and 2 tablespoons lemon juice until smooth.

  3. Drizzle the glaze generously over the cooled loaf.


Baker’s Tips

  • Even Baking: If your oven tends to brown unevenly, tent the bread with foil halfway through baking.

  • Storage: Keep the bread in an airtight container at room temperature for up to 3 days, or refrigerate for up to a week to maintain moisture.

  • Serving Suggestion: Enjoy as a breakfast treat, snack, or dessert. Pairs wonderfully with tea or coffee.