Glazed Brown Butter Honey Cakes

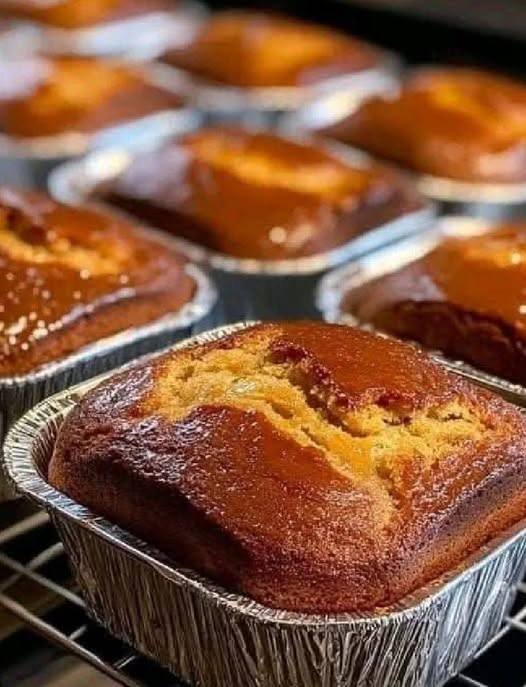
Glazed Brown Butter Honey Cakes

These cakes rely on the deep, nutty flavor of browned butter to create a dessert that tastes far more complex than the 10-minute prep time suggests.

Ingredients

For the Cake:

  • 1 cup (225g) Unsalted Butter: To be browned.

  • ¾ cup Granulated Sugar: Provides structure and sweetness.

  • ¼ cup Honey: Adds moisture and a distinct floral depth.

  • 2 Large Eggs: At room temperature for better emulsification.

  • 1 tsp Vanilla Extract: Enhances all the other flavors.

  • 1 ½ cups All-Purpose Flour: The base of the cake.

  • 1 tsp Baking Powder: For a perfect, airy rise.

  • ½ tsp Salt: Balances the sweetness of the honey.

  • ½ cup Whole Milk: Keeps the crumb tender.

For the Honey Glaze:

  • ¼ cup Honey: The star of the glaze.

  • 2 tbsp Water: To thin the glaze to a pourable consistency.

  • A pinch of Salt: To cut through the sugar.


Instructions

1. Brown the Butter

  • In a medium saucepan, melt the butter over medium heat.

  • Continue cooking, whisking occasionally. The butter will foam, then clear, and finally begin to turn golden brown with small dark specks at the bottom.

  • Once it smells nutty and looks like toasted hazelnuts, remove it from the heat immediately and pour into a heat-proof bowl to stop the cooking. Let it cool for 5 minutes.

2. Mix the Batter

  • Preheat your oven to 350°F (175°C). Grease individual foil baking tins or a standard muffin tin.

  • In a large bowl, whisk the browned butter with the sugar and honey until well combined.

  • Add the eggs one at a time, whisking well after each, then stir in the vanilla extract.

  • In a separate bowl, sift together the flour, baking powder, and salt.

  • Gradually add the dry ingredients to the butter mixture, alternating with the milk. Stir until just combined—do not overmix, or the cakes will be tough.

3. Bake

  • Divide the batter evenly among the prepared tins, filling them about two-thirds full.

  • Bake for 18–22 minutes, or until a toothpick inserted into the center comes out clean and the tops are a deep golden brown.

4. Glaze and Finish

  • While the cakes are baking, whisk the honey, water, and salt in a small bowl.

  • As soon as the cakes come out of the oven, brush the warm glaze generously over the tops. The warmth allows the glaze to soak into the top layer, creating a sticky, delicious crust.

  • Let the cakes cool in the tins for at least 10 minutes before serving.


Pro-Tip

For a dinner party presentation, serve these warm with a dollop of unsweetened whipped cream or a small scoop of vanilla bean ice cream to balance the richness of the honey.
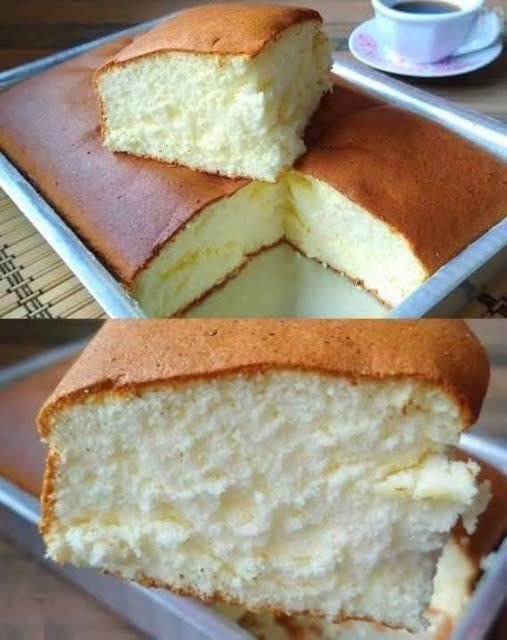
Cloud Milk Cake (3 Ingredients)

Cloud Milk Cake (3 Ingredients)

Prep Time: 15 minutes
Bake Time: 30–35 minutes
Serves: 6–8 slices

A light, airy cake made with eggs, milk, and sweetener, with a soft texture similar to a soufflé-style sponge.


Ingredients

  • 5 large eggs, separated

  • 1 cup (240 ml) milk

  • ½ cup granulated sweetener (such as monk fruit or erythritol, adjust to taste)

Optional:

  • 1 teaspoon vanilla extract

  • Pinch of cream of tartar (for stabilizing egg whites)


Instructions

1. Prepare the Pan and Oven

Preheat your oven to 325°F (160°C).
Line the bottom of an 8-inch round or square baking pan with parchment paper.
Do not grease the sides of the pan so the batter can rise evenly.


2. Mix the Yolk Batter

Place the egg yolks in a medium bowl.
Add the milk and ¼ cup of the sweetener.
Whisk until smooth and slightly pale in color.
Stir in vanilla extract if using.


3. Whip the Egg Whites

In a clean, dry bowl, beat the egg whites with a mixer on medium-high speed.
Once foamy, gradually add the remaining ¼ cup sweetener.
Beat until stiff peaks form.
If using cream of tartar, add it at the foamy stage.


4. Combine the Mixtures

Add a small portion of the whipped egg whites to the yolk mixture and stir gently to loosen it.
Then gently fold the remaining egg whites into the batter using a spatula.
Fold slowly and carefully to keep the mixture airy.


5. Bake in a Water Bath

Pour the batter into the prepared pan.
Place the pan inside a larger baking dish and pour hot water into the outer dish until it reaches about 1 inch up the sides of the cake pan.

Bake for 30–35 minutes, or until:

  • The top is lightly golden

  • The cake feels springy when gently touched


6. Cool Gradually

Turn off the oven and crack the door open.
Let the cake sit inside for 10 minutes.
Remove and allow to cool completely in the pan before slicing.


Helpful Tips

  • Clean bowl: Any grease or water can prevent egg whites from whipping properly.

  • Gentle folding: Use a light hand to keep the batter fluffy.

  • Flavor ideas: Add lemon zest or almond extract for variation.

  • Serving: Serve plain or with fruit, cream, or a light glaze.

  • Storage: Keep covered in the refrigerator for up to 2 days.

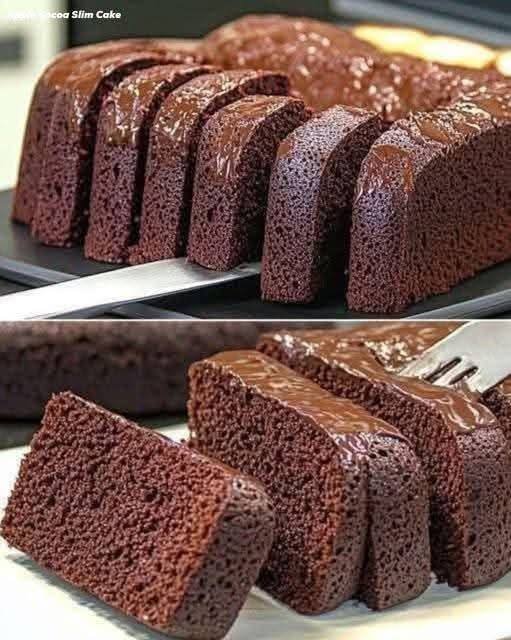
Flourless Apple & Cocoa Cake

Flourless Apple & Cocoa Cake

Prep Time: 10 minutes
Bake Time: 35–40 minutes
Serves: 8 slices

A soft, dense chocolate-style cake made from blended apples, eggs, and cocoa powder.


Ingredients

  • 4 medium apples (such as Gala, Fuji, or Red Delicious), peeled and cored

  • 4 large eggs

  • 5 tablespoons unsweetened cocoa powder

  • 1 teaspoon baking powder

  • Olive oil, for greasing the pan

  • Optional: Pinch of salt


Instructions

1. Prepare the Apples

Peel and core the apples.
Cut them into small chunks so they blend easily.


2. Blend the Base

Place the apple pieces and eggs into a blender or food processor.
Blend until completely smooth and liquid, with no visible apple pieces.


3. Add Dry Ingredients

Add the cocoa powder, baking powder, and salt (if using).
Blend again until the mixture is fully combined and evenly colored.


4. Prepare the Pan and Oven

Preheat your oven to 350°F (180°C).
Lightly grease a silicone mold or line a loaf pan with parchment paper and brush with olive oil.


5. Bake

Pour the batter into the prepared pan.
Bake for 35–40 minutes, or until a toothpick inserted into the center comes out clean.


6. Cool and Set

Let the cake cool in the pan for 20 minutes.
Transfer to the refrigerator and chill for 1 hour before slicing.
This helps the cake firm up and develop its dense texture.


7. Serve

Slice and serve as is, or with an optional topping of melted dark chocolate drizzled over the top.


Helpful Tips

  • Smoother texture: Blend the apples very well to avoid chunks in the batter.

  • Flavor option: Add ½ teaspoon vanilla extract or cinnamon for extra aroma.

  • Pan choice: Silicone or parchment-lined pans release more easily.

  • Storage: Store covered in the refrigerator for up to 3 days.

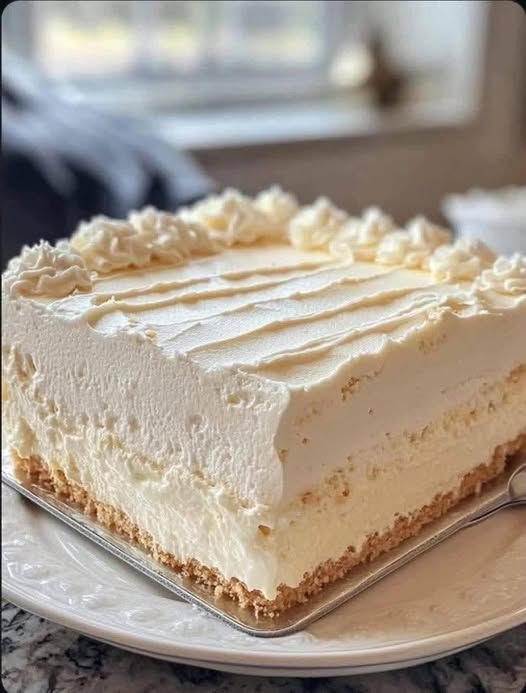
Creamy Vanilla Cream Slice Dessert

Creamy Vanilla Cream Slice Dessert

Prep Time: 20 minutes
Chill Time: 4 hours (or overnight)
Serves: 8–10 slices

A smooth, rich dessert with a biscuit base, creamy vanilla filling, and a soft whipped topping.


Ingredients

For the Base

  • 200 g (about 2 cups) crushed plain biscuits or graham crackers

  • 100 g (½ cup) melted butter

For the Cream Filling

  • 2 cups milk

  • ½ cup sugar

  • ¼ cup cornstarch

  • 2 egg yolks

  • 1 tablespoon butter

  • 1 teaspoon vanilla extract

For the Whipped Layer

  • 1½ cups heavy whipping cream

  • 3 tablespoons powdered sugar

  • ½ teaspoon vanilla extract


Instructions

1. Prepare the Base

In a bowl, mix the crushed biscuits with melted butter until evenly combined.
Press the mixture firmly into the bottom of a rectangular dish lined with parchment paper.
Refrigerate while preparing the filling.


2. Make the Cream Filling

In a saucepan, whisk together:

  • Milk

  • Sugar

  • Cornstarch

  • Egg yolks

Place over medium heat and stir constantly until thickened and smooth (about 5–7 minutes).
Remove from heat and stir in:

  • Butter

  • Vanilla extract

Let the mixture cool slightly, then pour over the biscuit base.
Spread evenly and refrigerate for at least 1 hour until set.


3. Prepare the Whipped Layer

In a chilled bowl, beat the heavy cream with powdered sugar and vanilla until soft peaks form.


4. Assemble

Spread the whipped cream evenly over the set cream layer.
Use a spatula to smooth the top or create decorative lines.


5. Chill

Refrigerate for 3 more hours or until fully firm and easy to slice.


6. Serve

Lift out using the parchment paper and cut into neat squares or slices.
Serve cold.


Helpful Tips

  • Neater slices: Dip your knife in hot water and wipe between cuts.

  • Flavor variation: Add lemon zest or a little almond extract to the cream filling.

  • Topping idea: Sprinkle shredded coconut or white chocolate curls on top.

  • Storage: Keep covered in the refrigerator for up to 3 days.

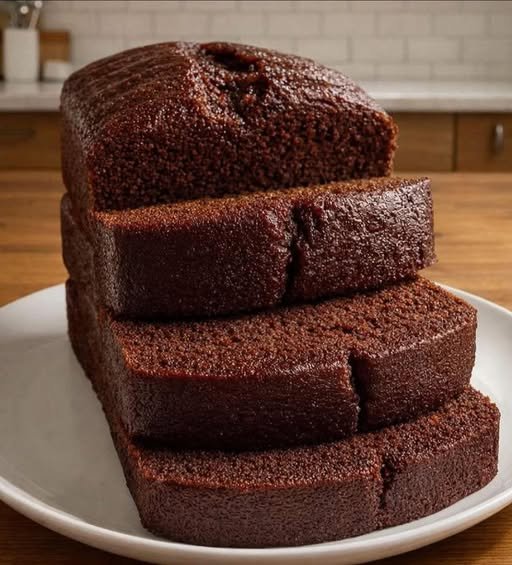
Quick & Easy Chocolate Loaf Cake

Quick & Easy Chocolate Loaf Cake

Prep time: 10 mins | Cook time: 45–55 mins | Total time: ~1 hour

Ingredients

  • 1 cup Granulated sugar

  • 1 cup Milk

  • ½ cup Vegetable oil

  • 2 Large eggs

  • 1 tsp Vanilla extract (optional)

  • 1 ½ cups All-purpose flour

  • ½ cup Unsweetened cocoa powder

  • 1 tsp Baking powder

  • ½ tsp Baking soda

  • ¼ tsp Salt

For the Optional Ganache:

  • ½ cup Heavy cream

  • 1 cup Semi-sweet chocolate chips


Instructions

  1. Preheat and Prep: Preheat your oven to 350°F (175°C). Grease a 9×5-inch loaf pan with butter or cooking spray, or line it with parchment paper for easy removal.

  2. Mix Wet Ingredients: In a large mixing bowl, whisk together the sugar, milk, vegetable oil, eggs, and vanilla extract until well combined and smooth.

  3. Incorporate Dry Ingredients: Sift in the flour, cocoa powder, baking powder, baking soda, and salt. Gently whisk by hand until just combined. Tip: Do not overmix, or the cake will become tough rather than tender.

  4. Bake: Pour the batter into the prepared loaf pan. Bake for 45 to 55 minutes. To check for doneness, insert a toothpick into the center; it should come out clean or with just a few moist crumbs.

  5. Cool: Let the cake cool in the pan for about 10 minutes before transferring it to a wire rack to cool completely.

  6. Make the Ganache (Optional): While the cake cools, heat the heavy cream in a small saucepan or microwave until it just begins to simmer. Pour the hot cream over the chocolate chips in a bowl. Let it sit for 5 minutes, then whisk until glossy and smooth.

  7. Finish: Pour the warm ganache over the cooled loaf cake and let it set before slicing.


Tips for a Busy Kitchen

  • No Sifter? No problem. Just use a whisk to fluff up the dry ingredients in a separate bowl before adding them to the wet mixture to get rid of any cocoa clumps.

  • Storage: This cake stays incredibly moist for up to 3 days if kept in an airtight container at room temperature.

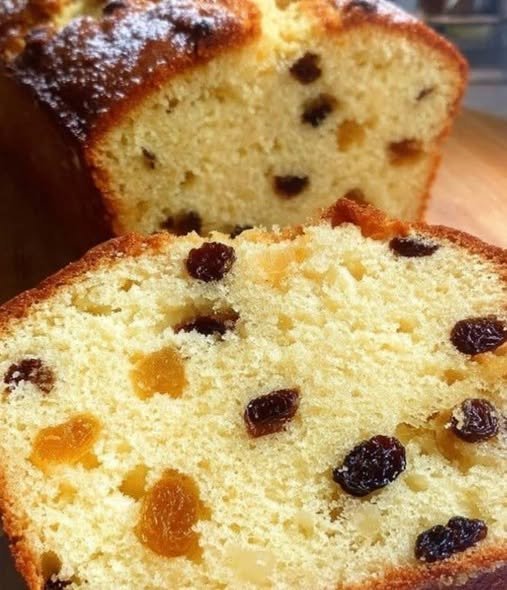
Vanilla Raisin Loaf Cake

Vanilla Raisin Loaf Cake

Prep Time: 15 minutes
Bake Time: 45–50 minutes
Servings: 8–10 slices

A soft, lightly sweet loaf cake flavored with vanilla and dotted with juicy raisins. Perfect for tea time or dessert.


🛒 Ingredients

  • 2 cups (250 g) all-purpose flour

  • 1½ teaspoons baking powder

  • ¼ teaspoon salt

  • ½ cup (115 g) unsalted butter, softened

  • ¾ cup (150 g) granulated sugar

  • 2 large eggs, at room temperature

  • 1 teaspoon vanilla extract

  • ½ cup (120 ml) milk

  • ½ cup (80 g) raisins
    (soaked in warm water for 10 minutes, then drained and patted dry)

Optional:

  • 1 tablespoon flour (for coating raisins)

  • Powdered sugar for dusting


👩‍🍳 Step-by-Step Instructions

1. Prepare the Pan

Preheat your oven to 180°C (350°F).

Grease a standard loaf pan (9×5 inch) with butter or oil and line with parchment paper for easy removal.


2. Mix Dry Ingredients

In a medium bowl, whisk together:

  • flour

  • baking powder

  • salt

Set aside.


3. Cream Butter and Sugar

In a large mixing bowl, beat:

  • softened butter

  • sugar

Mix until light and fluffy (about 2–3 minutes).

This step helps create a soft texture.


4. Add Eggs and Vanilla

Add eggs one at a time, mixing well after each addition.

Stir in vanilla extract.


5. Combine Wet and Dry

Add the flour mixture in two parts, alternating with milk:

  • Add half the flour → mix gently

  • Add milk → mix

  • Add remaining flour → mix just until combined

Do not overmix.


6. Add Raisins

Toss drained raisins with 1 tablespoon flour (optional, helps prevent sinking).

Fold raisins gently into the batter.


7. Bake

Pour batter into prepared pan and smooth the top.

Bake for 45–50 minutes, or until:

  • top is golden

  • a toothpick inserted in the center comes out clean


8. Cool

Let the loaf cool in the pan for 10 minutes, then transfer to a wire rack to cool completely.


🍽 Serving Ideas

  • Dust with powdered sugar

  • Serve plain or with butter

  • Pair with tea, coffee, or milk

  • Add sliced fruit on the side


💡 Helpful Tips

  • Soaking raisins keeps them soft and juicy.

  • Do not overmix the batter or the loaf may become dense.

  • You can replace raisins with chopped dates or dried apricots.

  • Store covered at room temperature for 2 days or refrigerate up to 5 days.