Healthy Oats with Eggs and Milk (Skillet Breakfast)

Healthy Oats with Eggs and Milk (Skillet Breakfast)

Ingredients (1 serving)

  • 1 cup rolled oats (or quick oats)

  • 2 eggs

  • 1 cup milk (dairy or plant-based)

  • ½ teaspoon cinnamon

  • 1 teaspoon honey (optional)

  • ½ cup fresh berries or sliced banana (optional)


Instructions

  1. Mix

    • In a bowl, whisk eggs and milk until smooth.

    • Add oats and cinnamon.

    • Let sit 1–2 minutes so oats absorb liquid.

  2. Cook

    • Heat a non-stick skillet over medium heat.

    • Lightly grease if needed.

    • Pour mixture into pan like a thick pancake.

    • Cook 2–3 minutes per side until golden and firm.

  3. Serve

    • Drizzle with honey while warm.

    • Top with berries or banana.


Optional Add-Ins

For more protein:

  • 1 tablespoon protein powder or extra egg white

For fiber:

  • 1 tablespoon chia or flaxseed

For crunch:

  • Chopped nuts or seeds

For indulgence:

  • Peanut butter or dark chocolate chips

Savory version:

  • Skip cinnamon & honey

  • Add salt, herbs, and top with avocado or extra egg


Make-Ahead Tips

  • Mix batter the night before and refrigerate

  • Cook in batches and store in fridge (3 days)

  • Freeze cooked portions up to 1 month


Nutrition (Approx. per serving)

  • Calories: 350

  • Protein: 15g

  • Fiber: 5g

  • Carbs: 40g

  • Fat: 11g

Blueberry Lemon Cream Bars

Blueberry Lemon Cream Bars

Yields: 12–16 bars | Prep time: 30 mins | Chill time: 4+ hours

Ingredients

The Graham Crust

  • 1 ½ cups graham cracker crumbs

  • 6 tbsp unsalted butter, melted

  • 2 tbsp granulated sugar

  • A pinch of salt

The Blueberry Filling

  • 2 cups fresh or frozen blueberries

  • ¼ cup granulated sugar

  • 1 tbsp lemon juice

  • 1 tbsp cornstarch mixed with 1 tbsp water (slurry)

The Lemon Cream Layer

  • 8 oz cream cheese, softened

  • 1 cup heavy whipping cream, cold

  • ½ cup powdered sugar

  • 2 tbsp lemon curd (plus extra for drizzling)

  • 1 tsp lemon zest

  • 1 tsp vanilla extract

The Topping

  • Fresh blueberries

  • A drizzle of warmed lemon curd or honey for the “gloss”


Instructions

1. Prepare the Crust

  1. Line an 8×8 inch baking pan with parchment paper, leaving an overhang on the sides.

  2. Mix graham cracker crumbs, melted butter, sugar, and salt until it feels like wet sand.

  3. Press firmly into the bottom of the pan. Pro tip: Bake at 350°F (175°C) for 8 minutes to make it extra crunchy, or just freeze for 15 minutes if you want a true no-bake version.

2. Make the Blueberry Compote

  1. In a small saucepan, combine blueberries, sugar, and lemon juice.

  2. Cook over medium heat for 5–8 minutes until the berries burst and release their juices.

  3. Stir in the cornstarch slurry and simmer for 1 minute until thickened.

  4. Important: Let this cool completely before spreading it over the crust.

3. Whip the Lemon Cream

  1. In a large bowl, beat the softened cream cheese, powdered sugar, lemon curd, zest, and vanilla until smooth.

  2. In a separate bowl, whip the heavy cream to stiff peaks.

  3. Gently fold the whipped cream into the cream cheese mixture until light and fluffy.

4. Assembly

  1. Spread the cooled blueberry filling evenly over the crust.

  2. Top with the lemon cream mixture, smoothing the surface with a spatula.

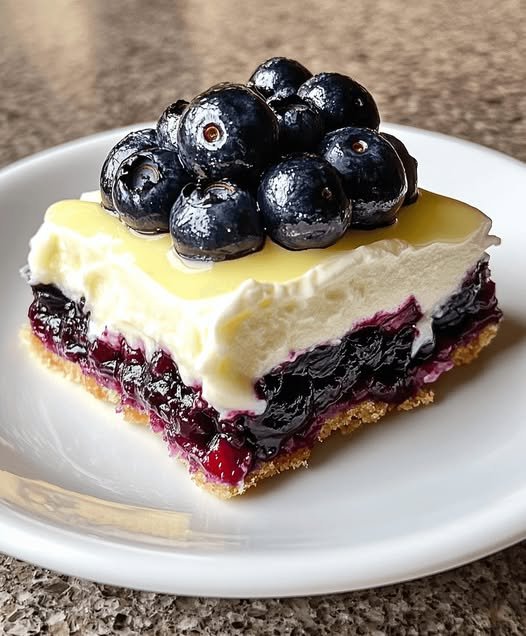
  3. Spread a thin layer of lemon curd over the top (as seen in your photo).

  4. Refrigerate for at least 4 hours (ideally overnight) to allow the layers to set.

5. Serving

  1. Lift the bars out using the parchment overhang.

  2. Slice into squares using a hot, clean knife.

  3. Pile fresh blueberries on top of each square and drizzle with a little extra lemon curd for that professional shine.

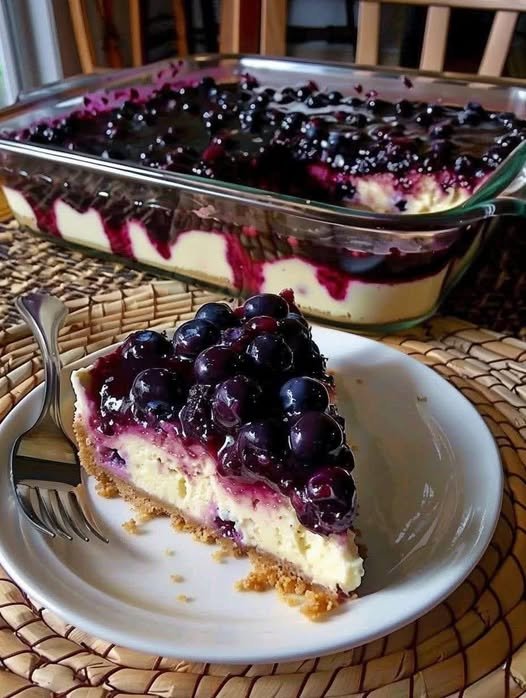
Blueberry Cheesecake Delight

Blueberry Cheesecake Delight is the kind of dessert that instantly steals the spotlight on any table. With its velvety cream cheese layer, buttery crust, and glossy blueberry topping, it offers the perfect balance of sweetness, richness, and refreshing fruitiness. This dessert looks impressive, tastes luxurious, and is surprisingly easy to prepare. Whether you’re hosting a gathering, preparing a family treat, or simply craving a creamy berry dessert, this layered delight is guaranteed to satisfy.
This recipe combines a classic graham cracker crust, a smooth cheesecake filling that doesn’t require baking, and a luscious blueberry topping that soaks beautifully into the creamy layer as shown in the picture. Every bite delivers crunch, creaminess, and fruity brightness—a perfect harmony of textures and flavors.


Ingredients

For the Crust:
•2 cups graham cracker crumbs
•½ cup unsalted butter, melted
•2 tablespoons granulated sugar
For the Cheesecake Layer:
•16 oz (450 g) cream cheese, softened
•1 cup powdered sugar
•1 teaspoon vanilla extract
•1 cup heavy whipping cream, whipped to stiff peaks
For the Blueberry Topping:
•3 cups fresh or frozen blueberries
•½ cup granulated sugar
•1 tablespoon lemon juice
•1 tablespoon cornstarch mixed with 2 tablespoons water (slurry)
•½ cup water


Instructions

1. Prepare the Crust
1. In a mixing bowl, combine the graham cracker crumbs, melted butter, and sugar.
2. Press the mixture evenly into the bottom of a 9×13-inch glass baking dish or a pie dish.

3. Place the crust in the refrigerator while you prepare the filling to help it firm up.
2. Make the Cheesecake Layer
1. In a large bowl, beat the softened cream cheese until smooth and creamy.
2. Add powdered sugar and vanilla extract; continue beating until fully combined.
3. In a separate bowl, whip the heavy cream to stiff peaks, then fold it gently into the cream cheese mixture.
4. Spread the cheesecake filling evenly over the chilled crust.
5. Refrigerate to allow the layer to set.
3. Prepare the Blueberry Topping
1. In a saucepan over medium heat, combine blueberries, sugar, lemon juice, and water.
2. Let the mixture come to a gentle simmer and cook until the berries start releasing their juices.

3. Stir in the cornstarch slurry and cook until the mixture thickens into a glossy sauce.
4. Remove from heat and allow it to cool completely.
5. Once cooled, pour the blueberry topping over the cheesecake layer, spreading it evenly.
4. Chill and Serve
1. Refrigerate the dessert for at least 4 hours, or preferably overnight, to allow the layers to fully set.
2. Slice into squares or wedges and serve chilled, just like the photo—creamy, fruity, and irresistible.


Blueberry Cheesecake Delight is a dessert that delivers both elegance and comfort in every serving. The buttery crust provides the perfect foundation, the creamy cheesecake center adds luxurious texture, and the vibrant blueberry topping brings a refreshing finish. It’s a dessert that looks stunning, tastes even better, and requires no complicated steps—ideal for both everyday treats and special occasions.
Serve it at family gatherings, dinner parties, or as a weekend dessert, and watch your guests return for seconds. With its beautiful layers and unforgettable flavor, this cheerful blueberry creation truly earns its name: a delightful masterpiece in every bite.
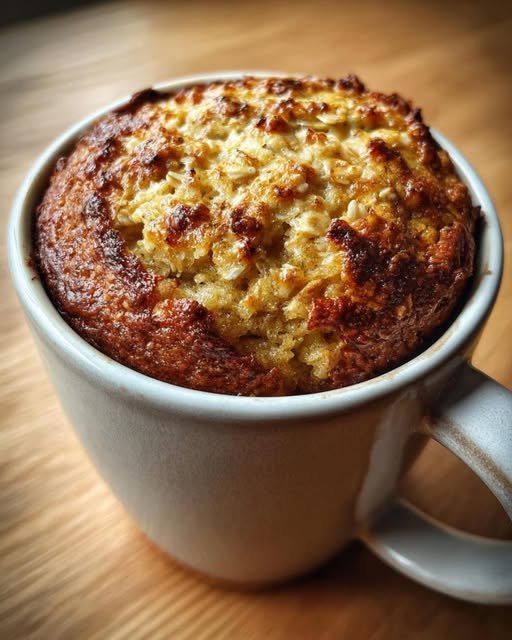
🍌 Banana Oat Microwave Mug Cake

🍌 Banana Oat Microwave Mug Cake

A quick, healthy-style single-serve cake made in the microwave using simple pantry ingredients. Soft, lightly sweet, and perfect for breakfast or dessert.

🧾 Ingredients

  • 1 ripe banana, mashed until smooth

  • ¼ cup rolled oats (quick oats give a smoother texture)

  • ¼ cup milk (dairy or plant-based)

  • 1 tablespoon honey or maple syrup

  • ½ teaspoon baking powder

  • ½ teaspoon vanilla extract

  • Optional:

    • Pinch of cinnamon

    • 1 tablespoon chocolate chips or chopped nuts


🥣 Instructions

  1. Mash the banana
    In a large microwave-safe mug (12 oz or bigger), mash the banana with a fork until very smooth.

  2. Add wet ingredients
    Stir in the milk, honey (or maple syrup), and vanilla extract. Mix until fully combined.

  3. Add dry ingredients
    Add oats, baking powder, and cinnamon (if using). Stir well so there are no dry patches.

  4. Add mix-ins (optional)
    Gently fold in chocolate chips or nuts.

  5. Microwave
    Microwave on HIGH for 1 minute 30 seconds.

    • If the center still looks wet, microwave in 15–30 second intervals until set.

  6. Rest before eating
    Let it sit for 1 minute. This finishes cooking the center and improves texture.

  7. Serve
    Eat directly from the mug or turn it out onto a plate. Enjoy warm!


💡 Tips

  • For smoother texture, blend oats into flour before mixing.

  • For extra moisture, add 1 teaspoon oil or nut butter.

  • Top with yogurt, peanut butter, or sliced banana.


🍫 Flavor Variations

  • Chocolate Banana: Add 1 tsp cocoa powder

  • Apple Pie: Add diced apple + cinnamon

  • Peanut Butter: Swirl in 1 tbsp peanut butter

  • Protein Boost: Add 1 tbsp protein powder + 1 tbsp extra milk

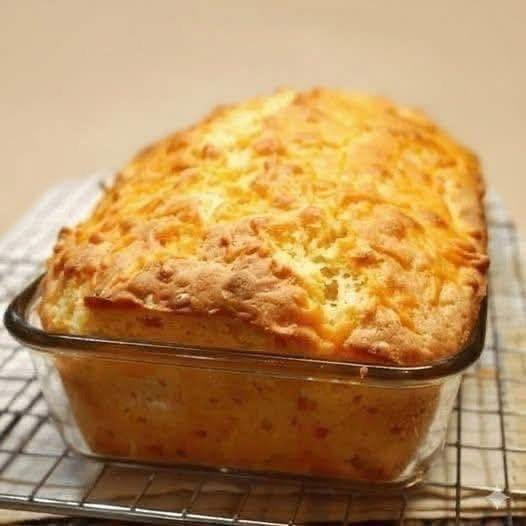
Flourless Savory Cheese Loaf


Flourless Savory Cheese Loaf

This bread uses the protein in eggs and the structure of cream cheese to create a fluffy, bread-like texture without any grain.

Ingredients

  • 3 large eggs, separated (whites in one bowl, yolks in another)

  • 3 oz (approx. 85g) cream cheese, softened to room temperature

  • 1/8 tsp cream of tartar (essential for stabilizing the egg whites)

  • 1/2 cup shredded cheddar cheese (plus a little extra for the topping)

  • 1/2 tsp garlic powder (optional)

  • A pinch of salt


Instructions

  1. Prep the Oven and Pan: Preheat your oven to 300°F (150°C). Lightly grease a small glass loaf dish or line it with parchment paper to ensure easy removal.

  2. Mix the Yolks: In a medium bowl, blend the egg yolks, softened cream cheese, and salt until the mixture is completely smooth. If you are using garlic powder or other herbs, fold them in now.

  3. Whip the Whites: In a separate, very clean metal or glass bowl, add the egg whites and the cream of tartar. Use a hand mixer or stand mixer to beat them on high speed until stiff peaks form (the whites should stand straight up when you lift the beaters).

  4. Fold Gently: Slowly and gently fold the yolk mixture into the egg whites using a spatula. Do not stir vigorously, or you will deflate the air bubbles that make the bread rise. Once mostly combined, gently fold in the shredded cheddar.

  5. Bake: Pour the batter into your prepared loaf dish. Sprinkle the remaining bit of cheese on top for that golden crust. Bake for 25–30 minutes. The top should be golden brown and the center should feel firm to the touch.

  6. Cool: Let the loaf cool in the pan for at least 10 minutes before slicing. This allows the internal structure to set so it doesn’t collapse.


Quick Tips

  • The Cream Cheese: Make sure it is truly at room temperature. If it’s cold, you’ll end up with lumps in your batter.

  • Variations: You can add dried rosemary, jalapenos, or even “everything bagel” seasoning to the top for extra flavor.

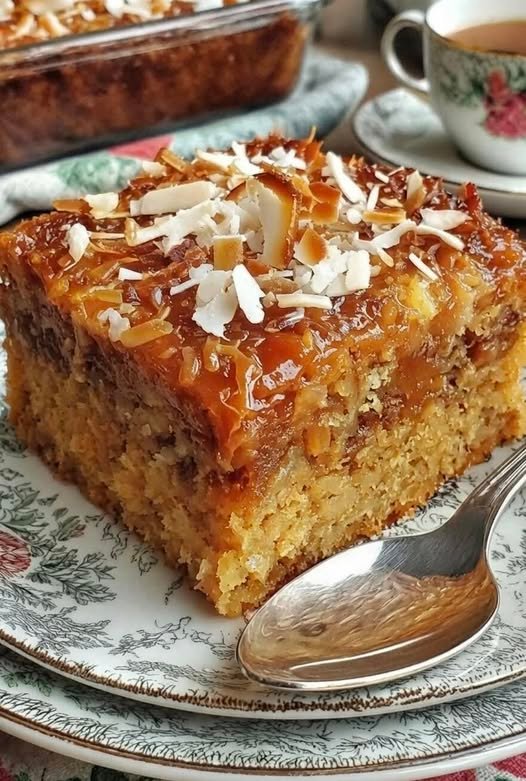
Old Fashioned Oatmeal Cake

Old Fashioned Oatmeal Cake

A nostalgic, tender cake with a caramelized broiled topping.

  • Prep time: 15 minutes

  • Cook time: 35–45 minutes

  • Servings: 12

  • Pan Size: 9×13 inch


Ingredients

The Oatmeal Base

  • 1 cup Old-fashioned rolled oats (not instant)

  • 1 ¼ cups Boiling water

The Cake Batter

  • ½ cup Unsalted butter, softened

  • 1 cup Brown sugar, packed

  • ½ cup Granulated sugar

  • 2 Large eggs

  • 1 tsp Vanilla extract

  • 1 ½ cups All-purpose flour

  • 1 tsp Baking soda

  • 1 tsp Ground cinnamon

  • ½ tsp Salt

The Coconut-Pecan Topping

  • ½ cup Unsalted butter, melted

  • ¾ cup Brown sugar, packed

  • ½ cup Heavy cream (or evaporated milk)

  • 1 cup Shredded sweetened coconut

  • ½ cup Chopped pecans or walnuts

  • ½ tsp Vanilla extract


Instructions

1. Soak the Oats

In a small heat-proof bowl, combine the rolled oats and boiling water. Let this sit for 15–20 minutes. The oats will absorb the water and become soft and plump; do not drain them.

2. Prep the Oven and Pan

Preheat your oven to 350°F (175°C). Grease and flour a 9×13 inch baking pan (or use a non-stick baking spray).

3. Cream and Mix

In a large mixing bowl, cream together the softened butter, brown sugar, and granulated sugar until the mixture is light and fluffy. Beat in the eggs one at a time, then stir in the vanilla extract.

4. Combine

Stir the soaked oat mixture (liquid and all) into the butter and sugar mixture. In a separate bowl, whisk together the flour, baking soda, cinnamon, and salt. Gradually add the dry ingredients to the wet ingredients, stirring until just combined.

5. First Bake

Pour the batter into the prepared pan. Bake for 30–35 minutes, or until a toothpick inserted into the center comes out clean.

6. Add the Topping

While the cake is baking, mix all the topping ingredients (melted butter, brown sugar, cream, coconut, pecans, and vanilla) in a medium bowl.

Once the cake comes out of the oven, immediately spread the topping evenly over the hot cake.

7. Final Broil/Bake

Return the cake to the oven for 10–12 minutes (or pop it under the broiler for 2–3 minutes—watch it closely!) until the topping is bubbly, golden brown, and caramelized.

8. Cool and Serve

Let the cake cool for at least 15–20 minutes to allow the topping to set before slicing.


Pro-Tips for Success

  • Don’t overmix: When you add the flour, stir just until the white streaks disappear. This keeps the cake light rather than chewy.

  • Storage: This cake is famous for staying moist. Store it covered at room temperature for 2 days, or in the fridge for up to 5 days.

  • The “Crunch” Factor: If you aren’t a fan of coconut, you can double the pecans for a “Pecan Pie” style topping instead!